4-37
4. Troubleshooting
4-3. Factory Mode Adjustments
4-3-1 Entering Factory Mode
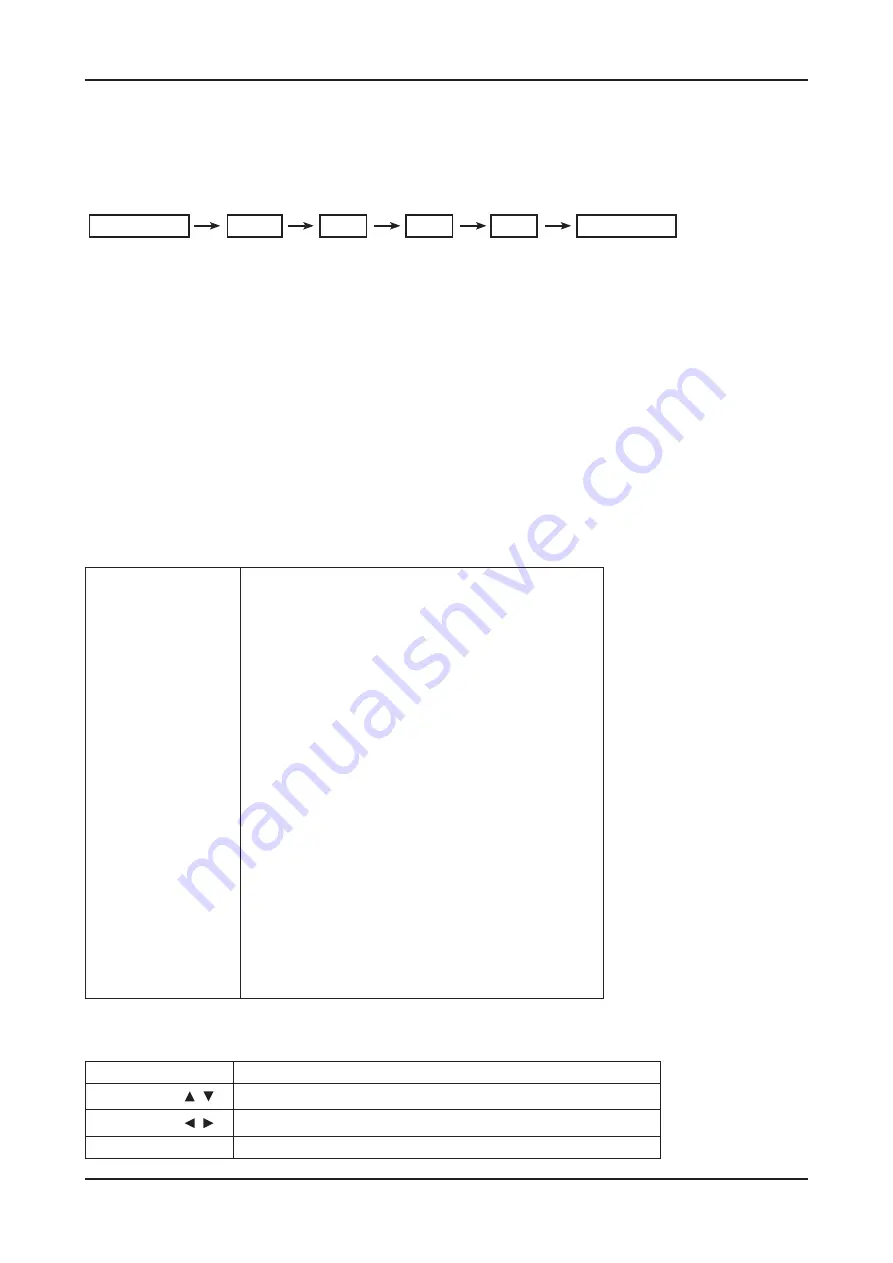
To enter ‘Service Mode’ Press the remote -control keys in this sequence :
- If you do not have Factory remote - control
MUTE
Power OFF
1
8
2
Power On
4-3-2 How to Access Service Mode
Using the Customer Remote
Turn the power off and set to stand-by mode
1.
Press the remote buttons in this order; MUTE-1-8-2-POWER ON to turn the set on.
2.
The set turns on and enters service mode. This may take approximately 20 seconds.
3.
Press the Power button to exit and store data in memory.
4.
- If you fail to enter service mode, repeat steps 1 and 2 above.
0
Using the Factory Remote
Press the 'info'+'factory' key of your Factory Remote.
1.
The set enters service mode right away.
2.
Initial SERVICE MODE DISPLAY State
(If you entered Service Mode by Customer Remote , 'Expert' and 'Advanced' menu would be hidder for security)
Mode : CATV , RES : NOSIGNAL
Option
Control
SVC
Expert
ADC/WB
Advanced
T-VAL9AUSC-00xx
T-VAL9AUSS-00xx
EDID SUCCESS
CALIB : AV X COMP X PC O HDMI O
Option : 0000 1100 10
DTP-SP-VAL-1048
RFS:42-42
2009-12-25
FRCS FW : 0111, CONFIG : 6D00
N240:0006
READING : 2010 CPLD :xxxxxx
Type : NONE
Model : UN46C9000
MAC SUCCESS
Factory Data Ver : 189
EERC Version : 81
DTP-AP-COMP-340
DTP-HIIG-0335
DTP-BP-0343-01
Date of purchase : --/--/----
"Advanced" is hidden menu.
You can not enter "Advanced" mode even you entered Service Mode using Factory Remote.
Buttons operations withn Service Mode
Menu
Full Menu Display/Move to Parent Menu
Direction Keys
/
Item Selection by Moving the Cursor
Direction Keys
/
Data Increase / Decrease for the Selected Item
Source
Cycles through the active input source that are connected to the unit
Содержание UN46C9000ZF
Страница 95: ...4 3 4 Troubleshooting ...
Страница 103: ...4 11 4 Troubleshooting Location Main TOP BOTTOM B A E C D Detail A B C D E ...
Страница 105: ...4 13 4 Troubleshooting Location Main TOP BOTTOM B A Detail A B ...
Страница 106: ...4 14 4 Troubleshooting WAVEFORMS 1 2 PC Input V Sync H Sync 3 LVDS Out CLK ...
Страница 108: ...4 16 4 Troubleshooting Location Main TOP BOTTOM C B A Detail A B C ...
Страница 109: ...4 17 4 Troubleshooting WAVEFORMS 4 5 HDMI Input CLK 6 Tuner CVBS Out Pattern Grey Bar 7 TS DATA Out Clk Data 0 ...
Страница 111: ...4 19 4 Troubleshooting Location Main TOP BOTTOM B A C Detail A B C ...
Страница 112: ...4 20 4 Troubleshooting WAVEFORMS 5 Tuner CVBS Out Pattern Grey Bar 6 Eagle Out Clk H Sync ...
Страница 114: ...4 22 4 Troubleshooting Location Main TOP BOTTOM B A C Detail A B C ...
Страница 115: ...4 23 4 Troubleshooting WAVEFORMS 5 Tuner CVBS Out Pattern Grey Bar 7 TS DATA Out Clk Data 0 ...
Страница 117: ...4 25 4 Troubleshooting Location Main TOP BOTTOM B A C Detail A B C ...
Страница 118: ...4 26 4 Troubleshooting WAVEFORMS 5 Tuner CVBS Out Pattern Grey Bar ...
Страница 120: ...4 28 4 Troubleshooting Location Main TOP BOTTOM B A C Detail A B C ...
Страница 121: ...4 29 4 Troubleshooting WAVEFORMS 5 Tuner CVBS Out Pattern Grey Bar 9 Component Input Y Pb ...
Страница 123: ...4 31 4 Troubleshooting Location Main TOP BOTTOM B D A C Detail A B C D ...
Страница 124: ...4 32 4 Troubleshooting WAVEFORMS 0 Audio Input Sign Wave I2S Input Clk Data Audio Amp Out Sign Wave ...


