background image

• F model can use MagicInfo menu when mounted Network box.

MagicBright 

MENU 


 ENTER 

 [

Picture

 ENTER 

 [

MagicBright

   ,   

 ENTER

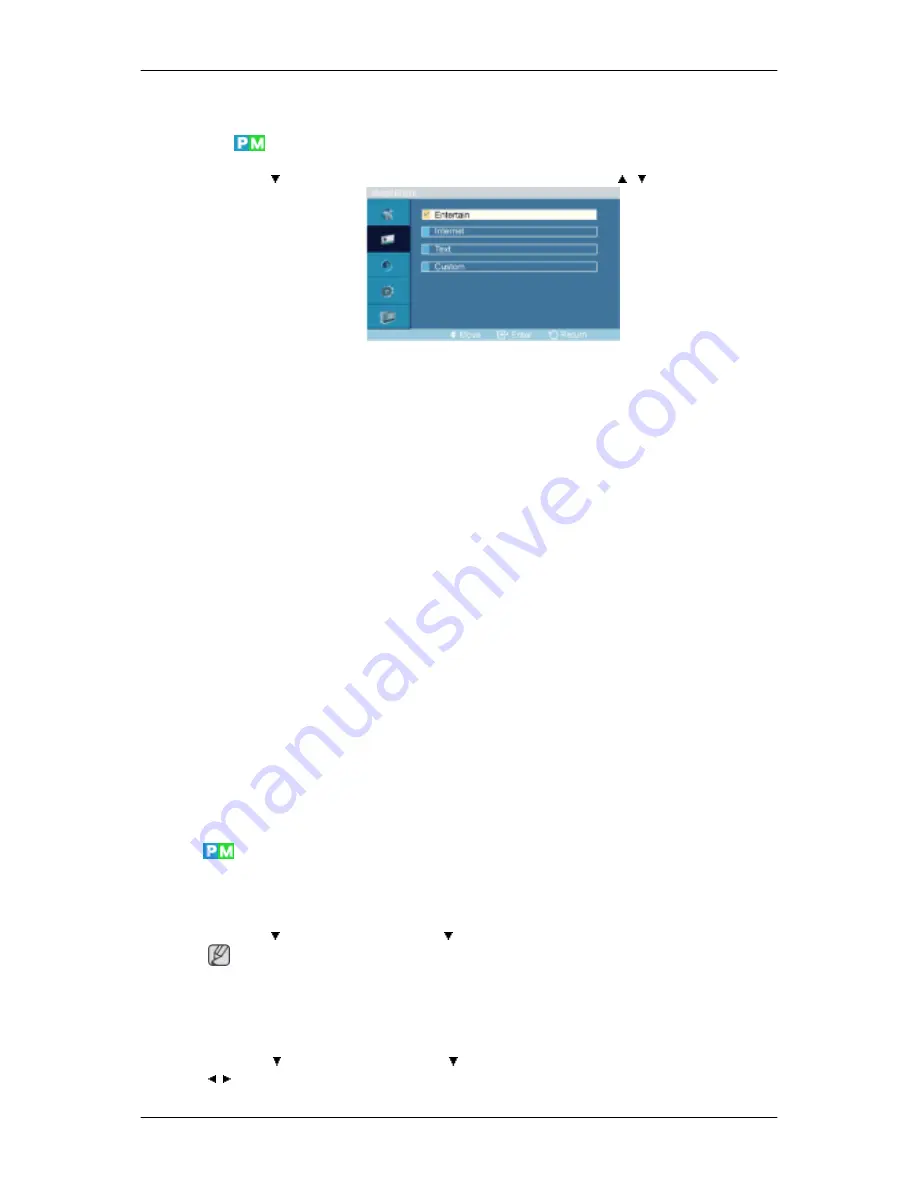
MagicBright is a feature providing the optimum viewing environment depending on the con-

tents of the image you are watching. Currently four different modes are available: Entertain,

Internet, Text and Custom. Each mode has its own pre-configured brightness value. You can

easily select one of the four settings by simply pressing the MagicBright control button.

1. Entertain

High brightness

For watching motion pictures such as a DVD or VCD.

2. Internet

Medium brightness

For working with a mixture of images such as texts and graphics.

3. Text

Normal brightness

For documentations or works involving heavy text.

4. Custom

Although the values are carefully chosen by our engineers, the pre-configured values

may not be comfortable to your eyes depending on your taste.

If this is the case, adjust the brightness and contrast by using the OSD menu.

Custom 

By using the on-screen menus, the contrast and brightness can be changed to your personal

preference.

MENU 


 ENTER 

 [

Picture


 ENTER 

 [

Custom]

 Note

By adjusting the picture using the Custom function, MagicBright will change to Custom mode.

Contrast

MENU 


 ENTER 

 [

Picture


 ENTER 

 [

Custom

 ENTER

 [

Contrast

,   

 ENTER

Adjusting the PDP Display

Содержание SyncMaster P50FN

Страница 1: ...SyncMaster P50F P50FN P63F P63FN PDP Monitor User Manual...

Страница 2: ...uch Ground to prevent an electric shock Power When not used for extended period of time set your computer to DPM If using screen saver set it to active screen mode The images here are for reference on...

Страница 3: ...ower cord of another product Otherwise this may result in fire or electric shock Installation Be sure to contact an authorized Service Center when installing your monitor in a location with heavy dust...

Страница 4: ...n Ensure that there is a clearance of more than 10 cm from the wall Otherwise it may result in fire due to an increase in the internal temperature Ensure that the packaging vinyl is kept away from chi...

Страница 5: ...hen cleaning the product do not spray water directly onto the main body of the product Ensure that water does not enter the product and that it is not wet Otherwise this may result in electric shock f...

Страница 6: ...ial enters the product disconnect the power cord and contact a Service Center This may result in a product malfunction electric shock or fire Do not use or keep combustible spray or flammable material...

Страница 7: ...he power cord from the power outlet Otherwise this may result in overheating or fire due to dust and may result in fire due to electric shock or leakage Do not place any heavy items or toys or confect...

Страница 8: ...e this may result in electric shock or fire When there is a gas leak do not touch the product or the power plug but ventilate immediately If a spark occurs it may cause an explosion or fire If the pro...

Страница 9: ...splay If any items are missing contact your dealer Contact a local dealer to buy optional items Unpacking PDP Display Manuals Quick Setup Guide Warranty Card Not available in all loca tions User s Gui...

Страница 10: ...nd KIT P50F N Note You can purchase and connect a separate network box or TV tuner box For information on how to use these refer to their respective user manuals You can only connect one external box...

Страница 11: ...n to adjust volume SEL Moves from one menu item to another vertically or adjusts selected menu values When OSD is not on the screen push the button to adjust channel Power button Use this button for t...

Страница 12: ...SB Connection Terminal Keyboard Mouse Mass Storage Device Compatible Applicable to the P50FN P63FN model on ly Note The number of PDP Displays that can be connected to loopout may differ depending on...

Страница 13: ...minal Using a D Sub Cable 15 pin D Sub PC mode Analog PC DVI PC HDMI IN DVI PC Video Con nection Terminal Using a DVI Cable DVI D to DVI D DVI mode Digital PC DC OUT 5V 1 5A Connect this to the POWER...

Страница 14: ...the Kensington Lock may be different depending on its model Using the Anti Theft Kensington Lock 1 Insert the locking device into the Ken sington slot on the Monitor and turn it in the locking directi...

Страница 15: ...ay differ depending on the cables signal source etc With cables where there is no degradation or signal source up to ten PDP Displays can be con nected RS232C OUT IN RS232C Serial PORT MDC Multiple Di...

Страница 16: ...tput terminal of the external device using a VIDEO cable AV AUDIO IN L AUDIO R Connect the port of the DVD VCR DVD DTV Set Top Box to the L AUDIO R port of the PDP Display AUDIO OUT L AUDIO R Headphon...

Страница 17: ...ENTER PRE CH CH P D MENU GUIDE RETURN Up Down Left Right buttons EXIT SRS MagicInfo P MODE DUAL MTS PIP SWAP 1 POWER Turns the product On 2 Off Turns the product Off 3 Number Buttons Press to change t...

Страница 18: ...ain to unfreeze 14 AUTO Adjusts the screen display automatically in PC mode By changing the resolution in the control panel auto function is performed 15 S MODE When pressing this button the current m...

Страница 19: ...iewing en vironment depending on the contents of the image you are watching Then push button again to circle through available preconfigured modes Entertain Internet Text Cus tom 29 DUAL MTS DUAL STER...

Страница 20: ...Mechanical Layout P50F N Mechanical Layout NETWORK MODEL SIZE Introduction...

Страница 21: ...ation Information Please contact your nearest SAMSUNG Distributor to place an order After your order is placed installation profes sionals will visit you and install the bracket At least 2 persons are...

Страница 22: ...ct is for installing on cement walls The product may not stay in place when installed on plaster or wood Components Only use the components and accessories shipped with the product Wall Bracket 1 Hing...

Страница 23: ...ength between the two locking holes 3 Check the installation diagram and mark the drill points on the wall Use the 5 0 mm bit to drill holes deeper than 35 mm Fix each anchor in the corresponding hole...

Страница 24: ...ht in the holes Make sure the wall bracket is securely fixed to the wall or the product may not stay in place after installation 3 Tighten the 4 screws in step 2 plastic hanger screw B to the rear hol...

Страница 25: ...he wall 1 Fix the product to the wall bracket 2 Hold the product at the top in the center and pull it forward direction of the arrow to adjust the angle Note You can adjust the bracket angle between 2...

Страница 26: ...the wall bracket SAMSUNG Electronics is not responsible for any damages to the product or harm to customers when the installation is done by the customer This product is for installing on cement wall...

Страница 27: ...ion of the arrow When done mount the wall bracket on the wall There are two hinges left and right Use the correct one A Captive Screw B Wall Bracket C Hinge Left D Hinge Right 2 Before drilling into t...

Страница 28: ...hten the 11 screws A To mount the product on the wall bracket The shape of the product may vary depending on the model The assemblies of the plastic hanger and the screw are the same 1 Remove the 4 sc...

Страница 29: ...ponding bracket holes 1 Then place the product 2 so that it is firmly fixed to the bracket Make sure to re insert and tighten the safety pin 3 to securely hold the product to the bracket A PDP Display...

Страница 30: ...Note You can adjust the bracket angle between 2 and 15 Make sure to use the top center and not the leftor the right side of the product to adjust the angle Introduction...

Страница 31: ...Your PDP Display Note Please refer to below image which contains explanations based on 50 inch model Only the terminal location is different between 50 inch and 63 inch models Connect the power cord f...

Страница 32: ...make sure to disconnect the AC power in advance Note AV input devices such as DVD players VCRs or camcorders as well as your computer can be connected to the PDP Display For detailed information on c...

Страница 33: ...e between the VIDEO OUTPUT jack on the camcorder and the AV IN VIDEO on the PDP Display 3 Select AV for the Camcorder connection using the Source button on the front of the PDP Display or on the remot...

Страница 34: ...nnect a set of audio cables between the AUX L R jacks on the AUDIO SYSTEM and AUDIO OUT L AUDIO R on PDP Display Connecting a LAN Cable Using a Power cord with Earth In the event of failure the earth...

Страница 35: ...orrectly before connecting the AC power When un wiring the earth lead make sure to disconnect the AC power in advance Note AV input devices such as DVD players VCRs or camcorders as well as your compu...

Страница 36: ...Applicable to the P50FN P63FN model only Connections...

Страница 37: ...ro installation file 3 When the Install Shield Wizard window appears click Next 4 Select I agree to the terms of the license agreement to accept the terms of use 5 You are required to log in to the Ma...

Страница 38: ...6 Choose a folder to install the MagicInfo Pro program 7 Click Install Using the Software...

Страница 39: ...8 The Installation Status window appears 9 It is recommended restarting the system for the normal operation of the MagicInfo Pro Server program Click Finish Using the Software...

Страница 40: ...utable icon appears on your desktop 11 Double click the icon to start the program System Requirements CPU RAM Ethernet OS Application Minimum P1 8 256M 100M 1G Windows XP Win dows 2000 Service Pack 4...

Страница 41: ...a standard of serial communication is used for the communication between a PC and a display Therefore a serial cable should be connected between the serial port on a PC and the serial port on a displ...

Страница 42: ...g for the PC Serial Port can change The original value is COM1 5 Click Select all or Clear to select or clear all displays 6 Use Grid to view brief information on selected display 7 Select a display f...

Страница 43: ...the Port Selection Menu 3 If the exact port name that is connected to the PDP Display using a serial cable is not selected communication will be unavailable 4 The selected port is stored in the progr...

Страница 44: ...ary to Power Control 1 Power Status 2 Input 3 Image Size 4 On Timer 5 Off Timer 2 Use the Select All button or Check Box to choose a display to control Power Control allows controlling some of the fun...

Страница 45: ...lecting one set at a time turn on the Mute function for the selected set The Mute function is disabled automatically when you adjust the volume level The values return to the default settings when you...

Страница 46: ...deo Changes the Input Source of the selected display to S Video 8 Component Changes the Input Source of the selected display to Component 9 MagicInfo The Input source of MagicInfo works only on MagicI...

Страница 47: ...en you click Image Size the PC Source tab first appear The Image Size Control button controls Image Size available for PC BNC DVI 6 Video Source Click the Video Source tab to control Image Size for re...

Страница 48: ...source 3 Switch Image Size of the selected display randomly Note Auto Wide Zoom1 and Zoom2 are not available for selection when the input signal type for Component and DVI HDCP is 720p or 1080i The Au...

Страница 49: ...f Time Setup of the selected display 4 Shows the On Time settings 5 Shows the Off Time settings The Input source of MagicInfo works only on MagicInfo model The Input source of TV works only on TV mode...

Страница 50: ...mall 5 Double 1 Turns on the PIP of the selected display and changes the size to Double 1 6 Double 2 Turns on the PIP of the selected display and changes the size to Double 2 7 Double 3 Picture By Pic...

Страница 51: ...V 6 S Video Changes the source of the PIP of the selected display to S Video 7 Component Changes the source of the PIP of the selected display to Component 8 HDMI Changes the source of the PIP of the...

Страница 52: ...y 4 Sharpness Adjusts Sharpness of the selected display 5 Color Adjusts Color of the selected display 6 Tint Adjusts Tint of the selected display Available only for NT 7 Color Tone Adjusts the Color T...

Страница 53: ...ess Adjusts Brightness for the selected display 4 Red Adjusts red Color of the selected display Available only for NT 5 Green Adjusts green Color of the selected display Available only for NT 6 Blue A...

Страница 54: ...de to CUSTOM 1 Audio Controls audio settings for all input sources 2 Bass Adjusts Bass of the selected display 3 Treble Adjusts Treble of the selected display 4 Balance Adjusts Balance of the selected...

Страница 55: ...ion Adjusts Position of the selected display 5 Auto Adjustment Self Adjust to the incoming PC signal The Input source of MagicInfo works only on MagicInfo model The Input source of TV works only on TV...

Страница 56: ...p Control 3 Manual Lamp Control Allows you to adjust the backlight of the selected display regardless of the time The Auto Lamp Control automatically turns off if you adjust using the Manual Lamp Cont...

Страница 57: ...xel Bar and Eraser by Screen Type The Input source of MagicInfo works only on MagicInfo model The Input source of TV works only on TV model Setting Second you can set to 1 2 3 4 5 for Scroll Type and...

Страница 58: ...y pressing a number in the selected mode z The MDC program supplied by Samsung supports up to 5x5 PDP Displayes 3 On Off Turns on off the Video Wall function of the selected display 4 Format The forma...

Страница 59: ...e is showing Apply current time to synchronize the display clocks 5 The remote may not function properly when you turn off the remote Function disconnect the RS 232C cable or exit the program in an Ir...

Страница 60: ...twork box Source List MENU ENTER Input ENTER Source List ENTER Use to select PC DVI or other external input sources connected to the PDP Display Use to select the screen of your choice 1 PC 2 DVI 3 AV...

Страница 61: ...C Note When connecting a PC to the HDMI or DVI terminal set Edit Name to PC In other cases set Edit Name to AV However since 640x480 720P 1280x720 and 1080p 1920x1080 are common signals for AV and PC...

Страница 62: ...a DVD or VCD 2 Internet Medium brightness For working with a mixture of images such as texts and graphics 3 Text Normal brightness For documentations or works involving heavy text 4 Custom Although th...

Страница 63: ...harpness Color Tone MENU ENTER Picture ENTER Color Tone ENTER The color tones can be changed 1 Off 2 Cool 3 Normal 4 Warm 5 Custom Note If you set the Color Tone to Cool Normal Warm or Custom the Colo...

Страница 64: ...e ENTER Color Temp ENTER Color Temp is a measure of the warmth of the image colors Note This function is only enabled if the Color Tone is set to Off Image Lock Image Lock is used to fine tune and get...

Страница 65: ...usts the screen location horizontally V Position MENU ENTER Picture ENTER Image Lock ENTER V Position ENTER Adjusts the screen location vertically Auto Adjustment MENU ENTER Picture ENTER Auto Adjustm...

Страница 66: ...ignal Balance ENTER Signal Control ENTER R Gain ENTER 2 G Gain MENU ENTER Picture ENTER Signal Balance ENTER Signal Control ENTER G Gain ENTER 3 B Gain MENU ENTER Picture ENTER Signal Balance ENTER Si...

Страница 67: ...e ENTER Size ENTER The Size can be switched 1 16 9 2 4 3 Picture AV HDMI DVI TV Mode Available Modes PC AV HDMI DVI MagicInfo TV Note The TV menu is available when a TV tuner box is installed F model...

Страница 68: ...emote control is the P MODE button Custom By using the on screen menus the contrast and brightness can be changed to your personal preference MENU ENTER Picture ENTER Custom Contrast MENU ENTER Pictur...

Страница 69: ...o the display Note Tint function can be available just in NTSC system Color Tone MENU ENTER Picture ENTER Color Tone ENTER The color tones can be changed The individual Color components are also user...

Страница 70: ...es the size of the picture more than Zoom 1 4 4 3 Sets the picture to 4 3 normal mode 5 Just Scan Displays the input scenes as they are without any cutoff when HDMI 720p 1080i 1080p signals are input...

Страница 71: ...you a theater quality viewing experience In HDMI mode this function can be available when the input signal is interlaced scan it cannot be available with progressive scan signal 1 Off 2 On Sound Avail...

Страница 72: ...5 Custom Selects Custom if you want to adjust the settings according to your personal preferences Custom The sound settings can be adjusted to suit your personal preferences MENU ENTER Sound ENTER Cu...

Страница 73: ...s 1 Off 2 On SRS TS XT MENU ENTER Sound ENTER SRS TS XT ENTER SRS TS XT is a patented SRS technology that solves the problem of playing 5 1 multichannel content over two speakers TruSurround delivers...

Страница 74: ...TER Setup ENTER Language ENTER You can choose one of 11 languages Note The language chosen affects only the language of the OSD It has no effect on any software running on the computer Time Selects fr...

Страница 75: ...y off automatically at certain times 1 Off 2 30 3 60 4 90 5 120 6 150 7 180 On Timer MENU ENTER Setup ENTER Time ENTER On Timer ENTER Turns the PDP Display on automatically at a preset time Controls t...

Страница 76: ...Transparency MENU ENTER Setup ENTER Menu Transparency ENTER Change the transparency of the background of the OSD 1 High 2 Medium 3 Low 4 Opaque Safety Lock PIN MENU ENTER Setup ENTER Safety Lock PIN 0...

Страница 77: ...a DVD or set top box is connected to your TV via HDMI it may cause a degradation in the screen quality such as an increase in the black level a low contrast or discoloration etc depending on the exte...

Страница 78: ...TER Turns Off On the Video Wall function of the selected display Off On 1 Off 2 On Format MENU ENTER Setup ENTER Video Wall ENTER Format ENTER The Format can be selected to see a divided screen 1 Full...

Страница 79: ...Setup ENTER Video Wall ENTER Screen Divider The screen can be divided into several images A number of screens can be selected with a different layout when dividing Select a mode in Screen Divider Sel...

Страница 80: ...on the screen you can use this function so that every minute pixels on the PDP are moved in horizontal or vertical direction 1 Off 2 On Note The Pixel Shift is not available when Video Wall is On Hor...

Страница 81: ...or vertical movement respectively Timer Timer MENU ENTER Setup ENTER Safety Screen ENTER Timer ENTER Timer ENTER You can set the timer for Screen Burn Protection If you start the operation to erase a...

Страница 82: ...ENTER Period ENTER Use this function to set the execution period for each mode set in the timer Time MENU ENTER Setup ENTER Safety Screen ENTER Timer ENTER Time ENTER Within the set period of time sp...

Страница 83: ...especially when you displayed a still image on the screen for a long time Bar MENU ENTER Setup ENTER Safety Screen ENTER Bar This function prevents after images on the screen by moving long black and...

Страница 84: ...ges on the screen by moving a diagonal pattern stored in the panel repeatedly Resolution Select MENU ENTER Setup ENTER Resolution Select ENTER When the picture is not displayed properly on the screen...

Страница 85: ...ent MENU ENTER Setup ENTER Power On Adjustment ENTER Adjusts the Power On time for the screen Caution Set the Power On time to be longer to avoid overvoltage Side Gray MENU ENTER Setup ENTER Side Gray...

Страница 86: ...Reset function is not available when Video Wall is On Color Reset MENU ENTER Setup ENTER Reset ENTER Color Reset ENTER Multi Control Available Modes PC DVI AV HDMI MagicInfo TV Multi Control Assigns...

Страница 87: ...device ex video display Otherwise the program MagicInfo may stop To access other sources press the SOURCE button in MagicInfo The preset password for the PDP Display is 000000 The server program s Pow...

Страница 88: ...hen EWF is in the Enable state to save the changes in the disk you must Commit them By selecting Disable Enable or Commit the system is restarted Magicinfo 1 Select Magicinfo in the Source List menu 2...

Страница 89: ...age will be inserted appears Move the cursor over the icon Note If the Magicinfo icon is not displayed on the notification area double click the Magicinfo icon on the window desktop The icon will appe...

Страница 90: ...7 The Player screen of Magicinfo pro is displayed Note To finish the MagicInfo press ALT F12 Photo The JPEG BMP file format are supported Adjusting the PDP Display...

Страница 91: ...Auto Automatically fits the image to the window Original Shows the properties of the original file Slide Show Displays the properties of the original file as they are Adjusting the PDP Display...

Страница 92: ...terval Controls the time intervals between image files for a slide show 5 Sec 10 Sec 20 Sec 30 Sec 60 Sec Rotation Displays an image file by turning it clockwise by 90 degrees Adjusting the PDP Displa...

Страница 93: ...Zoom Displays a reduced picture Close Closes the image control Menu Adjusting the PDP Display...

Страница 94: ...Music The MP3 file format is supported Movie The MPEG1 WMV file format are supported Play Plays a movie file Adjusting the PDP Display...

Страница 95: ...ull screen OFFICE HTML PPT Power Point DOC MS Word XLS MS Excel PDF HTML HTM files are displayed Note Install the proper viewer freeware program to see the MS Office Word Excel Power Point or PDF douc...

Страница 96: ...Internet Connects to the Internet Setup Sets various functions in MagicInfo mode A password must be entered to access Setup mode Schedule View Displays a schedule Adjusting the PDP Display...

Страница 97: ...TCP IP Changes the TCP IP settings Connection Modifies the network settings Adjusting the PDP Display...

Страница 98: ...mat If you enter the wrong password three times the setup configuration is reset and a warning message appears from the server If you forget the password enter Info 8 2 and 4 on the remote control to...

Страница 99: ...Sets the screen resolution to 1366x768 pixels Portrait Sets the screen resolution to 768x1366 pixels EWF Enhanced Write Filter Prevents change to and loss of the data saved on the disk Disable Disable...

Страница 100: ...d reconnect the video cable then turn on both your com puter and the PDP Display If your PDP Display screen remains blank after using the previous procedure check your video controller and computer sy...

Страница 101: ...e than 3 times when booting If it does request an a service for the main board of the computer 3 If you installed a new video card or if you assembled the PC check if you installed the Adaptor video 4...

Страница 102: ...y A Check if the signal cable is securely connected Re connect it if necessary Refer to Connecting a Computer Q The image is not clear picture is blurred A Run Frequency Coarse and Fine tuning A Turn...

Страница 103: ...screen when you pressing the MENU button check the cable connection between the PDP Display and the computer to en sure that the connector is properly connected Problems related to Audio Note Problem...

Страница 104: ...sing the Enter key in the Boot menu A 4 Switch your set on while your USB disk is connected and boot up in DOS mode A 5 Run C ghost exe and choose Local Partition From Image from the menu Choose the g...

Страница 105: ...nd then clean the PDP Display with a soft cloth using either a cleaning solution or plain water Do not leave any detergent or scratches on the case Do not let any water enter the PDP Display Q How can...

Страница 106: ...m V SyncMaster P63F N 0 726mm H x 0 726mm V Synchronization Horizontal 30 81 kHz Vertical 56 85 Hz Display Color 16 7 M Resolution Optimum resolu tion P50F N 1920 x 1080 60 Hz P63F N 1920 x 1080 60 Hz...

Страница 107: ...Characteristics Audio Input RCA Jack Red R White L 0 5 Vrms 9 dB Audio Output RCA Jack Red R White L 0 5 Vrms 9 dB PC Audio Input 3 5 Stereo Jack 0 5 Vrms 9 dB Frequency RF 80 Hz 15 kHz at 3 dB Respo...

Страница 108: ...eyboard Mouse Mass Storage Device Compati ble USB removable storage can be supported Contents Photo Supported File Format BMP JPEG 2274x1704 or less Music Supported File Format MP3 Sound bandwidth 50...

Страница 109: ...PA ENERGY 2000 Power Indicator Green Green Blink ing Red Power Consump tion P50F N 550 W Less than5 watts Less than5 watts P63F N 750 W PowerSaver When used as a normal PDP Display State Normal Opera...

Страница 110: ...70 79 500 VESA 1280 X 960 60 000 60 000 108 000 VESA 1280 X 1024 63 981 60 020 108 000 VESA 1280 X 1024 79 976 75 025 135 000 VESA 1360 x 768 47 712 60 015 85 500 VESA 1600 x 1200 75 000 60 000 162 00...

Страница 111: ...you may stain it If you are not satisfied with the picture quality you can get better quality of picture by performing the Auto Adjustment function in display screen that is ap peared as window termi...

Страница 112: ...in one color or a moving image is recommended Change the Color Information periodically Note Use Two different colors Rotate the Color Information with 2 different colors every 30 minutes Avoid using...

Страница 113: ...em to operate a Screen Saver program when you are not using it Also Warranty service will be limited based on instruction guide Apply the Screen Scroll function on Product Apply the Screen Scroll func...

Страница 114: ...Select method Instruction Guide OSD Menu Set Up Safety Screen Bar Time Interval 1 10 hours Recommend 1 Time Period 10 50 second Recommend 50 Note Please check CD s User Guide at OSD Function some mode...

Страница 115: ...Time Interval 1 10 hours Recommend 1 Time Period 10 50 second Recommend 50 Note Please check CD s User Guide at OSD Function some model s will not availa ble Information...

Страница 116: ...www samsung com co COSTA RICA 0 800 507 7267 http www samsung com lat in ECUADOR 1 800 10 7267 http www samsung com lat in EL SALVADOR 800 6225 http www samsung com lat in GUATEMALA 1 800 299 0013 ht...

Страница 117: ...7864 http www samsung com no POLAND 0 801 1SAMSUNG 172678 022 607 93 33 http www samsung com pl PORTUGAL 808 20 SAMSUNG 7267864 http www samsung com pt SLOVAKIA 0800 SAMSUNG 726 7864 http www samsung...

Страница 118: ...ca SOUTH AFRICA 0860 SAMSUNG 726 7864 http www samsung com za TURKEY 444 77 11 http www samsung com tr U A E 800 SAMSUNG 726 7864 8000 4726 http www samsung com ae Terms Dot Pitch The image on a monit...

Страница 119: ...T This feature outputs sonorous and vivid 3D sound as for 5 1 channel speaker sound but through a 2 channel speaker It has a good effect when stereo signals are input Correct Disposal Correct Disposal...

Страница 120: ...r use of this ma terial Samsung is the registered trademark of Samsung Electronics Co Ltd Microsoft Windows and Windows NT are registered trademarks of Microsoft Corporation VESA DPM and DDC are regis...

Отзывы: