manualshive.com logo in svg
background image

V1.0.0     2016-05-02     W

e reserve the right to technical modifications, errors and misprints.     © 2016 Dallmeier electronic

www.dallmeier.com

VMC Touch: Mounting Monitor Bracket

Ports Connection And Cables Installation

All trademarks identified by ® are registered trademarks of Dallmeier electronic.

The Touch Monitor with the application VMC touch expands a SeMSy

®

 III Workstation Software with a convenient multi-touch operation. 

Many functions of the individual modules of a SeMSy

®

 III Workstation Software can be operated easily and intuitively on the optimized user interface by 

dragging, wiping, tapping, scrolling, zooming. As a result, users receive a much more flexible way of operating.

The Touch Monitor must first be mounted in the bracket and the required cable connections must be connected to the appropriate port before commis

-

sioning.

NOTICE

Hardware Damage!


¾

Leave the protective film on the screen of the Touch Monitor for mounting.


¾

Ensure a clean and flat work space.

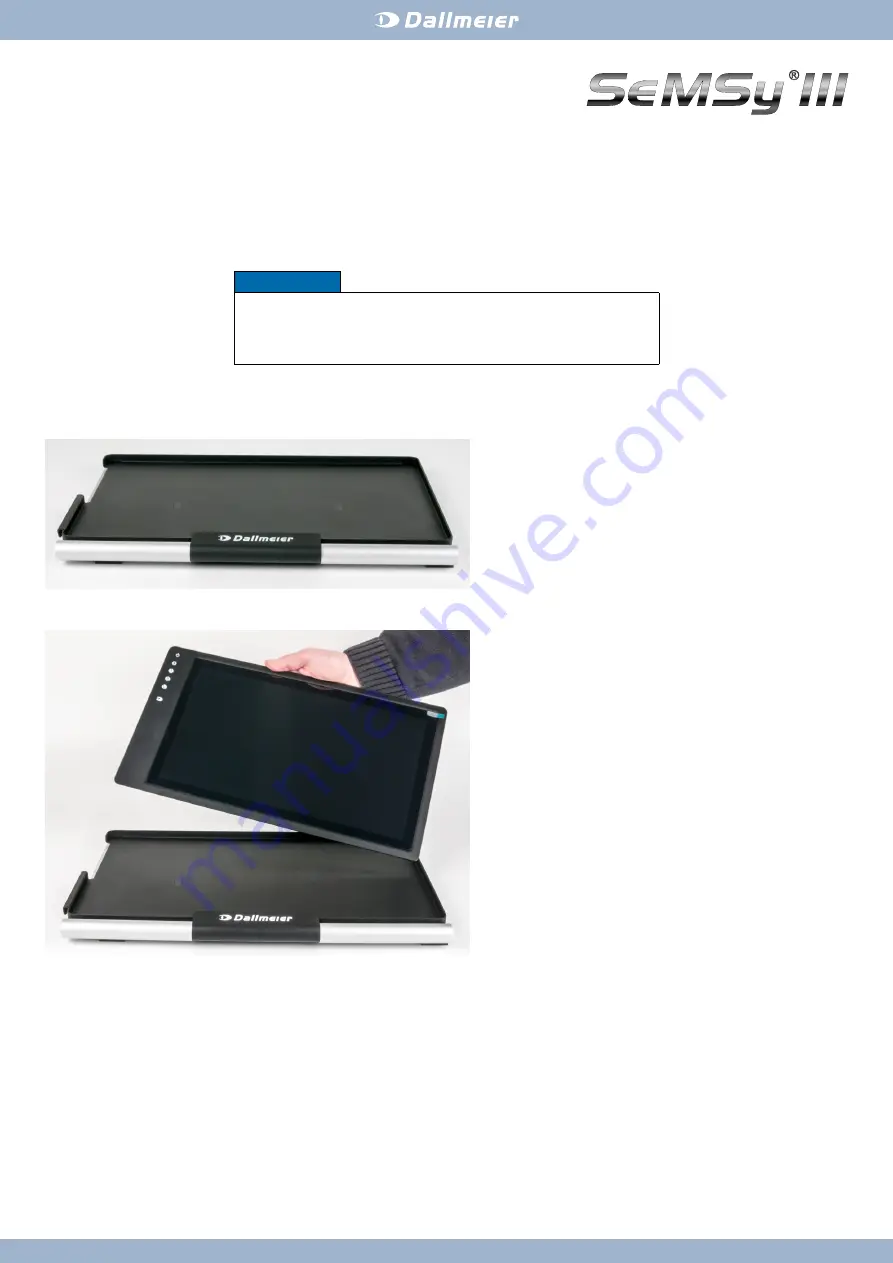
Step 1: Inserting Touch Monitor Into Bracket


¾

Place the folded bracket on the surface of the work space.

Fig. 1 


¾

Insert the Touch Monitor carefully into the bracket.

Fig. 2 

Содержание Semsy III VMC Touch

Страница 1: ...SeMSy III Workstation Software can be operated easily and intuitively on the optimized user interface by dragging wiping tapping scrolling zooming As a result users receive a much more flexible way of...

Страница 2: ...at the front of the bracket and place it in this securely Clamping component Fig 3 The Touch Monitor is now inserted into the bracket Fig 4 NOTICE Hardware Damage The Touch Monitor is not fixed in the...

Страница 3: ...trademarks identified by are registered trademarks of Dallmeier electronic Combined micro USB port for data and power supply Connect the USB cable with the micro USB connector to the USB1 port on the...

Страница 4: ...re registered trademarks of Dallmeier electronic Mount the HDMI cable into the cable conductor Fig 8 Step 3 Rotate Touch Monitor With Bracket On The Screen Side Guide the two cables from the cable con...

Страница 5: ...lmeier electronic Place the Touch Monitor with the bracket on the hinge carefully Always make sure that the Touch Monitor does not slip out of the bracket Fig 11 NOTICE Hardware Damage The Touch Monit...

Страница 6: ...stered trademarks of Dallmeier electronic Step 4 Attach Cables Into The Cable Conductors On The Rear Side Loosen the screws on the three cable conductors using a Phil lips screwdriver size PH2 Fig 14...

Страница 7: ...y are registered trademarks of Dallmeier electronic Fig 17 Step 5 Set Up Touch Monitor In Operating Position Lift the bracket with the inserted Touch Monitor and turn it back carefully to the other si...

Отзывы: