8
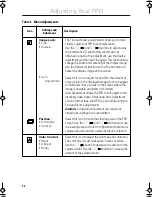
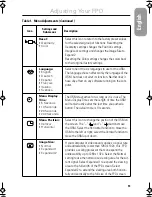
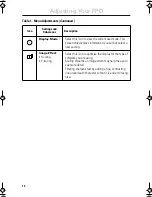
Your flat panel display allows you to easily adjust the characteristics of the image being
displayed. All of these adjustments are made using the control buttons on the front of the
FPD. While you use these buttons to adjust the controls, an on-screen menu shows you their
numeric values as they change.
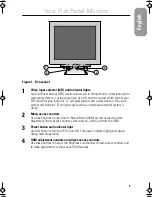
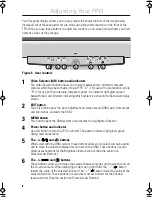
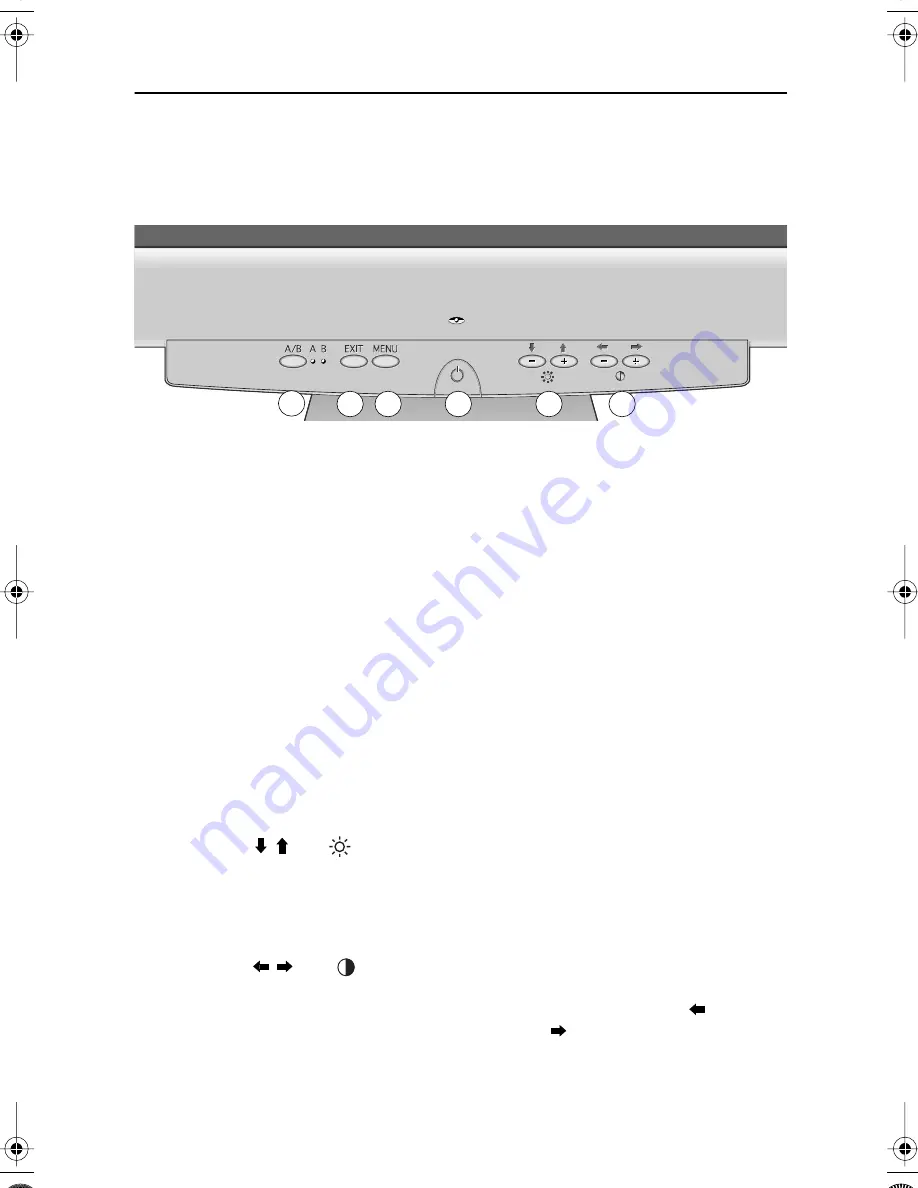
Figure 5. User controls
1
Video Selector (A/B) button and indicators
The Video Selector button allows you to select between two different computer
systems which may be connected to your FPD. “A” is for use with a workstation, while
“B” is for use with an alternate computer system. An indicator light glows green
beneath the A and B letters indicating which system is active on the flat panel display
screen.
2
EXIT button
The EXIT button opens the Auto Adjustment on-screen menu (OSM), exits from menus
and sub-menus, and exits the OSM.
3
MENU button
This button opens the OSM system and activates the highlighted function.
4
Power button and indicator
Use this button to turn the FPD on and off. The power indicator light glows green
during normal operation.
5
The –/+ ( / and
) buttons
When used with the OSM system, these buttons allow you to select sub-menu items
and to move the selector between menu rows on the OSM. These buttons are also
direct access buttons for the Brightness feature control. (See the section on
Direct-Access Buttons.)
6
The –/+ (
/
and
) buttons
These buttons allow you to move the selector between menus and to select items on
the on-screen menu. When adjusting an item using the OSM, the “ – “ (
) button
lowers the value of the selected function. The “ + “ (
) button raises the value of the
selected function. These buttons are also direct access buttons for the Contrast
feature control. (See the section on Direct-Access Buttons)
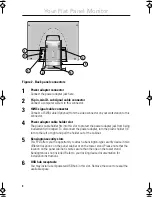
1
2
3
4
5
6
Adjusting Your FPD
sa800e2.fm Page 8 Monday, May 29, 2000 2:09 PM


