

S A M S U N G D I G I T A L R E C O R D E R Q U I C K G U I D E
■
SAMSUNG TECHWIN CO., LTD.
145-3, Sangdaewon-dong, Jungwon-gu, Seongnam-si, Gyeonggi-do, 462-120, Korea • TEL : +82-31-740-8151~8158 • FAX: +82-31-740-8145
Quick Guide To Using SVR-940/450
recording Function
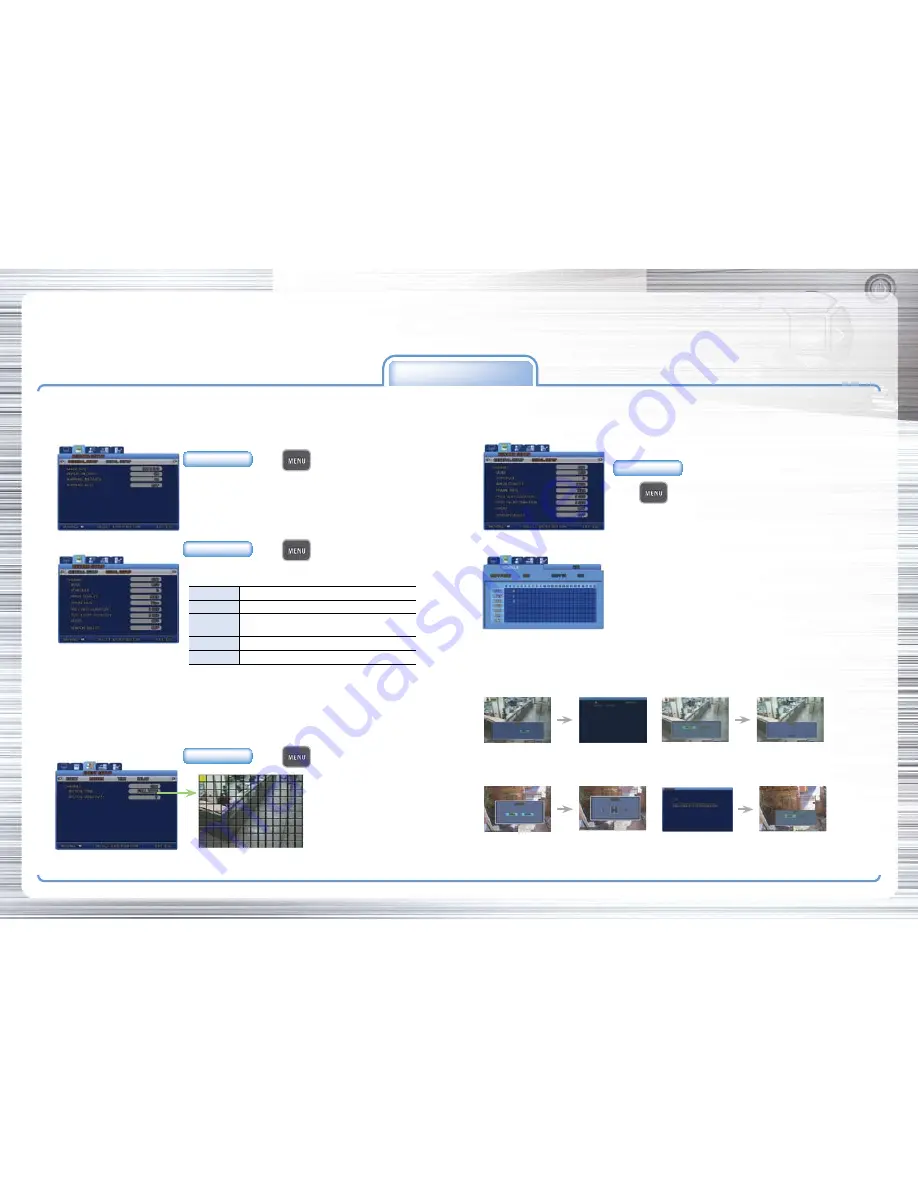
1. RECORD SETUP
3. SCHEDULE Record
2. EVENT SETUP
SAMSUNG DVR provides several different recording methods. You can easily select and set any recording method that is most suitable for your environment or needs.
Step 1 :
GENERAL SETUP
Step 1 :
Select Scheduled Recording
Step 2 :
Set Schedule Recording -
A Schedule can be set 24 hours a day.
●
IMAGE SIZE : Recording Resolution can be selected.
(SVR-940 : 720x480, 720x240, 360x240, SVR-450 : 720x480, 360x240)
●
REPEAT RECORD : Set whether to repeat recording.
●
S : Sensor record
●
- : No record
●
C : Normal record
●
M : Motion detection record
●
T : Text record
●
CHANNEL : Select the channel for motion
detection setup.
●
MOTION ZONE :
Select the area for motion detection to
Full or Partial zone.
●
MOTION SENSITIVITY : You can set the sensitivity to changes on a screen from 1 to 9.
Key Button
Select
▶
RECORD SETUP
▶
GENERAL SETUP
Step 2 :
DETAIL SETUP
●
CHANNEL : Select the channel for which to set DETAILED SETUP.
●
MODE : Select one of four recording methods below.
Key Button
Select
▶
RECORD SETUP
▶
DETAIL SETUP
Key Button
Select
▶
EVENT SETUP
▶
MOTION
Key Button
Select
▶
RECORD SETUP
▶
DETAIL SETUP
▶
SCHEDULE
* Please refer to a user's manual for more information.
Step 2
:
Set Video backup(Only available during Playback mode)
1. During the
Playback
, Press
COPY
→
Select Video or Still image
2. Select desired date and press
◀ ▶ ▲ ▼ →
Insert USB memory stick and press copy button
4. Copy(back-up)
Back-up the contents of HDD to USB memory stick for backup. Both of Still image and Video can be backup.
Maximum backup time of Video is up to 999 seconds.
1. While monitoring, Press
COPY
→
Select YES to store the image into HDD
2. Press
SEARCH
and select desired date press
◀ ▶ ▲ ▼ →
press copy button to Insert USB memory stick
Step 1 :
Set Still image Backup
CONTINUOUS
Continuous recording mode for 24 hours a day
SCHEDULE
Reserved recording
MOTION DETECT
Recording is activated when the system detects motion from input
video images.
SENSOR
Recording is activated when the system detects sensor operation.
DISABLE
This is the setup mode to disable recording
●
SCHEDULE : See the 3. SCHEDULE Record
●
IMAGE QUALITY: Set the compression level [Super/High/Standard].
●
PRE EVENT DURATION : Set the pre-event data record.
●
POST EVENT DURATION : Event recording continues for the predefined time (MAX. 20 secs).
●
AUDIO : Select whether to save audio data along with video.
●
SENSOR SELECT: Set it to ON to activate the sensor.


