background image

Digital Video Recorder        User’s Manual

44

Digital Video Recorder        User’s Manual

45

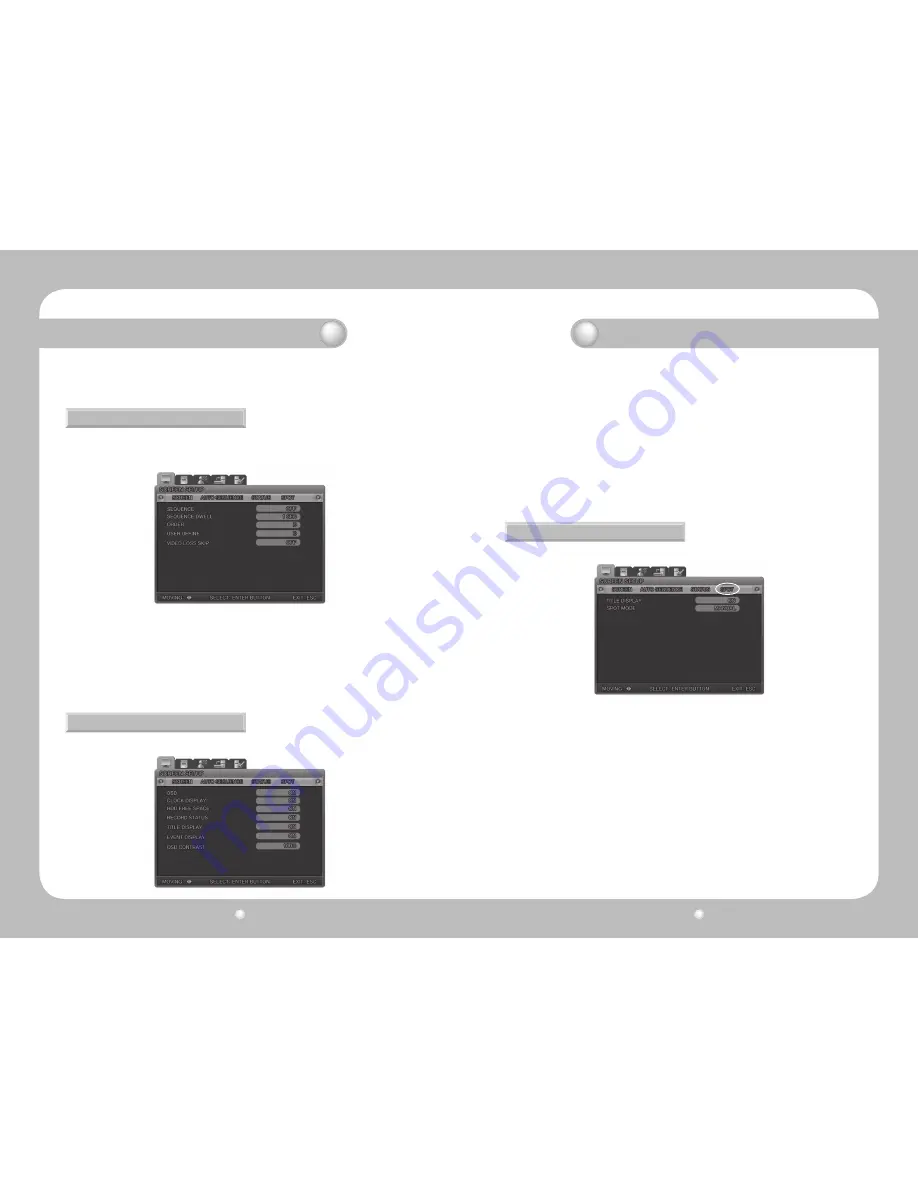
5.4.3 STATUS DISPLAY

Selects information to display on the live screens.

. BRIGHTNESS : Adjusts the screen brightness by changing the values.
. CONTRAST : Adjusts the screen contrast by changing the values.

5.4.2 AUTO SEQUENCE

The live screens are automatically switched in the order of [SVR-450: <CH1 -> CH2 -> CH3 -> CH4 ] / 
[SVR-940: <CH1 -> CH2 -> CH3 -> CH4 -> CH5 -> CH6 -> CH7 -> CH8 -> CH9 >] at the predefined switch-
ing interval. The channel switching interval can be set from 1 up to 10 on the [SEQUENCE] menu. 

. SEQUENCE : Set it ON for Auto Sequence mode 
. SEQUENCE DWELL :  Set the screen display duration by channel. The switching interval can be set from 

1 up to 10 sec.

. ORDER : Select the channels for Auto Sequence.
. USER DEFINE : Select the display channels for Auto sequence in Quad mode display screen.
. VIDEO LOSS SKIP :  With Video Loss Skip [ON], channels without video input signals are automatically 

skipped and only channels with video input are displayed.

· OSD [ON/OFF] : With OSD [ON], Status information is displayed on the live screen.
· CLOCK DISPLAY [ON/OFF] : With Clock Display [ON], the current time is displayed on the live screens.
·  HDD FREE SPACE [ON/OFF] :  With  HDD  Free  Space  [ON],  the  free  space  for  recording  on  the  HDD  is 

indicated.

· RECORD STATUS [ON/OFF] :   With Record Status [ON], the recording status "S" is displayed on the corner 

of the screen during recording.

· TITLE DISPLAY [ON/OFF] :  With Titles Display [ON], the titles of [CH1~4] set on the Channel Title submenu 

by users are displayed on the live screens.

· EVENT DISPLAY [ON/OFF] :  With Event Display [ON], the event information is displayed when an event 

occurs. 

· OSD CONTRAST : Set the contrast for Menu OSD. The higher the %, the darker the OSD.

· TITLE DISPLAY : Select whether to display the channel name on the SPOT screen.
· SPOT MODE

Manual :  Select [Manual] and save this setting. 

Press “0” on the system front button or “10” on the remote controller (“SP” is displayed on 
the left upper corner) and press the number of the channel. Then the SPOT channel will be 
displayed on the SPOT monitor. 
In order to cancel this setting, press the ESC button. 
Sequence : Set to display one SPOT channel in sequence.

5.4.4 SPOT

The SPOT menu is available for only SVR-940.

Chapter 5. Configuration

Chapter 5. Configuration

Содержание SRV-940

Страница 1: ...Digital Video Recorder User s Manual 1 ...

Страница 2: ...ated power source Malfunction caused by natural disasters fire flood tidal wave etc Replacement of expendable parts HDD FAN etc Warranty only refers to the warranty covering products that have been paid for After expiration of the warranty period 2 years examination and repair will be provided for a fee Even during the warranty period repair and examination of items outside the preceding warranty ...

Страница 3: ...k or an injury Do not use water thinner or organic solvent for cleaning the product exterior Doing so may cause a malfunction or an electric shock Use a dry cloth to clean the exterior During installation To get adequate ventilation install the product with at least 15cm of space between the cooling ventilation opening and a wall To prevent falling install the product in a flat area Dropping the p...

Страница 4: ...mits for a ClassA digital device pursu ant to part 15 of the FCC Rules These limits are designed to provide reasonable protection against harmful interference when the equipment is operated in a commercial environment This equipment generates uses and can radiate radio frequency energy and if not installed and used in accordance with the instruction manual may cause harmful interference to radio c...

Страница 5: ...usive PC viewer Live image view from a remote location available full screen quad screen and 9 channel screen mode for SVR 940 selectable Search and playback by time or event from a remote location 10 100Mbps Ethernet xDSL supported DDNS supported Network Simple firmware upgrade using USB memory Up to 4 channel voice recording in real time VGA output supported Menu language selectable Other 2 2 Co...

Страница 6: ...on Button Indication Number Button Name Description 7 Playback position moves 1 frame forward back during Pause 8 Press to start and stop manual recording 9 Press to search the recorded data 10 Press to launch Setup Menu 11 Press to control the PTZ functions 12 Press to backup still images or video 13 Press to start screen Auto Sequence Set ÆSCREEN SETUP AUTO SEQUENCE SEQUENCE Ø as ÆON Ø 14 Press ...

Страница 7: ... record ON OFF STOP Button to stop playback SEARCH Button for search menu STEP Playback position moves 1 frame forward back during Pause PLAY PAUSE Button to Play and Pause the Playback screen FAST Button for Forward Playback Speeds of 2X 4X 8X DIR Button to select and change the direction of play in playback When pressed during forward playback the system reverses the direction of play ENTER Butt...

Страница 8: ...ems SVR 450 SVR 940 Remote controller Infrared LED Up to 5m Exclusive controller SCC 3100A RS 485 Backup Items SVR 450 SVR 940 Digital Backup USB Memory Stick Built in CD RW DVD Recording HDD Items SVR 450 SVR 940 Maximum Number of Frames Sec per Resolution NTSC 720X480 30 Frames Sec 360X240 120 Frames Sec 720X480 30 Frames Sec 720X240 60 Frames Sec 360X240 120 Frames Sec Recording Method Pre Even...

Страница 9: ...d and Reverse Fast Search Rewind X2 X4 X8 Rewind X2 X4 X8 STEP Search Search in 1 second increments Pause and Frame Playback Playback pause Playback by frame in the pause status Chapter 2 Summary Chapter 2 Summary User Environment Exterior Connection Terminals Accessories Items SVR 450 SVR 940 Operating Temperature Storage Temperature Humidity 5 C 40 C 10 C 60 C 30 90 without dewfall Items SVR 450...

Страница 10: ...escribed as below 3 2 Detailed connection The SVR 450 and 950 can accommodate up to 4 or 9 cameras respectively Connect the BNC termi nal of each camera to the CAMERA IN terminal of the unit The SVR 450 950 can save audio information For storage or output of audio information it is required to connect the relevant devices 3 2 1 Camera 3 2 2 Audio SVR 450 SVR 940 SVR 450 Chapter 3 Installation Chap...

Страница 11: ... the VGA output cannot be used at the same time and the system can send only one video out at the same time Please refer to Chapter 4 1 Checklist before operation for the setting of monitor selection During playback with theVGA monitor a few frames can sometimes be missing but this is not a defect of the unit Sensor input SENSOR IN As external sensor connecting terminal signals from an external se...

Страница 12: ...ck of the SVR 940 there is a TERM switch Notes The operation of each relay output can be defined by a combination of Motion Detect and Sensor in the Event Setting on the Main Menu See Paragraph 4 5 3 CH1 CH4 Relay Setting for details SVR 450 SVR 940 No Description Classification RS 422 RS 485 1 TX Transmit Data 2 TX Transmit Data 3 RX Receive Data Data 4 RX Receive Data Data Caution When using RS ...

Страница 13: ...o connection 2 Green Signal 75 0 7Vp p 10 Ground 3 Blue Signal 75 0 7Vp p 11 Ground 4 N C No connection 12 N C No connection 5 Ground 13 HSYNC Horizontal Synchronization 6 Ground 14 VSYNC Vertical Synchronization 7 Ground 15 N C No connection 8 Ground 4 1 Checklist before operation Users must select the video mode NTSC or PAL and video output BNC or VGA before powering the system on These can be s...

Страница 14: ... failure all the setting values will preserve When the system is turned ON the live monitoring screen is displayed When Channel number buttons 1 4 SVR 450 1 9 SVR 940 are pressed each channel is dis played in full screen When the AUTO button is pressed in each full screen mode each channel is rotated automatically following the setting in SCREEN SETUP Auto Sequence SEQUENCE must be set to YES When...

Страница 15: ...ns are changed according to the type of recording When the corresponding channel is not being recorded no recording status icon is displayed 4 5 Search Press the SEARCH button and the Search Menu appears as illustrated below Recorded video can be searched and played back by time event or date and the Log File is also displayed From the Event Search menu the recorded data can be searched by Motion ...

Страница 16: ... 4 5 5 Go last search Press the ENTER button on this menu to display the calendar Select a desired date on the calendar to display the Log files Press the ESC button to exit this menu Both Still images and Video can be backed up The maximum backup time for Video is up to 999 seconds During monitoring Press the COPY button if you wish to capture an image When Figure 1 is displayed press YES to stor...

Страница 17: ...y stick orCD RW Whenbackupiscompleted Figure3isdisplayed 4 5 7 2 Video backup Only available during Playback mode Figure 3 Figure 1 Figure 2 Figure 3 4 6 Playback 4 7 PTZ REC Button for manual recording STEP Playback position moves 1 frame forward back during Pause PLAY PAUSE Button for playback and pause STOP Button for stop FAST Button for fast forward DIR Button to select and change the directi...

Страница 18: ...Player The DVR provides an exclusive video file format as well asAVI file type To play and see the DVR exclusive type file you should play back this video file on our exclusive player as follow Notice When the MPEG 4 Codec is not installed the exclusive player can not play the DVR format file In this case FFDSHOW Codec ffdshow exe on network client software CD that is provided in the package shoul...

Страница 19: ...LAY SPOT MODE Only for SVR 940 AUTO SEQUENCE SEQUENCE SEQUENCE DWELL VIDEO LOSS SKIP STATUS OSD CLOCK DISPLAY HDD FREE SPACE RECORD STATUS TITLE DISPLAY EVENT DISPLAY OSD CONTRAST Chapter 4 Operating 4 Select the backup file DVR type you wish to playback 6 Overview of DVR Player 5 Click the play button to start playback the DVR file you selected Click to start playback the selected file 1 2 3 4 5 ...

Страница 20: ... MONTH TYPE PTZ CHANNEL PTZ CAMERA ID MODEL HDD HDD FORMAT HDD DESCRIPTION PASSWORD USER AUTHENTICATION USER PASSWORD EVENT BEEP 5 2 Default Setup The SVR 450 940 are delivered to customers with the factory default values as described below To initialize the menu setup to the factory default values select YES for the DEFAULT item in SYSTEM SETUP ETC on the menu Then all setting values changed by u...

Страница 21: ...N 0 DISPLAY HDD HDD FORMAT HDD DESCRIPTION APPLY DISPLAY PASSWORD USER AUTHENTICATION USER PASSWORD EVENT BEEP OFF CLOCK SETUP CLOCK DATE MODE MONTH TYPE YYYY MM DD INITIAL PTZ CHANNEL PTZ CAMERA ID MODEL CH1 0 NONE Main Menu Submenu Default NETWORK NETWORK TYPE IP ADDRESS SUBNET MASK GATEWAY DNS SWR DDNS SERVER DOMAIN ADDRESS ID PW LAN 172 16 1 52 255 255 0 0 0 0 0 0 172 16 1 220 OFF CLIENT ACCES...

Страница 22: ...ach channel Select the channel title and press the ENTER button Then the keyboard to enter the title is displayed as illustrated below The positions of characters in the Channel Titles can be arranged by using the buttons After moving the cursor press the ENTER button to select the relevant character To exit from the Menu Setup press the ESC button Press the Up Down arrow button to move between ch...

Страница 23: ...formation is displayed on the live screen CLOCK DISPLAY ON OFF With Clock Display ON the current time is displayed on the live screens HDD FREE SPACE ON OFF With HDD Free Space ON the free space for recording on the HDD is indicated RECORD STATUS ON OFF With Record Status ON the recording status S is displayed on the corner of the screen during recording TITLE DISPLAY ON OFF WithTitles Display ON ...

Страница 24: ...elated to the system then appears as illustrated below Press the ENTER button and select the submenu using the Left Right button Then press the ENTER button again and you can select setup items using the Left Right button CHANNEL Select the channel for which to set DETAILED SETUP MODE Select one of four recording methods below SCHEDULE Press the ENTER button when the cursor is on SCHEDULE and the ...

Страница 25: ...ing is not activated if you set it to OFF POST EVENT DURATION Recording continues for the predefined time following the occurrence of an event The available setting values are from 1 to 20 seconds AUDIO Select whether to save audio data along with video SENSOR SELECT Set it to ON to activate the sensor 5 6 1 EVENT 5 6 EVENT SETUP This is a set up menu related to the DVR system Press the MENU butto...

Страница 26: ...wing are sample data from a POS device Kalatel Quick Easy Mart 0D 0A 3197 Airport Loop Drive 0D 0A Costa Mesa Ca 92626 0D 0A 0D 0A Candy Bar 1 49 0D 0A Soft Drink 64oz 2 49 0D 0A Chips 0 99 0D 0A 0D 0A TOTAL 7 99 0D 0A 0D 0A When CHECK PROTOCOL is set to OFF a different data format from the above is displayed When HEADER1 2 is set to none and DELIMITER is set to 0D 0A and LINES is set to 10 lines ...

Страница 27: ...connect to a computer IP ADDRESS Enters the IP ADDRESS that the relevant Internet service provider assigns to a user SUBNET MASK Enters the SUBNET MASK address that the relevant Internet service provider assigns to a user GATEWAY Enters the GATEWAY address that the relevant Internet service provider assigns to a user DNS Enters the DNS address that the relevant Internet service provider assigns to...

Страница 28: ...VER IP Please keep the default value ID Input the registered ID of the MAIL SERVER PW Input the registered PW of the MAIL SERVER RETURN MAIL ADDRESS Input the e mail address to return an undelivered mail to the mail address that is set from MAIL ADDRESS In case of still image capturing at an event input the IP address to send this captured image to SYSTEM ID Set the system ID BAUD RATE Set the dat...

Страница 29: ...general terms and conditions SIGN UP page check ID availability 2 The product registration is possible after sign up Sign in at iPOLiS website Product List If you didn t register products there are no list Chapter 5 Configuration Chapter 5 Configuration Product Registration Check ID availability ...

Страница 30: ...polis com ID PW Enter the ID Domain Password using the product registration at iPOLiS website The DDNS configuration at DVR is completed VIEW See the log in page of selected product Edit Delete Edit Delete the selected product password is needed for checking 4 The connection status of selected product can be checked on product list Chapter 5 Configuration Chapter 5 Configuration Caution The produc...

Страница 31: ...an be selected User will be transferred to the appropriate page when the security code is entered Product ID Domain cannot be edited so if deleted ID Domain must be re entered View Transfers to product login page View is available for all products Chapter 5 Configuration Chapter 5 Configuration Click the edit button from the product list i Editing product profile under Product Information ii Delet...

Страница 32: ...he system settings can be changed from a remote site over the network REMOTE CONTROLLER ID Set the remote control ID A remote controller ID can be selected from numbers 0 to 9 The remote controller ID is displayed with an icon such as R 1 R 2 etc on the screen If you select 0 it appears as R A on the screen and the user can control all the DVRs by using only one remote controller DESCRIPTION Detai...

Страница 33: ...line are initialized to O 2 The authority to view the SYSTEM SETUP PASSWORD USER AUTHORIZATION page Only an administrator can view this page In the case of PASSWORD CHECK X the system does not archive any data about who logs into the system menu Everybody can view SYSTEM SETUP PASSWORD USER AUTHORIZATION When the user is the only one who operates the system this setting can be available Only when ...

Страница 34: ...for Network Time Protocol which is for synchronizing the clocks of computer systems over variable latency data networks TIME SERVER Input the address of the NTP TIME SERVER GMT Greenwich Mean Time GMT is a term originally referring to mean solar time at the Royal Observatory Greenwich in London Because NTP synchronizes clocks with Greenwich Mean Time GMT regardless of geography users must set thei...

Страница 35: ... the firmware up grade is completed When the DVR system time is reset or mismatched the message below is displayed This message is displayed when the DVR system time is set to before of the time recording data on the HDD If the DVR system time is set correctly the DVR will not show the TIME MISMATCH error message When the above message is displayed power the system OFF Please the power the system ...

Страница 36: ...the Connection Type is iPolis Server the default setting value is displayed The default setting value is www samsungipolis com Port Input the port number of the system if the Connection Type is IP Address Input the system ID that was pre registered in the iPOLiS home page when the Connection Type is iPolis Server USER ID Only the USER ID that is pre set in SYSTEM MENU PASSWORD USER AU THORIZATION ...

Страница 37: ...WORD USER AUTHORIZATION Button to change the ZOOM FOCUS mode of speed dome cameras Before using this function please set the PTZ field to 0 in SYSTEM MENU PASSWORD USER AUTHORIZATION Button for ZOOM IN OUT Button for FOCUS IN OUT Not available in SVR 940 450 models Not available in SVR 940 450 models Button to control Alarm Alarm Out Buttons Functions Button to change to Live mode Buttons for play...

Страница 38: ...on for Search Mode Display camera OSD menu ZF mdoe Buttons to select the speeds for Pan Tilt Zoom Focus Max 6X Close camera OSD menu Button to go or return to the selected menu in the camera OSD menu Buttons for Zoom Focus of camera OSD control ZOOM IN FOCUS IN ZOOM OUT FOCUS OUT Button for Live Mode Calendar Play buttons Button for OSD control over video screen Show hide Chapter 6 Web Viewer Chap...

Страница 39: ...nitor screen is not clear Check whether the camera s focus is properly adjusted Spec SVR 450 SVR 940 Video Input 4BNC 9BNC Video Output Monitor A 1BNC 1VGA Selectable 1BNC 1VGA Selectable S Video Monitor B 1BNC Single SPOT Compression MPEG4 Display Speed 120fps 270fps Resolution 720 X 480 360 X 240 720x480 720x240 360x240 Multi screen 1 4 1 4 9 Record Speed Max 120fps Resolution 704X480 352X240 70...

Страница 40: ...HD S725050KLAT80 500 GB 7200 RPM 8 M OK OK OK MAXTOR 6L300R0 300 GB 7200 RPM 16 M OK OK OK SAMSUNG SP0822N 80 GB 7200 RPM 2 M OK OK OK SP1604N 160 GB 7200 RPM 2 M OK OK OK WesternDigital WD1600BB 22GUA0 160 GB 7200 RPM 2 M OK OK OK WD2000BB 00GUA0 200 GB 7200 RPM 8 M OK OK OK Seagate ST3400 15ACE 40 GB 7200 RPM 2 M OK OK OK ST3800 12ACE 80 GB 7200 RPM 2 M OK OK OK COMPANY MODEL SIZE RPM BUFFER Rec...

Страница 41: ...MEMO MEMO ...

Страница 42: ... 462 120 Korea TEL 82 31 740 8151 8158 FAX 82 31 740 8145 SAMSUNG OPTO ELECTRONICS UK LTD Samsung House 1000 Hillswood Drive Hillswood Business Park Chertsey Surrey KT16 OPS TEL 44 1932 45 5308 FAX 44 1932 45 5325 www samsungtechwin com www samsungcctv com SALES NETWORK VAN 08 06 ...

Отзывы: