background image

English


_

41


menu 

Se

TT

in

G

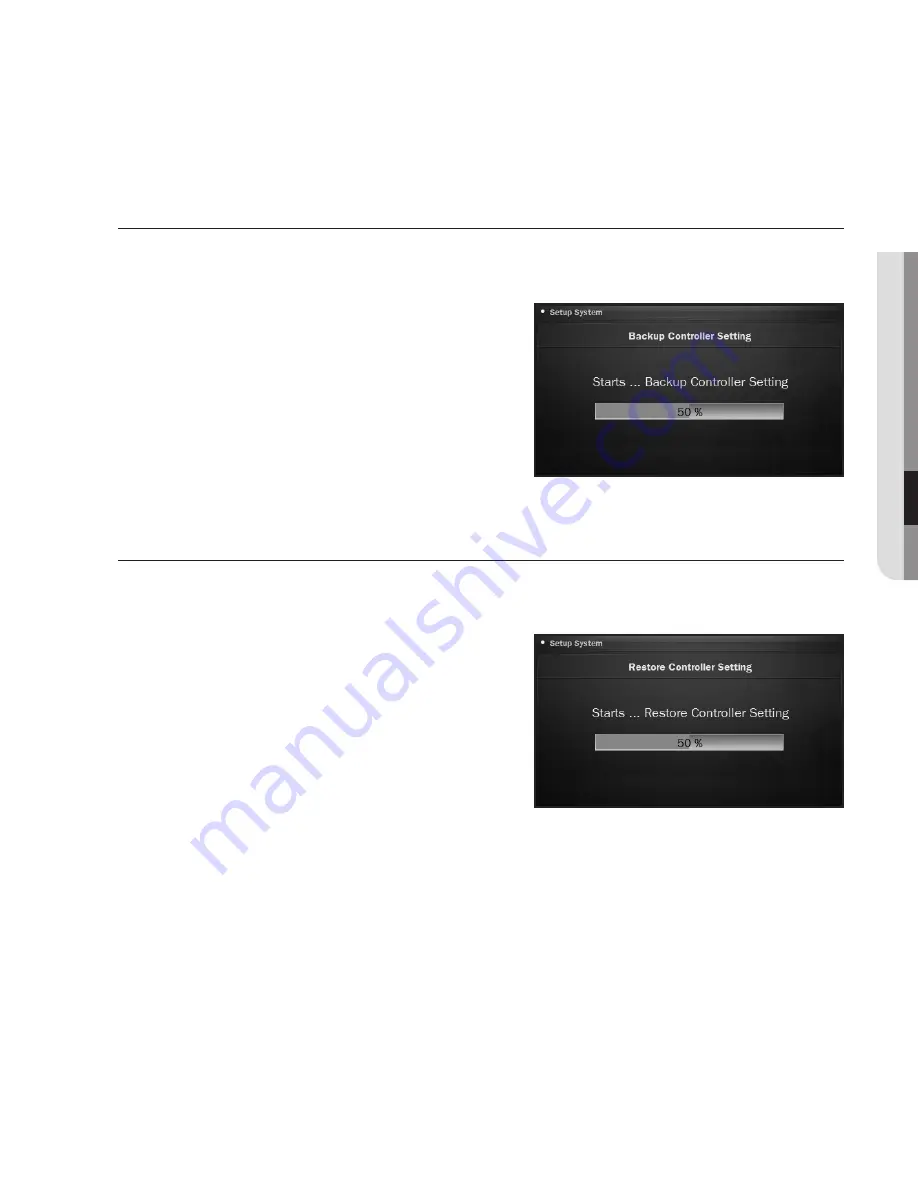
To backup the controller settings

If you want to change the controller or replace the camera, you can save the settings of the controller as 

a file and load the controller settings into a new camera.

1. 

From the menu setup screen, press <

update

>.

2. 

Press <

Backup Controller Setting

>.

3. 

Press <

oK

>. 

The backup process begins.


M


`

Do not disconnect the USB memory or power cable during 

the backup. Otherwise, it may fail to backup the controller 

settings.

To restore the controller settings

If you have set the controller improperly or reset it, you can upload the current settings to a different 

controller.

1. 

From the menu setup screen, press <

update

>.

2. 

Press <

restore Controller Setting

>.

3. 

Press <

oK

>. 

The restoration process begins.


M


`

Do not disconnect the USB memory or power cable during 

the restoration. Otherwise, it may fail to restore the controller 

settings.

Содержание SPC-6000

Страница 1: ...SYSTEM CONTROLLER User Manual SPC 6000 ...

Страница 2: ...amsung Techwin Disclaimer Samsung Techwin makes the best to verify the integrity and correctness of the contents in this document but no formal guarantee shall be provided Use of this document and the subsequent results shall be entirely on the user s own responsibility Samsung Techwin reserves the right to change the contents of this document without prior notice Design and specifications are sub...

Страница 3: ...fit into your outlet consult an electrician for replacement of the obsolete outlet 10 Protect the power cord from being walked on or pinched particularly at plugs convenience recep tacles and the point where they exit from the apparatus 11 Only use attachments accessories specified by the manufacturer 12 Use only with the cart stand tripod bracket or table specified by the manufacturer or sold wit...

Страница 4: ...UCE THE RISK OF ELECTRIC SHOCK DO NOT REMOVE COVER OR BACK NO USER SERVICEABLE PARTS INSIDE REFER SERVICING TO QUALIFIED SERVICE PERSONNEL EXPLANATION OF GRAPHICAL SYMBOLS The lightning flash with arrowhead symbol within an equilateral triangle is intended to alert the user to the presence of dangerous voltage within the product s enclosure that may be of sufficient magnitude to constitute a risk ...

Страница 5: ... to the goods or person may occur For safety please read this manual for the before using of goods and keep it in the safe place Do not Place this apparatus on an uneven surface Do not install on a surface where it is exposed to direct sunlight near heating equipment or heavy cold area Do not place this apparatus near Do not attempt to service this apparatus yourself Do not place a glass of water ...

Страница 6: ...romote the sustainable reuse of material resources Household users should contact either the retailer where they purchased this product or their local government office for details of where and how they can take these items for environmentally safe recycling Business users should contact their supplier and check the terms and conditions of the purchase contract This product and its electronic acce...

Страница 7: ... 14 14 Precautions 15 Before Installation 15 Adjusting the Screen Angle of the System Controller 16 Switching the Layout of Joystick and Jog Shuttle connecting to an external device 17 17 To Connect a RS 485 Device 23 Connecting to other System Controller using the menu 24 24 Getting Started 24 Controlling the PTZ Camera 30 Controlling DVR 32 Controlling MATRIX ...

Страница 8: ...w menu setting 34 34 To Access the Main Menu 34 PTZ setting 35 DVR Setting 35 Controller Setting 40 Firmware Update 42 To Check the Controller Information appendix 43 43 Specifications 44 Q A 45 GPL LGPL Software License ...

Страница 9: ...different sites and connect up to 16 controllers simultaneously Switch the joystick and jog shuttle module positions For the user s convenience the positions of the joystick and jog shuttle module can be switched between left and right User friendly interface The operation status of the system control is displayed on the screen the touch screen enables you to select a menu with ease the joystick m...

Страница 10: ...luded Unpack the product package and place the product on the floor or a flat surface Check if the following components are all included in the product package Main Unit User Manual Power Adaptor 1EA Power Cable 1EA Terminal Block 1EA ...

Страница 11: ... of the system controller d SETUP Bar Press the FUNC button and press SETUP to enter the Setup menu e Camera Operation Bar Access the selected PTZ menu or execute Preset Group or Track f Joystick Controller You can manipulate the Pan Tilt operation up or down in connection with the PTZ camera or receiver unit Turn the joystick clockwise or counter clockwise to control zooming You can control the d...

Страница 12: ...ems ENTER Move to a desired item using the navigation buttons and select it ESC Cancel the current operation i Number 0 9 Buttons Used to specify numeric characters for camera monitor DVR or Preset settings j Controller Selection Bar Used to select a camera monitor or DVR k Jog Shuttle Jog Used to search for forward reverse frame in DVR play mode Shuttle Forward Reverse Play FF REW in DVR play mod...

Страница 13: ...m controller settings or upgrading the firmware e Power DC 12V input port f Cable Hook To prevent the power cable from being loose M M Be sure to use the cable hook when installing and using the controller M M The MATRIX port contains the power line so you don t need to supply DC 12V separately if using the MATRIX port The MATRIX port contains a single line controlling the main and subsidiary cont...

Страница 14: ...ble The layout of the main unit and the wiring system are critical for a proper system operation If the devices are too close with each other or in a poor ventilating environment the system may not work properly Inaccessibility to the system makes the repair difficult or even impossible To prevent a system failure or to reduce the system shutdown make enough room for ventilation and close the cove...

Страница 15: ...out of people s reach in an attempt to prevent a risk of physical damage Leaving an abnormal smoke or smell as it is may lead to a fire or electric shock If this is the case turn off the product immediately and contact us for a technical assistance Take an appropriate action if you find damp floor unearthed power extension cord peeled off power cable or absence of safety grounding J J Use a dry cl...

Страница 16: ...oller and switch the modules manually Or press Change in the controller setup menu and switch the modules manually page 38 1 Press down both hooks on the bottom of the system controller to remove the module 2 Remove both joystick and jog shuttle modules from the controller and switch the position When done insert them until you hear a click Bottom 주의 전원을 끄고 모듈을 탈착하십시오 Caution Turn the power off an...

Страница 17: ...rts RS 485 communication protocols 1 Connect the rear PORT 1 with RS 485 port of the PTZ camera or DVR 2 According to the external device connected select Half Duplex or Full Duplex connection M M For the Half Duplex system use TX terminals For RS 485 communications pay special attention to the polarity Use the provided terminal block in the product package Check if the RS 485 device is compatible...

Страница 18: ...connecting to an external device 18_ connecting to an external device If connecting the keyboard without using MATRIX Main Controller Sub1 Controller Sub2 Controller Sub16 Controller ...

Страница 19: ...TRIX port contains the power line so you don t need to supply DC 12V separately 2 Connect TX and TX of the sub controller to T and T of the matrix respectively The baud rate between sub controllers in sync with MATRIX will be fixed to 9600 bps The MATRIX ID is fixed to SUB 09 3 Connect DVR and PTZ camera to MATRIX Main Controller PTZ Camera DVR PTZ Camera DVR Sub Controller ...

Страница 20: ... PTZ camera For the half duplex system Connect RX of RS 485 port of the PTZ camera with TX of PORT 1 of SPC 6000 Connect RX of RS 485 port of the PTZ camera with TX of PORT 1 of SPC 6000 For the full duplex system Connect RX of RS 485 port of the PTZ camera with TX of PORT 1 of SPC 6000 Connect RX of RS 485 port of the PTZ camera with TX of PORT 1 of SPC 6000 Connect TX of RS 485 port of the PTZ c...

Страница 21: ...he DVR with TX of PORT 1 of SPC 6000 For the full duplex system Connect TX of RS 485 port of the DVR with RX of PORT 1 of SPC 6000 Connect TX of RS 485 port of the DVR with RX of PORT 1 of SPC 6000 Connect RX of RS 485 port of the DVR with TX of PORT 1 of SPC 6000 Connect RX of RS 485 port of the DVR with TX of PORT 1 of SPC 6000 PTZ device Half Duplex Type Data Data Full Duplex Type Rx Rx Tx Tx R...

Страница 22: ...necting SRD 4XX or SHR 604X series with DVR Connect RS 485 port on the rear of SRD 4XX or SHR 604X series with SPC 6000 For the half duplex system Connect TX of SRD 4XX or SHR 604X with TX of PORT 1 of SPC 6000 Connect TX of SRD 4XX or SHR 604X with TX of PORT 1 of SPC 6000 ...

Страница 23: ...her SPC 6000 For the full duplex system Connect TX of PORT 2 of the main controller SPC 6000 with RX of PORT 2 of the sub controller SPC 6000 Connect TX of PORT 2 of the main controller SPC 6000 with RX of PORT 2 of the sub controller SPC 6000 Connect RX of PORT 2 of the main controller SPC 6000 with TX of PORT 2 of the sub controller SPC 6000 Connect RX of PORT 2 of the main controller SPC 6000 w...

Страница 24: ...n dialog appears 3 Use the number pad to enter the password and press ENTER The main menu of the PTZ control system appears The default password is 4321 Controlling the PTZ Camera To enter PTZ control mode Press PTZ of the controller To select a camera 1 Use the number buttons to enter the number of the camera of your choice 2 Press CAM or ENTER using the menu ...

Страница 25: ...r to fit the camera focus IRIS Press IRIS OPEN or IRIS CLOSE on the controller to adjust the brightness of the camera video PRESET Move the camera to a pre determined point To set a preset 1 Select a camera that you want to set a preset for 2 Use the joystick to move the camera to a desired point 3 Press SETUP and enter a desired number using the number buttons Then press PRESET To execute the pre...

Страница 26: ...ING from the menu screen 2 Press SETTING 3 Use the number buttons to select PAN TILT and specify the start preset and end preset 4 Specify the speed and dwell time 5 Press Save To execute the swing 1 Select SWING from the menu screen 2 Use the number buttons to select PAN or TILT for the swing type 3 The swing function will be executed ...

Страница 27: ...1 Select GROUP SCAN from the menu screen 2 Select Group Setting 3 Enter a group number and press ENTER 4 Specify the speed and dwell time 5 Press Save To execute the group function 1 Select GROUP SCAN from the menu screen 2 Select Group Executing 3 Enter a group number and press ENTER 4 The group function will be executed ...

Страница 28: ...p to 6 groups to a tour 4 Press Save to apply your settings To execute the tour function 1 Select TOUR from the menu screen 2 Select Tour Executing 3 The tour function will be executed TRACE With the joystick or camera buttons you can instruct the controller to record the camera movement for a specific time and repeat the movement To set a trace 1 Select TRACE PATTERN from the menu screen 2 Select...

Страница 29: ... be activated RESET 1 Select RESET from the menu screen 2 The camera will be reset TARGET LOCK 1 Select TARGET LOCK from the menu screen There appears a rectangle box on the camera video 2 Move to an object to track down and press ENTER This is applied only to a camera that supports the tracking function TRACK 1 Select TRACK from the menu screen 2 The track function will be executed This is applie...

Страница 30: ...tting may cause a problem using the DVR To select a DVR 1 Press DVR 2 Use the number buttons to enter a DVR number 0 255 and press ENTER 3 The main menu screen appears It differs depending on the model M M For a DVR that supports SRD protocols the menu screen displays only menu items available If you connect a DVR that supports SRD protocols the PTZ settings will be made automatically ...

Страница 31: ...e that is connected to the DVR If this is the case press PTZ to switch from DVR control mode to camera control mode To control the PTZ device in DVR mode 1 Press PTZ in the bottom right corner of the DVR menu screen 2 Use the joystick to control the PTZ camera in connection with the DVR For details refer to the user manual of the DVR DVR login You must access the DVR menu with the right user accou...

Страница 32: ...or will play the video of the selected camera To play the current video on the previous monitor Enter a number for the camera to select 1 Press the camera number in the Matrix setup screen and press CAM 2 The previous monitor will play the video of the currently selected camera Auto Select You can make a schedule of operations in the Matrix setup menu 1 Select a monitor number in the Matrix setup ...

Страница 33: ...ress the combination of All RUN to run Auto Select as you set Press the combination of All HOLD to stop operating Auto Select and wait for your input M M To instruct an operation for an individual monitor press a combination of monitor number RUN or monitor number HOLD Alarm Play If the sensor is triggered in Alarm Play mode the siren will sound if the alarm unit has set the siren to ON or you can...

Страница 34: ...en you can specify the protocol and baud rate 1 Press PTZ from the setup main screen 2 Use the direction buttons or joystick to move to a desired menu 3 You can change the settings using ZOOM WIDE or ZOOM TELE 4 When you have completed the settings of protocol and baud rate press Save 5 To exit the PTZ Setup screen press OK or ESC M M Before moving to a different page save your settings menu setti...

Страница 35: ... and specify the DVR type 3 Specify the baud rate 4 When done press Save 5 To exit the DVR Setup screen press OK or ESC M M Before moving to a different page save your settings Controller Setting Controller ID You can select RS 485 or RS 422 for the communication system 1 Select RS 485 or RS 422 for the communication system between controller and external devices 2 Press the port button to specify...

Страница 36: ...ess Save PORT 2 ID You can specify the main or sub controller for communications between controllers and also set the use of matrix and sub list 1 Press Port 2 from the control ID setup screen 2 Use the direction buttons to select a desired item and select a communication system between controllers You must set the sub list in a multi controller environment 3 When done press Save ...

Страница 37: ...ub List screen press OK or ESC Joystick Button Operation You can set the operation for the joystick button 1 Press the joystick Button 2 From the joystick button operation screen select a function button for the selected joystick button 3 Check the current setting press Exit Screen Saver You can set to activate the screen saver if you do not intend to use the controller for an extended time 1 If y...

Страница 38: ...k from left to right or vice versa 1 Press Change 2 From the Change Module screen that appears you can switch the position between jog shuttle and joystick 3 To exit the screen press Exit Language You can select a preferred language for the user interface 1 Press Language 2 From the Language selection screen that appears use the direction buttons or joystick to select a preferred language The lang...

Страница 39: ...ange the password You can change the password 1 Press the password Set button 2 Provide the current password 3 Provide a new password 4 To apply the changes press OK To cancel your setting press Exit M M The default password is 4321 J J The default password can be exposed to a hacking thread so it is recommended to change the password after installing the product Note that the security and other r...

Страница 40: ...ct the USB memory containing the latest firmware files to the system controller 2 From the menu setup screen press Update 3 Press Update Controller Firmware 4 From the update screen press OK The update status will be displayed in the progress bar 5 Wait until the system restarts after the update M M Do not disconnect the USB memory or power cable during the update Otherwise it may fail to update t...

Страница 41: ...gins M M Do not disconnect the USB memory or power cable during the backup Otherwise it may fail to backup the controller settings To restore the controller settings If you have set the controller improperly or reset it you can upload the current settings to a different controller 1 From the menu setup screen press Update 2 Press Restore Controller Setting 3 Press OK The restoration process begins...

Страница 42: ...To Check the Controller Information You can check the model name and software version of the system controller Status Screen You can check the controller status 1 From the menu setup screen press Status 2 Check the controller status ...

Страница 43: ...col MATRIX SMX 25632 Protocol RECEIVER Samsung T Multilingual Support English Spanish French Italian German Turkish Polish Russian Portuguese Swedish Dutch Czech Serbian Korean Chinese Japanese LCD Display 5 TFT LCD Touch LCD USB Port Backup Restore S W Update Video Port BNC Video Input Loop Through Output Joystick PTZ control 3 axial twist zoom Jog Shuttle Control DVD playback Power DC 12V Max 4W...

Страница 44: ...he G port of the device to the G port of SPC 6000 Check if the address of the system controller is specified properly For specifying the address refer to Controller Setting from Menu Setting page 35 The USB memory is not recognized properly Check if the USB memory works properly Use only one USB memory and try again M M The LCD panel of the system controller is a consumable part To purchase the pa...

Страница 45: ... program will individually obtain patent licenses in effect making the program proprietary To prevent this we have made it clear that any patent must be licensed for everyone s free use or not licensed at all The precise terms and conditions for copying distribution and modification follow TERMS AND CONDITIONS FOR COPYING DISTRIBUTION AND MODIFICATION Version 2 June 1991 Copyright C 1989 1991 Free...

Страница 46: ...strictions on the recipients exercise of the rights granted herein You are not responsible for enforcing compliance by third parties to this License 7 If as a consequence of a court judgment or allegation of patent infringement or for any other reason not limited to patent issues conditions are imposed on you whether by court order agreement or otherwise that contradict the conditions of this Lice...

Страница 47: ...NU General Public License is intended to guarantee your freedom to share and change all versions of a program to make sure it remains free software for all its users We the Free Software Foundation use the GNU General Public License for most of our software it applies also to any other work released this way by its authors You can apply it to your programs too When we speak of free software we are...

Страница 48: ...ing or running the covered works for you must do so exclusively on your behalf under your direction and control on terms that prohibit them from making any copies of your copyrighted material outside their relationship with you Conveying under any other circumstances is permitted solely under the conditions stated below Sublicensing is not allowed section 10 makes it unnecessary 3 Protecting Users...

Страница 49: ... special password or key for unpacking reading or copying 7 Additional Terms Additional permissions are terms that supplement the terms of this License by making exceptions from one or more of its conditions Additional permissions that are applicable to the entire Program shall be treated as though they were included in this License to the extent that they are valid under applicable law If additio...

Страница 50: ...agate by procuring conveyance of a covered work and grant a patent license to some of the parties receiving the covered work authorizing them to use propagate modify or convey a specific copy of the covered work then the patent license you grant is automatically extended to all recipients of the covered work and works based on it A patent license is discriminatory if it does not include within the...

Страница 51: ...ally software patents pose a constant threat to the existence of any free program We wish to make sure that a company cannot effectively restrict the users of a free program by obtaining a restrictive license from a patent holder Therefore we insist that any patent license obtained for a version of the library must be consistent with the full freedom of use specified in this license Most GNU softw...

Страница 52: ...e of the Library into a program that is not a library 4 You may copy and distribute the Library or a portion or derivative of it under Section 2 in object code or executable form under the terms of Sections 1 and 2 above provided t hat you accompany it with the complete corresponding machine readable source code which must be distributed under the terms of Sections 1 and 2 above on a medium custom...

Страница 53: ... who receive copies directly or indirectly through you then the only way you could satisfy both it and this License would be to refrain entirely from distribution of the Library If any portion of this section is held invalid or unenforceable under any particular circumstance the balance of the section is intended to apply and the section as a whole is intended to apply in other circumstances It is...

Страница 54: ...terms of the GNU Lesser General Public License as published by the Free Software Foundation either version 2 1 of the License or at your option any later version This library is distributed in the hope that it will be useful but WITHOUT ANY WARRANTY without even the implied warranty of MERCHANTABILITY or FITNESS FOR A PARTICULAR PURPOSE See the GNU Lesser General Public License for more details Yo...

Страница 55: ......

Страница 56: ...AMERICA Inc 100 Challenger Rd Suite 700 Ridgefield Park NJ 07660 Toll Free 1 877 213 1222 Direct 1 201 325 6920 Fax 1 201 373 0124 www samsungcctvusa com SAMSUNG TECHWIN EUROPE LTD Samsung House 1000 Hillswood Drive Hillswood Business Park Chertsey Surrey UNITED KINGDOM KT16 OPS TEL 44 1932 45 5300 FAX 44 1932 45 5325 www samsungtechwin com www samsungsecurity com PT01 000841A PT01 000841A ...

Отзывы: