13
12
●
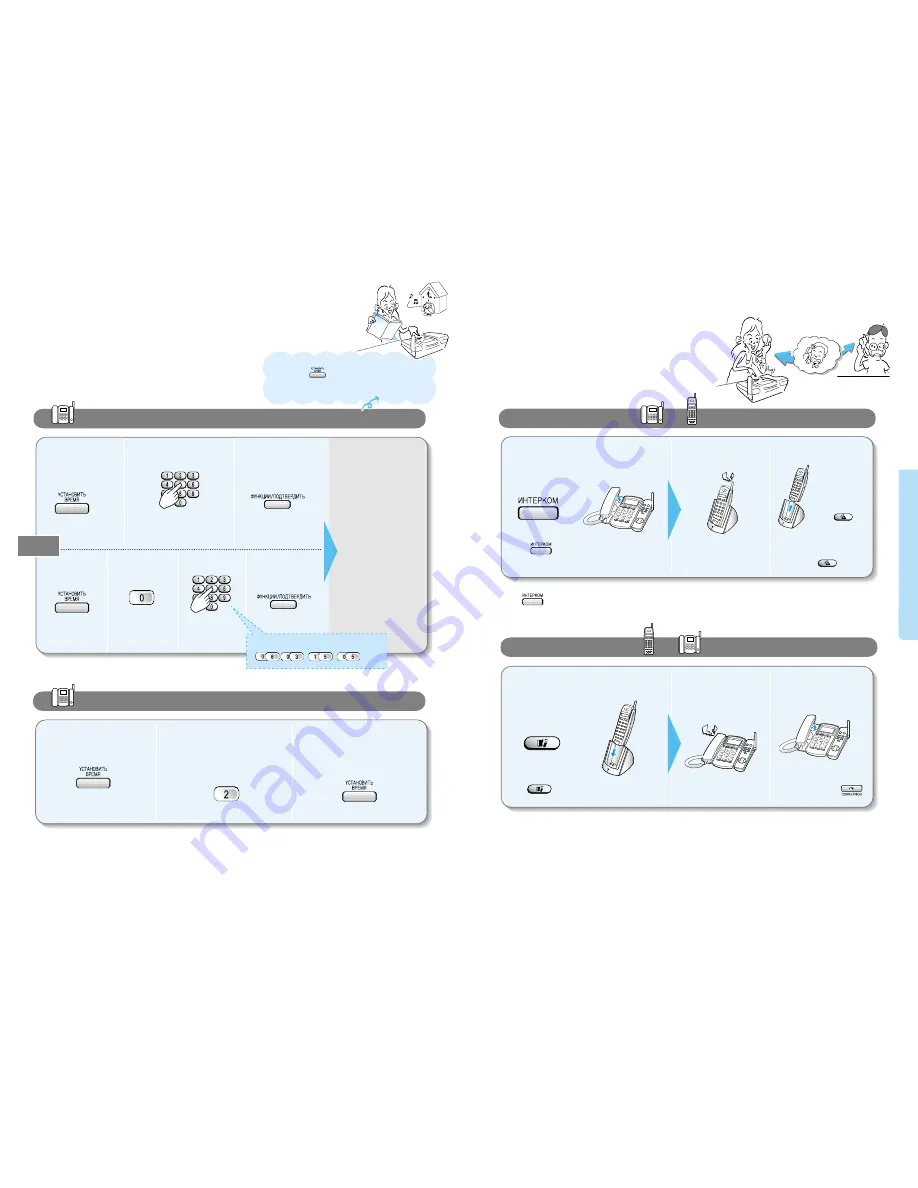
If the Remote set is not
placed on the charger,
just press button.
Press button and hang up the handset.
Press button and hang up the Remote set.
When you hear the
intercom ringing
When you hear the
intercom bell
Pull out the
Remote set from
the charger and
press
button.
How to transfer from to during a call.
How to transfer from to during a call.
●
Or you can press
button to receive the call.
Pick up the handset in the
base set to receive the call.
;;;
;;;
@@@
@@@
ÀÀÀ
ÀÀÀ
;;
;;
@@
@@
ÀÀ
ÀÀ
Transferring calls
●
You need to setup the current time in order to see the
message recorded time and to use the morning call
function.
Date/Time setting
(setting the current time)
2
3
1
2
3
1
2
3
1
2
3
4
1
Press 8 digits in the
order of day, month,
hour and minute.
Press 8 digits in the
order of day, month,
hour and minute.
Ex) March 6th, 15:05
When the date and
time has been set,
you can hear the
currently set date
and time in a
recorded voice.
Operating procedure
(press the following buttons in ordered sequence)
When additional Remote sets are registered
You can transfer calls among Remote sets. Press the Intecom button and press the intercom number you wish the
transfer to go.
When the Intercom transfer does not work
If nobody answers the call, on the base set within 15 seconds, then the call will be transferred back to the Remote
set. Furthermore, if this call is not answered for another 15 seconds, the call will automatically be hung up.
When additional Remote sets are registered
Press button and then press the internal number you wish the transfer to go.
(If you do not designate a particular number, then all the registered Remote sets will ring.)
2
3
1
Selecting pulse / tone dial type
�
�
●
To see the currently set time, place the handset in the base
set and press button. In case of a power shutdown, it
will erase the date and time. Therefore, you will have to set
it up once again.
●
The number 2 will blink on the screen and the recorded voice will tell you the current type.
●
You can toggle between the two types by pressing 2.
Or
Basic features


