background image

69

CHAPTER 4

Watching TV

4

4

4

To see details for the listed purchases, highlight a purchase,
then press the SELECT button. A screen displaying program 
details for the selected purchase appears.

5

To return to the Past Purchases screen, press the BACK button
on your remote control.

The Future Purchases screen displays both purchases you have made for programs that have not yet
aired, and purchases for past programs which you never watched. Purchases which you  have made
that have not yet aired can be canceled following the instructions below.

Canceling a pay per view purchase

To cancel the purchase of a pay per view program that you purchased but have not
yet watched, follow these steps:

1

Press the MENU button on your remote control.

2

Highlight the Purchases menu item, then press the SELECT button.

3

Highlight the Future Purchases menu item, then press the SELECT button.

4

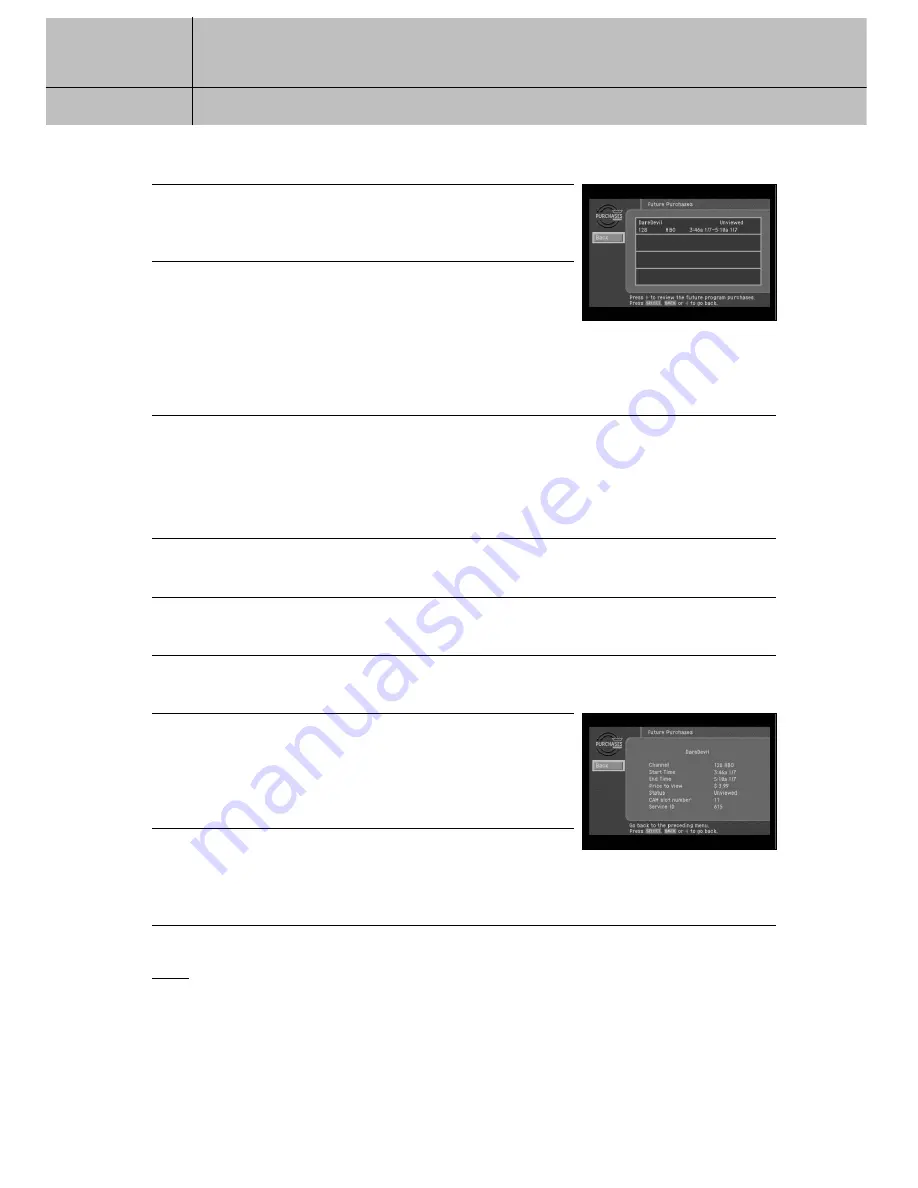
To cancel a purchase, highlight the program purchase you
wish to cancel, then press the SELECT button.

A screen displaying program details for the selected purchase 
appears.

5

Highlight the on-screen Cancel Purchase button, then press
the SELECT button. The Program Detail screen disappears.
The Future Purchase screen appears; the purchase you canceled
is now listed as canceled.

NOTE

Past programs which you purchased but never watched cannot be canceled.
Only PPV purchases made from the DIRECTV HD Receiver may be canceled.

Содержание SIR-TS360 - Satellite TV Receiver

Страница 1: ...Owner s Manual DIRECTV HD Receiver SIR TS360 ...

Страница 2: ...tant One Federal Court has held that unauthorized recording of copyrighted TV programs is an infringement of U S copyright laws To prevent damage which may result in fire or electric shock hazard do not expose this appliance to rain or moisture Always be careful when using this product To reduce the risk of fire electrical shock and other injuries keep these safety precautions in mind when install...

Страница 3: ...essories specified by the manufacturer 12 Use only with cart stand tripod bracket or table specified by the manufacturer or sold with the apparatus When a used caution when moving the cart apparatus combination to avoid injury from tip over 13 Unplug this apparatus during lightning storms or when unused for long periods of time 14 Refer all servicing to qualified service personnel Servicing is req...

Страница 4: ...e user is encouraged to try to correct the interference by one or more of the following measures Reorient or relocate the receiving antenna Increase the separation between the equipment and receiver Connect the equipment into an outlet on a circuit different from that to which the receiver is connected Consult the dealer or an experienced radio TV technician for help Trademark and copyright statem...

Страница 5: ...HD Receiver The number for the Access Card is on the back of the card and on the carton label Record these numbers for reference when calling your sales or service representative regarding this product Model Number ____________________________________ Serial Number ____________________________________ Access Card Number _______________________________ Receiver ID __________________________________...

Страница 6: ...ver is longer SAMSUNG s obligations with respect to software products distributed by SAMSUNG under the SAMSUNG brand name are set forth in the applicable end user license agreement Non SAMSUNG hardware and software products are provided on an AS IS basis However non SAMSUNG manufacturers suppliers publishers and service providers may provide their own warranties This limited warranty covers manufa...

Страница 7: ...AN THE PURCHASE PRICE OF THE PRODUCT SOLD BY SAMSUNG AND CAUSING THE ALLEGED DAMAGE WITHOUT LIMITING THE OREGOING PURCHASER ASSUMES ALL RISK AND LIABILITY FOR LOSS DAMAGE OR INJURY TO PURCHASER AND PURCHASER S PROPERTY AND TO OTHERS AND THEIR PROPERTY ARISING OUT OF THE USE MISUSE OR INABILITY TO USE THIS PRODUCT SOLD BY SAMSUNG NOT CAUSED DIRECTLY BY THE NEGLIGENCE OF SAMSUNG THIS LIMITED WARRANT...

Страница 8: ... your DIRECTV HD Receiver 31 Connecting the VCR control cable 36 Turning on the DIRECTV HD Receiver for the first time 37 Memorizing Channels 37 Acquiring the correct dish pointing angles 38 Checking the satellite signal strength 39 Setting the dish type 40 Using Auto Detection to set the dish type 42 Testing the DIRECTV HD Receiver 43 Testing the Signal Strength 44 Setting up local networks 44 Sc...

Страница 9: ...mail 86 Setting system preferences 87 Reviewing and controlling caller ID 97 Setting the Local Time options 99 Adjusting the Raster Picture Centering 100 Installing a new Access Card 101 Setting Remote control type 102 Setting RF Remote control ID Optional 104 Viewing important information and a list of features supported by your DIRECTV HD Receiver 105 Viewing information on automatic system upgr...

Страница 10: ... TV broadcasts Digital TV Digital television sometimes called DTV is a newer method of broadcasting TV signals that delivers higher quality audio and video Digital TV is broadcast in two sets of formats SDTV and HDTV NTSC NTSC National Television Standards Committee refers to the group that first established the standards used for conventional analog television broadcasts and TV equipment ATSC ATS...

Страница 11: ...the Air In jack Unscrambled analog cable TV services for unscrambled cable programming through the Cable In jack To view cable TV or DIRECTV programming programming subscriptions are also required What equipment is required to view HDTV programming To view HDTV programming in addition to your DIRECTV HD Receiver you will need an HDTV monitor or television set For DIRECTV High Definition programmin...

Страница 12: ...an video video frames are displayed every 1 60th of a second containing all of the lines of video information for each frame The specifications for video resolutions are usually stated by giving the number of horizontal lines followed by either the letter i for interlaced video or p for progressive scan video Most standard TV broadcasts are 480i 480 lines of interlaced video resolution Some DVDs a...

Страница 13: ...utton on the front panel or the remote control the display format will be switched between 1080i 720p 480p i Native 1 Native 2 and Native 3 All input signal formats in the 1080i 720p and 480p i modes will be converted to the selected display format The output display format in the Native 1 Native 2 and Native 3 modes will be automatically changed according to the input signal format as shown in th...

Страница 14: ...eo signal it is capable of using NOTE If you connect your TV to one of the composite video out jacks VIDEO OUT S VIDEO OUT and you view a HD program with the DIRECTV HD Receiver s RESOLUTION button set to either 720p or 1080i the picture will be slightly cropped at the top and bottom the very top and bottom edges of the image will not appear on the TV screen To avoid this problem set the RESOLUTIO...

Страница 15: ...movies shown in theaters This makes HDTV an ideal format for broadcasting and viewing movies on a TV But what happens if you are watching a nearly square shaped 4 3 broadcast on a rectangular 16 9 TV or vice versa The DIRECTV HD Receiver allows you to choose from a variety of screen formats to help you deal with those scenarios Screen formats To deal with the mismatches that can occur between the ...

Страница 16: ...etched to fit the height of the screen like in the Letter box format But instead of applying black gray bars to the top and bottom of the screen the program image is stretched vertically until it is tall enough to fill your screen Your entire TV screen is full but the program images are a little stretched to compensate for the program to screen mismatch Zoom 1 This format stretches the top and bot...

Страница 17: ...des of the screen the program image is stretched horizontally until it is wide enough to fill your screen Your entire TV screen is full but the program images are a little stretched to compensate for the program to screen mismatch Zoom 1 This format stretches the left and right edges of the image at an equal ratio keeping the 4 3 aspect ratio intact The top and bottom portions of the image will be...

Страница 18: ...6 9 program signals Full Full Letter box Full Zoom 1 Zoom 2 For either of these scenarios the option you choose is a matter of preference The FORMAT button on your remote control allows you to cycle through the formats available for your display type NOTE You can set the color of the horizontal or vertical bars displayed for Letter box and Pillar box screen formats to either black or gray See Chap...

Страница 19: ... connected to a compatible Dolby Digital 5 1 channel A V receiver and speaker setup is a home theater experience that provides much of the dynamic range 360 degree imaging and sonic excitement of a real theater Not all Digital TV programming is broadcast using Dolby Digital 5 1 For DIRECTV programming you can see which programs are broadcast using this high quality audio standard by checking the I...

Страница 20: ... of the DIRECTV HD Receiver Installing the batteries in the remote control Inserting the Access Card Box contents Welcome The first step in setting up your DIRECTV HD Receiver is to unpack the box and familiarize yourself with its contents If you are missing any items contact your dealer DIRECTV HD Receiver AAA size batteries RJ 11 Telephone cord Access Card S Video cable VCR control cable A V cab...

Страница 21: ...ets the video resolution output by the DIRECTV HD Receiver to match the resolution of your TV or monitor 480p i Affects the signal output from the COMPONENT OUT RGB OUT and DVI HDCP OUT jacks OUTPUT MODE This button determines the signal type output by either DVI HDCP OUT and RGB OUT or COMPONENT OUT jacks Access Card slot This slot holds the Access Card which allows you to view DIRECTV programmin...

Страница 22: ...ct the audio jack to L1 and R1 when using the component terminal Y PB or PR Connect the audio jack to L2 and R2 when using the S Video or Video terminal RS232C This is used to connect your receiver to a computer for reading and loading data information DVI HDCP OUT Using a digital DVI cable this jack connects your DIRECTV HD Receiver to a TV that accepts the unconverted DVI signal from a HD digita...

Страница 23: ...d A V cables these jacks connect your DIRECTV HD Receiver to a TV or VCR that accepts HD component video input DOLBY DIGITAL COAXIAL Using a coaxial digital audio cable this jack allows you to connect your DIRECTV HD Receiver to an A V receiver that accepts coaxial digital audio input DOLBY DIGITAL OUT OPTICAL Using an optical digital audio cable this jack allows you to connect your DIRECTV HD Rec...

Страница 24: ...ontrol 2 Insert 2 AAA batteries as shown making sure the and ends of each battery line up with the corresponding marks in the battery compartment 3 Snap the cover back onto the remote control 4 Test the remote control to make sure the batteries have been inserted correctly Press the MODE button repeatedly until the DIRECTV mode is selected and make sure the button lights up If it does not light up...

Страница 25: ... Receiver For some receivers the card may already be inserted when you unpack the box 1 Locate the ACCESS CARD slot The slot is located on the front of the DIRECTV HD Receiver 2 Insert the Access Card Make sure the side with the bar code is facing down and the arrow is pointing away from you The Access Card should only be removed when replacing the card with a new one provided by DIRECTV or your p...

Страница 26: ...bles are plugged or screwed tightly into their jacks Please make sure that all antennas and cables are properly grounded Whenever possible route audio and video cables away from power cords Protect your components from overheating Do not block ventilation holes in the top of the DIRECTV HD Receiver or any other components Make sure to position the components so that air can circulate freely If you...

Страница 27: ...uality composite video signal using RCA type cables Audio jacks can be used to connect the DIRECTV HD Receiver to an A V receiver The audio video jacks on the back of the receiver and the audio video cable connectors are color coded yellow for video red for right audio and white for left audio Telephone jack and cord The TEL LINE jack and the included telephone cord connect your DIRECTV HD Receive...

Страница 28: ...les and jacks Y PB PR are used to connect the DIRECTV HD Receiver to TVs VCRs and A V receivers equipped with component video input jacks Component video connections provide a TV picture superior to S Video connections Component video jacks use 3 RCA type cables to carry the signal This connection is capable of displaying Digital TV and HDTV video resolutions These cables carry video only use with...

Страница 29: ... cable not included RGB OUT jack and cable use a computer standard 15 pin VGA video connection Each main video color Red Green and Blue uses a separate pin and other pins are used to carry vertical and horizontal sync signals Using the RGB OUT jack and an RGB cable you can connect your DIRECTV HD Receiver to devices equipped with RGB input jacks computer monitors for example The RGB Out jack can c...

Страница 30: ... tape programs for you using simple on screen controls Audio Video input jacks and cables RCA type Use these jacks and cables to connect your receiver to a TV VCR DVD or to other components such as a stereo receiver or amplifier The Video input jacks provide a high quality composite video signal using RCA type cables Audio jacks can be used to connect the DIRECTV HD Receiver to an A V receiver The...

Страница 31: ...to the CABLE IN jack on the back of the DIRECTV HD Receiver 4 If you plan to watch off air TV programming analog or digital connect the coaxial cable running from your off air TV antenna to the AIR IN jack on the back of the DIRECTV High Definition Receiver 5 Connect the supplied phone cord to a telephone wall jack and to the TEL LINE jack on the back of the DIRECTV HD Receiver NOTE A triple LNB m...

Страница 32: ...igh definition format using this product Whenever possible you should connect both HD RGB Component DVI and SD S Video A V interfaces to permit SD viewing of programs if HD viewing is restricted For the best access to high definition programming at the highest available resolution broadcast by DIRECTV connect the DVI HDCP output to the corresponding DVI HDCP input that supports High bandwidth Digi...

Страница 33: ...ptical and coaxial digital audio outputs provide the highest quality audio see Dolby Digital 5 1 in Chapter 1 The standard A V audio jacks provide the next best audio quality Whichever connection you choose connect one end of the audio cable s to the appropriate OUT jack s on the back of the DIRECTV HD Receiver Connect the other end of the audio cable s to the audio input s on your TV NOTE If you ...

Страница 34: ...cks provide the next best video quality and high quality audio for your VCR Whichever connection you choose connect one end of the audio and video cables to the appropriate OUT jack s on your DIRECTV HD Receiver Connect the other end of the audio and video cable s to the audio and video inputs on your VCR Finally connect your VCR to your TV by connecting audio and video output jacks on your VCR to...

Страница 35: ... the DIRECTV HD Receiver This is a setting on your TV usually controlled by a Video Input or Mode button See your TV manual for help Also if necessary set your A V receiver to play the audio from the audio input jack you used to make the audio connection See your A V receiver manual for help Connecting the RF remote cable with RF receiver You can operate the Digital Satellite Receiver when install...

Страница 36: ...ram for you To connect the VCR control cable to your DIRECTV HD Receiver follow these steps 1 Plug the VCR control cable into the VCR CONTROL jack on the back of the DIRECTV HD Receiver 2 Remove the backing tape from the adhesive on the other end of the VCR control cable Stick the VCR control next to the remote control sensor on your VCR See the manual for your VCR if you are not sure where its re...

Страница 37: ...nt panel If this is the first time you have turned on your DIRECTV HD Receiver it will take a few moments to acquire the program guide from the satellite During this process the Progress screen appears When the program guide has been fully acquired the Progress screen clears and the TV screen is displayed You are ready to continue setting up your DIRECTV System Memorizing Channels If your DIRECTV ...

Страница 38: ...nu item in the Set Dish menu allows you to find out exactly how to point your satellite dish by entering your ZIP code If you have not yet successfully aligned your satellite dish or if you need to realign it follow these instructions to find the exact angles you should use to point your dish 1 Press the MENU button on your remote control The Main menu appears 2 Highlight the Setup menu item then ...

Страница 39: ...e Signal Meter allows you to check the strength of the signal from the satellite to your satellite dish This is useful while setting up your satellite dish and while troubleshooting any reception problems you may encounter Satellite signal strength can be affected by how accurately you have pointed the satellite dish and by any obstructions between the satellite and the satellite dish tree limbs f...

Страница 40: ...e TV programs but do not plan to receive DIRECTV programming select No Dish 6 A message appears warning you that your DIRECTV HD Receiver needs to reboot turn itself off and on for the Dish Type setting to take effect When you have displayed the correct dish type use the right arrow button on your remote control to highlight the on screen SELECT button then press the SELECT button 7 To change the ...

Страница 41: ...e MENU button on your remote control 2 Highlight the Setup menu item then press the SELECT button 3 Highlight the Installation menu item then press the SELECT button 4 Highlight the Set Dish menu item then press the SELECT button 5 Highlight the Auto Detection menu item then press the SELECT button The Auto Detection screen appears The DIRECTV HD Receiver starts attempting to identify the dish typ...

Страница 42: ...view to the satellite If the test discovers a problem with the Access Card check that the card is properly inserted See Inserting the Access Card in Chapter 2 for details If the test discovers a problem with the Receiver ID contact an authorized call center NOTE The Receiver ID is printed on the rear panel of your receiver and consists of twelve digits If the test discovers a problem with the LNB ...

Страница 43: ...isplayed in a moment NOTE Transponders that are inactive shall have n a in place of a signal strength number 5 When you have finished the system test you can run the test again using the on screen Test Again button exit the Menu system by pressing the EXIT button on your remote control or use the arrow keys to highlight on screen BACK button then press the SELECT button to return to the System men...

Страница 44: ... signal strength for different satellites oval dishes only or different transponders use the left and right arrow buttons on your remote control to highlight the on screen Satellite or Transponder option then use the up and down arrow buttons to change the setting The signal meter updates to show you the signal strength for the new satellite or transponder Setting the dish type To function properl...

Страница 45: ...annels are broadcast and press the SELECT button 8 Highlight the on screen BACK button and press the SELECT button You return to the Local Networks screen 9 Optional If you receive off air broadcasts from a second city highlight Secondary Air and press the SELECT button Repeat steps 6 8 for the second city 10 Optional If you receive programming from a cable TV service highlight Cable and press the...

Страница 46: ...ff Air NTSC sources standard TV broadcasts Cable NTSC standard cable TV services or all of these If this is the first time you are setting up this DIRECTV HD Receiver to receive local channels the All setting is recommended 5 Highlight the Scan Type option that matches the type of broadcasts you would like to program into your DIRECTV HD Receiver then press the SELECT button 6 Next set your cable ...

Страница 47: ...TV bill Activation of programming may be subject to credit approval and requires valid service address social security number and or major credit card Deposit or prepayment may be required Programming subject to change You must be physically located in the U S to receive DIRECTV service DIRECTV services not available outside the U S DIRECTV programming is sold separately and independently of DIREC...

Страница 48: ...ms in the Guide Choosing an alternate audio format for a program Changing the User setting Pay per view programs Remote control overview Here is a quick review of the buttons on your DIRECTV HD Receiver s remote control Before your DIRECTV HD Receiver s remote control can operate your TV VCR DVD player or other device you must first program the remote control to operate that device See Chapter 8 P...

Страница 49: ...s move the highlight to any on screen Guide or Menu selection SELECT Select highlighted items in the on screen Menu or Guide BACK Return to the channel you were last watching or return to a previous Menu EXIT Exit any Guide or Menu screen and return to the TV program you were watching CALLER ID red button Displays the phone numbers of callers who called you on the phone line connected to your DIRE...

Страница 50: ...hannel number Press the CH button to tune to a lower channel number 2 Enter a channel number directly with the 0 9 number buttons After entering a number press the SELECT button or wait a few seconds for the system to tune to the new channel For some broadcasts you may need to enter a two part number to specify a channel and a sub channel entering 5 1 for example would tune you to channel 5 sub ch...

Страница 51: ...nformation about the channel you are currently watching simply press the INFO button on your DIRECTV HD Receiver s remote control Pressing the INFO button displays the Full Channel Banner The Full Channel Banner displays all the information in the Channel Banner plus more details about the program For example the Full Channel Banner for a movie might display the category for the movie drama comedy...

Страница 52: ...ks are available Press the yellow AUDIO button to choose an alternate audio track Locked This icon appears when the system is locked Unlocked This icon appears when the system is temporarily unlocked Mail This icon appears when there are unread mail messages from DIRECTV in your system mailbox Music channel This icon appears when the channel is a music only channel Pay per view program This icon a...

Страница 53: ...Exit Clears the screen and displays the last channel you were viewing Buy Price For pay per view programs allows you to purchase the program Cancel Price For pay per view programs that you have previously purchased but that have not yet aired lets you cancel your purchase View Displays the channel airing the program described Schedule For future programs allows you to set your DIRECTV HD Receiver ...

Страница 54: ...at follow tell you how to access and use each of these Guide types Quick Guide The Quick Guide allows you to quickly scan to see what is on right now while still viewing the channel you are watching Great for those times when you just want to quickly check out what s showing on that favorite channel Grid Guide The Grid Guide is the most complete detailed Guide type It lets you see the programs for...

Страница 55: ...rrow buttons on your remote control to highlight the Set Guide menu item The page icon to the right of the Set Guide item indicates selecting this item will display a list of options 4 Press the SELECT button on your remote control A list of Guide Styles appears 5 Highlight the Guide style you wish to have displayed anytime you press the GUIDE button then press the SELECT button The list of Guide ...

Страница 56: ... and CH buttons on your remote control You can also use the number buttons on your remote control to move the Quick Guide directly to a specific channel As you highlight each program listing its information appears in the Channel Banner 3 To see more information on a highlighted program press the INFO button on your remote control The Full Channel Banner appears 4 To get information on a channel r...

Страница 57: ...rid Guide by pressing the MENU button on your remote control Then highlight Guide and press the SELECT button Then highlight Grid Guide and press the SELECT button again 3 To clear the Grid Guide from your screen press the EXIT button on your remote control Grid Guide overview This diamond marks the current time so you can see how close you are to a program start or end time Title of the highlight...

Страница 58: ...program listing in the Grid Guide information about the program appears in the Channel Banner To see more information on a highlighted program press the INFO button on your remote control The Program Detail screen appears showing complete information about the highlighted program and a list of actions you might want to take related to that program To return to the Grid Guide highlight the Back ite...

Страница 59: ...ayed on your screen press the RED button on your remote control A list of Guide Styles appears on your screen 2 Highlight the Guide style you wish to view then press the SELECT button The Guide Style list disappears and the Guide appears in the style you chose Viewing the Guide for a different time You can view the TV programming for different times by using the Guide s time control bar Here s how...

Страница 60: ...creen 2 Highlight the Guide category you wish to view then press the SELECT button The Guide Category list disappears and the Guide appears displaying channels showing programs that match the category you chose Exits the time control bar Moves the Guide view back 6 hours unavailable when viewing the current time Moves the Guide view back 30 minutes unavailable when viewing the current time Moves t...

Страница 61: ... Logo Guide option and press the SELECT button The Logo Guide appears 3 Or you can set the default Guide Style so that the Logo Guide always appears whenever you press the GUIDE button on your remote control See Setting the default Guide style on page 55 for details on setting the default Guide Style 4 To clear the Logo Guide from your screen press the EXIT button on your remote control Logo Guide...

Страница 62: ...s on your remote control to enter the desired channel number 4 As you highlight each channel logo in the Logo Guide information about the program currently showing on the highlighted channel appears in the Channel Banner To see more information on a highlighted program press the INFO button on your remote control The Program Detail Screen appears showing complete information about the program on t...

Страница 63: ...ntire list of programs stored in your DIRECTV HD Receiver s program guide to find exactly the program you wish to see There are four ways to search the Guide By Credits Lets you find programs that match the actor director role award or year you type using an on screen keyboard By Title Lets you find programs that match the program title you type using an on screen keyboard By Text Lets you find pr...

Страница 64: ...SELECT button To erase a letter highlight the on screen left arrow and press the SELECT button To clear the entire entry highlight the on screen Clear button and press the SELECT button 4 Continue to select letters from the on screen keyboard until you have completed your search term As you enter letters an on screen list shows you matches for the text you have entered so far 5 To execute the sear...

Страница 65: ...ton 4 To see a list of show times for one of the search results highlight that program then press the SELECT button 5 To see information about one of the search results highlight that program then press the INFO button Choosing an alternate audio format for a program Many programs on your DIRECTV HD Receiver offer several audio formats For example some programs are available in alternative languag...

Страница 66: ...lor and translucency of the on screen Guides and Menus Detailed instructions for modifying these user settings are in Chapter 6 To set your DIRECTV HD Receiver to operate using the settings specified for one of the users follow these steps 1 While viewing a program press the WHO button on your remote control The Who list appears 2 Highlight the name of the user whose settings you wish to activate ...

Страница 67: ... view program 1 Locate and highlight the program you wish to purchase in the Guide You can purchase current programs as long as the program is less than half over or future programs 2 Press the INFO button on your remote control The Program Details screen appears with the list of available actions for that program 3 Use the arrow keys on your remote control to highlight the Buy item from the list ...

Страница 68: ...st Purchases screen appears 4 To see details for the listed purchases highlight a purchase then press the SELECT button A screen displaying program details for the selected purchase appears 5 To return to the Past Purchases screen press the BACK button on your remote control NOTE The Past Purchases screen only displays pay per view programs which you purchased and watched Pay per view programs tha...

Страница 69: ...se of a pay per view program that you purchased but have not yet watched follow these steps 1 Press the MENU button on your remote control 2 Highlight the Purchases menu item then press the SELECT button 3 Highlight the Future Purchases menu item then press the SELECT button 4 To cancel a purchase highlight the program purchase you wish to cancel then press the SELECT button A screen displaying pr...

Страница 70: ... automatically program your VCR to record programs for you Instructions on setting recording timers appear later in this chapter Before your DIRECTV HD Receiver can program your VCR you must have correctly connected and aligned the VCR control cable see Connecting the VCR control cable in Chapter 3 and you must tell your DIRECTV HD Receiver what kind of VCR you have Here s how 1 Press the MENU but...

Страница 71: ...again and at this time select the next VCR type from the list Check VCR cable connection if the above method doesn t work Once you have set up the VCR control you are ready to use the VCR control to record programs for you The rest of this chapter describes how to schedule and modify timers that allow you to record programs and set program reminders Scheduling program reminders and recording timer...

Страница 72: ... this chapter Make sure there is a tape in your VCR and that the VCR is turned off before the start time of any programs you have set to be recorded Reviewing and modifying reminders and recording timers The Timers item in the SETUP menu allows you to review modify or create new program reminders and program recording timers Here s how 1 Press the MENU button on your remote control 2 Highlight the...

Страница 73: ...minder or a recording timer For timers that you scheduled using the on screen Guide you can only change the frequency and mode setting Once you have highlighted the option you wish to modify use the up or down arrow buttons on your remote control to edit the option setting Use the left and right arrow buttons to highlight different options To delete the selected timer use the right arrow button on...

Страница 74: ...V HD Receiver is going to be used by more than one person in your household you should consider setting up user profiles for each user The Profiles section of the Menu system allows you to Set ratings limits for the DIRECTV HD Receiver applies to all users Set pay per view spending limits for the DIRECTV HD Receiver applies to all users Edit channel lists for the DIRECTV System and customized list...

Страница 75: ...les User 1 User 4 These four user profiles allow individuals in your household to create custom channel lists and custom screen appearances for their own use These profiles can be renamed to identify them with members of your household Ratings spending and channel restrictions set in the Family profile still apply when one of these four user profiles is the active profile and the system is locked ...

Страница 76: ...at user profile appears The Edit User Name item is highlighted 4 Press the SELECT button to start editing the user name for that profile The Edit User Name screen appears 5 Type a new name for the user profile as described below To type each letter or number in the new name highlight a key on the on screen keyboard then press the SELECT button Repeat this until you have typed the entire name If yo...

Страница 77: ...tions set in the Family profile apply to the entire DIRECTV System when the system is locked regardless of which user profile is active Channels that are removed from the channel list in the Family profile are blocked for all profiles that is these channels cannot be viewed even when tuned directly using the 0 9 buttons on your remote control Here are the steps for editing a channel list 1 Press t...

Страница 78: ...o set limits for the following kinds of ratings TV program ratings for the Entire Audience TV program ratings specifically for Children TV program ratings for unrated programs TV rating of none Movie ratings based on the MPAA Motion Picture Association of America ratings If you have younger TV viewers in your home you should set the maximum rating for each of these program types to ensure the most...

Страница 79: ...u item then press the SELECT button The TV menu appears 6 Highlight the rating option you wish to set then press the SELECT button The screen you selected appears 7 Use the arrow and SELECT buttons on your remote control to select the buttons ratings or the specific types of content you wish to block your family from viewing Programs containing blocked content or that are rated at or above the lev...

Страница 80: ... sexual situations V Violence Here are descriptions of the ratings and abbreviations used on the Children rating screen TV Y All children This program is designed to be appropriate for all children TV Y7 Directed to older children This program is designed to be viewed by children age 7 and above TV Y7 FV Similar to TV Y7 but may include strong fantasy violence such as fighting by animated characte...

Страница 81: ...ton 8 When you have finished setting the ratings on the Movies screen select the on screen Back button You return to the Rating Limit menu Here are descriptions of the ratings used on the Movies rating screen G General Audiences This rating is generally suitable for all audiences PG Parental Guidance Suggested Indicates that some parents may find material in this film unsuitable for children PG 13...

Страница 82: ... 1 Press the MENU button on your remote control 2 Highlight the PROFILES menu item then press the SELECT button The PROFILES menu appears The Family profile is highlighted 3 Press the SELECT button to display the Family profile menu The Family profile menu appears 4 Highlight the Pay Per View menu item then press the SELECT button A list appears from which you can choose to Allow or Block pay per ...

Страница 83: ... highlighted 3 Press the SELECT button to display the Family profile menu The Family profile menu appears 4 Highlight the Spending Limit menu item then press the SELECT button The Spending Limit screen appears 5 Use the 0 9 buttons on your remote control to enter the maximum price allowed for a pay per view program For example to block programs that cost over twenty dollars each you would press 0 ...

Страница 84: ...profile To set the current user profile making that profile s channel list screen color and screen translucency settings active follow these steps 1 Press the MENU button on your remote control 2 Highlight the PROFILES menu item then press the SELECT button The PROFILES menu appears 3 Highlight the Set User menu item then press the SELECT button The user profile list appears 4 Highlight the profil...

Страница 85: ...PROFILES menu appears 3 Highlight the Lock System or Unlock System menu item then press the SELECT button 4 Highlight the first digit in the password 5 Use the 0 9 buttons up or down arrow button on your remote control to enter a four digit password Then highlight the on screen Done button and press the SELECT button If you are locking the system you will see a second screen asking you to confirm ...

Страница 86: ...y DIRECTV or your service provider Here s how 1 Press the MENU button on your remote control 2 Highlight the MAILBOX menu item then press the SELECT button The MAILBOX screen appears displaying all of the mail you have received both read and unread 3 To read one of the pieces of mail highlight that piece of mail in your mailbox then press the SELECT button The selected mail message appears 4 To de...

Страница 87: ...gital for digital audio broadcasts Input source setting Setting the language for on screen Menus and Guides To choose a language for the Menu and Guide screens follow these steps 1 Press the MENU button on your remote control 2 Highlight the Setup menu item then press the SELECT button 3 Highlight the Preferences menu item then press the SELECT button 4 Highlight the Default Language menu item the...

Страница 88: ...e Select your TV screen Type box then use the up or down arrows buttons on your remote control to set the screen type to match the type of TV you have Choose 4 3 for a standard TV or 16 9 for a widescreen TV 6 Use the left and right arrow buttons to highlight the format you wish to use to display programs that do not match your TV screen shape For standard 4 3 TVs displaying widescreen broadcasts ...

Страница 89: ...ting 4 3 images are stretched to fit the width of the screen like in the Pillar box format But instead of applying black gray bars to the sides of the screen the program image is stretched horizontally until it is wide enough to fill your screen Your entire TV screen is full but the program images are a little stretched to compensate for the program to screen mismatch Zoom 1 This format stretches ...

Страница 90: ...he Caption item in the Preferences menu allows you to turn closed captions on and off to set a language for the closed captions and to choose a closed caption format CC1 CC2 CC3 or CC4 which may provide varying closed caption displays for some programs 1 Press the MENU button on your remote control 2 Highlight the Setup menu item then press the SELECT button 3 Highlight the Preferences menu item t...

Страница 91: ...and Opaque no translucency Translucency can also be set for the Family profile and the four User profiles those choices will override the default translucency selection you set here when those profiles are active To set a default screen color and translucency follow these steps 1 Press the MENU button on your remote control 2 Highlight the Setup menu item then press the SELECT button 3 Highlight t...

Страница 92: ...s the SELECT button The Input Source menu appears The Input Source menu item is highlighted 5 Press the SELECT button on your remote control to display the list of available Input sources A list of input source appears 6 Highlight the input source you wish to use then press the SELECT button A list appears from which you can choose Satellite Antenna Component S Video or Video When you select an in...

Страница 93: ...ontrol 2 Highlight the Setup menu item then press the SELECT button 3 Highlight the Preferences menu item then press the SELECT button 4 Highlight the Audio menu item then press the SELECT button The Audio menu appears The Default Language menu item is highlighted 5 Press the SELECT button on your remote control to display the list of available languages A list of languages appears 6 Highlight the...

Страница 94: ...ut format preference follow these steps 1 Press the MENU button on your remote control 2 Highlight the Setup menu item then press the SELECT button 3 Highlight the Preferences menu item then press the SELECT button 4 Highlight the Audio menu item then press the SELECT button The Audio menu appears 5 Highlight the Digital Out menu item then press the SELECT button A list appears from which you can ...

Страница 95: ...tem then press the SELECT button The Audio menu appears The Analog Audio menu item is highlighted 5 Press the SELECT button on your remote control to display the list of available audio format A list of audio format appears 6 Highlight the audio format you wish to use then press the SELECT button A list appears from which you can choose Mono Stereo or SAP When you select an audio format the list d...

Страница 96: ...he Setup menu item then press the SELECT button 3 Highlight the Preferences menu item the press the SELECT button 4 Highlight the Audio menu item then press the SELECT button The Audio menu appears 5 Highlight the Default Type menu item then press the SELECT button A list of Default Type appears from which you can choose Dolby Digital or MPEG audio ...

Страница 97: ...formation follow these steps 1 Press the MENU button on your remote control 2 Highlight the SETUP menu item then press the SELECT button 3 Highlight the Caller ID menu item then press the SELECT button The Caller ID menu appears 4 Highlight the Display Caller IDs menu item then press the SELECT button A list appears allowing you to select whether you would like the Caller ID feature to be On or Of...

Страница 98: ...te control 2 Highlight the Setup menu item then press the SELECT button 3 Highlight the Caller ID menu item then press the SELECT button The Caller ID menu appears 4 Highlight the Review Caller IDs menu item then press the SELECT button The Review Caller IDs screen appears The calls on the list are sorted in time order 5 To see details about any of the listed calls highlight the call from the list...

Страница 99: ...emote control 2 Highlight the Setup menu item then press the SELECT button 3 Highlight the Installation menu item then press the SELECT button 4 Highlight the Local Time menu item then press the SELECT button 5 To change the Local Time Setting highlight it using the arrow buttons on your remote control then press the SELECT button A list appears from which you can indicate whether you want the loc...

Страница 100: ... the SELECT button The list disappears and the Status line indicates either DST in effect or Standard time in effect Adjusting the Raster Picture Centering In this menu you can adjust the Raster picture on the monitor to be centered The Raster picture centering is only available for RGB DVI YPbPr output modes 1 Press the MENU button on your remote control 2 Highlight the Setup menu item then press...

Страница 101: ...ENU button on your remote control 2 Highlight the Setup menu item then press the SELECT button 3 Highlight the Installation menu item then press the SELECT button 4 Highlight the New Access Card menu item then press the SELECT button The New Access Card screen appears 5 To start replacing your Access Card highlight the on screen SELECT button then press the SELECT button On screen instructions tel...

Страница 102: ...e control 2 Highlight the Setup menu item then press the SELECT button 3 Highlight the Installation menu item then press the SELECT button 4 Highlight the Remote Control Setup menu item then press the SELECT button The Remote Control Setup menu appears 5 Highlight the Remote Control Type menu item then press the SELECT button A list appears from which you can choose Remote Control Type IR Select t...

Страница 103: ... Press the Cancel button in the message window that appears after this operation 7 You may select Done or Cancel in the warning message window Select the Done and press the Select button to complete selection of the remote control to use 8 When you have finished setting the remote control type screen select the on screen Back button NOTE The factory setting for the remote control type is IR RF If ...

Страница 104: ...ELECT button The Remote Control Setup menu appears 5 Highlight the RF Remote Control ID menu item then press the SELECT button 6 Input eight digit serial number to enter into the RF remote control ID menu as shown in the below figure The eight digit serial number is displayed inside the battery box of the RF remote control unit 7 Input all of the eight digit serial number displayed inside the remo...

Страница 105: ...enu provides information about the current software on your DIRECTV HD Receiver and a history of when previous upgrades have been downloaded to your Receiver To View this information use the System Upgrades item in the System portion of the Setup menu Viewing fun system extras The Extras menu contains a useful calendar a fun biorhythm charting tool and games you can play To view the system extras ...

Страница 106: ...o operate your TV VCR DVD player and other A V equipment You use the code lists provided in this chapter to enter the code for your brand of TV VCR etc Method To use the manual method to program your DIRECTV HD Receiver s remote control follow these steps 1 Turn on the device you want to control 2 Aim the DIRECTV HD Receiver s remote control at the device 3 After pressing a device mode button to o...

Страница 107: ...number in the remote control 6 Repeat the procedure for other devices you wish to operate with your DIRECTV HD Receiver s remote control Operating a device with your programmed remote control To operate a device using your programmed remote control you should turn on the LED of the device using the MODE button TV VCR DVD AUX or DIRECTV Then use the remote control to operate that device The remote ...

Страница 108: ...mote control can be programmed to operate your TV VCR You use the code lists provided in your RF Remote Control manual to enter the code for your brand of TV VCR Method To use the manual method to program your DIRECTV HD Receiver s remote control follow these steps 1 Turn on the device you want to control 2 Aim the DIRECTV HD Receiver s remote control at the device 3 After pressing a device button...

Страница 109: ...ating a device with your programmed remote control RF To operate a device using your programmed RF remote control you must first press the corresponding device button TV VCR or DIRECTV Then use the RF remote control to operate that device The RF remote control will continue to operate that device until you press another device button Each time you want to button to a different device with your RF ...

Страница 110: ...058 112 076 120 088 206 070 002 003 004 058 001 004 024 043 070 002 003 004 043 101 103 143 043 004 043 050 051 143 043 054 191 043 143 070 101 143 004 043 076 103 004 016 043 114 120 127 143 128 136 192 044 004 143 043 062 024 076 120 143 TV continued Brand names Code numbers EMERSON FISHER FUJITSU FUNAL FUTURETECH GE GOLDSTAR LG GRADIENTE HALL MARK HITACHI INFINITY JBL JCPENNEY JENSEN JVC KEC KE...

Страница 111: ...4 164 093 038 005 059 127 070 003 004 025 070 004 018 023 190 004 143 065 160 161 167 145 065 TV continued Brand names Code numbers PROTON QUASAR RADIO SHACK RCA REALISTIC RUNCO SAMPO SAMSUNG SANYO SCOTT SEARS SELECO SHARP SIEMENS SIGNATURE SONY SOUNDESIGN SPECTRICON SSS SUPRE MACY SYLVANIA SYMPHONICS TANDY TATUNG TECHNICS TECHWOOD 004 058 112 143 171 173 034 056 080 164 004 019 043 127 143 160 16...

Страница 112: ...39 043 035 037 044 129 152 028 031 108 003 040 135 031 041 156 117 119 005 116 007 010 065 108 110 112 VCR continued Brand names Code numbers DAYTRON DIMENSIA DBX DYNATECH ELECTROHOME EMERSON FISHER FUNAI GE GO VIDEO GOLDSTAR LG HARMAN KARDON HITACHI HUGHES INSTANTREPLAY JCL JCPENNY JENSEN JVC KENWOOD LLOYD LXI MAGIN MAGNAVOX MARANTZ MARTA 108 156 012 023 039 043 034 053 059 006 029 035 025 027 03...

Страница 113: ...51 001 041 034 040 156 031 140 003 008 010 014 031 034 040 053 054 101 058 078 014 000 040 032 104 107 109 112 113 115 120 122 125 159 VCR continued Brand names Code numbers SANSUI SANYO SCOTT SEARS SHARP SHINTOM SIGNATURE SONY SOUNDESIGN STS SYLVANIA SYMPHONIC TANDY TATUNG TEAC TECHNICS TEKNIKA TMK TOSHIBA TOTEVISION UNITECH VECTOR RESEARCH VIDEO CONCEPTS VIDEOSONIC WARDS YAMAHA ZENITH 043 048 13...

Страница 114: ... 112 198 252 096 104 119 125 148 151 163 171 173 242 223 215 250 066 120 205 229 123 177 126 162 185 186 224 228 AUX AUDIO continued Brand names Code numbers MARANTZ MCINTOSH MONDIAL MCS MITSUBISHI MERIDIAN NAD NAKAMICHI NILES ONKYO OPTIMUS PANASONIC PARASOUND PHILIPS PIONEER QUASAR RCA REALISTIC ROTEL SANSUI SANYO SAMSUNG SCOTT SHARP SHERWOOD SONY SOUNDSTREAM STARCOM SYMPHONIC 074 105 126 128 139...

Страница 115: ...OLDSTAR LG HARMAN KARDON HITACHI JVC MAGNAVOX MARANTZ MITSUBISHI NAD ONKYO PANASONIC PHILIPS PIONEER PROSCAN 009 075 076 030 226 035 036 028 041 217 011 031 038 042 008 006 007 032 077 207 003 039 038 042 006 007 034 005 010 035 036 DVD continued Brand names Code numbers RCA SAMSUNG SHARP SONY TOSHIBA YAMAHA ZENITH 035 036 000 040 004 037 038 001 206 039 079 028 041 DVD LDP Brand names Code number...

Страница 116: ...rned on Make sure your Access Card is inserted properly into your receiver Check the signal strength from the satellite see Checking the satellite signal strength in Chapter 3 Make sure the coaxial cable is properly connected to the satellite dish Check the connections between your DIRECTV HD Receiver and your TV Turn your receiver off unplug it wait 10 to 20 seconds then plug it back in and turn ...

Страница 117: ... Receiver not both Unplug your receiver for 10 to 20 seconds then plug it back in and turn it on Check the batteries in the remote control Make sure your subscription includes the channel you want to watch Call your service provider if you are not sure Make sure your system is not locked by looking for the locked icon in the channel banner It may be too late to purchase the program Try purchasing ...

Страница 118: ...o Decoder Audio Decoder Input Voltage AC 120V 60Hz SMPS type Power Consumption 37W max Audio Decoding MPEG Layer II Dolby Digital Sampling Frequency 48 kHz Size W X H X D 16 93 in W X 2 64in H X 12 28 in D 430mm x 67mm x 312mm Weight Net 3 51 Kg around 7 74 lbs Operation Temp 32 F 0 C to 104 F 40 C Storage Temp 40 F 40 C to 150 F 66 C Transport stream MPEG 2 ISO IEC 13818 ...

Страница 119: ...output 1 Coaxial digital audio output Audio input 4 RCA Cinch 2 pairs for L R VCR control 1 VCR control output Modem RJ 11 connector Resolution select button 480p i 720p 1080i Native 1 Native 2 Native 3 Output mode button DVI RGB Y PB PR Access Card 1 Access Card slot RF Remote optional 1 RF Remote Receiver 1 RF Remote Control Cables 1 phone cable 1 A V RCA cable 1 S VIDEO cable 1 Component cable ...

Страница 120: ...MF68 00298A 00 Samsung Electronics America inc SERVICE DIVISION 400 Valley Road Suite 201 Mount Arlington NJ 07856 TEL 1 800 SAMSUNG 1 800 726 7864 www samsungusa com ...

Отзывы: