4-4
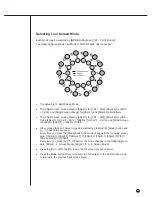
Selecting Live Screen Mode
Each mode may be selected by [MODE Button] and [CH1 ~ CH16 Button]
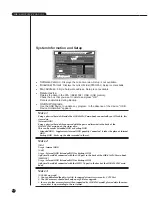
The following figure shows Live Mode of SHR-4160N/P after converted.
●
The default is 16 Split Screen Mode.
●
The 9 Split Screen mode default is [9Split 1] for [CH1 ~ CH9], [9Split 2] for [CH10
~ CH16], and [9Split Screen change] for [9Split 1] and [9Split 2] alternatively.
●
The 4 Split Screen mode default is [4Split 1] for [CH1 ~ CH4], [4Split 2] for [CH5 ~
CH8], [4Split 3] for [CH9 ~ CH12], [4Split 4] for [CH13 ~ CH16], and [4Split Screen
change] for [4Split 1] ~ [4Split 4] in tern.
●
Other modes than Full Screen may be selected by pressing the [Mode] button and
[
,
➝
] button in sequence.
Every time you press the [Mode] button, the mode changes in the following proce-
dure, [16Split]
➝
[9Split 1]
➝
[4Split 1]
➝
[6Split]
➝
[7Split]
➝
[8Split]
➝
[PIP]
➝
[Screen Mode]
➝
[16Split].
Every time you press the [ ,
➝
] button, the mode changes in the following proce-
dure, [9Split 1, 2, Screen Mode], [4Split 1, 2, 3, 4, Screen Mode].
●
Press the [CH1~CH16] button to see the full screen of each channel.
●
Press the Mode button after you convert to a full screen in the Split Screen mode
to returns to the previous Split mode screen.
➝
➝
Содержание SHR-4160N/P
Страница 1: ...16 Channel DVR SHR 4160N P User s Manual ...
Страница 7: ......
Страница 8: ...Chapter 1 Overview 1 ...
Страница 14: ......
Страница 15: ...Chapter 2 Installation 2 ...
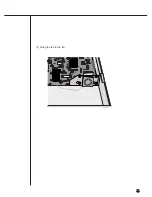
Страница 24: ...SHR 4160N P USER S MANUAL 2 9 Please install the fan to be seen from the front view of the set ...
Страница 25: ...2 10 Fixing the fan to the left ...
Страница 26: ...Chapter 3 Connecting with Other Equipment 3 ...
Страница 27: ...1Connecting Video Audio Monitor 3 1 SHR 4160N P USER S MANUAL ...
Страница 28: ...3 2 2Connecting Network Connecting to Internet through Ethernet 10 100BaseT Connecting Internet through ADSL ...
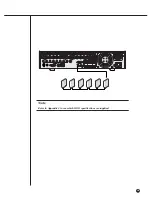
Страница 30: ...3 4 Note Note Refer to Appendix 2 to see which HDD specifications are supplied ...
Страница 33: ...SHR 4160N P USER S MANUAL 3 7 ALARM IN OUT Connection ...
Страница 35: ...Chapter 4 Live 4 ...
Страница 44: ...Chapter 5 Menu Setup 5 ...
Страница 77: ...Chapter 6 PTZ device Control 6 ...
Страница 86: ...Chapter 7 Recording 7 ...
Страница 91: ...Chapter 8 Search Play 8 ...
Страница 101: ...Chapter 9 Backup and Backup Search 9 ...
Страница 107: ...Chapter 10 Smart Viewer 10 ...
Страница 166: ...Chapter 11 Backup Viewer 11 ...
Страница 171: ...SHR 4160N P USER S MANUAL 11 5 Click Next If you agree with the Backup Viewer license click Yes ...
Страница 173: ...SHR 4160N P USER S MANUAL 11 7 Installation is complete Click Finish to terminate the whole installation process ...
Страница 182: ......
Страница 183: ...Appendix 12 ...
Страница 188: ...SHR 4160N P USER S MANUAL 3Outline Drawing 12 5 ...

