38
_English
French_
38
Setting the display option of
"16:9 Wide"
does not
imply wide angle (wide aspect ratio) recording. Camera
output, recording and playback signal is formatted to 4:3
aspect ratio.
Please note that all movies recorded with this memory
camcorder have 4:3 aspect ratio regardless of the display
option (16:9 Wide/4:3). When it is set to
"16:9 Wide"
, the
displayed picture may appear wider or rougher than that
of 4:3 screen aspect ratio.
➥
pages 55,61
•
•
Le réglage de l'option d'affi chage grand écran 16:9 ne
signifi e pas un enregistrement au format grand écran. La
sortie du caméscope et le signal d'enregistrement et de
lecture sont au format 4:3.
Veuillez prendre note que toutes les vidéos enregistrées avec
le caméscope numérique sont au format 4:3 quelle que soit
l'option d'affi chage (grand écran 16:9/4:3). La photo affi chée en
format grand écran
"16:9 Wide"
peut sembler plus large et plus
irrégulière que celles affi chées au format 4:3.
➥
Pages 55,61
•
•
enregistrement
Les procédures fondamentales d’enregistrement de vidéo sont présentées ci-après.
L’ENREGISTREMENT DE VIDÉOS
Le caméscope numérique possède deux touches
d’enregistrement
start/stop
. L’une est située à l’endos du caméscope
numérique et l’autre sur l’écran ACL. Selecteer de
d’
enregistrement start/stop
.
1.
Mettez le caméscope numérique sous tension.
Branchez une source d’alimentation sur le
caméscope numérique.
➥
page 12,18
(Bloc-piles ou adaptateur CA)
Faites glisser l’interrupteur
POWER
vers le bas
pour l’allumer.
➥
page 21
Défi nissez le support de stockage convenable.
(SC-MX10A/MX10AU uniquement)
(Si vous souhaitez enregistrer sur une carte
mémoire, insérez-la maintenant.)
2.
Réglez la mise au point du sujet sur l’écran ACL.
3.
Appuyez sur la touche
d’enregistrement start/
stop
(démarrage/arrêt de l’enregistre ment).
Le témoin d’enregistrement ( ) s’affi che et l’
enregistrement est lancé.
Si vous appuyez à nouveau sur la touche
d’
enregistrement start/stop
(démarrage/arrêt de
l’enregistrement en cours d’enregistrement, le
caméscope numérique s’arrête momentanément
(mode pause).
4
.
Éteignez le caméscope numérique à la fi n de l’ enregistrement.
•
•
•
•
•
•
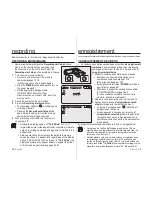
recording
Basic procedures to record movie images described below.
RECORDING MOVIE IMAGES
Memory camcorder provides two
Recording start/stop
buttons.
One is on the rear side of the camcorder and
the other one is on the LCD panel. Select the
Recording start/ stop
button according to the use.
1.
Turn the memory camcorder on.
Connect a power source to the memory
camcorder.
➥
page 12,18
(A battery pack or an AC power adapter)
Slide the
POWER
switch downward to turn on
the power
➥
page 21
Set the appropriate storage media.
(SC-MX10A/MX10AU only) (If you
want to record on a memory card, insert the
memory card.)
2.
Check the subject on the LCD screen.
3.
Press the
Recording start/stop
button.
The recording indicator (
) will display and
recording will start.
Pressing the
Recording start/stop
button
again during recording will set the memory
camcorder to recording pause mode.
4.
When recording is fi nished, turn the memory
camcorder off.
•
•
•
•
•
•
00:00:00/00:58:00
120
MIN
Recording...
STBY
00:00:30/00:57:30
120
MIN


