background image

01

Intr
oducción

7

Español

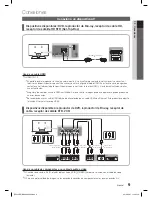
Conexión a una antena

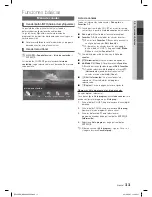
Cuando se enciende el televisor por primera vez, los parámetros de configuración básicos se establecen automáticamente.


Conexión del cable de alimentación y la antena.


El dispositivo PDP puede interferir con una radio amateur o radio AM.


Usar unidades portátiles y móviles emisoras/receptoras o radios amateur o AM cerca de su televisor puede hacer que 

el televisor funcione incorrectamente.


La posición de la entrada de alimentación puede variar según el modelo.

Configuración (Configuración inicial)

Cuando se enciende el televisor por primera vez, una secuencia de indicaciones en pantalla le ayuda a configurar los parámetros de 
configuración básicos. Pulse el botón 

POWER

P

Configuración

 está disponible sólo cuando el 

Origen

 está establecido como TV.


Para iniciar la función 

Configuración

, ingrese la contraseña usando el control remoto. La contraseña predeterminada 

es 0-0-0-0.


Para regresar al paso anterior, pulse el botón 

Anterior

.

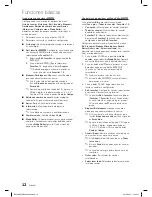
1. Idioma del menú

: Seleccionar un idioma del menú

Pulse el botón 

 o 

, luego pulse el botón 

ENTER

E

. Seleccione el idioma de la OSD (presentación en pantalla).

2. Modo de uso

: Seleccionar el modo de uso 

Pulse el botón 

 o 

, luego pulse el botón 

ENTER

E

•  Seleccione el modo 

Uso domiciliario

. El modo 

Demo comercio

 se utiliza en entornos de comercios minoristas.

•  Al pulsar el controlador del televisor, aparece la pantalla del menú de funciones. Seleccione el botón 

MENU

(

m

) y 

manténgalo pulsado más de 5 segundos utilizando el controlador. El modo 

Demo comercio

 queda configurado. 

Cancele el 

Demo comercio

 seleccionando 

Origen

(

s

) y manteniéndolo pulsado más de 5 segundos. 

• 

Demo comercio

 es sólo para la exhibición en el comercio. Si lo selecciona, no se podrán utilizar varias funciones. 

Seleccione 

Uso domiciliario

 para mirar televisión en su casa.

ANT OUT

Antena VHF/UHF

Entrada de alimentación

o

Cable

Cable de antena (no suministrado)

[PE400-ZS]BN68-04363C.indb   7

2012-03-27   �� 4:25:14

Содержание pl43e400

Страница 1: ...g com COSTA RICA 0 800 507 7267 www samsung com DOMINICA 1 800 751 2676 www samsung com ECUADOR 1 800 10 7267 www samsung com EL SALVADOR 800 6225 www samsung com GUATEMALA 1 800 299 0013 www samsung com HONDURAS 800 7919267 www samsung com JAMAICA 1 800 234 7267 www samsung com NICARAGUA 00 1800 5077267 www samsung com PANAMA 800 7267 www samsung com PERU 0 800 777 08 www samsung com PUERTO RICO ...

Страница 2: ...s or expands due to a change in the surrounding environment such as temperature or humidity This is normal and not a defect Cell Defects The PDP uses a panel consisting of 1 226 880 SD level to 6 221 000 FHD level pixels which require sophisticated technology to produce However there may be a few bright or dark pixels on the screen These pixels will have no impact on the performance of the product...

Страница 3: ...ode 14 Adjusting Picture Settings 14 Changing the Picture Options 15 y y Sound Menu 17 Changing the Preset Sound Mode 17 Sound Settings 17 Adjusting Sound Settings 17 Preference Features y y System Menu 18 Setting the Setup 18 Setting the Time 18 Using the Sleep Timer 18 Setting the On Off Timer 18 Locking Programs 19 Economical Solutions 19 Other Features 20 y y Support Menu 22 Support Menu 22 Ad...

Страница 4: ... required distances between the product and other objects e g walls to ensure proper ventilation Failing to do so may result in fire or a problem with the product due to an increase in the internal temperature of the product When using a stand or wall mount use parts provided by Samsung Electronics only If you use parts provided by another manufacturer it may result in a problem with the product o...

Страница 5: ... menu screen The Contents Home main screen appears Selecting the Source s Selects the Source s by moving the controller in the function menu screen The Source list screen appears Power Off P Selects the Power Off P to turn the TV off by moving the controller in the function menu screen Exits the menu when pressing the controller more than 1 second When selecting the function by moving the controll...

Страница 6: ... channel Press to directly access to channels Turns the TV on and off Use these buttons in a specific feature MTS Press to choose stereo mono or Separate Audio Program SAP broadcast P SIZE Choose the picture size CC Controls the caption decoder Cut off the sound temporarily Display the EPG Electronic Program Guide Displays the channel list on the screen Press to display information on the TV scree...

Страница 7: ...te control The default password is 0 0 0 0 To return to the previous step press the Previous button 1 Menu Language Selecting a menu language Press the or button then press the ENTERE button Select the desired OSD On Screen Display language 2 Use Mode Selecting the usage mode Press the or button then press the ENTERE button Select the Home Use mode Store Demo Mode is for retail environments When p...

Страница 8: ...s the or button to select Air or Cable and then press the ENTERE button The channel search will start automatically For more information refer to Channel Auto Program Press the ENTERE button at any time to interrupt the memorization process 5 Clock Setting the Clock Mode Set the Clock Mode automatically or manually Auto Select the time zone where you live for Brazil Chile Ecuador Manual Allows you...

Страница 9: ...display or a connection error may occur x xA basic high speed HDMI cable or one with ethernet is recommended This product does not support the ethernet function via HDMI Available devices DVD Blu ray player cable box STB satellite receiver VCR Using a Component or an Audio Video Cable When connecting to AV IN the color of the AV IN Y VIDEO jack green will not match the video cable yellow For bette...

Страница 10: ...cted to the TV 1 Press the SOURCE button on your remote 2 Select a desired external input source TV HDMI1 HDMI2 AV Component In the Source connected inputs will be highlighted How to use Edit Name In the Source press the TOOLS button and then you can set an external input sources name you want VCR DVD Cable STB Satellite STB PVR STB AV Receiver Game Camcorder PC DVI PC DVI Devices TV IPTV Blu ray ...

Страница 11: ... to view favorites channels you added press the CH LIST button and use L CH Mode button to move Favorites 1 5 Using the function buttons with the Channel List T Tools Displays the option menu L CH Mode Channel Move to the Favorites 1 5 when Edit Favorites is set When you select the Program View in T Tools menu you can move to other channels using L Channel button E Watch Information Watches the ch...

Страница 12: ...ded Ch All Channels Favorites 1 5 Added Ch Shows all added channels All Channels Shows all currently available channels Favorites 1 5 Shows all favorite channels Favorites 1 5 will be displayed when you set Edit Favorites Set each channel using the menu options Edit Favorites Lock Unlock Add Delete Deselect Select All The option menu items that appear may differ depending on the channel status and...

Страница 13: ...ected program To cancel the schedule press the ENTERE button again and select Cancel schedule Schedule Manager O O MENUm Support Contents Home Schedule Manager ENTERE You can set a desired channel to be displayed automatically at the intended time In addition you can view modify or delete a channel you have reserved to watch Set the current time first to use this function Using Option Menu t Set e...

Страница 14: ...the color implementation is unsatisfactory select any of PAL M PAL N or NTSC Picture Menu Changing the Preset Picture Mode O O MENUm Picture Picture Mode ENTERE Picture Mode t Select your preferred picture type Dynamic Suitable for a bright room Standard Suitable for a normal environment Movie Suitable for watching movies in a dark room Adjusting Picture Settings Cell Light Contrast Brightness Sha...

Страница 15: ...ure Size ATV AV 16 9 Zoom1 Zoom2 4 3 DTV 720p 16 9 Wide Fit 4 3 DTV 1080i 1080p 16 9 Wide Fit 4 3 Screen Fit Component 480i 480p 576i 576p 720p 16 9 Wide Fit 4 3 Component 1080i 1080p 16 9 Wide Fit 4 3 Screen Fit HDMI 720p 1080i 1080p 16 9 Wide Fit 4 3 Screen Fit Changing the Picture Options Advanced Settings O O MENUm Picture Advanced Settings ENTERE available in Standard Movie mode Advanced Sett...

Страница 16: ... is displayed Auto Visualization When changing analog channels displays signal strength Only available for analog channels When the INFO button is pressed the signal strength bar is displayed When bar is green you are receiving the best possible signal MPEG Noise Filter Off Low Medium High Auto Reduces MPEG noise to provide improved picture quality HDMI Black Level Low Normal Selects the black lev...

Страница 17: ...z 10kHz Bandwidth Adjustment Adjusts the level of specific bandwidth frequencies Reset Resets the equalizer to its default settings Adjusting Sound Settings Broadcast Audio Options O O MENUm Sound Broadcast Audio Options ENTERE Audio Language t digital channels only Change the default value for audio languages The available language may differ depending on the broadcast Multi Track Sound MTS t ana...

Страница 18: ...et the time manually Clock Set Set the Date and Time Available only when Clock Mode is set to Manual You can set the Date and Time directly by pressing the number buttons on the remote control Time Zone for Brazil Chile Ecuador Select your time zone This function is only available when the Clock Mode is set to Auto Using the Sleep Timer O O MENUm System Time Sleep Timer ENTERE Sleep Timer t Automa...

Страница 19: ...e day you ve selected Time Set the hour minute and am pm R Return Close Time 12 00 am Sun Mon Tue Wed Thu Fri Sat Setup Off Off Timer 1 Locking Programs O O MENUm System Security ENTERE Security The PIN input screen appears before the setup screen Enter your 4 digit PIN the default of which is 0 0 0 0 Change the PIN using the Change PIN option Channel Lock Off On Lock channels to prevent unauthori...

Страница 20: ... this function you can minutely move pixels on the PDP in horizontal or vertical direction to minimize after image on the screen Optimum condition for pixel shift Item TV HDMI Horizontal 0 4 3 Vertical 0 4 3 Time minute 1 4 min 4 min The Pixel Shift value may differ depending on the monitor size inches and mode This function is not available in the Screen Fit mode Auto Protection Time Off 10 min 2...

Страница 21: ...ure Mode is set to Standard and Sound Mode is set to Movie Panel Lock Off On Lock or unlock all the keys on the panel Boot Logo Off On Display Samsung logo when the TV is turned on AV Color System Auto PAL M PAL N NTSC Normally the TV can receive image and sound with good quality when in the mode Auto This mode detects the signal color system automatically In case of some signal reception with col...

Страница 22: ...ect or the channels are unavailable Adjust your antenna to increase signal strength Reset Reset all settings to the factory defaults except network settings The PIN input screen appears before the setup screen Enter your 4 digit PIN Change the PIN using the Change PIN option Software Upgrade Software Upgrade can be performed by downloading the latest firmware from www samsung com to a USB memory d...

Страница 23: ...a file damage or data loss The HDD Hard Disk Drive connected to USB is not supported Do not disconnect the USB device while it is loading The higher the resolution of the image the longer it takes to display on the screen The maximum supported JPEG resolution is 15360 x 8640 pixels For unsupported or corrupted files the Not Supported File Format message is displayed MP3 files with DRM that have be...

Страница 24: ...device and then press the TOOLS button The Tools menu appears 4 Select Safely Remove USB and then wait until the selected USB device is disconnected You can remove a USB device from the TV To remove a USB device from the TV we recommend use Safely Remove USB function Screen Display Move to the desired file using the buttons and then press the ENTERE or Play button The screen may differ depending o...

Страница 25: ...n use REW and µ FF buttons during playback In this mode you can enjoy movie clips contained on a Game but you cannot play the Game itself Supported Subtitle Formats External Name File extension MPEG 4 timed text ttxt SAMI smi SubRip srt SubViewer sub Micro DVD sub or txt SubStation Alpha ssa Advanced SubStation Alpha ass Powerdivx psb Internal Name Container Format Xsub AVI Picture Format SubStati...

Страница 26: ...e compatible with the player The menu can be displayed late if the video is over 10Mbps bit rate Video decoder Audio decoder Supports up to H 264 Level 4 1 H 264 FMO ASO RS VC1 SP MP AP L4 and AVCHD are not supported GMC is not supported WMA 10 Pro supports up to 5 1 channel and M2 profile LBR mode of M0 is not supported WMA lossless audio is not supported Photos Viewing a Photo or Slide Show 1 Pr...

Страница 27: ...play music files repeatedly Shuffle Mode Off On You can play the music randomly Sound Mode Standard Music Movie Clear Voice Amplify You can adjust the sound setting Supported Music Formats File Extension Type Codec Remark mp3 MPEG MPEG1 Audio Layer 3 m4a mpa aac 3ga MPEG4 AAC flac FLAC FLAC Seek is not supported Supports up to 2ch ogg OGG Vorbis Supports up to 2ch wma WMA WMA WMA 10 Pro supports u...

Страница 28: ...guage c Subtitle You can set subtitles on off c Subtitle Settings You can play the video with subtitles This function only works if the subtitles are the same file name as the video c Start Slide Show Stop Slide Show You can start or stop a slide show c Slide Show Speed You can select the slide show speed during the slide show c Background Music On Background Music Off You can set on off backgroun...

Страница 29: ...detailed installation manual and all parts necessary for assembly are provided x xDo not use screws that do not comply with the VESA standard screw specifications x xDo not use screws that are longer than the standard dimension or do not comply with the VESA standard screw specifications Screws that are too long may cause damage to the inside of the TV set x xFor wall mounts that do not comply wit...

Страница 30: ...ds It is safe to connect the string so that the clamps fixed on the wall are equal to or lower than the clamps fixed on the TV Untie the string before moving the TV 4 Verify all connections are properly secured Periodically check connections for any sign of fatigue for failure If you have any doubt about the security of your connections contact a professional installer Anti theft Kensington Lock T...

Страница 31: ...ns in the TV menu go to Picture Mode Color Brightness Sharpness Adjust Energy Saving option in the TV menu go to MENU System Eco Solution Energy Saving Try resetting the picture to view the default picture setting go to MENU Picture Reset Picture There is a dotted line on the edge of the screen If the picture size is set to Screen Fit change it to 16 9 Change cable satellite box resolution The pic...

Страница 32: ...e the correct Cable TV signal type is set in the menu Verify the Antenna is positioned correctly No Caption on digital channels Check Caption setup menu Some channels may not have caption data The picture is distorted macroblock error small block dots pixelization Compression of video contents may cause picture distortion especially on fast moving pictures such as sports and action movies A low si...

Страница 33: ...n the Self Diagnosis Test menu This function is only available with digital channels from an Antenna RF Coax connection TV is tilted to the right or left side Remove the stand base from the TV and reassemble it The Channel menu is gray out unavailable The Channel menu is only available when the TV source is selected Your settings are lost after 30 minutes or every time the TV is turned off If the ...

Страница 34: ...rmation and software tools to convert your files into DivX videos ABOUT DIVX VIDEO ON DEMAND This DivX Certified device must be registered in order to play purchased DivX Video on Demand VOD movies To obtain your registration code locate the DivX VOD section in your device setup menu Go to vod divx com for more information on how to complete your registration Covered by one or more of the followin...

Страница 35: ...play Resolution 852 X 480 Screen Size 43 inches Power Consumption Normal operation Standby 176W 1W Sound Output 10W x 2 Dimensions WxHxD Body With stand 1010 1 X 621 0 X 56 0 mm 1010 1 X 675 1 X 262 0 mm Weight Without Stand With Stand 14 1 kg 15 3 Kg Design and specifications are subject to change without prior notice For information about power supply and more about power consumption refer to th...

Страница 36: ...Solution 19 Edit Favorites 12 Edit Mode 12 Equalizer 17 F Favorites 11 Film Mode 16 Fine Tune 14 G Game Mode 21 Guide 13 K Kensington Lock 30 M Media Play 23 Music 27 P Photos 26 Picture Mode 14 Picture Size 14 R Repeat Mode 28 RGB Only Mode 15 S Schedule Manager 13 Screen Burn Protection 20 Security 19 Self Diagnosis 22 Sleep Timer 18 Software Upgrade 22 Sound Mode 17 T Time 18 U USB 23 V Videos ...

Страница 37: ...televisor se contrae o expande debido a un cambio en el ambiente que lo rodea por ejemplo en la temperatura o humedad Esto es normal y no constituye un defecto Defectos de celda La PDP utiliza un panel compuesto de 1 226 880 nivel SD a 6 221 000 nivel FHD píxeles que requieren una sofisticada tecnología para su producción No obstante es posible que existan algunos píxeles brillantes u oscuros en l...

Страница 38: ...15 y y Menú de sonido 17 Cambio de los modos preestablecidos de sonido 17 Configuración de sonido 17 Ajuste de la configuración de sonido 17 Características de preferencia y y Menú de sistema 18 Configuración de Configuración 18 Configuración de la hora 18 Uso del temporizador 18 Configuración de temporizador encendido apagado 18 Bloqueo de programas 19 Soluciones económicas 19 Otras funciones 20 ...

Страница 39: ...el producto y otros objetos por ejemplo paredes para asegurar la ventilación adecuada En caso contrario podría producirse un incendio o podría surgir un problema en el producto debido a un incremento en la temperatura interna del producto Cuando utiliza un soporte o un montaje de pared utilice únicamente las piezas proporcionadas por Samsung Electronics Si utiliza piezas proporcionadas por otro fa...

Страница 40: ...alla del menú de funciones Aparece la pantalla principal Inicio de contenido Selección del Origen s Selecciona el Origen s moviendo el controlador en la pantalla del menú de funciones Aparece la pantalla Origen Apagar P Seleccione el Apagar P para apagar el televisor moviendo el controlador en la pantalla del menú de funciones Sale del menú cuando pulsa el controlador más de 1 segundo Al seleccion...

Страница 41: ...para acceder directamente a los canales Enciende y apaga el televisor Utilice estos botones en una función específica MTS Pulse para elegir programas estéreo mono o de audio independiente emisión SAP P SIZE Elegir el tamaño de la imagen CC Controla el decodificador de subtítulos digitales Cortar el sonido temporalmente Muestra la EPG Guía electrónica de programas Muestra la lista de canales en la ...

Страница 42: ...l control remoto La contraseña predeterminada es 0 0 0 0 Para regresar al paso anterior pulse el botón Anterior 1 Idioma del menú Seleccionar un idioma del menú Pulse el botón o luego pulse el botón ENTERE Seleccione el idioma de la OSD presentación en pantalla 2 Modo de uso Seleccionar el modo de uso Pulse el botón o luego pulse el botón ENTERE Seleccione el modo Uso domiciliario El modo Demo com...

Страница 43: ... o para seleccionar Aire o Cable y luego pulse el botón ENTERE La búsqueda de canales comenzará automáticamente Para obtener más información consulte Canal Prog Automática Pulse el botón ENTERE en cualquier momento para interrumpir el proceso de memorización 5 Reloj Configuración del Modo Reloj Configure el Modo Reloj en forma automática o manual Automático Seleccione la zona horaria donde vive pa...

Страница 44: ...irse un error de conexión x xSe recomienda usar un cable HDMI básico de alta velocidad o un cable HDMI con Ethernet Este producto no admite la función Ethernet a través de HDMI Dispositivos disponibles reproductor de DVD reproductor de Blu ray receptor de cable receptor de satélite STB VCR Uso de un cable de componentes o un cable de audio a video Cuando se conecta a AV IN el color de la entrada A...

Страница 45: ...TB conectado al televisor 1 Pulse el botón SOURCE en su control remoto 2 Seleccione la fuente de entrada externa que desee TV HDMI1 HDMI2 AV Componente En Origen se resaltan las entradas conectadas Cómo usar Editar Nombre En Origen pulse el botón TOOLS y luego podrá configurar el nombre de las fuentes de entrada externas que desee VCR DVD STB cable STB satélite STB PVR Receptor AV Juego Filmadora ...

Страница 46: ... Edit favoritos Si desea ver los canales favoritos que agregó pulse el botón CH LIST y luego pulse L Modo CH para visualizar Favoritos 1 5 Uso de los botones de función con la Lista de canales T Herramientas Muestra el menú de opciones L Modo CH Canal Desplácese hacia Favoritos 1 5 cuando está configurada la opción Edit favoritos Cuando selecciona Vista prog en el menú T Herramientas puede moverse...

Страница 47: ...os 1 5 Can agrds Muestra todos los canales añadidos Todos los canales Muestra todos los canales disponibles actualmente Favoritos 1 5 Muestra todos los canales favoritos Se mostrará Favoritos 1 5 cuando se encuentra configurada la opción Edit favoritos Configure cada canal usando las opciones del menú Edit favoritos Bloquear Desbloquear Añadir Borrar Quitar selec Seleccionar todo Los elementos del...

Страница 48: ...se el botón ENTERE nuevamente y luego seleccione Cancelar prog Admin de programa O O MENUm Soporte técnico Inicio de contenido Admin de programa ENTERE Puede configurar un canal deseado para que se muestre automáticamente a una hora establecida Además puede ver modificar o borrar un canal que haya reservado para ver Para utilizar esta función primero configure la hora actual Uso del menú de opcion...

Страница 49: ...e color no es satisfactoria seleccione cualquiera de PAL M PAL N o NTSC Menú de imágenes Cambio del modo preestablecido de la imagen O O MENUm Imagen Modo de Imagen ENTERE Modo de Imagen t Seleccione el tipo de imagen preferido Dinámico Adecuado para un entorno iluminado Normal Adecuado para un entorno normal Película Adecuado para ver películas en un entorno oscuro Ajuste de configuración de imag...

Страница 50: ... de ancho 4 3 DTV 1080i 1080p 16 9 Ajuste de ancho 4 3 Ajuste pantalla Componente 480i 480p 576i 576p 720p 16 9 Ajuste de ancho 4 3 Componente 1080i 1080p 16 9 Ajuste de ancho 4 3 Ajuste pantalla HDMI 720p 1080i 1080p 16 9 Ajuste de ancho 4 3 Ajuste pantalla Cambio de las opciones de imagen Configuración avanzada O O MENUm Imagen Configuración avanzada ENTERE disponible en modo Normal Película Con...

Страница 51: ... canales analógicos muestra la intensidad de señal Sólo disponible para los canales analógicos Cuando se pulsa el botón INFO aparece la barra de intensidad de señal Cuando la barra es verde se está recibiendo la mejor señal posible Filtro de ruido MPEG Apagado Bajo Medio Alto Automático Reduce el ruido MPEG para proporcionar una mejor calidad de imagen Nivel de negro HDMI Bajo Normal Permite selec...

Страница 52: ...z 1kHz 3kHz 10kHz Ajuste de ancho de banda Ajusta el nivel de frecuencias específicas de ancho de banda Reiniciar Restablece la configuración del ecualizador Ajuste de la configuración de sonido Opciones difusión audio O O MENUm Sonido Opciones difusión audio ENTERE Idioma del audio t canales digitales solamente Cambie los valores predeterminados para los idiomas del audio El idioma disponible pue...

Страница 53: ...e Config Reloj Configure la Fecha y Tiempo Disponible sólo cuando el Modo Reloj está configurado en Manual Puede configurar la Fecha y Tiempo directamente pulsando los botones de números en el control remoto Zona horaria para Brasil Chile Ecuador Seleccione su zona horaria Esta función sólo está disponible cuando Modo Reloj está configurado en Automático Uso del temporizador O O MENUm Sistema Tiem...

Страница 54: ...r La marca c indica los días que ha seleccionado Tiempo Configure la hora los minutos y am pm R Regresar Cerrar Tiempo 12 00 am Dom Lun Mar Mie Jue Vie Sáb Configuración Apagado Temporiz apag 1 Bloqueo de programas O O MENUm Sistema Seguridad ENTERE Seguridad La pantalla de entrada de PIN aparece antes que la pantalla de configuración Ingrese su PIN de 4 dígitos el predeterminado es 0 0 0 0 Cambie...

Страница 55: ... puede mover mínimamente los píxeles en PDP en dirección horizontal o vertical para minimizar las imágenes fantasma en la pantalla Condición óptima para cambio de píxel Elemento TV HDMI Horizontal 0 4 3 Vertical 0 4 3 Tiempo minuto 1 4 min 4 min El valor de Cambio de Pixel puede variar según el tamaño del monitor pulgadas y el modo Esta función no está disponible en el modo Ajuste pantalla Tpo pro...

Страница 56: ...ncendido Modo Juego se configura en Normal y Sonido Modo se configura en Película Bloqueo del panel Apagado Encendido Bloquea o desbloquea todas las teclas del panel Logotipo carga Apagado Encendido Muestra el logotipo de Samsung cuando el televisor está encendido Sistema de color AV Automático PAL M PAL N NTSC Normalmente el televisor puede recibir imágenes y sonido con buena calidad en modo Auto...

Страница 57: ...anales no están disponibles Ajuste la antena para aumentar la intensidad de la señal Reiniciar Restablezca toda la configuración a los ajustes predeterminados de fábrica excepto la configuración de red La pantalla de entrada de PIN aparece antes que la pantalla de configuración Ingrese su PIN de 4 dígitos Cambie el PIN usando la opción Cambiar Código Actualización del software La Actualización del...

Страница 58: ... daños o pérdidas de datos SAMSUNG no se hace responsable de ningún daño de archivo de datos ni de ninguna pérdida de datos La unidad de disco duro HDD conectada a USB no es compatible No desconecte el dispositivo USB mientras se está cargando Cuanto mayor sea la resolución de la imagen más tiempo tardará en visualizarse en la pantalla La máxima resolución JPEG admitida es 15360 x 8640 píxeles Par...

Страница 59: ...el menú Herramientas 4 Seleccione Retire el dispositivo USB con seguridad y luego espere hasta que se desconecte el dispositivo USB seleccionado Puede quitar un dispositivo USB del televisor Para quitar un dispositivo USB del televisor es aconsejable usar la función Retire el dispositivo USB con seguridad Visualización de pantalla Pase al archivo deseado usando los botones y luego pulse el botón E...

Страница 60: ...nes y Puede usar los botones REW y µ FF durante la reproducción En este modo puede disfrutar de clips de películas contenidos en un Juego pero no se puede reproducir el Juego Formatos de subtítulo admitidos Externos Nombre Extensión del archivo Texto basado en tiempo MPEG 4 ttxt SAMI smi SubRip srt SubViewer sub Micro DVD sub o txt SubStation Alpha ssa Advanced SubStation Alpha ass Powerdivx psb I...

Страница 61: ...ser compatibles con el reproductor Se puede mostrar el menú con demora si el video es de más de 10MBps velocidad de bits Decodificador de video Decodificador de audio Admite hasta H 264 nivel 4 1 H 264 FMO ASO RS VC1 SP MP AP L4 y AVCHD no se admiten No se admite GMC WMA 10 Pro admite hasta 5 1 canales y el perfil M2 El modo LBR de M0 no se admite El audio WMA Lossless no se admite Fotos Visualiza...

Страница 62: ...rchivos de música en forma repetida Modo Aleatorio Apagado Encendido Puede reproducir la música al azar Sonido Modo Normal Música Película Voz clara Amplificar Puede ajustar la configuración del sonido Formatos de música admitidos Extensión del archivo Tipo Códec Comentario mp3 MPEG MPEG1 Audio Layer 3 m4a mpa aac 3ga MPEG4 AAC flac FLAC FLAC La búsqueda no se admite Admite hasta 2 canales ogg OGG...

Страница 63: ...Puede activar o desactivar los subtítulos c Config de subtítulos Puede reproducir los videos con subtítulos Esta función sólo se activa si los subtítulos tienen el mismo nombre de archivo que el video c Inic vis aut Detener presentacion Puede iniciar o detener una presentación c Veloc vis aut Puede seleccionar la velocidad de la presentación durante la misma c Música de fondo activ Música de fondo...

Страница 64: ...un manual de instalación detallado y todas las piezas necesarias para el montaje x xNo use tornillos que no cumplan las especificaciones de tornillos estándar VESA x xNo use tornillos con una longitud superior a la medida estándar o que no cumplan con especificaciones de tornillos estándar VESA Los tornillos que sean demasiado largos pueden causar daños en el interior del televisor x xPara montaje...

Страница 65: ...pared deben estar a la misma o a menor altura que las grapas del televisor Cuando desee mover el televisor deberá desatar la cadena 4 Verifique que todas las conexiones estén bien aseguradas Compruébelas periódicamente para detectar cualquier signo de fatiga o falla Si tiene alguna duda sobre la seguridad de sus conexiones comuníquese con un instalador profesional Bloqueo antirrobo Kensington Sams...

Страница 66: ... mala calidad Ajuste las opciones de Imagen en el menú del televisor vaya a Modo de Imagen Color Brillo Definición Ajuste la opción Ahorro de energía en el menú del televisor vaya a MENU Sistema Solución Eco Ahorro de energía Intente reiniciar la imagen para ver la configuración de imagen predeterminada vaya a MENU Imagen Restablezca imagen Hay una línea de puntos en el borde de la pantalla Si el ...

Страница 67: ... televisor no recibe todos los canales Compruebe que el cable coaxial esté firmemente conectado Ejecute Prog Automática para añadir los canales disponibles a la lista de canales Vaya a MENU Canal Prog Automática luego seleccione Automático y asegúrese de que en el menú esté establecido el tipo de señal de televisión por cable correcto Compruebe la posición correcta de la antena No hay subtítulos e...

Страница 68: ...eccionar en el menú del televisor cuando está conectado mediante HDMI o Componente Se debe activar Subtítulo en el dispositivo externo Se advierte un olor a plástico que proviene del televisor Este olor es normal y desaparece con el tiempo La Información de señal del televisor no está disponible en el menú de Prueba Autodiagnóstico Esta función sólo está disponible en los canales digitales que el ...

Страница 69: ...ideos ABOUT DIVX VIDEO ON DEMAND This DivX Certified device must be registered in order to play purchased DivX Video on Demand VOD movies To obtain your registration code locate the DivX VOD section in your device setup menu Go to vod divx com for more information on how to complete your registration Covered by one or more of the following U S patents 7 295 673 7 460 668 7 515 710 7 519 274 DivX D...

Страница 70: ...antalla 852 X 480 Tamaño de pantalla 43 pulgadas Consumo de energía Funcionamiento normal Modo suspensión 176W 1W Sonido Salida 10W x 2 Dimensiones An x Al x Pr Cuerpo principal Con el soporte 1010 1 X 621 0 X 56 0 mm 1010 1 X 675 1 X 262 0 mm Peso Sin el soporte Con el soporte 14 1 kg 15 3 Kg El diseño y las especificaciones pueden cambiar sin previo aviso Para obtener información sobre la fuente...

Страница 71: ...tro dig de ruido 16 Fotos 26 G Guía 13 I Imagen Tamaño 14 Inicio de contenido 11 L Lista de canales 11 M Modo de Imagen 14 Modo de repetición 28 Modo Editar 12 Modo Juego 21 Modo película 16 Media Play 23 Música 27 O Opciones difusión audio 17 P Prog Automática 14 Protección de pantalla 20 S Seguridad 19 Sintonia Fina 14 Solo modo RGB 15 Solución Eco 19 Sonido Modo 17 Subtítulos 20 T Temporizador ...

Отзывы: