background image

63

Menu Tab

Main Menu

Sub Menu

Secondary Menu Page

MULTI 
SLIDE

SHOW

(

 )

Show Start

Play / Repeat Play

-

p.64

Images

All

Date

p.65

Select

-

Effect

Off

Basic

Classic

p.65

Memories Rhythmic

Delight

Interval

1, 3, 5, 10 sec

-

p.66

Music

Off

Panorama

p.66

First Smile

Remembrance

PLAYBACK

(

à

 )

Voice Memo

Off

-

p.66

On

-

Delete

Select

-

p.67

All

No / Yes

Protect

Select

-

p.67

All

Unlock / Lock

DPOF

Standard

Select / All Pics / 

Cancel

p.68

~

p.69

Index

No / Yes

Size

Select / All Pics / 

Cancel

Copy To Card

No

-

p.70

Yes

-

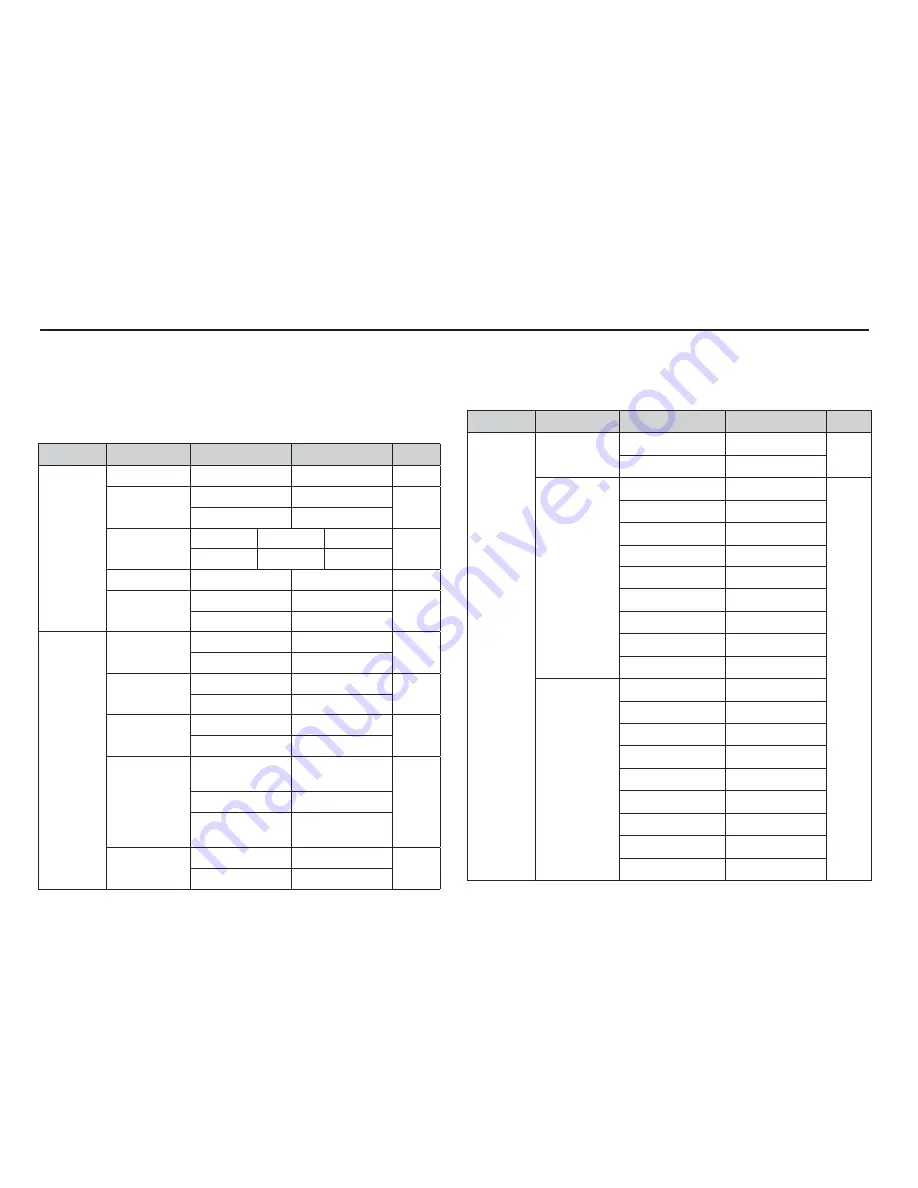
PLAY mode functions can be changed by using the LCD monitor. 
In the PLAY mode, pressing the MENU button displays the menu 
on the LCD monitor. The menus you can set up in Play mode are 
as follows. To capture an image after setting up the play menu, 
press the PLAY mode button or shutter button.

Menu Tab

Main Menu

Sub Menu

Secondary Menu Page

Images

One Pic

-

p.72

All Pics

-

Size

Auto

-

p.72

PostCard

-

Card

-

4X6

-


L

-

2L

-

Letter

-

A4

-

A3

-

Layout

Auto

-

Full

-

1

-

2

-

4

-

8

-

9

-

16

-

Index

-

This menu is available while the camera is connected to a PictBridge 
supporting printer (direct connection to the camera, sold separately) 
with a USB cable.

Setting up the play back function using the LCD monitor

Содержание P10

Страница 1: ......

Страница 2: ...rd due to the use of a card reader The contents and illustrations of this manual are subject to change without prior notice for upgrading the camera functions Microsoft Windows and Windows logo are re...

Страница 3: ...e do not cover the camera or Charger This may cause heat to build up and distort the camera body or cause a fire Always use the camera and its accessories in a well ventilated area Danger DANGER indic...

Страница 4: ...the camera Failure to do so may damage the cords or cables and cause a fire or electric shock Take care not to touch the lens or lens cover to avoid taking an unclear image and possibly causing camer...

Страница 5: ...Display SETUP 41 022 Pausing while recording a movie clip Successive Recording 023 Things to Watch Out for When Taking Pictures 024 Using the camera buttons to set the camera 024 POWER button 024 SHU...

Страница 6: ...a buttons to set the camera 055 Thumbnail Enlargement button 057 Info Up button PLAY 53 057 Play Pause Down button 058 Left Right Menu OK button 058 Printer button 058 Delete button 059 E Effect butto...

Страница 7: ...es 075 Warning indicator 076 Before contacting a service centre 078 Specifications 081 Software Notes 081 System Requirements 082 About the software 083 Setting up the application software 085 Startin...

Страница 8: ...sales region To buy the optional equipment contact your nearest Samsung dealer or Samsung service centre Included items Camera Rechargeable battery SLB 0837 B AC adapter SAC 47 USB cable SUC C3 AV ca...

Страница 9: ...8 Identification of features Front Top Mode dial Shutter button Lens Lens cover Flash Self timer lamp AF sensor Power button Microphone USB AV connection terminal Speaker...

Страница 10: ...n of features Back 5 function button Play mode Printer button Fn Delete button Strap eyelet LCD monitor Camera status lamp Zoom T button Digital zoom Zoom W button Thumbnail E Effects button Face Dete...

Страница 11: ...on Information Up button Flash Left button Self timer Right button Macro Down button Play Pause button MENU OK button Tripod socket Memory card slot Battery chamber cover Battery chamber Battery holde...

Страница 12: ...the image data and turns off when the camera is ready to take a picture When flash battery is charging The lamp blinks When the USB cable is inserted to a PC The lamp lights up LCD monitor turns off...

Страница 13: ...Samsung s standard conditions and shooting conditions and may vary depending on the user s methods Important information about battery usage When camera is not in use turn off the power Please remove...

Страница 14: ...g LED of the AC Charger does not turn on or blink after inserting the rechargeable battery please check whether the battery is inserted correctly If you charge the battery with the camera power on the...

Страница 15: ...ery status on the LCD may be different from the actual battery status Insert the battery as shown Inserting the memory card Insert the memory card as shown Turn off the camera s power be fore insertin...

Страница 16: ...ith a different camera Turn off the camera power whenever the memory card is being inserted or removed Repeated use of the memory card will eventually reduce the memory card s performance Should this...

Страница 17: ...ing capacity will be as follows These figures are approximate as image capacities can be affected by variables such as subject matter and memory card type Recorded image size Super Fine Fine Normal 30...

Страница 18: ...00 p 16 Image Full Status No Description Icons Page 5 Memory card icon Internal memory icon 6 Battery p 14 7 Image Size p 37 8 Image Quality Frame Rate p 37 9 Metering p 38 10 Drive mode p 38 11 ISO...

Страница 19: ...rd is inserted an image will be stored on the memory card 3 Close the battery chamber cover 4 Press the power button to turn on the camera 5 Select the AUTO mode by rotating the mode dial 6 Point the...

Страница 20: ...l not operate in the DIS mode 2 If the lighting condition is brighter than fluorescent lighting conditions the DIS will not activate 3 If the lighting condition is darker than in fluorescent lighting...

Страница 21: ...hen you press the shutter Guide list MENU Pressing the Left Right button Pressing the Left Right button Pressing the Up Down button Pressing the Right button Half press shutter button to focus Focusin...

Страница 22: ...ht or in other dark conditions Children To take a picture of fast moving objects for example children Landscape To take pictures of distant scenery Close Up Close up shooting for small objects such as...

Страница 23: ...r MOVIE mode 4 Press the Menu button 5 Select the RECORDING menu by pressing the Left Right button Recording the movie clip without sound Using Successive Recording Steps from 1 2 are the same as thos...

Страница 24: ...see page 40 or ACB see page 42 function Avoid obstructing the lens or the flash when you capture an image Compose the image by using the LCD monitor Things to Watch Out for When Taking Pictures Lightl...

Страница 25: ...utton down halfway activates the autofocus and checks the condition of the flash Pressing the shutter button down fully takes and stores the image If you select voice memo recording the recording will...

Страница 26: ...ll not be recorded You may notice a decrease in image quality when using the digital zoom To view a clearer digital zoom image press the shutter button halfway at the maximum optical zoom position and...

Страница 27: ...hidden When the person being taken does not look at the camera Camera doesn t detect a face as the brightness is too dark or too bright The distance between the camera and object are far The maximum...

Страница 28: ...The guiding sound can be set using the sound setting menu See p 46 Pressing the FD button While the menu is showing the Up button operates as a direction button If the menu screen does not appear info...

Страница 29: ...ularly careful to avoid camera shake When you take a picture within 40cm Wide zoom or 50cm Tele zoom in the Macro mode select the FLASH OFF mode When you take a picture within the 10cm macro range the...

Страница 30: ...y and focus on the subject Using the Focus Lock 1 Ensure the subject is in the centre of the autofocus frame 2 Press the SHUTTER button halfway When the green auto focus frame lights up it means the c...

Страница 31: ...an image in poorly lit conditions with the flash there may be a white speck in the captured image The speck is caused by the flash light reflecting off atmospheric dust Flash Left button When the menu...

Страница 32: ...e flash fires regardless of the avail able light The intensity of the flash will be automatically controlled to suit the prevailing conditions Slow synchro The flash operates with a slow shutter speed...

Страница 33: ...ble self timer A picture will be taken after about 10 seconds and 2 seconds later a second picture will be taken When using the flash the 2 second self timer may be delayed for longer than 2 seconds d...

Страница 34: ...doesn t sense stillness after sensing movement Motion Timer Motion Icon Self timer lamp Pressing the Shuter button after setting the Motion Timer Blink 1 second interval Detecting the subject s moveme...

Страница 35: ...will be stored in a blue tone Save the image in negative mode Captured image will be saved in set RGB tone E Effect button Colour It is possible to add special effects to your images by using this bu...

Страница 36: ...a bar for selecting the contrast will be displayed 2 Change the contrast by pressing the Left Right button 3 Press the Shutter button to take an image Sharpness Move Set OK Contrast Move Set OK 1 Sel...

Страница 37: ...o o p 40 1 This menu is only available in the Children scene mode 3 Select a desired menu by pressing the Left Right button and then press the OK button 1 Press the Fn button in an available mode 2 Se...

Страница 38: ...CF Design rule for Camera File system JPEG Joint Photographic Experts Group JPEG is the image compression standard developed by the Joint Photographic Experts Group This type of compression is most co...

Страница 39: ...spot metering as this may result in an exposure error In this circumstance it is better to use exposure compensation METERING Multi Fn button DRIVE Single Drive mode You can select continuous shot an...

Страница 40: ...eed or specific light sensitivity of a camera is rated by ISO numbers ISO Auto Fn button White balance The white balance control allows you to adjust the colours to appear more natural Mode Icon Descr...

Страница 41: ...ritten White paper Fn button Exposure compensation This camera automatically adjusts the exposure according to the ambient lighting conditions You can also select the exposure value by using the Fn bu...

Страница 42: ...enus 3 Use the UP and DOWN buttons to select a sub menu 4 Select a sub menu and then the value you set will be saved Press the MENU button and the menu will disappear Press the LEFT or RIGHT button RE...

Страница 43: ...on the subject the auto focus frame turns to red Center AF Multi AF RECORDING Back Set OK Voice Record Focus Area Voice Memo Center AF Multi AF ACB Recording ACB This function is to adjust the contra...

Страница 44: ...again File type wav Voice recording mode REC Exit SH MENU RECORDING Voice Record Voice Memo Off Center AF Move Set OK Focus Area Off ACB Voice Memo You can add your voice over to a stored still image...

Страница 45: ...the voice recording is paused the voice recording is cancelled Stop REC SH Recording Recording the movie clip without voice You can record the movie without voice Select On of Voice Mute menu in the M...

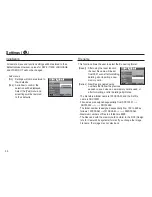
Страница 46: ...ect a volume of start up sound shutter sound beep sound and AF sound Volume sub menu Off Low Medium High Volume You can select the sound that is activated whenever the camera is turned on Start up sou...

Страница 47: ...it automatically detects the location of the subject s face when taking a self portrait This feature can be set byusing the OFF and ON buttons SOUND Beep Sound Volume Start Sound Shutter Sound Sound 3...

Страница 48: ...1 min p 51 3 min 5 min 10 min Video Out NTSC PAL p 52 AF Lamp Off On p 52 Menus are subject to change without prior notice Setup menu There is a choice of language that can be displayed on the LCD mo...

Страница 49: ...travelling overseas Date type yyyy mm dd mm dd yyyy dd mm yyyy Off DISPLAY Set OK London GMT 2008 07 01 13 00 DST DISPLAY Date Time Display Bright Language Start Image Back Set OK Quick View Display...

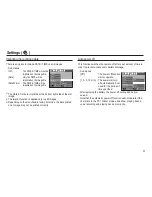
Страница 50: ...SPLAY Display Bright Date Time Start Image Back Set OK Language Display SAVE Quick View 1 sec Off 3 sec 0 5 sec This is used for formatting the memory If you run Format on the memory all images includ...

Страница 51: ...om 0001 even after formatting deleting all or inserting a new memory card Series New files are named using numbers that follow the previous sequence even when a new memory card is used or after format...

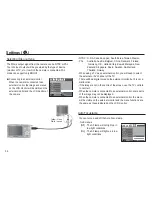
Страница 52: ...tly SETTINGS Imprint Power Off Reset File Date Time Off Back Set OK Format Video Out Date This function switches the camera off after a set amount of time in order to prevent unnecessary battery drain...

Страница 53: ...uwait Malaysia New Zealand Singapore Spain Sweden Switzerland Thailand Norway When using a TV as an external monitor you will need to select the external or AV channel of the TV There will be a digita...

Страница 54: ...all the camera functions apply only to the internal memory Playing back a still image 1 Select the PLAY mode by pressing the play mode button Playing back a movie clip Play Capture E 1 Select the reco...

Страница 55: ...e same size as the original movie clip 640x480 320x240 When you press the E button at the beginning of the movie clip the first frame of the movie clip will be saved as a still image Press the E butto...

Страница 56: ...ted 3 Press the 5 function button to move to a desired image 4 To view an image separately press the enlargement button Thumbnail display mode Highlighted image Highlighted image Pressing the enlargem...

Страница 57: ...trimmed image the image can t be trimmed Image size Maximum enlargement rate X11 4 X9 2 X7 7 X9 6 X7 3 X4 0 X3 2 Trimming No Yes Confirm OK Image enlargement 1 Select an image that you want to enlarge...

Страница 58: ...still image with a voice memo a voice file or a movie clip During playback Temporarily stops playback In Pause mode Resumes playback Voice recording is stopped Voice recording is playing Voice recordi...

Страница 59: ...e Print Menu OK Delete No Yes Confirm OK Delete No Yes Select Confirm T OK Select Delete T OK Prev Prev Next Next Left Right Menu OK button LEFT RIGHT MENU OK buttons activate the following LEFT butto...

Страница 60: ...e versa Only JPEG images can be resized Movie clip AVI Voice recording WAV files can t be resized You can change the resolution of only those files compressed in the JPEG 4 2 2 format The resized imag...

Страница 61: ...the OK button Icon Descroption Captured images will be stored in black and white Captured images will be stored in a sepia tone a gradient of yellowish brown colours Captured images will be stored in...

Страница 62: ...Select menu tab by pressing the Left Right button Red eye effect can be removed from the captured image Red eye Removal 1 Select by pressing the Up Down button and press the OK button 2 The Processing...

Страница 63: ...Down button and a bar for selecting the contrast will be displayed 2 Change the contrast by pressing the Left Right button 3 Press the OK button and the image will be saved as a new file name 1 Select...

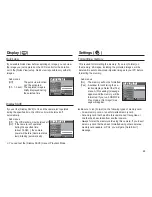
Страница 64: ...Yes PLAY mode functions can be changed by using the LCD monitor In the PLAY mode pressing the MENU button displays the menu on the LCD monitor The menus you can set up in Play mode are as follows To...

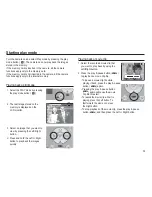
Страница 65: ...SLIDE SHOW menu tab Start the Multi Slide Show The Multi Slide Show can start only in the Show Start menu 1 Use the Up Down buttons to select the Show Start menu and press the Right button 2 Select a...

Страница 66: ...s Select1 Select2 and Select3 3 Press the OK button and the settings are saved 4 Select Play or Repeat Play in the Show menu to start the multi slide show Selecting Images Unique screen effects can be...

Страница 67: ...lay interval 1 Select the Interval sub menu by pressing the UP DOWN button and press the RIGHT button 2 Use the Up Down buttons to select the desired interval 3 Press the OK button to save the configu...

Страница 68: ...nd a No Image message will appear 3 After deletion the screen will be changed to the play mode screen Confirm OK DeleteAll No Yes This deletes images stored on the memory PLAYBACK Protect Copy to Card...

Страница 69: ...le image Some photo labs may not support the wide angle size print DPOF Playback Standard This function allows you to embed printing quantity information on a stored image 1 Press the Up Down button a...

Страница 70: ...then press the Right button 2 Select the Size menu and press the Right button again Sub menu will display 3 Select a desired sub menu by pressing the UP DOWN button and press the OK button Select Sele...

Страница 71: ...e displayed If there is not enough space available in the memory card to copy saved images in the internal memory About 16MB the Copy To Card command will copy only some of the images and display Memo...

Страница 72: ...Down button and press the OK button Select USB Computer Printer Confirm OK If the USB menu is set to the Computer you cannot connect a Pictbridge compatible printer to the camera through USB cable wit...

Страница 73: ...K 0 0 PICTBRIDGE Size Layout One Pic Images Date Type Back Set OK All Pics Quality PictBridge Print Setting You can select the Paper Size Print Format Paper Type Print Quality Date Print and File Name...

Страница 74: ...high magnetism or excessive vibration Areas with high explosives or highly flammable materials Do not leave this camera in places subject to dust chemicals like naphthalene and mothballs high temperat...

Страница 75: ...protect the memory card Camera Maintenance Use a soft brush available from photo stores to gently clean the lens and LCD assemblies If this does not work lens cleaning paper with lens cleaning fluid c...

Страница 76: ...tect switch to the top of the memory card Memory Full The memory card or internal memory is full Insert new memory card Delete the unnecessary image files No Image There are no images stored on the me...

Страница 77: ...the Shutter button There is insufficient memory capacity Delete unnecessary image files The memory card has not been formatted Format the memory card p 49 The memory card is exhausted Insert a new me...

Страница 78: ...le name Violation of DCF format Do not change the image file name Colour of image is different to the original scene White balance or effect setting is incorrect Select appropriate White balance and e...

Страница 79: ...ng Multi Spot Center Weighted Compensation 2EV 1 3EV steps ISO Auto 80 100 200 400 800 1600 Flash Modes Auto Auto Red eye reduction Fill in flash Slow sync Flash off Red eye Fix Range Wide 0 4m 3 0m T...

Страница 80: ...ne About 219 About 241 About 282 About 290 About 366 About 1089 About 1907 Fine About 304 About 341 About 395 About 412 About 507 About 1458 About 2204 Normal About 507 About 550 About 619 About 660 A...

Страница 81: ...protrusions Weight Approx 110g without batteries and card Operating Temperature 0 40 C Operating Humidity 5 85 Software Samsung Master Adobe Reader Specifications are subject to change without prior n...

Страница 82: ...PC and OS that has not been guaranteed by the manufacturer is not covered by the Samsung warranty Before reading this manual you should have a basic knowledge of computers and O S Operating Systems Fo...

Страница 83: ...edia software solution You can download view edit and save your digital images and movie clips with this software This software is only compatible with Windows You should allow 5 10 seconds for runnin...

Страница 84: ...rogram You can visit the Samsung web site through the internet http www samsungcamera com English http www samsungcamera co kr Korean 1 The auto run frame will display Click the Samsung Digital Camera...

Страница 85: ...dware Wizard will open and the computer will recognise the camera If your OS is Windows XP Vista an image viewer program will open 3 After restarting the computer connect the PC to the camera with the...

Страница 86: ...grade the Internet Explorer If you connect the USB cable to a USB port on your PC and then turn on the power the camera will automatically switch to computer connection mode In this mode you can downl...

Страница 87: ...this case disconnect the USB cable and then follow the procedure from Step 2 and onward Downloading stored images You can download the still images stored on the camera to your PC s hard disk and pri...

Страница 88: ...By using Samsung Master you can see the stored images in the memory directly on the PC monitor and you can copy or move the image files We recommend that you should copy the images to the PC to view...

Страница 89: ...ose shown depending on the Windows O S 1 Check whether the camera and PC are transferring a file If the camera status lamp blinks please wait until the lamp has finished blinking and is constantly on...

Страница 90: ...e Start button to download the images 7 Downloaded images will be displayed You can download view edit and save your images and movies with this software This software is only compatible with Windows...

Страница 91: ...e selected image 8 Image display window Images of the selected folder are displayed Refer to the Help menu in Samsung Master for further information Image edit You can edit the still image Image edit...

Страница 92: ...nsert a narration Produce You can save the edited multi media as a new file name You can select AVI Windows media wmv and Windows media asf file types Frame display window You can insert multi media i...

Страница 93: ...patible with MAC OS 10 3 3 Connect the camera to the Macintosh and turn the camera power on 4 A new icon will be displayed on the desktop after connecting the camera to the MAC 1 Double click a new i...

Страница 94: ...onnected to the USB port located on the front of the computer the computer may not recognise the camera Connect the camera to the USB port located on the back of the computer Case 1 USB cable is not c...

Страница 95: ...Master icon on the Taskbar Install all the application programs included in the software CD Correct Disposal of This Product Correct Disposal of This Product Waste Electrical Electronic Equipment App...

Страница 96: ...rked the chemical symbols Hg Cd or Pb indicate that the battery contains mercury cadmium or lead above the reference levels in EC Directive 2006 66 If batteries are not properly disposed of these subs...

Страница 97: ...MEMO 96...

Страница 98: ......

Отзывы: