background image

English  43

Tr

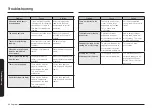
ouble

shoo

ting

Problem

Cause

Action

The door cannot be opened 
properly.

Food residue is stuck 
between the door and 
oven interior.

Clean the oven and then 
open the door.

The oven does not heat.

The oven may not work, 
too much food is being 
cooked, or improper 
cookware is being used. 

Put one cup of water in a 
microwave-safe container 
and run the microwave 
for 1-2 minutes to check 
whether the water is 
heated.
Reduce the amount of 
food and start the function 
again.
Use a cooking container 
with a flat bottom.

Heating is weak or slow.

The oven may not work, 
too much food is being 
cooked, or improper 
cookware is being used. 

Put one cup of water in a 
microwave-safe container 
and run the microwave 
for 1-2 minutes to check 
whether the water is 
heated.
Reduce the amount of 
food and start the function 
again.
Use a cooking container 
with a flat bottom.

Problem

Cause

Action

The warm function does 
not work.

The oven may not work, 
too much food is being 
cooked, or improper 
cookware is being used. 

Put one cup of water in a 
microwave-safe container 
and run the microwave 
for 1-2 minutes to check 
whether the water is 
heated.
Reduce the amount of 
food and start the function 
again.
Use a cooking container 
with a flat bottom.

The thaw function does not 
work.

The oven may not work, 
too much food is being 
cooked, or improper 
cookware is being used. 

Put one cup of water in a 
microwave-safe container 
and run the microwave 
for 1-2 minutes to check 
whether the water is 
heated.
Reduce the amount of 
food and start the function 
again.
Use a cooking container 
with a flat bottom.

The interior light is dim or 
does not turn on.

The door has been left 
open for a long time.

The interior light may 
automatically turn off 
when the Eco function 
operates.
Close and reopen the door 
or press the "Light" button.

The interior light is 
covered by foreign matter.

Clean the inside of the 
oven and check again.

Содержание NQ5B5763DBK/U4

Страница 1: ...Microwave oven User manual NQ5B5763D ...

Страница 2: ...llation instructions 11 Maintenance 15 Cleaning 15 Replacement repair 15 Care against an extended period of disuse 15 Before you start 16 Control panel 16 Clock 16 Side racks 17 About microwave energy 17 Cookware for microwave 18 Operations 19 Feature overview 19 Manual mode 20 Auto mode 25 Auto cook guide 25 Special functions 28 More Functions 30 System Settings 31 Smart Control 32 Cooking Smart ...

Страница 3: ...d in household only and it is not intended to be used such as staff kitchen areas in shops offices and other working environments farm houses by clients in hotels motels and other residential environments bed and breakfast type environments Only use utensils that are suitable for use in microwave ovens When heating food in plastic or paper containers keep an eye on the oven due to the possibility ...

Страница 4: ...iance is not intended for use by persons including children with reduced physical sensory or mental capabilities or lack of experience and knowledge unless they have been given supervision or instruction concerning use of the appliance by a person responsible for their safety Children should be supervised to ensure that they do not play with the appliance This appliance can be used by children age...

Страница 5: ...d in the combination mode children should only use the oven under adult supervision due to the temperatures generated During use the appliance becomes hot Care should be taken to avoid touching heating elements inside the oven If this appliance has cleaning function during cleaning conditions the surfaces may get hotter than usual and children should be kept away The cleaning function depends on t...

Страница 6: ...ring use The Appliances are not intended to be operated by means of an external timer or separate remote control system This appliance can be used by children aged from 8 years and above and persons with reduced physical sensory or mental capabilities or lack of experience and knowledge if they have been given supervision or instruction concerning use of the appliance in a safe way and understand ...

Страница 7: ... on the door When opening closing the door keep children away Microwave warning Microwave heating of beverages may result in delayed eruptive boiling always use caution when handling the container Always allow beverages to stand at least 20 seconds before handling If necessary stir during heating Always stir after heating In the event of scalding follow these First Aid instructions 1 Immerse the s...

Страница 8: ...tended purpose as described in this instruction manual Warnings and Important Safety Instructions in this manual do not cover all possible conditions and situations that may occur It is your responsibility to use common sense caution and care when installing maintaining and operating your oven Because these following operating instructions cover various models the characteristics of your microwave...

Страница 9: ...symbol has been introduced for your benefit when cooking or reheating packaged food Packaged food is also increasingly using a microwave symbol similar to the one below When you see this Symbol on food packaging cooking instructions are based on either the IEC Power Output Rating or the Reheating Categories A B C D or E Cooking instructions The IEC Power Output rating is an internationally standar...

Страница 10: ...ock 04 Door 05 Door Handle Accessories The oven comes with different accessories that help you prepare different types of food Ceramic tray Useful for microwave mode Baking tray Do not use for microwave mode Wire tray insert Useful for speed menu and grill mode Pure steam cooker Useful for microwave mode for steam cooking Air Fry rack Useful for Air Fry mode Steam tray Useful for natural steam mod...

Страница 11: ...ren are present Pure steam cooker The Pure steam cooker is a set of the Bowl Insert tray and Lid which is designed for steam cooking Use the Pure steam cooker for foods such as rice pasta and vegetables to preserve their nutritional values The Pure steam cooker parts can withstand temperatures from 10 C to 130 C When defrosting place frozen food in the steam bowl without the lid The liquid will re...

Страница 12: ...upply after installation The disconnection may be achieved by having the plug accessible or by incorporating a switch in the fixed wiring in accordance with the wiring rules Install in the Cabinet Kitchen Cabinets in contact with the oven must be heatresistant up to 100 C Samsung will take no responsibility for damage of cabinets from the heat Required Dimensions for installation This product is d...

Страница 13: ...stallation space requirement A B C D H G E F Built in cabinet mm A 600 B Min 564 568 C Min 550 D Min 446 Max 450 E Min 50 F 200 cm2 G 200 cm2 H Space for power outlet 30 Ø Hole A B C D E Under sink cabinet mm A Min 550 B Min 564 Max 568 C Min 446 Max 450 D 50 E 200 cm2 NOTE Minimum height requirement C is for oven installation alone ...

Страница 14: ...lectrical connection Check that the appliance works 02 02 01 01 Door handle 02 Side handle Be sure to hold the appliance with 2 side handles and door handle when unpacking the product After the installation is complete remove the protective film tape and other packing material and take out the provided accessories from inside of the oven To remove the oven from the cabinet first disconnect power t...

Страница 15: ...ning Clean the oven regularly to prevent impurities from building up on or inside the oven Also pay special attention to the door door sealing applicable models only If the door won t open or close smoothly first check if the door seals have built up impurities Use a soft cloth in soapy water to clean both the inner and outer sides of the oven Rinse and dry well To remove stubborn impurities with ...

Страница 16: ...s 07 Back Tap to move to the previous screen or to cancel the cooking 08 Power Tap to turn the screen on or off 09 Dial Knob Turn left and right to navigate through the menus and lists An item will be underlined to show you where you are on the screen Press to select the underlined item Clock It is important to set the correct time to ensure correct automatic operations To set the clock time 1 Tap...

Страница 17: ...owaves are dissipated inside the food as cooking continues 3 The cooking time is affected by the following conditions of the food Quantity and density Moisture content Initial temperature especially when frozen NOTE The cooked food keeps heat in its core after cooking is complete This is why you must respect the standing time specified in this manual which ensures cooking evenly down to the core S...

Страница 18: ...rate the food Metals such as stainless steel aluminium and copper reflect microwaves Therefore do not use cookware made of metallic materials Cookware marked microwave safe is always safe for use For additional information on appropriate cookware refer to the following guidelines and place a glass of water or some food on the cavity Requirements Flat bottom and straight sides Tight fitting lid Wel...

Страница 19: ...d or reheated without changing either the form or the colour Feature Temperature Power level range Default temperature Power level Microwave Grill 40 200 C 100 W 600 W 200 C 300 W The heating elements generate heat which is reinforced by the microwave energy Microwave Convection 40 200 C 100 W 600 W 180 C 300 W The heating elements generate heat and the convection fan distributes the heat inside t...

Страница 20: ... Conventional Large Grill Fan Grill Air Fry Natural Steam modes Step 3 Set the cooking time and Power level 1 Use the Dial to select Set Cook Time and change cooking time If you tap you can set cooking time 2 To set end time select Ready at 12 00 and set desired end time by using Dial 3 To change the power level select Cook at 800W and use Dial to change 4 When done tap to start cooking CAUTION Do...

Страница 21: ...akes choux and soufflés Step 1 Step 2 Step 3 Step 4 Convection Temperature Cooking time Preheating 1 Put food in suitable cookware put the cookware on the recommended accessory and then close the door 2 Follow steps 1 4 in the Manual mode section on page 20 21 3 When cooking is complete you can select Add 5 min using the Dial Use oven gloves to take out food Fan Conventional The heat is generated ...

Страница 22: ...ooking time Preheating 1 Put food in suitable cookware put the cookware on the recommended accessory and then close the door 2 Follow steps 1 4 in the Manual mode section on page 20 21 3 When cooking is complete you can select Add 5 min using the Dial Use oven gloves to take out food Natural Steam The heat is generated from the top and bottom heating elements with fans This function should be used...

Страница 23: ... heat up liquid HIGH LOW 88 700 Use to heat up and cook MEDIUM HIGH 75 600 MEDIUM 56 450 Use to cook meat and heat up vegetables MEDIUM LOW 38 300 DEFROST 22 180 Use to defrost before cooking LOW 13 100 Use to defrost vegetables Microwave Grill The heating elements generate heat which is reinforced by the microwave energy Use only microwave safe cookware such as glass or ceramic cookware Step 1 St...

Страница 24: ...oor 2 Follow steps 1 3 in the Manual mode section on page 20 20 The oven will start after setting the cooking time 3 When cooking is complete you can select Add 30 sec using the Dial Use oven gloves to take out food CAUTION Use only ovenproof cookware such as glasses potteries or bone china without metal trim Air Fry The heating elements generate heat which is evenly distributed inside the oven by...

Страница 25: ...feature to save you time or shorten your learning curve The cooking time and temperature will be adjusted according to the selected recipe Step 1 Step 2 Step 3 Auto Cook Menu Weight 1 Put food in suitable cookware put the cookware on the recommended accessory and then close the door 2 Follow steps 1 3 in the Auto mode section on page 25 3 When cooking is complete use oven gloves to take out food A...

Страница 26: ...ng tray 3 Put fresh dough into suitable sized rectangular metal baking dish length 25 cm Put dish length way to the door on baking tray Food Serving size kg Accessory Level Broccoli Florets 0 2 0 3 0 3 0 4 Ceramic tray 1 Cut broccoli into slices or halves Add only 15 ml 1 tablespoon water Put them evenly into a glass bowl with lid Cook covered Stir after cooking Cauliflower Florets 0 2 0 3 0 3 0 4...

Страница 27: ...volume during cooking Cook covered After cooking time is over stir before letting stand Add salt or herbs and butter Note that rice may not have absorbed all water after the cooking time is finished Auto Defrost The oven offers 5 defrosting programmes for your convenience The time and power level are automatically adjusted according to the selected programme Step 1 Step 2 Step 3 Auto Defrost Menu ...

Страница 28: ... evenly on ceramic tray This programme is suitable for fruits like raspberries mixed berries and tropical fruits Special functions Keep Warm With this function only the convection heating element operates and it cycles on and off to keep food warm When cooking is complete 1 Use the Dial to wake the control panel and then select Keep Warm 2 Press the Dial to confirm 3 Turn the Dial to select the de...

Страница 29: ...Do not overload maximum load 7 kg Cleaning Cleaning offers Steam clean and Deodorisation functions Steam Clean This function is useful for cleaning light soiling with steaming 1 Pour 100 ml of water onto the bottom of the oven and close the oven door 2 Use the Dial to wake the control panel and then select Cleaning 3 Use the Dial to select Steam Clean 4 When done press the Dial If you want a quick...

Страница 30: ...y to remove any unpleasant odour in your oven 1 Use the Dial to wake the control panel and then select Cleaning 2 Use the Dial to select Deodorisation 3 Turn the Dial to set time and then press the Dial Default set time is 5 minutes 4 When done press the Dial or tap to start More Functions Menu Description Timer You can set the timer Lock You can lock the control panel My Modes You can edit the co...

Страница 31: ...ng the Dial and then press the Dial 3 Turn the Dial to select the desired time 4 Press the Dial to save the changes Sound 1 Tap and then press the Dial 2 Select Sound using the Dial and then press the Dial 3 Turn the Dial to select On or Off 4 Press the Dial to save the changes System Settings Tap and hold for 3 seconds to enter the System Settings menu and then turn the Dial to change various set...

Страница 32: ...nditions are poor or the oven is installed in a place with a weak Wi Fi signal How to connect the microwave oven 1 Download and open the SmartThings app on your mobile device 2 Follow the app s on screen instructions to connect your oven 3 Once the process is complete the icon located on your oven display and the app will confirm you are connected 4 If the icon does not appear follow the instructi...

Страница 33: ...zed florets Cut big florets into halves Arrange stems to the centre Courgettes 250 3 4 3 Cut courgettes into slices Add 30 ml 2 tbsp of water or a knob of butter Cook until just tender Egg Plants 250 3 4 3 Cut egg plants into small slices and sprinkle with 1 tablespoon lemon juice Leeks 250 3 4 3 Cut leeks into thick slices Food Serving size g Cooking time min Standing time min Mushrooms 125 250 1...

Страница 34: ...uids or baby foods Stir well before during and after cooking with a plastic spoon or glass stirring stick to prevent eruptive boiling and scalding Keep them inside the oven during the standing time Allow a longer reheating time than other food types Recommended standing time after reheating is 2 4 minutes See the table below for reference Liquids and food Food Serving size Power W Cooking time min...

Страница 35: ...ster defrosting cut the food into small pieces and wrap them with aluminum foil before defrosting When the outer surface of frozen foods begins to melt stop defrosting and let stand as instructed in the table below Do not change the default power level 180 W for defrosting Food Serving size g Defrosting time min Standing time min Meat Minced meat 250 500 6 7 8 12 15 30 Pork steaks 250 7 8 Place th...

Страница 36: ... the food Cookware Grill and Fan grill Use flameproof containers which may include metal parts Do not use plastic cookware of any kind Microwave Grill Do not use cookware that is made of metal or plastic substances Food type Chops sausages steaks hamburgers bacon and gammon rashers thin fish portions sandwiches and all kinds of toast with toppings Grilling Set 220 C grill temperature preheat for 5...

Страница 37: ...Wire tray insert Ceramic Tray 4 10 15 Roast fish 300 180 200 Wire tray insert Ceramic Tray 4 5 8 6 10 Chicken pieces 300 180 200 Wire tray insert Ceramic Tray 4 13 17 13 17 Convection guide Convection and Fan conventional Convection mode and Fan conventional mode both the heating element and the side wall fan operate together to circulate the heat inside the cooking chamber All conventional ovenpr...

Страница 38: ...lls 180 190 Baking tray 2 10 15 Cookies 160 180 Baking tray 3 10 20 Oven chips 200 220 Baking tray 3 15 20 Fan Conventional Use temperatures and times in this table as guidelines for baking We recommend to preheat the oven with Fan Conventional mode Food Temp C Accessory Level Cooking time min Lasagna 180 190 Baking tray 3 25 30 Potato Gratin 170 180 Baking tray 2 45 50 Sponge Cake 150 160 Baking ...

Страница 39: ...ng Time min Potatoes Frozen Oven Chips 500 1000 210 220 4 20 25 Frozen Oven Chips Seasoned 500 1000 210 220 4 15 20 Frozen Tater Tots 500 1000 210 220 4 15 20 Frozen Hash Brown 500 1000 210 220 4 15 20 Frozen Potato Wedges 500 1000 210 220 4 15 20 Homemade Oven Chips 500 1000 190 200 4 20 25 Homemade Potato Wedges 500 1000 200 210 4 20 25 Frozen Frozen Chicken Nuggets 300 500 210 220 4 15 20 Froze...

Страница 40: ... and cutting into similar size Put tray into bowl Distribute vegetables on insert tray Add 2 tbsp water Cover with lid Stand for 1 2 minutes Food Serving size g Power level W Cooking Time min Accessory Frozen Vegetables 300 600 8 9 Bowl Insert tray Lid Put the frozen vegetables into the steam bowl Put insert tray into bowl Add 1 tbsp water Cover with lid Stir well after cooking and standing Stand ...

Страница 41: ...econds using 800 W until butter is melted Melting chocolate Put 100 g chocolate into a small deep glass dish Heat for 3 5 minutes using 450 W until chocolate is melted Stir once or twice during melting Use oven gloves while taking out Meltng crystallized honey Put 20 g crystallized honey into a small deep glass dish Heat for 20 30 seconds using 300 W until honey is melted Melting gelatine Lay dry ...

Страница 42: ...t and rear of the oven for ventilation Keep the gaps specified in the product installation guide Objects are on top of the oven Remove all objects on the top of the oven Troubleshooting You may encounter a problem using the oven In that case first check the table below and try the suggestions If a problem persists or if any information code keeps appearing on the display contact a local Samsung se...

Страница 43: ... a flat bottom Problem Cause Action The warm function does not work The oven may not work too much food is being cooked or improper cookware is being used Put one cup of water in a microwave safe container and run the microwave for 1 2 minutes to check whether the water is heated Reduce the amount of food and start the function again Use a cooking container with a flat bottom The thaw function doe...

Страница 44: ...s during cooking If the Auto Cook function is being used this beeping sound means it s time to turn over the food during thawing After turning over the food press the Start button again to restart operation The oven is not level The oven is installed on an uneven surface Make sure the oven is installed on flat stable surface There are sparks during cooking Metal containers are used during the oven...

Страница 45: ... oven cool and then remove the food from the heating elements There is a burning or plastic smell when using the oven Plastic or non heat resistant cookware is used Use glass cookware suitable for high temperatures Problem Cause Action There is a bad smell coming from inside the oven Food residue or plastic has melted and stuck to the interior Use the steam function and then wipe with a dry cloth ...

Страница 46: ...g enough time and restart the microwave oven C F2 The touch key is malfunction Press to try again C d0 Unplug the power cord for cooling enough time and clean the button Dust Water When appear same problem contact a local Samsung service centre Technical specifications SAMSUNG strives to improve its products at all times Both the design specifications and these user instructions are thus subject t...

Страница 47: ...ective 2014 53 EU and with the relevant statutory requirements in the UK The full text of the EU declaration of conformity and the UK declaration of conformtiy is available at the following internet address The official Declaration of conformity may be found at http www samsung com go to Support Search Product Support and enter the model name Frequency range Transmitter power Max Wi Fi 2412 2472 M...

Страница 48: ...SUNG 800 7267864 www samsung com it support CYPRUS 8009 4000 only from landline toll free www samsung com gr support GREECE 80111 SAMSUNG 80111 726 7864 only from land line 30 210 6897691 from mobile and land line www samsung com gr support LUXEMBURG 261 03 710 www samsung com be_fr support NETHERLANDS 088 90 90 100 www samsung com nl support NORWAY 21629099 www samsung com no support PORTUGAL 210...

Отзывы: