16 English
Be
for
e y
ou s
tar
t
Before you start
There are a couple of components that you should know before going directly to a
recipe.
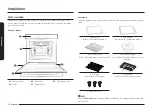
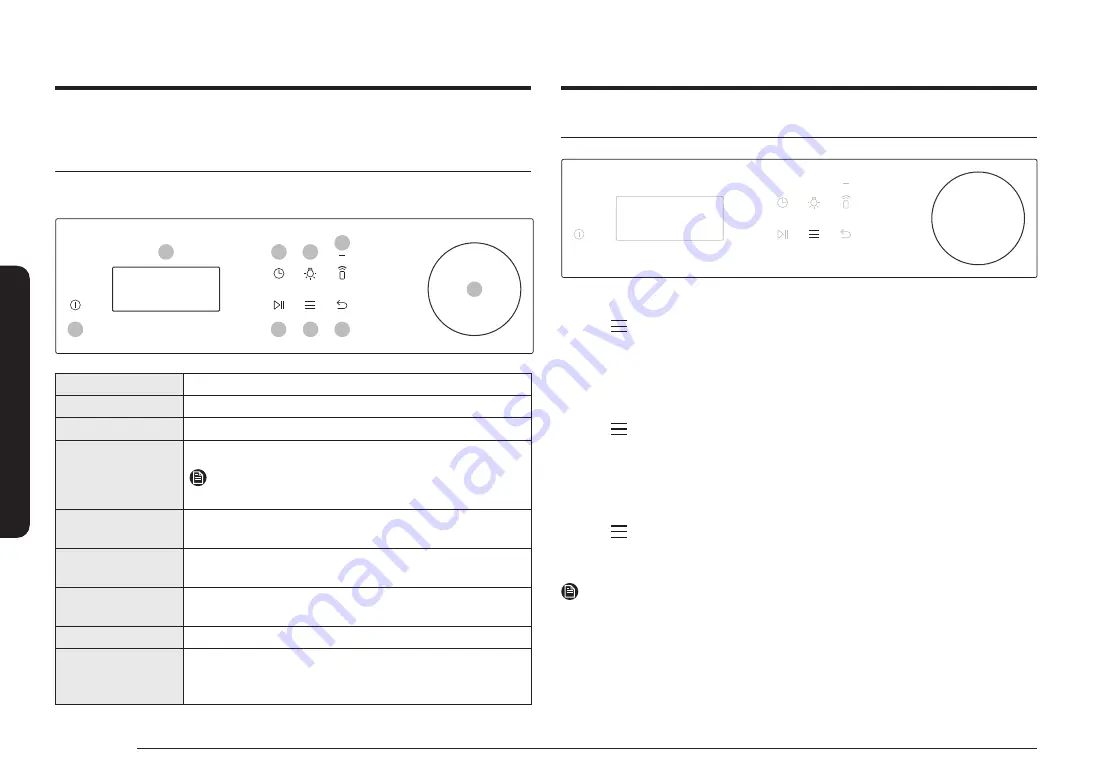
Control panel
The front panel comes in a wide range of materials and colours. For improved
quality, the actual appearance of the oven is subject to change without notice.
01
02
03
04
08
05
06
07
09
01
Screen
Displays the menu, information and cooking progress.
02
Cooking Time
Tap to set the cooking time.
03
Light
Tap to turn the oven light on or off.
04
Smart Control
Set the Smart Control function on or off.
NOTE
Easy Connection should be set prior to use this function.
05
Start / Stop
Tap to start or stop the oven operation.
Tap and hold 3 seconds during cooking to cancel.
06
Options
Tap to see the Options list.
Tap and hold 3 seconds to see the System settings.
07
Back
Tap to move to the previous screen or to cancel the
cooking.
08
Power
Tap to turn the screen on or off.
09
Dial Knob
Turn left and right to navigate through the menus and
lists. An item will be underlined to show you where you
are on the screen. Press to select the underlined item.
Clock
It is important to set the correct time to ensure correct automatic operations.
To set the clock time
1.
Tap
and press the
Dial
.
2.
Select
Set time
using the
Dial
, and then press the
Dial
.
3.
Set the current time using the
Dial
, and then press the
Dial
. (Hour, minute, and
AM/PM if necessary)
To set the date
1.
Tap
and press the
Dial
.
2.
Select
Set date
using the
Dial
, and then press the
Dial
.
3.
Set the current date using the
Dial
, and then press the
Dial
. (Month, day, and
year)
To set the time format
1.
Tap
and press the
Dial
.
2.
Select
Time format
using the
Dial
, and then press the
Dial
.
3.
Turn the
Dial
to select 12hr or 24hr, and then press the
Dial
.
NOTE
•
You cannot change the clock time while the oven is operating.
Содержание NQ5B5763DBK/U4
Страница 1: ...Microwave oven User manual NQ5B5763D ...

