background image

O

PERATION

13

O

PERATION

Setting Cooking Times & Power
Levels

Your microwave allows you to set up to three differ-
ent stages of cooking, each with its own time length
and power level.  The power level lets you control
the heating intensity from Warm (1) to High (0).

One-stage Cooking 

For simple one-stage cooking, you only need to set a
cooking time. The power level is automatically set at
High. If you want the power set at any other level,
you must set it using the 

Power Level

button.

1

Use the number buttons to set a cooking
time. You can set a time from one second
to 99 minutes, 99 seconds.  To set a time
over one minute, enter the seconds too.

For example, to set 20 minutes, enter
2, 0, 0, 0 .

If you want to set the power level to
something other than High, press the

Power Level

button, then use the number

buttons to enter a power level.  

Power Levels:

1 = warm

6 = simmer

2 = low

7 = medium high

3 = defrost

8 = reheat

4 = medium low

9 = sauté

5 = medium

0 = high

The display shows “PRESS START OR ENTER NEXT
STAGE COOKING TIME”

Press the

Start

button to begin cooking.

If you want to change the power level,
press 

Pause/Cancel 

before you press

Start

, and reenter all of the instructions.

Setting Cooking Times, continued

Some recipes require different stages of cooking at
different temperatures.  You can set multiple stages
of cooking with your microwave.

Multi-stage Cooking

Follow steps 1 and 2 in the “One-Stage
Cooking” section on this page.  The dis-
play shows “PRESS START OR ENTER
NEXT STAGE COOKING TIME.”

When entering more than one cooking stage, the

Power Level

button must be pressed before the

second cooking stage can be entered. 

To set the power level at High for a stage of cook-
ing, press the 

Power Level 

button twice.  

Use the 

Number

buttons to set a second

cooking time. 

Press the 

Power Level

button, then use

the number buttons to set the power
level of the second stage of cooking.
The display shows the power level you
have set and then “PRESS START OR
ENTER NEXT STAGE COOKING TIME.”

Press 

Start 

to begin cooking, or repeat

steps 2 and 3 to set a cooking time and
power level for a third stage of cooking.
When finished, press 

Start.

Содержание MS5796S

Страница 1: ...Microwave Oven Owner s Manual MS5796S MS5796W MS5797G MS7796W MS7797G CODE NO DE68 00279A 01 ...

Страница 2: ...manual Do not use corrosive chemicals or vapors in this appliance This type of oven is specifically designed to heat cook or dry food It is not designed for industrial or labo ratory use As with any appliance close supervision is nec essary when used by children To reduce risk of burns electric shock fire personal injury or expo sure to excessive microwave energy Read all safety instructions befor...

Страница 3: ...not cook without the glass tray in place on the oven floor Food will not cook properly without the tray Do not defrost frozen beverages in narrow necked bottles The containers can break Dishes and containers can become hot Handle with care Carefully remove container coverings directing steam away from hands and face Remove lids from baby food before heating After heating baby food stir well and te...

Страница 4: ...ou are not is properly grounded ords d is provided to reduce angled in or tripping over d sets or extension cords used if care is exercised d or extension cord is ating of the cord set or be at least as great as the appliance st be a grounding type 3 be plugged into a 3 slot be arranged so that it counter top or tabletop on by children or tripped ou use an extension cord icker and the blower crowa...

Страница 5: ...s 16 Cooking Utensils 16 Testing Utensils 16 Cooking Techniques 17 General Tips 17 Auto Sensor Cook 18 Utensils Cover For Sensor Cooking 18 Important 18 Cooking Guides 19 20 Sensor Cooking Guide 21 22 Sensor Reheat Guide 22 Sensor Recipes 23 24 Appendix 25 Troubleshooting Guide 25 Care and Cleaning 25 Warranty Information 26 Specifications 27 Guía de Consulta Rápida en Español 28 29 Manual Block W...

Страница 6: ...receipt to the vice Center For service on of the nearest service SAMSUNG 800 726 7864 AMSUNGSUPPORT COM 071100 Setting Up Your Microwave Oven 1 Place the oven on a flat sturdy surface and plug the cord into a grounded outlet Once plugged in the display on your oven will show Make sure there is adequate ventilation for your oven by leaving at least four inches of space behind above and to the side ...

Страница 7: ...CROWAVE OVEN ons p 10 ute of cooking at p 9 opular foods p 10 p 9 tion about the fea p 10 ng with reduced ounts and power p 14 p 14 ooking time p 15 p 11 defrosted p 13 than high p 8 p 8 orrect a mistake ...

Страница 8: ...to set the clock If the current time is 5 00 enter 5 0 0 3 Press Clock again A colon will appear indicating that the time is set If there is a power interruption you will need to reset the clock You can check the current time while cooking is in progress by pressing the Clock button Using the Pause Cancel Button The Pause Cancel button allows you to clear instructions you have entered It also allo...

Страница 9: ...t least five minutes between each bag to avoid overheating the glass tray If you want to adjust the cooking time you can use the MORE LESS button See page14 for more information Ifyouwanttocheckthecurrenttimewhilecooking isinprogress presstheCLOCKbutton Serving sizes available for each button POPCORN 3 0oz 3 5oz Ifyouwanttousethe1 75oz servingsize youcanusethe LESS keyoftheMORE LESS button FROZENB...

Страница 10: ...r Reheat Heating leftovers and precooked foods is easy with your new microwave By actually sensing the steam that escapes as food heat this feature auto matically adjusts the oven s heating time for vari ous types and amounts of precooked food All food should be precooked and at refrigerator tempera ture To use sensor reheating 1 Press SENSOR REHEAT The display will show REHEAT and the oven will s...

Страница 11: ... button The dis 0 2Kg if you have tric measure your food press the repeatedly This t by 0 5 lb incre e number buttons to he food directly the defrosting time ally Twice during will beep and the URN THE FOOD ncel button open the the food over n to resume r the Auto Defrosting ...

Страница 12: ...irst stage turn the chicken over and shield any warm portions with narrow strips of aluminum foil After the second stage again shield any warm portions with narrow strips of aluminum foil When defrost cycle is over let stand covered for 30 60 minutes in the refrigerator Type of food Chicken pieces Amount 0 5 3 0 lbs Procedure After each stage rearrange or remove any pieces of food that are nearly ...

Страница 13: ... multiple stages of cooking with your microwave Multi stage Cooking 1 Follow steps 1 and 2 in the One Stage Cooking section on this page The dis play shows PRESS START OR ENTER NEXT STAGE COOKING TIME When entering more than one cooking stage the Power Level button must be pressed before the second cooking stage can be entered To set the power level at High for a stage of cook ing press the Power ...

Страница 14: ...til the word in the display Adjusting the Volume The Sound button on the microwave allows you to adjust the volume of the microwave s chime sound The sound is initially set to its highest set ting To change the volume 1 Press the Sound button The display shows 0 OFF 1 LOW 2 MED 3 HIGH 2 Press 0 to turn the volume off 1 for low volume 2 for medium volume or 3 for high volume The display will show t...

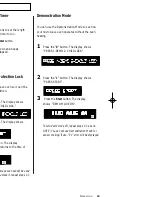
Страница 15: ...epeat steps 1 3 Demonstration Mode You can use the Demonstration Mode to see how your microwave oven operates without the oven heating 1 Press the 0 button The display shows PRESS 1 DEMO 2 CHILD LOCK 2 Press the 1 button The display shows PRESS START 3 Press the Start button The display shows DEMO MODE ON To turn demo mode off repeat steps 1 3 above NOTE You can not use Demonstration Mode for sens...

Страница 16: ...ommended Glass jars and bottles Regular glass is too thin to be used in a microwave and can shatter Paper bags These are a fire hazard except for popcorn bags that are designed for microwave use Styrofoam plates and cups These can melt and leave an unhealthy residue on food Plastic storage and food containers Containers such as margarine tubs can melt in the microwave Metal utensils These can dama...

Страница 17: ...to dry food to help it cook General Tips Dense foods such as potatoes take longer to heat than lighter foods Foods with a delicate texture should be heated at a low power level to avoid becoming tough Altitude and the type of cookware you are using can affect cooking time When using a new recipe use the minimum cooking time and check the food occasionally to prevent over cooking Foods with a non p...

Страница 18: ...ng or rotating should be ard the end of the Sensor time has started to count Important After installing the oven and plugging into an electrical outlet do not unplug the power cord The gas sensor needs time to stabilize in order to cook satisfactorily It its not advisable to use the auto sensor cook ing feature on a continuous cooking operation i e one cooking operation immediately after another I...

Страница 19: ...per Turn over when the cooking time is half up Cook until juices run clear and meat near the bone is no longer pink Let stand 5 10 min oultry in Your Microwave rowave safe roasting rack in a microwave safe dish x paper to prevent spattering hield bone tips thin meat areas or areas that start to overcook e in several places before letting the poultry stand the recommended time ng Time min lb for 11...

Страница 20: ... peas can be served immediately ggs in Your Microwave e shell and never warm hard cooked eggs in the shell they can explode eggs to keep them from bursting et they become tough if overcooked egetables in Your Microwave Seafood in Your Microwave s easily with a fork wave safe roasting rack in a microwave safe dish eam fish A lighter cover of wax paper or paper towel provides less steaming check it ...

Страница 21: ...ables in microwave safe ceramic glass or plastic dish and combine with 2 Tbs water For even cooking stir or turn vegetables according to instructions Let vegetables stand 3 minutes before serving Let oven cool for at least 5 minutes before using again 7 to 18 oz Remove packing from outer wrapping and follow box instructions for covering and standing Let oven cool for at least 5 minutes before usin...

Страница 22: ...paper If food is not as hot as you prefer after heating with SENSOR REHEAT continue heating using time and power Contents 3 4 oz meat poultry or fish up to 6 oz with bone 1 2 cup starch potatoes pasta rice etc 1 2 cup vegetables about 3 4 oz 1 to 4 servings Use only refrigerated foods Cover plate with lid or vented plastic wrap If food is not as hot as you prefer after heating with SENSOR REHEAT c...

Страница 23: ...1 2 quart casserole combine peas cel ery and water cover Microwave at HIGH 10 for 5 to 7 1 2 min utes or use Sensor Fresh Vegetable Stir in lettuce re cover 2 In small dish combine butter flour sugar salt and pepper Blend in cream Microwave at HIGH 10 for 1 to 2 minutes or use Sensor Reheat Stir until smooth 3 Drain vegetables Add sauce to vegetables toss to coat Stuffed Potatoes 4 servings 4 medi...

Страница 24: ...o and over vegetables Sprinkle eese and serve Franks And Beans Casserole 4 to 6 servings 1 2 cup chopped onions 2 tablespoons butter or margarine 1 pkg 12 16 oz frankfurters cut in quar ters 1 can 16 oz baked beans 1 can 15 16 oz cannellini white kidney beans drained 1 can 15 16 oz red kidney beans drained 1 3 cup brown sugar 1 4 cup catsup 1 teaspoon yellow mustard Salt pepper and garlic power to...

Страница 25: ...d spilled liquids can stick to the oven walls causing the oven to work less efficiently Wipe up spills immediately Use a damp cloth and mild soap Do not use harsh detergents or abrasives To help loosen baked on food particles or liq uids heat two cups of water add the juice of one lemon if you desire to keep the oven fresh in a four cup measuring glass at High power for five minutes or until boili...

Страница 26: ...w ning maintenance and environmental instructions that are covered and prescribed in the moval and reinstallation problems caused by pest infestations and overheating or over or turntable reduced magnetron power output related to normal aging SAMSUNG does not or free operation of the product ARRANTIES OTHER THAN THOSE LISTED AND DESCRIBED ABOVE AND NO WAR SS OR IMPLIED INCLUDING BUT NOT LIMITED TO...

Страница 27: ...defrost 10 power levels including defrost 99 minutes 99 seconds 99 minutes 99 seconds 120 VAC 60 Hz 120 VAC 60 Hz 1100 Watts 1100 Watts 2011 32 W X 1111 16 H X 1429 32 D 217 8 W X 125 16 H X 1621 32 D 137 32 W X 93 32 H X 1323 32 D 143 4 W X 917 32 H X 157 16 D 35 3 38 6 lbs 38 6 43 lbs ...

Страница 28: ...ndo el Tiempo de Concinar y Niveles de Potencia Cocinando en Etapas Múltiples Utilice los botones numéricos 0 9 para ajustar el tiempo de cocinar Oprima el botón POWER LEVEL y los botones numéricos 0 9 para seleccionar la potencia de cocinar si es diferente a 0 Utilice los botones numéricos 0 9 para ajustar el segundo tiempo de cocinar Oprima el botón POWER LEVEL y los botones numéricos 0 9 para s...

Страница 29: ...do da que desea cocinar epetidamente para pro e la porción Ajustando el Tiempo de Cocinado Si desea ajustar el tiempo de cocinado mientras el horno está en operación opri ma el botón MORE LESS repetidamente hasta llegar al tiempo deseado Usando el Cronómetro Oprima los botones numéricos 0 9 para ajustar el tiempo luego oprima el botón KITCHEN TIMER Utilizando el Seguro Para Evitar que Niños Utilic...

Страница 30: ...t be performed by a G Authorized Service Center Along with this Statement al Limited Warranty Statement and a dated Bill of Sale as Purchase must be presented to the Service Center tion to and from the Service Center is the responsibility of ser covered are limited only to manufacturing defects in workmanship and only those encountered in normal use uct but not limited to are any original specifie...

Страница 31: ...y 1 Press AUTO DEFROST 2 Enter weight of food by pressing AUTO DEFROST button repeatedly or using the number buttons 3 When prompted by oven display open oven door and turn food over Press START to resume defrosting cycle 1 Press SENSOR REHEAT 2 The display will show REHEAT and the oven will start automatically 1 Use number buttons to set cooking time 2 To set power level at other than HIGH press ...

Страница 32: ...Four à micro ondes Guide de l utilisateur MS5796W MS7796W MS5797G MS7797G MS5796S MS7796S ...

Страница 33: ...l Veuillez lire et respecter les PRÉCAUTIONS À PRENDRE POUR ÉVITER UNE EXPOSITION EXCESSIVE AUX MICRO ONDES à l intérieur de la page de couverture de ce manuel Cet appareil doit être mis à la terre Vous ne devez le raccorder qu à une prise bien mise à la terre Consultez DIRECTIVES DE MISE À LA TERRE à la page 4 Installez cet appareil conformément aux instructions d installation fournies Des produi...

Страница 34: ...vité aux fins d entreposage Ne laissez pas de produits en papier d usten siles de cuisson ou de nourriture dans le four lorsque vous ne l utilisez pas N essayez pas de préchauffer le four ou de le faire fonctionner lorsqu il est vide Ne cuisez pas sans le plateau en verre bien installé sur le sol sinon les aliments ne cuiront pas bien Ne décongelez pas les breuvages congelés dans des bouteilles à ...

Страница 35: ...urrait trébucher emmêler Des cordons plus s peuvent être utilisés si l on cautions Si vous utilisez un allonge 1 la valeur électrique nominale marquée sur le cordon ou la rallonge doit être aussi élevée que celle de l appareil 2 la rallonge doit être du type à 3 conducteurs avec mise à la terre et elle doit être branchée sur une prise à trois fentes 3 le cordon plus long doit être disposé de sorte...

Страница 36: ...on 16 Ustensiles de cuisson 16 Test de résistance aux micro ondes 16 Techniques de cuisson 17 Conseils généraux et précautions 17 Cuisson automatique avec senseur 18 Ustensils et couvercles pour la cuisson avec senseur 18 Conseils importants sur la cuisson avec senseur 18 Guides de cuisson 19 20 Guide de la cuisson instantanée 21 22 Guide du réchauffage avec senseur 22 Recettes 23 24 Annexe 25 Dép...

Страница 37: ...ces de garantie _____________________ _____________________ _____________________ _____________________ Installation de votre four à micro ondes 1 Installez le four sur une surface plate et stable et branchez le cordon à une prise murale mise à la terre Une fois branché l afficheur montrera le message Il est important de prévoir assez de ventilation pour le four Gardez au moins 4 pouces autour du ...

Страница 38: ... aide p 9 che pour afficher des nctionnement pas à pas douce p 10 che pour une cuisson puissance réduit une durée de cuisson ons p 14 che Plus Moins p 14 ou de diminuer la durée erie p 15 e che pour mettre le four ation automatique p 11 oids de l aliment à cuire de puissance p 13 niveau de puissance ssance maximal p 8 rloge à l heure Annulation p 8 che pour arrêter le four our corriger une erreur ...

Страница 39: ...ues pour régler l horloge Si l heure actuelle est 5h00 alors appuyez sur 5 0 0 3 Appuyez de nouveau sur la touche Clock Les deux points apparaîtront pour indi quer que l horloge est réglée Si une panne de courant survient il faut régler l horloge de nouveau Vous pouvez toujours vérifier quelle heure est il pendant la cuisson si vous appuyez sur la touche Clock Utilisation de la touche Pause Cancel...

Страница 40: ...oins cinq minutes avant de cuire le prochain sac ce qui per mettra au plateau en verre de se refroidir Lors de la cuisson de pommes de terre retournez les quand l af ficheur du four l indique Si vous désirez régler la durée de cuisson vous pouvez vous servir de la touche MORE LESS Consultez la page 14 pour des renseignements supplémentaires Si vous désirez afficher l heure actuelle pendant la cuis...

Страница 41: ...ffage avec senseur Votre nouveau four à micro ondes rend facile le réchauffage des restes et des aliments précuits En détectant la vapeur dégagée par les aliments ce four règle la durée de cuisson selon le type d ali ment précuit et son poids Tous les aliments devraient être précuits et à la température du réfrigérateur Pour utiliser la fonction de réchauffage avec senseur 1 Appuyez sur la touche ...

Страница 42: ... aliment es reprises sur la touche poids augmentera par usqu à 6 lb si vous avez de mesure métriques le poids par étapes de 0 2 si vous servir des touch our spécifier le poids de e la durée de ensuite commence la e l aliment Deux fois ngélation le four émettra affichera le message urriture ouche Pause Cancel t tournez l aliment ouche Start pour repren tion ide de la décongélation a page suivante ...

Страница 43: ...z la décongélation avec la poitrine vers le bas Après le premier stade retournez le poulet et pro tégez toute partie chaude util isant des bandes étroites d alu minium Après le deuxième stade protégez de nouveau toute partie chaude utilisant des ban des étroites d aluminium Une fois la décongélation completée lais sez reposer couvert pendant 30 à 60 minutes dans le réfrigérateur Aliment Poulet piè...

Страница 44: ...à différentes températures Pour réaliser ceci votre four à micro ondes vous permet de régler plusieurs stades de cuisson Cuisson à plusieurs stades 1 Suivez les étapes 1 et 2 dans la section Cuisson à un stade à la page précédente L afficheur indique d appuyer sur la touche Start ou d entrer la durée de cuisson du stade suivant Lors de la programmation de plus d un stade il faut appuyer sur la tou...

Страница 45: ... à ce que le mot he à l afficheur Réglage du niveau sonore Le bouton de réglage du niveau sonore du four à micro ondes vous permet de régler le volume de la sonnerie La sonnerie est réglée en usine au niveau plus élevé Si vous désirez abaisser le vol ume 1 Appuyez sur la touche Sound L afficheur montre les options 0 OFF 1 Bas 2 Moyen et 3 Élevé 2 Appuyez sur 0 pour assourdir le vol ume 1 pour un v...

Страница 46: ... four 1à 3 ci dessus Mode de démonstration Vous pouvez apprendre comment faire fonctionner votre four à micro ondes sans qu il chauffe en util isant le mode de démonstration 1 Appuyez sur la touche numérique 0 L afficheur montre le message Pressez 1 Demo 2 Verrou 2 Appuyez sur la touche numérique 1 L afficheur vous indique d appuyer sur la touche de mise en marche 3 Appuyez sur la touche Start L a...

Страница 47: ...tilisez que pour la cuis car les contenants de ces x peuvent être inflammables Non recommandé Pots en verre et bouteilles Le verre régulier est trop mince pour supporter le transfert de la chaleur des aliments et des boissons et peut éclater Sacs en papier Ils peuvent causer un incendie sauf pour les sacs de maïs à éclater conçus pour le four à micro ondes Assiettes et tasses en mousse de polystyr...

Страница 48: ...our l aider à cuire Conseils généraux et précautions La densité des aliments a un effet sur les durées de cuisson Les aliments denses tels que les pommes de terre prennent plus de temps à cuire que les aliments poreux et légers Les ali ments dont la texture est délicate cuisent mieux à une allure moins élevée pendant quelques secondes pour éviter qu ils durcissent Des facteurs tels que l altitude ...

Страница 49: ...s la fin de la durée a durée de cuisson est Conseils importants sur la cuisson avec senseur Après avoir installé et branché le four sur une prise murale ne le débranchez pas Le senseur à gaz a besoin de se stabiliser afin de pouvoir offrir des résultats satisfaisants L utilisation continuelle de toute fonction avec senseur est déconseillée Afin d assurer le bon fonctionnement du senseur installez ...

Страница 50: ... à ce que le jus qui coule soit transparent et jusqu à ce que la viande entourant les os ne soit plus rosée Laissez reposer de 5 à 10 min de la volaille sur la grille dans un plat à rôtir qui sont les deux à l épreuve des micro ondes avec du papier ciré pour prévenir les éclaboussures d os les parties minces ou les portions qui commencent à trop cuire avec des ban uminium ture à plusieurs endroits...

Страница 51: ...our éviter qu ils n explosent oeufs que jusqu à ce qu ils soient fermes Ils sont fragiles et peuvent devenir s sont trop cuits des légumes de fruits de mer t lorsqu il s effrite facilement avec une fourchette n sur une grille de rôtissage dans un plat à l épreuve des micro ondes cle bien fermé pour cuire le poisson à la vapeur On peut aussi le couvrir plus u papier ciré ou un essuie tout pour obte...

Страница 52: ... verre ou de plastique à l épreuve des micro ondes et ajoutez 2 cuillers à soupe d eau Pour une cuisson uniforme mélangez ou retournez les légumes selon les instructions Laissez reposer les légumes pendant 3 minutes avant de les servir Laissez refroidir le four pendant au moins 5 minutes avant de l utiliser de nouveau 7 à 18 oz Retirez le repas de son emballage extérieur et suivez les instructions...

Страница 53: ... de cuisson et le niveau de puissance Aliments 3 4 oz viande volaille ou poisson jusqu à 6 oz avec os 1 2 tasse de féculents pommes de terre pâtes riz etc 1 2 tasse de légumes environ 3 4 oz 1 à 4 portions Utilisez uniquement des aliments que vous venez de sortir du réfrigérateur Couvrez le plat avec une pellicule de plastique et repliez un coin Si l aliment n est pas réchauffé à votre goût util i...

Страница 54: ... élevée 10 pendant 5 à 7 1 2 minutes ou servez vous de la touche de cuis son instanta née avec senseur Fresh Vegetable Ajoutez du laitue recouvrez 2 Dans un petit plat mélangez le beurre la farine le sucre le sel et le poivre Ajoutez la crème et mélangez Faites cuire à la puissance maxi male de 10 pendant 1 à 2 minutes ou utilisez la touche de réchauffage automatique avec senseur Mélangez jusqu à ...

Страница 55: ...nt 30 sec Ajoutez l origan et le jus de les légumes Saupoudrez de an et servez Casserole de saucisses et de fèves 4 à 6 portions 1 2 tasse d oignons hachés 2 c à soupe de beurre ou margarine 1 emb 12 16 oz saucisses coupées en quartiers 1 boîte 16 oz de fèves cuites 1 boîte 15 16 oz de fèves cannellini blanch es égouttées 1 boîte 15 16 oz de fèves rouges égouttées 1 3 tasse de sucre brun 1 4 tasse...

Страница 56: ...ollent aux parois du four et absorberont les micro ondes ce qui réduira l efficacité du four Essuyez immédiatement Essuyez tous les renverse ments avec un linge humide et un détergent doux N utilisez pas de détergents puissants ou abrasifs Pour vous aider à dégager des particules de nourrit ure ou de liquides renversés collés dans le four faites chauffer 2 tasses d eau dans une tasse à mesurer de ...

Страница 57: ...t appareil dont le numéro de série a été modifié ou est manquant La présente garantie ne couvre que les appareils achetés et utilisés au Canada ée de l acheteur st garanti par SAMSUNG DA INC ci après appelé auts de matériaux ou de fabri iodes précisées ci dessous ana au comptoir ment que lors du défaut de ct de ce produit durant la e spécifiée si ce manque de résultat d une erreur de fab t matérie...

Страница 58: ...essus doivent ffectuées dans un centre de réparation agréé UNG En plus de la présente garantie la garantie e originale et une facture datée en tant que preuve at doivent être présentées au centre de réparation Le port de l appareil au et à partir du centre de réparation ure la responsabilité de l acheteur onditions couvertes ne sont limitées qu aux vices de iaux et de fabrication dans des conditio...

Страница 59: ...rises sur la touche de cuisson instantanée pour sélectionner la portion désirée 1 Appuyez sur la touche AUTO DEFROST 2 Spécifiez le poids de l aliment en appuyant plusieurs fois sur la touche AUTO DEFROST ou en utilisant les touches numériques 3 A l invite de l afficheur ouvrez le four et retournez les aliments Appuyez sur la touche START pour reprendre la décongélation 1 Appuyez sur la touche SEN...

Отзывы: