background image

GB

9

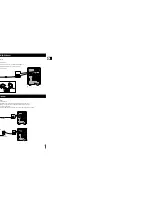
The AM aerial (for medium waves) can be:

Placed on a stable surface

Fixed to the wall (you must first remove the base)

The 

AM

aerial connector terminals are located on the rear of the system and are marked 

AM ANT

.

To avoid noise interference, check that the loudspeaker wires do not run close to the 
aerial wires.
Always keep them at least 2 inches (5 cm) away.

Connecting the AM (MW)Aerial

How to connect a COAXIAL TYPE aerial.

Connect a 75

antenna to the 

FM

antenna terminal. 

Plug the connector on the 

FM

aerial supplied into the coaxial socket (75

) marked 

FM

on the rear of the system.

Follow the instructions given on 

Page 15

to tune into a radio station, and determine the best position for the aerial.

If reception is poor, you may need to install an outdoor aerial.
To do so, connect an outdoor 

FM

aerial to the 

FM

socket on the rear of the system using a 75

coaxial cable (not supplied).

Connecting the FM Aerial

GB

8

The auxiliary input can be used to take advantage of the sound quality
of your micro component system when listening to other sources.

Examples: A 

television

A video disc player

A Hi-Fi stereo video cassette recorder

To connect to  the external source, the source must have an audio
output. In addition, you need an RCA connection cable.

Set the system to standby mode and disconnect it and the external
source from the main socket.

Connect the audio cable to the rear of the micro component system.

Connect the...

To the connector marked...

Red jack

R (right)

White jack

L (left)

For optimum sound quality, do not invert the right and left 
channels.

Plug the system back into the main socket and press (          ) to
switch it on.

Select the AUX source by pressing 

AUX

.

Result: 

AUX

is displayed.

Switch the external source on.

Example: You can watch a film and take advantage of stereo sound

provided that the original sound track is in stereo (as if you
were in a cinema).

Connecting to an External Source

1

2

3

4

5

Speaker Connection

Directions in Installing Speaker 

Installation in a place near heating apparatus, under direct lay of
light or with high humidity may cause performance degradation
of the speaker.

Do not install on the wall or on a high place of pole or other
unstable place to prevent any safety accident caused by falling
of the speaker.

Do not take the speaker apart from TV or computer monitor. 
The speaker near the TV or computer monitor may influence the
quality of the screen display.

(Right Speaker)

(Left Speaker)

(+)

(-)

(+)

(-)

Main Speaker Connection: Connect the Speaker cords (red/black) to
the Main Speaker jacks of System.

Red wire to the + terminals

Black wire to the – terminals

This unit can output CD digital sound signals through this jack. 
Use an optical cable to connect digital audio equipment. 
(DAT deck, MD recorder, etc.).
Remove the dust cap (1) from the CD DIGITAL OUT jack. 
Then, connect an optical cable plug to the CD DIGITAL OUT jack.

When the CD DIGITAL OUT jack is not being used.

Attach the supplied dust cap.

CD Digital Out Jack 

(1)

Содержание MM-UC8H

Страница 1: ......

Страница 2: ...Component System 7 the Power Supply 7 atteries 7 Source 8 8 8 rial 9 9 10 10 10 11 11 m and track 11 sic Passage on a CD 12 tracks at a time 13 s on the Compact Discs 13 13 13 Playback 14 rammed Tracks 14 15 B Device 16 16 16 17 17 17 on 18 18 he Radio Stations 19 19 19 20 on 20 on and PTY SEARCH function 21 22 back Mode 22 22 23 m 23 24 24 25 25 25 25 26 h off Automatically 26 26 27 onent System ...

Страница 3: ...Y RDS 20 SURROUND XT 21 REPEAT A B FM MONO STEREO 22 TIMER ON OFF 23 MUTE 24 REC PAUSE USB REC 25 TIMER CLOCK TAPE TUNER BAND MO ST TIMER CLOCK TIMERON OFF USB AUX PROGRAM SET SLEEP REC PAUSE REPEAT TUNING MODE VOLUME MUTE 10 REV MODE DISPLAY PTY RDS TUNING ALBUM CD MP3 CD SURROUNDXT COUNTERRESET USBREC 25 24 23 22 21 20 19 18 17 16 15 14 13 ...

Страница 4: ...e control batteries when you Purchase the micro component system Find that the remote control is no longer operating correctly When replacing the batteries use a new set of batteries and never mix alkaline and manganese batteries Place your thumb on the position marked on the battery compartment cover rear of the remote control and push the cover in the direction of the arrow Insert two AAA LR03 o...

Страница 5: ...e ches 5 cm away AM MW Aerial aerial antenna terminal al supplied into the coaxial socket 75Ω marked FM on the rear of the system age 15 to tune into a radio station and determine the best position for the aerial to install an outdoor aerial aerial to the FM socket on the rear of the system using a 75Ω coaxial cable not supplied M Aerial ...

Страница 6: ...3 CD 6 2 4 You can select the track you wish to listen to either when the com pact disc player is stopped or when a disc is playing To start playback at the beginning of the Press Next track once Current track once Previous track twice Track of your choice or the appropriate number of times Selecting a Track TAPE SLEEP REC PAUSE REPEAT TUNING MODE VOLUME 10 REV MODE DISPLAY PTY RDS TUNING ALBUM CD...

Страница 7: ...morized Your selected passages are repeated 3 times When you have finished the Repeat playback press REP A B REPEAT A B Function This function is not available during playback of an MP3 CD 1 2 3 4 TAPE BAND MO ST USB AUX PROGRAM SET SLEEP REC PAUSE REPEAT TUNING MODE VOLUME 10 REV MODE DISPLAY PTY RDS TUNING ALBUM CD MP3 CD SOUNDMODE COUNTERRESET USBREC TUNER BAND MO ST TIMER CLOCK TIMERON OFF USB...

Страница 8: ...al USB storage device only in safe removal mode USB REMOVE display ON OFF Otherwise internal file can be damaged Press the Stop button more than 3 times to get into the safe removal mode If you want to play files in the safe removal mode disconnect and reconnect the external USB storage device USB hub will not be recognized Directory names are shown up to 14 letters and MP3 file names up to 30 let...

Страница 9: ... TUNER BAND MO ST TIMER CLOCK TIMERON OFF USB AUX PROGRAM SET SLEEP REC PAUSE REV MODE DISPLAY PTY RDS CD MP3 CD SURROUNDXT COUNTERRESET USBREC ternal USB storage device to your player nction by using the USB AUX button ng the play e track only ctory only he entire directories PE TUNING MODE 10 TUNING ALBUM speed ternal USB storage device to your player nction by using the USB AUX button or slow d...

Страница 10: ... station to You can improve the quality of radio reception by Rotating the FM or AM MW aerial If reception from a specific FM radio station is poor press MO ST to switch from stereo mode to mono The quality of the sound will be improved You can listen to a stored radio station as follows Switch the system on by pressing Select the required frequency band by pressing TUNER BAND on the front panel S...

Страница 11: ... The PTY MODE is shown on the display press the PTY KEY once again to convert into PTY SEARCH MODE and auto search the station sequentially If the PTY MODE received in the course of auto search agrees with the selected PTY MODE the auto search stops and the PTY SEARCH is finished indication and tion 1 2 TAPE TUNER BAND MO ST TIMER CLOCK TIMERON OFF USB AUX PROGRAM SET SLEEP REC PAUSE REPEAT TUNING...

Страница 12: ...Recording a Radio Program assette in two different ways ronize the start of the recording of your choice ing k ton to open the cassette door close the cassette door safety tabs tton to open the CD door OPEN CLOSE button to close utton buttons to select the desired song C PAUSE button utton to start the recording from the REC PAUSE button during the play ording from the first part of the music utto...

Страница 13: ...select the level of high tones you desire 1 2 BASS function stresses low tones providing thudding sound effects Press MULTI JOG PUSH ENTER button until BASS 00 is displayed Turn MULTI JOG PUSH ENTER knob to select from BASS 07 to BASS 07 total 15 steps You can select the level of low tones you desire 1 2 BASS Level Function Mode ed with the function of Power urround XT onventional stereo sound wit...

Страница 14: ...ette cleaning agent to clean the Head 1 Rollers 2 Drive capstans 3 If you will not be using the remote control for a long time remove the batteries to prevent corrosion Although your system is very hard wearing it should not be used in an excessively dusty environment or subjected to shocks or extreme heat close to heating appliances or in direct sunlight etc If the unit emits an unpleasant odor w...

Страница 15: ...ctions without notice cations 40 dB 56 dB 2 55 dB 10 dB 0 8 R 20 Hz 20 KHz 1 dB 70 dB at 1 KHz with filter 0 2 at 1 KHz 45 dB Diameter 120 or 80 mm Thickness 1 2 mm 125 Hz 10 KHz 40 dB 33 dB 45 dB 2X35 Watts RMS total harmonic distortion 10 45 dB 72 dB 170 W x 232 H x 332 D mm GB 29 ...

Страница 16: ......

Отзывы: