18
You can store up to:
15 FM stations
15 MW stations
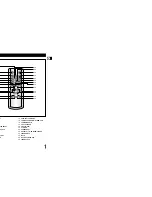
Switch the system on by pressing
( )
.
Select the required frequency band by pressing
TUNER/BAND
again on the front panel or
BAND
on the remote control.
Result: The appropriate indication is displayed:
FM
Frequency Modulation
MW
Medium Wave
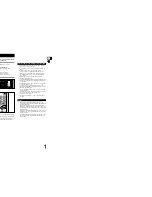
To search for a
Press TUNING MODE
station...
Manually
One or more times until
MANUAL
is displayed.
Automatically
One or more times until
AUTO
is
displayed.
PRESET function is explained in detail in the section
“Selecting a Stored Station” on.
Select the station to be stored by:
Pressing or buttons
on the front panel or
or
buttons on the remote control to increase or decrease the
frequency respectively.
To scroll through the frequencies faster when
searching manually, hold down the
or
buttons.
The automatic search procedure may stop on a
frequency that does not correspond to a radio station. If
this happens, use the manual search mode.
If you do not want to store the radio station found, revert to Step
4
and search for another station.
Otherwise:
a
Press
PROGRAM/SET
.
Result: The
PROG
is displayed for a few seconds.
b
Pressing or buttons
on the front panel or
or
buttons on the remote control to assign a program number .
c
Press
PROGRAM/SET
to store the radio station.
Result:
PROG
is no longer displayed and the station is stored.
To store any other radio frequencies required, repeat Steps
3
to
5
.
The PROGRAM function can be used to assign a new station to
an existing program number.
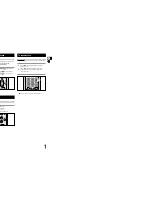
You can improve the quality of radio reception by:
Rotating the FM or AM(MW) aerial
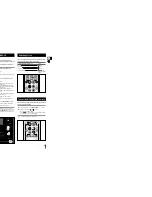
If reception from a specific FM radio station is poor, press
MO/ST.
to switch from stereo mode to mono. The quality of the sound will be
improved.
You can listen to a stored radio station as follows:
Switch the system on by pressing
( )
.
Select the required frequency band by pressing
TUNER/BAND
on
the front panel.
Select the radio station as follows.
To listen to ...
Press ...
Stored station
1. the
TUNING MODE
button until
“
PRESET
” is displayed.
2.
or
button to select the
required program.
Selecting a Stored Station
1
2
3
Improving Radio Reception
1
2
3
4
5
6
Searching for and Storing the Radio
Stations
TA P E
TUNER
BAND
MO/ST
TIMER/CLOCK
TIMER ON/OFF
USB/AUX
PROGRAM/SET
COUNTER RESET
SLEEP
REC./PAUSE
REPEAT
TUNING
MODE
VOLUME
+10
REV.MODE
DISPLAY
PTY
RDS
TUNING/
ALBUM
CD/MP3-CD
SOUND MODE
COUNTER RESET
USB REC.
2
3
5
5
4
3
2
1
3
TUNER
BAND
MO/ST
TIMER/CLOCK
TIMER ON/OFF
USB/AUX
PROGRAM/SET
SLEEP
REC./PAUSE
MUTE
REV.MODE
DISPLAY
PTY
RDS
CD/MP3-CD
SURROUND XT
COUNTER RESET
USB REC.
3
2
5
4
5
4
5
4
3
GB
GB
19
You can record the sounds of CD, MP3-CD, cassette tape, radio
broadcast and external device in the external USB storage device as
MP3 files.
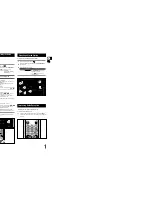
Before you begin!
Connect the external USB storage device to your player.
Select USB function by using the USB/AUX button.
Example:
When recording a CD
Connect the external USB storage device to your player.
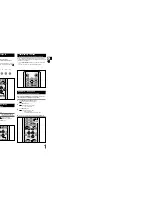
Press and hold the
USB REC.
button.
‘SS-REC’ directory is created in the external USB storage device
and the track is stored as MP3 file.
If SS-REC directory was already created, the MP3 file is saved in
the directory without creating another directory.
Press the
Play/Pause
(
√
/
»
) button to play the CD.
Press the
,
button to select a desired track.
If you want to stop, press the
USB REC.
button again.
USB Recording (Encoding) Specifications
CD/MP3-CD: 128Kbps, 44.1KHz
Cassette Tape and External Device: 64Kbps, 24KHz
Radio Broadcast:64kbps,16KHz
USB Recording (Encoding) Specifications
MPEG 1, 2, 2.5 Layer 3
32Kbps~320Kbps
32KHz, 44.1KHz, 48KHz
1
2
3
4
Recoding USB (Encoding)
MO/ST
USB/AUX
PROGRAM/SET
SLEEP
REC./PAUSE
REPEAT
TUNING
MODE
VOLUME
REV.MODE
DISPLAY
PTY
RDS
TUNING/
ALBUM
CD/MP3-CD
SURROUND XT
COUNTER RESET
USB REC.
3
2,4
Depending on the type of the external USB storage device, recorded
(encoded) file may not be played from the external USB storage device.
But, the file will be played if the file is saved in the player.
When recording on an external USB storage device, check to make
sure that there are more than 10MB of free space.
When it is less than 10MB, you will not make a recording.
If you try to make a record on connecting an external USB storage
device, the recording may fail. Wait a moment after connecting an
external USB device until SPACE CHK message disappears on the
screen because SPACE CHK message appears when the player is
reading information necessary for recording.
When you make a recording a cassette tape, radio or other external
device for a long time, a new file is created and saved at every
21 minutes.
If you make a recording for longer than 21 minutes, approximate 10
seconds will not be recorded to prepare the following recording operation.
1
To use Last Memory function
Before you begin!
Connect the external USB storage device to your player.
Select USB function by using the USB/AUX button.
Last Memory is a function that resumes playback from the last part of
the previous listening when the user reselects USB function again
after stopping the play, turning the power off or selecting another
function.
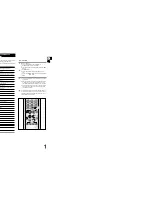
Press and hold the
PROGRAM/SET
button,
LAST ON and LAST OFF are repeatedly selected.
TUNER
BAND
MO/ST
TIMER/CLOCK
TIMER ON/OFF
USB/AUX
PROGRAM/SET
SLEEP
REC./PAUSE
REV.MODE
DISPLAY
PTY
RDS
CD/MP3 CD
SURROUND XT
COUNTER RESET
USB REC.


