background image

*

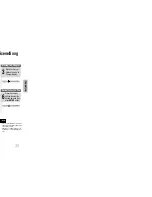
If the language you selected is
not recorded on the disc, menu
language will not change even
if you set it to your desired
language.

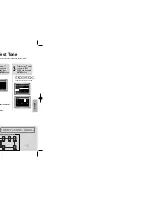
Selecting the 

OSD Language

Selecting the 

Audio Language

(recorded on the disc)

Setting the Language

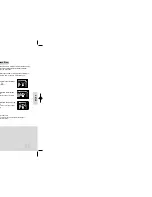
OSD language is set to English by default.

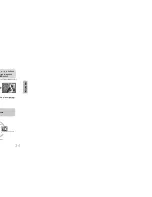
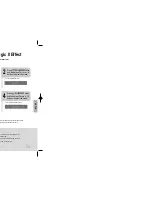
2

1

In stop mode,Press

MENU

button.

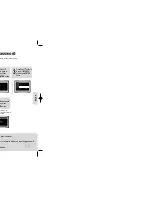
Press Cursor
button to move to
‘Setup’ and then
press 

ENTER

button.

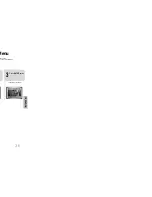
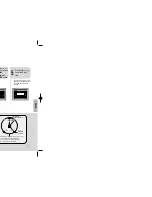
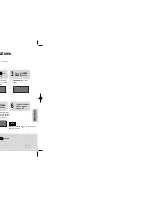
4

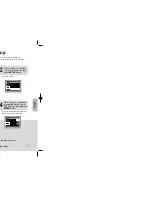
Once the setup is complete, if the language was
set to English, OSD will be displayed in English.

3

Selecting the 

Subtitle Language

(recorded on the disc)

Selecting the Disc Menu

Language (recorded on the disc)

Press 

ENTER

button.

5

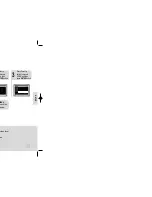
Press Cursor       ,
button to select the
desired item and then
press 

ENTER

button.

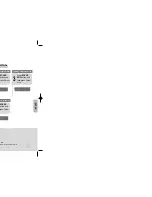
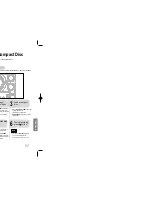
Press Cursor       ,
button to select the
desired language and then
press 

ENTER

button.

Press 

RETURN

button to return to the previous level.

Press 

MENU

button to exit the setup screen.

SETUP

37

38

• To select other language, select OTHER

and enter the language code of your
country. 
(See 38 page for language code of
countries)
AUDIO, SUB TITLE and DISC MENU
language can be selected. 

Note

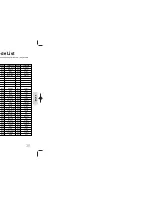
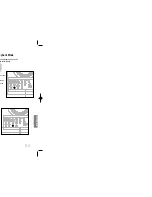
Language Code List

Enter the appropriate code number for the initial settings “Disc Audio”, “Disc Subtitle”
and/or “Disc Menu” (See page 35).

Code

Language

Code

Language

Code

Language

Code

Language

1027

Afar

1181

Frisian

1334

Latvian, Lettish

1506

Slovenian

1028

Abkhazian

1183

Irish

1345

Malagasy

1507

Samoan

1032

Afrikaans

1186

Scots Gaelic

1347

Maori

1508

Shona      

1039

Amharic

1194

Galician

1349

Macedonian

1509

Somali  

1044

Arabic

1196

Guarani

1350

Malayalam

1511

Albanian  

1045

Assamese

1203

Gujarati

1352

Mongolian

1512

Serbian   

1051

Aymara

1209

Hausa

1353

Moldavian

1513

Siswati  

1052

Azerbaijani

1217

Hindi

1356

Marathi

1514

Sesotho   

1053

Bashkir

1226

Croatian

1357

Malay

1515

Sundanese  

1057

Byelorussian

1229

Hungarian

1358

Maltese

1516

Swedish   

1059

Bulgarian

1233

Armenian

1363

Burmese

1517

Swahili            

1060

Bihari                 1235

Interlingua

1365

Nauru

1521

Tamil             

1069

Bislama               1239

Interlingue

1369

Nepali

1525

Tegulu   

1066

Bengali; Bangla        1245

Inupiak

1376

Dutch

1527

Tajik              

1067

Tibetan               1248

Indonesian

1379

Norwegian

1528

Thai              

1070

Breton                1253

Icelandic

1393

Occitan

1529

Tigrinya           

1079

Catalan               1254

Italian

1403

(Afan) Oromo

1531

Turkmen  

1093

Corsican              1257

Hebrew

1408

Oriya

1532

Tagalog   

1097

Czech

1261

Japanese

1417

Punjabi

1534

Setswana  

1103

Welsh

1269

Yiddish

1428

Polish

1535

Tonga     

1105

Danish

1283

Javanese

1435

Pashto, Pushto 

1538

Turkish            

1109

German

1287

Georgian

1436

Portuguese

1539

Tsonga   

1130

Bhutani

1297

Kazakh

1463

Quechua

1540

Tatar              

1142

Greek

1298

Greenlandic

1481

Rhaeto-Romance

1543

Twi               

1144

English

1299

Cambodian

1482

Kirundi

1557

Ukrainian   

1145

Esperanto

1300

Kannada

1483

Romanian

1564

Urdu              

1149

Spanish

1301

Korean

1489

Russian

1572

Uzbek   

1150

Estonian

1305

Kashmiri

1491

Kinyarwanda

1581

Vietnamese   

1151

Basque

1307

Kurdish

1495

Sanskrit

1587

Volapuk    

1157

Persian

1311

Kirghiz

1498

Sindhi

1613

Wolof   

1165

Finnish

1313

Latin                 1501

Sangro

1632

Xhosa   

1166

Fiji

1326

Lingala                1502

Serbo-Croatian

1665

Yoruba 

1171

Faeroese

1327

Laothian              1503

Singhalese

1684

Chinese   

1174

French

1332

Lithuanian             1505

Slovak 

1697

Zulu

36P~76P(DC995)-hao  2003.1.17  9:09 AM  Page 30

Содержание MAX-DC20900

Страница 1: ...T SYSTEM HOST MP3 CD CD R RW 900 ual MONO ST ...

Страница 2: ...pment which may become ontinuous use Switching off the DVD player to ayer completely from the power supply f time the unit to direct sunlight or other heat to overheating and malfunction of the unit ed with this product contain chemicals that the environment e of batteries in the general household trash PREPARATION ...

Страница 3: ...4 1 2 3 5 9 11 12 13 14 15 16 18 19 21 23 24 25 26 27 29 30 31 32 33 35 36 37 38 39 41 42 43 45 46 47 48 49 51 53 55 56 57 58 59 62 64 65 66 67 68 69 70 71 72 73 75 76 77 78 PREPARATION ...

Страница 4: ...ck eo Output Connector V is equipped with an S Video input or S VIDEO IN connect it to the S Video output jack Output Connector t the TV s video input jacks VIDEO IN to EO OUT connector ponent Video Output Connectors ct a TV with component vide input jacks to cks hannel Speaker Output nals ge Selector Option ...

Страница 5: ...8 Replace the battery cover 3 ells arity to and to may differ in voltage PREPARATION ...

Страница 6: ...10 L SL SW Subwoofer Rear Speaker L Front Speaker L CONNECTIONS ...

Страница 7: ...ve Scan and Interlace method scans one full frame of the screen line by line at one time as opposed to the ss by which a video image is s method is desirable for dealing an FULL FRAME canning ts Y Pr Pb that support onent inputs i e non progressive work and PAL video format of your TV rol or REC PAUSE on the Main Unit CONNECTIONS 12 ...

Страница 8: ...poor e g distance from ansmitter too great walls blocking the dio waves etc install an outdoor aerial e unit so that the unit can be operated upply cool air to the unit your safety ntilation the temperature inside the unit ooling fan or ventilation holes are e the unit and fire may result ntenna connection he AM loop antenna supplied and terminals n is poor connect an outdoor yl covered wire to th...

Страница 9: ...R button is pressed playback mes from the stop position This function works with DVDs ssed twice STOP is displayed and if Y PAUSE button is pressed playback s from the beginning top playback s STOP during playback sponding DISC 1 2 3 button on the front panel or he required disc indicator flashes tarting with the one selected ected when Disc Skip is pushed c changer en listening to the radio or to...

Страница 10: ... digit key kaging for details and the key number dio disc that has a ber input screen DVD Audio disc containing still images select images depending on how the unplug the player you will need to re enter es e button on the DVD AUDIO DVD AUDIO OPERATION ...

Страница 11: ...o and Audio ll versions of DivX later than 3 11 including rted In addition XviD is supported nd V7 formats are possible 20X480 and may support up to 720X576 MP3s encoded at bitrates from 80kbps to 8kbps to 384kbps and WMAs from 56kbps d s this unit will support Text format SMI LE ON and SUBTITLE OFF 20 ...

Страница 12: ... B2 0 or USB1 1 ect a USB1 1 device e USB HDD for proper operation ot USB card reader pported ay experience problems on Pixel Sampling Frequency 640 480 44 1kHz 44 1kHz CD2 0 320 480 44 1KHz 3 V7 720 480 44 1KHz 48KHz ported X5 1 Xvid 720 480 44 1KHz 48KHz OPERATION AT file system is supported l USB devices P78 ...

Страница 13: ...ck follows ack VCD DivX 24 Reverse slow playback does not work with VCDs and DivX Note During fast playback of a CD or MP3 CD sound is heard only at 2x speed and not at 4x 8x and 32x speeds No sound is heard during slow playback and step motion playback OPERATION ...

Страница 14: ...ngles 2 Press Cursor button to move to ANGLE display the angle changes as follows buttons or numeric buttons ed angle s only with discs on which multiple angles 26 OPERATION ...

Страница 15: ...select Repeat Play elect Repeat Play in 2 Press Cursor button to move to REPEAT PLAYBACK display 4 Press ENTER button peat Playback Mode rmation Screen 28 OPERATION ...

Страница 16: ...splayed image n DVD VCD Each time the button is pressed the zoom level changes as follows 3 Press ENTER button e format orizontal to vertical ratio 30 OPERATION ...

Страница 17: ...utton 01 05 028 040 1 30 00 1 1 Moving to a Specific Time 3 Press Cursor buttons to move to Chapter display Moving to a Chapter You can press on the remote control to move directly to the desired title chapter or track Depending on the disc you may not be able to move to the selected title or time Note 32 OPERATION ...

Страница 18: ...cally zontally button Rotate 90 Clockwise buttons sired image and ER button d for 5 seconds before moving to ows press back 34 OPERATION ...

Страница 19: ...Menu each movie all or may work differently 3 Press ENTER button The title menu appears 36 OPERATION ...

Страница 20: ...5 Nauru 1521 Tamil 1369 Nepali 1525 Tegulu 1376 Dutch 1527 Tajik 1379 Norwegian 1528 Thai 1393 Occitan 1529 Tigrinya 1403 Afan Oromo 1531 Turkmen 1408 Oriya 1532 Tagalog 1417 Punjabi 1534 Setswana 1428 Polish 1535 Tonga 1435 Pashto Pushto 1538 Turkish 1436 Portuguese 1539 Tsonga 1463 Quechua 1540 Tatar 1481 Rhaeto Romance 1543 Twi 1482 Kirundi 1557 Ukrainian 1483 Romanian 1564 Urdu 1489 Russian 15...

Страница 21: ...r 4 3LB or 4 3PS option according to Select 16 9 if you have a wide screen TV picture in the full screen n TV n aspect picture in the letter box V op and bottom of the screen picture in the pan scan V n of the screen only with the f t in wide screen age formats they will look different depending on ect ratio setting reen Size SETUP ...

Страница 22: ...d then ENTER button assword a new confirm new password complete 3 Press Cursor button to move to PASSWORD and then press ENTER button the password en press R button assword rental rating level setting SETUP error numeric when you inputting password ...

Страница 23: ...SETUP 3 rsor move to nd then TER button Press Cursor button to move to LOGO and then press ENTER button MENU o exit the creen vious level en 44 ...

Страница 24: ...move to Audio and then press ENTER button 4 You can set the audio delay time between 0 ms and 300 ms Set it to the optimal status Press Cursor buttons to select the Delay Time of AV SYNC and then press the ENTER button f it is connected with digital TV udio to optimal status to fit the video ...

Страница 25: ... Speaker L RS Rear Speaker R revious level een 48 SETUP Cursor o move to and then NTER button 3 Press Cursor button to move to TEST TONE and then press ENTER button The test tone will be sent to L C R SR SL SW in that order If the ENTER button is pressed again at this time the test tone will stop ulti Channel Pro Logic Mode Start ...

Страница 26: ... SPEAKER Ideal CENTER SPEAKER placement t is desirable to place all speakers within this circle Ideal SPEAKER placement SETUP You can set the delay time for C between 00 and 05mSEC and for LS and RS between 00 and 15mSEC 5 sor ons to move red nd then TER button Press Cursor to set the Delay time ...

Страница 27: ... Balance 3 Adjusting Center Speaker Level oofer Speaker Level 52 SOUND button and press Cursor Press SOUND EDIT button and then press Cursor SOUND button and ress Cursor SETUP DS RT ST TUNED kHz MHz TITLE CHAP PRGM RDS RT ST TUNED kHz MHz RDS RT ST TUNED kHz ...

Страница 28: ...54 4 Press Cursor to adjust the DRC e previous level screen SETUP The Cursor button is pressed the greater the effect and the Cursor button is pressed the smaller the effect ...

Страница 29: ...ear or more channels multi channel mode will be Pro Logic II button does not work You can select either 0 or 1 Press PL II EFFECT button and then press Cursor buttons to select the mode CMX MPEG TITLE PBC CHAP PRGM RDS RT TA TUNED kHz MHz ST DSP CMX MPEG TITLE PBC CHAP PRGM RDS RT TA TUNED kHz MHz ST Press PL II EFFECT button and then press Cursor buttons to select the mode SETUP ...

Страница 30: ...RY button before pears from the display pears from the display d in memory Press the TUNER MEMORY button TUNER button 6 To preset another station repeat steps 2 to 5 kHz MHz kHz PROGRAM MHz kHz MHz 15AM stations RADIO OPERATION When listening AM SW Dolby Pro Logic II button does not work Note ...

Страница 31: ...60 en stops stops il you TAPE DECK sette playback modes which te automatically ayback Mode ...

Страница 32: ... CD and press the OPEN CLOSE button to close the CD door ECT button door insert a lose the cassette with the safety 3 ank n Tape 2 s the button to om the first SYNCHRO ayback of CD to om the first part layed Load a compact disc SYNCHRO 6 To stop recording press button Note You can use CD SYNCHRO button only in CD Playback Mode 62 In Recoding DPL II doesn t work ...

Страница 33: ...S Radio Program oice t has no effect on the recording 3 blank in Deck 2 in red and Select the TUNER function by pressing TUNER BAND EC PAUSE 6 To stop recording press button 64 Note In Recoding DPL II doesn t work ...

Страница 34: ...layer is in standby utomatically as shown by the TIMER indication on the display you must cancel it is displayed again To resume the timer press TIMER ON OFF again ER on Turn the VOLUME knob to adjust the sub woofer volume 2 ofer Level Function oofer level with the SUB WOOFER OUT ...

Страница 35: ... timer setting press SLEEP button tton is pressed the selection changes as follows N 45 MIN 30 MIN 15 MIN OFF EEP button p Timer Function the time that the DVD player will shut itself off sleep timer press SLEEP button until on the display in the display press the button again Function when answering a doorbell or telephone call TE button kHz MHz kHz MHz ...

Страница 36: ...70 MISCELLANEOUS el USER EQ Function ing thudding sound effects You can select the level of low tones you desire 2 n ding thudding sound effects You can select the level of high tones you desire 2 ...

Страница 37: ...y or cause breaks in o scratch discs when handling them m if warm air comes into contact with cold parts condensation forms inside the player the player tly If this occurs remove the disc and let the hours with the power on aut p remove the safety tab on the upper edge of the been broken simply cover the opening with adhesive s put it back in its case sunlight where they will not be exposed to hig...

Страница 38: ... longer than 5 seconds INITIAL appears on the ettings will return to the default values ER button function will erase all stored settings nless necessary wer and hold the STOP button on the main unit for econds function will erase all stored settings nless necessary connected properly input signal is weak install an external FM rea with good reception Check Remedy 6 9 DVDs in 16 9 WIDE mode 4 3 LE...

Страница 39: ...al audio CD version 2 0 Selected scenes or information can splayed on the TV monitor D discs are encoded with a region number DVD disc does not correspond to the region number r cannot play the disc bottom of the screen A DVD disc can contain up to d on DVD discs When a disc contains two or more mbered as Title 1 Title 2 etc d to the tracks which are recorded on video and cific tracks to be locate...

Страница 40: ... Camera Not recognize in PC DSC F828 Sony Digital Camera DSC P73 Sony Digital Camera DSC T1 Sony Digital Camera DSC F88 Sony Digital Camera DSC M1 Sony Digital Camera DSC W1 Sony Digital Camera DSC T3 Sony Digital Camera Sora PDR T30 Toshiba Digital Camera Coolpix 5900 Nikon Digital Camera Coolpix S1 Nikon Digital Camera Coolpix 7600 Nikon Digital Camera DMC FX7 Panasonic Digital Camera DMC LS1 Pa...

Страница 41: ...MISCELLANEOUS 80 ...

Отзывы: