background image

3-8

Samsung Electronics

3. New  Functions

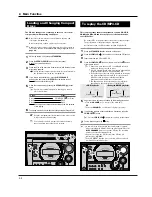
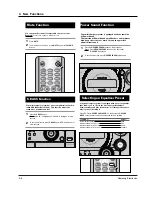
Your mini-compact system is equipped with the function
of Power Sound .
The function of Power Sound amplifies bass and improves
high key or bass twice as much for you to appreciate
powerful real sound.

Press the 

P(POWER SOUND)

button on the front panel.

Result: Press 

P(POWER SOUND)

button on the front panel,

P

,

SOUND

” is displayed.

To cancel this function, press 

P(POWER SOUND)

button again .

1

2

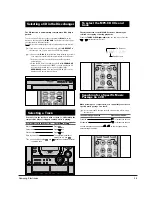
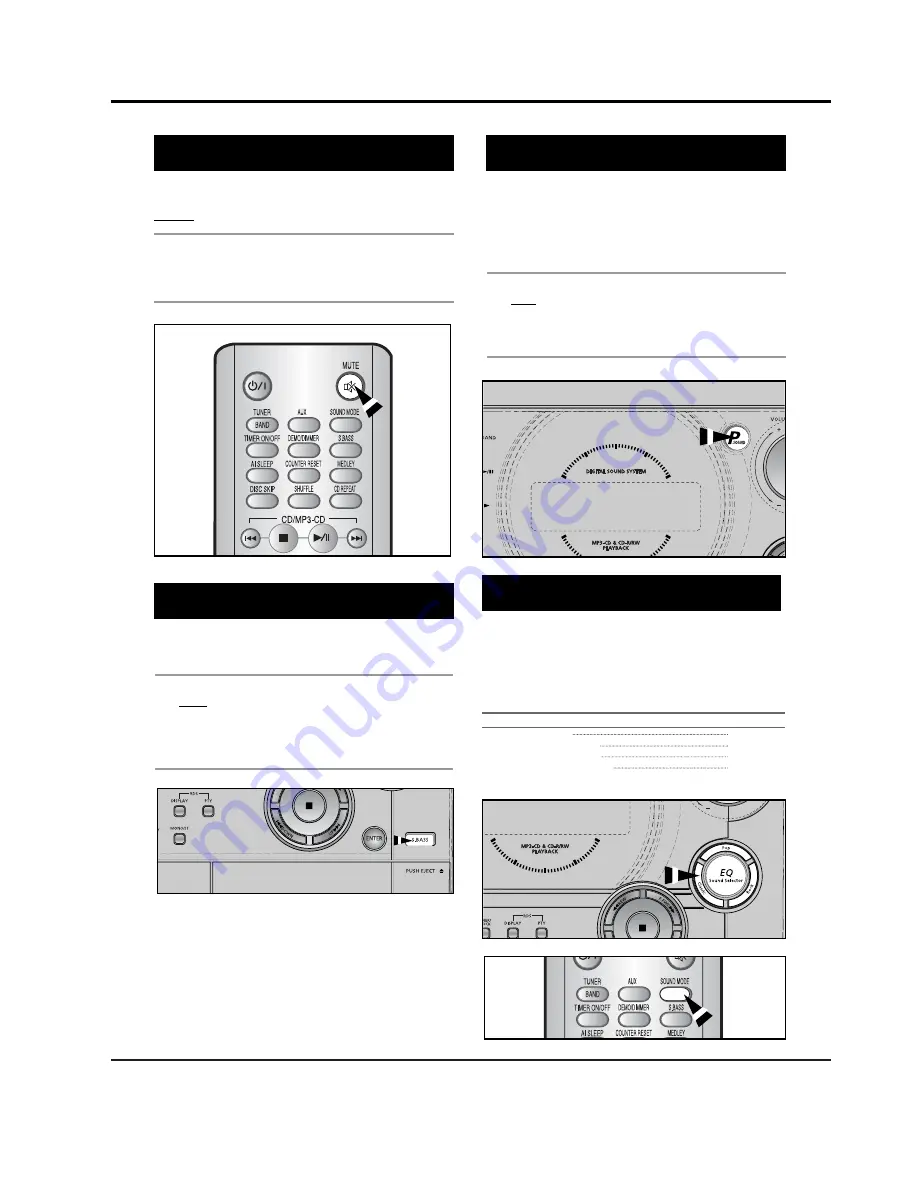
You can turn the sound off temporarily on your system.
Example: 

You wish to answer a telephone call.

Press 

MUTE

.

To switch the sound back on , press 

MUTE

again or the 

VOLUME

buttons.

Mute Function

2

1

Power Sound Function

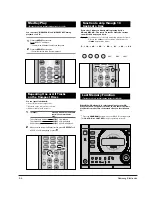
Selecting an Equalizer Preset

Your mini-compact system is equipped with a preset equalizer
that allows you to choose the most appropriate balance
between treble and bass frequencies, according to the type of
music you are listening to.

Press EQ Preset (

POP/ROCK/CLASSIC

) on the front panel or 

SOUND

MODE

on the remote control until the required option is selected.

To obtain a...

Select...

Normal balance (linear)

PASS

Balance suitable for pop music

POP

Balance suitable for rock music

ROCK

Balance suitable for classic music

CLASSIC

Y

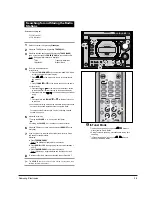
our mini-compact system has a bass amplification function

called SBS (Super Bass Sound). This function makes the
sound more powerful and real.

Press the 

S.BASS

button.

Result:

S. BASS

is displayed and “SBS ON” is displayed  for a few

seconds.

To cancel this function, press 

S.BASS

again, “

OFF

” is displayed  for

a few seconds.

1

2

S.BASS Function             

Содержание MAX-C550

Страница 1: ...3 CD CHANGER MINI COMPONENT SYSTEM BASIC MODEL MAX C570 MAX C550 SERVICEManual MINI COMPONENT SYSTEM Features COUNT RESET MP3 CD CD R RW Playback Tuner Tape Deck Confidential MODEL MAX C550 MAX C570 ...

Страница 2: ... Samsung Electronics Co Ltd JUNE 2005 Printed in Korea Code no AH68 01771D ELECTRONICS ...

Страница 3: ...ns 3 3 Ch4 Adjustments Cassette Deck 4 1 Ch5 How to disassemble How to disassemble 5 1 Ch6 Troubleshooting 1 No Power 6 1 Ch7 Exploded View Parts List 1 Total Exploded View 7 1 2 Parts List 7 5 Ch8 Electrical Parts List Electrical Parts List 8 1 Ch9 Block Diagram Block Diagram 9 1 Ch10 Wiring Diagram Wiring Diagram 10 1 Ch11 PCB Diagram 1 MAIN 11 1 2 FRONT 11 2 Ch12 Schematic Diagram 1 MAIN 12 1 2...

Страница 4: ...rrent for Appliances and Underwriters Laboratories UL Publication UL1410 59 7 With the unit completely reassembled plug the AC line cord directly into a 120V AC outlet With the unit s AC switch first in the ON position and then OFF measure the current between a known earth ground metal water pipe etc and all exposed metal parts Examples Handle brackets metal cabinets screwheads and control shafts ...

Страница 5: ...nplug the unit s AC power cord from the AC power source before attempting to a Remove or reinstall any component or assembly b Disconnect an electrical plug or connector c Connect a test component in parallel with an electrolytic capacitor 3 Some components are raised above the printed circuit board for safety An insulation tube or tape is sometimes used The internal wiring may be clamped to preve...

Страница 6: ...ready to install it Most replacement ESDs are packaged with leads that are electrically shorted together by conductive foam aluminum foil or other conductive materials 8 Immediately before removing the protective material from the leads of a replacement ESD touch the protective material to the chassis or circuit assembly into which the device will be installed 9 Minimize body motions when handing ...

Страница 7: ...d plane which is grounded 3 The repair technician must wear a wrist strap which is grounded to the copper sheet 4 To remove the Optical Pickup block Place the set on the conductive sheet and momentarily touch the conductive sheet with both hands While working do not allow any electrostatic sources such as clothes to touch the unit 5 Ground the Short Terminal located on the PCB inside the Pickup As...

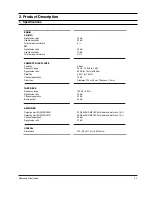
Страница 8: ...Signal noise ratio 90 dB at 1 KHz with filter Distortion 0 05 at 1 KHz Channel separation 75 dB Disc sizes Diameter 120 or 80 mm Thickness 1 2 mm TAPE DECK Frequency range 125 Hz 8 KHz Signal noise ratio 40 dB Channel separation 35 dB Erasing effect 50 dB AMPLIFIER Output power 6 Ω MAX C550 30 Watts CH RMS IEC total harmonic distortion 10 Output power 6 Ω MAX C570 50 Watts CH RMS IEC total harmoni...

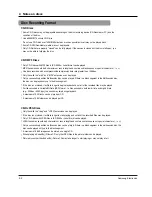
Страница 9: ...disc can be played only up to the blank segment A maximum of 9 999 images can be stored on a single CD When playing a Kodak Fuji Picture CD only the JPEG files in the picture folder can be played Picture discs other than Kodak Fuji Picture CDs may take longer to start playing or may not play at all Disc Recording Format CD R MP3 Discs Only CD R discs with MP3 files in ISO 9660 or Joliet format can...

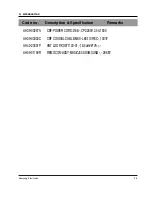
Страница 10: ...es AH39 00257A CBF POWER CORD Z 88 CP2 250V 2 5A 1830 AH39 00320C CBF COAXIAL CABLE MAX L68 110REC 1007 AH42 20001P ANT LOOP KS971120 01 18 5uH 10 AH59 01159R REMOCON ASSY MAX ZJ550 SAMSUNG 28KEY Code no Description Specification Remarks ...

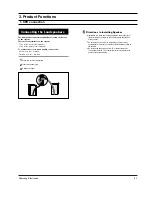
Страница 11: ...g of the speaker Do not take the speaker apart from TV or computer monitor The speaker near the TV or computer monitor may influence the quality of the screen display The loudspeaker connector terminals are located on the rear of the system There are four terminals on the system Two for the left speaker marked L Two for the right speaker marked R To achieve the correct sound quality connect the Re...

Страница 12: ...pes like heart or octagon shapes The performance of the player may be degraded At least more than one CD should be inserted for playbacks Press the STANDBY ON button to switch on the power Press the CD MP3 CD of the main unit to select the CD function Insert more than one CD or a MP3 CD Press the CD MP3 CD button of the main unit or the button of the remote control If there are more than one CD or...

Страница 13: ...listen to either when the compact disc player is stopped or when a disc is playing To start playback at the beginning of the Press the and Next track Press once Current track Press once Previous track Press twice Track of your choice The appropriate number of pressing the and You can also use the and buttons on the remote control to select a track Selecting a CD in the Disc changer Selecting a Tra...

Страница 14: ...ayback of MP3 CD COUNT RESET DECK 1 2 TUNING MODE 10 You can select MEDLEY ON and MEDLEY OFF during playback of a CD Press the MEDLEY button once Result MEDLEY is displayed The interval time between the tracks can be shorten Press the MEDLEY button again Cancel this function return to normal playback Medley Play This function is only available during playback of a CD You can repeat indefinitely A ...

Страница 15: ...op at the desired station because the signal is weak For details on the Preset function see the Selecting a Stored Station on page 15 Adjust the volume by Turning the VOLUME or knob on the front panel or Pressing the VOLUME or buttons on the remote control Select the FM stereo or mono mode by pressing MONO ST on the front panel If you do not want to store the radio station found revert to Step 4 a...

Страница 16: ...ack Result The track is recorded on the cassette To stop recording press 1 1 2 3 4 5 6 7 2 3 4 5 6 7 8 9 COUNT RESET 7 6 COUNT RESET 1 3 6 8 9 7 CD Synchro Record Feature This function is not available during playback of an MP3 CD Recording a Compact Disc You can record a radio program of your choice You can only record on cassettes in Deck 2 You do not need to adjust the volume as it has no effec...

Страница 17: ... XX is displayed where XX corresponds to the vol ume already set Press DOWN and UP to adjust the volume level and press ENTER Result The source to be selected is displayed pressing the buttons to select the source to be played when the system switches on If you select You must also TAPE cassette Insert a recorded cassette in one of the decks before setting the system to stand by TUNER radio a Pres...

Страница 18: ...ting an Equalizer Preset Your mini compact system is equipped with a preset equalizer that allows you to choose the most appropriate balance between treble and bass frequencies according to the type of music you are listening to Press EQ Preset POP ROCK CLASSIC on the front panel or SOUND MODE on the remote control until the required option is selected To obtain a Select Normal balance linear PASS...

Страница 19: ...ontrol 1 SPK OUT connected to the frequency counter Fixed 3KHz Remark Standard To Adjust Pre Setup Item Step Pre Setup Condition 1 Deck MTT 111 2 Press PLAY SW button SPK OUT Figure 1 7 In Out MAIN PCB Oscilloscope 1 range Figure 1 8 Audio OSC SET MAIN PCB Oscilloscope AUX IN VTVM IN SPK OUT IN OUT TP Figure 1 6 Recording Play head AZIMUTH control screw RVS Play AZIMUTH control screw FWD Play MAIN...

Страница 20: ...em Step Pre Setup Condition AfterputtingMTT 114NintoDeck1 PressFWDPLAY button 1 2 T urn thecontrol screwtoasshownin Figure1 6 MAX OUTPUT and same phase both channels CHECK TO 7mV 0 5mV Remark Standard To Adjust Pre Setup Item Step Pre Setup Condition AfterputtingMTT 5512intoDeck2 1 PressRECPLAYbutton 2 T APEPCBJCW3 connected toVTVM Recording Bias Voltage 2 To Adjust PlayBack Level REC 2 Adjust Dec...

Страница 21: ...Samsung Electronics 5 1 5 How to disassemble ...

Страница 22: ...5 2 Samsung Electronics ...

Страница 23: ...Samsung Electronics 5 3 ...

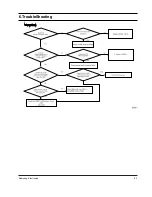
Страница 24: ...Samsung Electronics 6 1 6 TroubleShooting ...

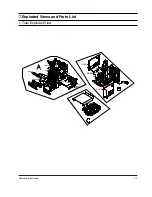
Страница 25: ...ist 1 Total Exploded View AC010 AB000 AL002 AL002 AK370 AK410 AK140 AS292 AD005 AB100 AS291 AD005 AL155 AK270 AK125 AK230 AK170 AK290 AK250 AF020 AH090 AH090 AD410 AD420 AC100 AK420 AW140 AD480 AS400 AS390 AH020 AH060 AC080 AC020 AC070 AC050 AB200 AC060 ...

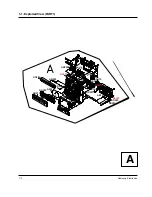
Страница 26: ...Electronics 1 1 Exploded View PART1 A AC010 AB000 AL002 AL002 AK370 AK410 AK140 AS292 AD005 AB100 AS291 AD005 AL155 AK270 AK125 AK230 AK170 AK290 AK250 AF020 AH090 AH090 AD410 AD420 AC100 AK420 AW140 AD480 AS AC060 ...

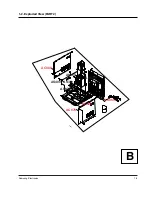
Страница 27: ...Samsung Electronics 7 3 1 2 Exploded View PART2 B AL002 AS292 AD005 AS400 AS390 AH020 AH060 AC080 AC020 AC070 AC050 AB200 AC060 ...

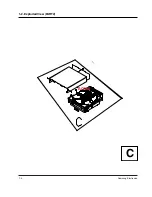
Страница 28: ...7 4 Samsung Electronics 1 2 Exploded View PART2 C AS292 AC080 AC070 ...

Страница 29: ...FD MAX C550 570 PC 1 AH330 AH61 01513A HOLDER P SOUND MAX ZJ650 ABS GRAY 1 AK125 AH64 03599B KNOB EQ MAX C550 570 ABS 2 AK140 AH64 03602D KNOB ENTER MAX C570 1 AK170 AH64 03595B KNOB FUNCTION MAX C550 1 AK230 AH64 03596C KNOB MAIN MAX C550 2 AK250 AH64 02289B KNOB MIC MAX S530 ABS L GRAY SI 1 AK270 AH64 03597B KNOB OPEN MAX C550 1 AK290 AH64 03598B KNOB POWER MAX C550 1 AK370 AH64 03600B KNOB STOP...

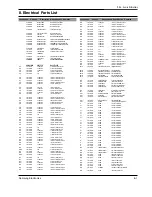
Страница 30: ... 000203 C CER CHIP 100nF 10 16V X7R TP 2012 2mm C219 2401 000240 C AL 100uF 20 10V GP TP 5x11 5 C220 2203 000203 C CER CHIP 100nF 10 16V X7R TP 2012 2mm C221 2401 000240 C AL 100uF 20 10V GP TP 5x11 5 C222 2203 000683 C CER CHIP 0 027nF 5 50V C0G 2012 C223 2203 000683 C CER CHIP 0 027nF 5 50V C0G 2012 C224 2203 000203 C CER CHIP 100nF 10 16V X7R TP 2012 2mm C226 2203 000203 C CER CHIP 100nF 10 16V...

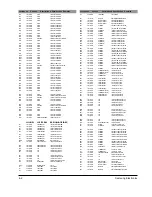
Страница 31: ... SMALL SIGNAL KTC8050 NPN 625MW TO 92 AQ4 0501 002375 TR SMALL SIGNAL KTC8050 NPN 625MW TO 92 AR1 2001 000734 R CARBON 4 7KOHM 5 1 8W AA TP 1 8X3 2M AR10 2001 000429 R CARBON 1KOHM 5 1 8W AA TP 1 8X3 2MM AR11 2001 000028 R CARBON S 100OHM 5 1 2W AA TP 2 4X6 4 AR12 2001 000864 R CARBON 56KOHM 5 1 8W AA TP 1 8X3 2MM AR13 2001 000864 R CARBON 56KOHM 5 1 8W AA TP 1 8X3 2MM AR14 2001 000331 R CARBON 12...

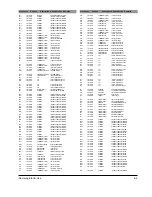
Страница 32: ...SC 10NF 80 20 50V Y5V TP 4 JC1L 2202 000847 C CERAMIC MLC AXIAL 1 8nF 30 50V Y5S TP JC1R 2202 000847 C CERAMIC MLC AXIAL 1 8nF 30 50V Y5S TP JC2L 2202 000847 C CERAMIC MLC AXIAL 1 8nF 30 50V Y5S TP JC2R 2202 000847 C CERAMIC MLC AXIAL 1 8nF 30 50V Y5S TP JC3L 2301 000379 C FILM LEAD PEF 10nF 10 50V TP 6x12x3 5 JC3R 2301 000379 C FILM LEAD PEF 10nF 10 50V TP 6x12x3 5 JC4L 2301 000375 C FILM LEAD PE...

Страница 33: ...MM STRA RCW4 3711 003359 CONNECTOR HEADER BOX 10P 1R 2 5mm STRAIG RFR1 2008 000135 R FUSIBLE 1ohm 5 1 2W AA TP 3 3x9mm RFS1 3601 000162 FUSE CARTRIDGE 250V 1 25A TIME LAG GLASS RFS1 4 3602 000147 FUSE CLIP 250V 7 5A 30mohm RFS3 3601 000281 FUSE CARTRIDGE 250V 4A TIME LAG GLASS 5 RFS4 3601 000281 FUSE CARTRIDGE 250V 4A TIME LAG GLASS 5 RFS5 3601 000248 FUSE CARTRIDGE 250V 2A TIME LAG GLASS 5x RL1 A...

Страница 34: ...404 000165 SWITCH TACT 12V 50mA 160gf 6x6mm SPST UK30 3404 000165 SWITCH TACT 12V 50mA 160gf 6x6mm SPST UK31 3404 000165 SWITCH TACT 12V 50mA 160gf 6x6mm SPST UK32 3404 000165 SWITCH TACT 12V 50mA 160gf 6x6mm SPST UK33 3404 000165 SWITCH TACT 12V 50mA 160gf 6x6mm SPST UK4 3404 000165 SWITCH TACT 12V 50mA 160gf 6x6mm SPST UK5 3404 000165 SWITCH TACT 12V 50mA 160gf 6x6mm SPST UK6 3404 000165 SWITCH ...

Страница 35: ... CONNECTOR ASSY 5247 81SHI EP ELLDD AH39 20002D LEAD CONNECTOR ASSY 5264 3P 300MM 2970 AH59 01144A DECK CASSETTE ADR268DSW1 MAXS530 DC1 Location no Code no Description Specification Remarks Location no Code no Description Specification Remarks 8 6 Samsung Electronics ...

Страница 36: ...Samsung Electronics 9 1 9 Block Diagram ...

Страница 37: ...Samsung Electronics 10 1 10 Wiring Diagram ...

Страница 38: ...Samsung Electronics 11 1 11 PCB Diagram 1 MAIN ...

Страница 39: ...11 2 Samsung Electronics 2 FRONT ...

Страница 40: ...Samsung Electronics 12 1 This Document can not be used without Samsung s authorization 12 Schematic Diagram 1 1 MAIN ...

Страница 41: ...12 2 Samsung Electronics This Document can not be used without Samsung s authorization 2 FRONT ...

Страница 42: ...Samsung Electronics 13 1 13 Circuit Board Description ...

Страница 43: ...13 2 Samsung Electronics ...

Страница 44: ...cessively dusty environment or subjected to shocks or extreme heat close to heating appliances or in direct sunlight etc If the unit emits an unpleasant odor when in use unplug it from the main supply and contact the after sales service Cleaning Your Component System 1 1 2 2 3 2 1 Check that the tape in the cassette is sufficiently taut To prevent erasing a cassette that you wish to keep remove th...

Страница 45: ...Samsung Electronics 14 2 ...

Отзывы: