


Español -
Para seleccionar la fuente
Úselo para seleccionar TV u otras fuentes de entrada externas como reproductores
de DVD o receptores de cable y satélite (decodificadores), conectados al televisor.
Permite seleccionar la fuente de entrada que se prefiera.
1.
Pulse el botón
MENU
para ver el menú en pantalla.
Pulse los botón ▲ o ▼ para seleccionar “Entrada” y, después, pulse el botón
ENTER
.
2.
Pulse el botón
ENTER
para seleccionar “Lista de Origen”.
Pulse los botón ▲ o ▼ para seleccionar la fuente de la señal, después pulse
el botón
ENTER
.
Orígenes de señal disponibles: TV, AV1, AV2, S-Video, Componente1,
Componente2, PC, HDMI1, HDMI2/DVI, HDMI3, HDMI4, USB.
Puede elegir solamente los dispositivos externos que estén conectados al
televisor. En “Lista de Origen”, las entradas conectadas se resaltan y se
ordenan en la parte superior. Las entradas que no están conectadas se
ordenan en la parte inferior.
Uso de los botones de colores del mando a distancia con la lista de
fuentes
rojo
(Actualizar): Actualiza los dispositivos externos conectados.
TOOLS (
Opción
)
: Muestra los menús “Editar Nombre” e
“Información”.
•
•
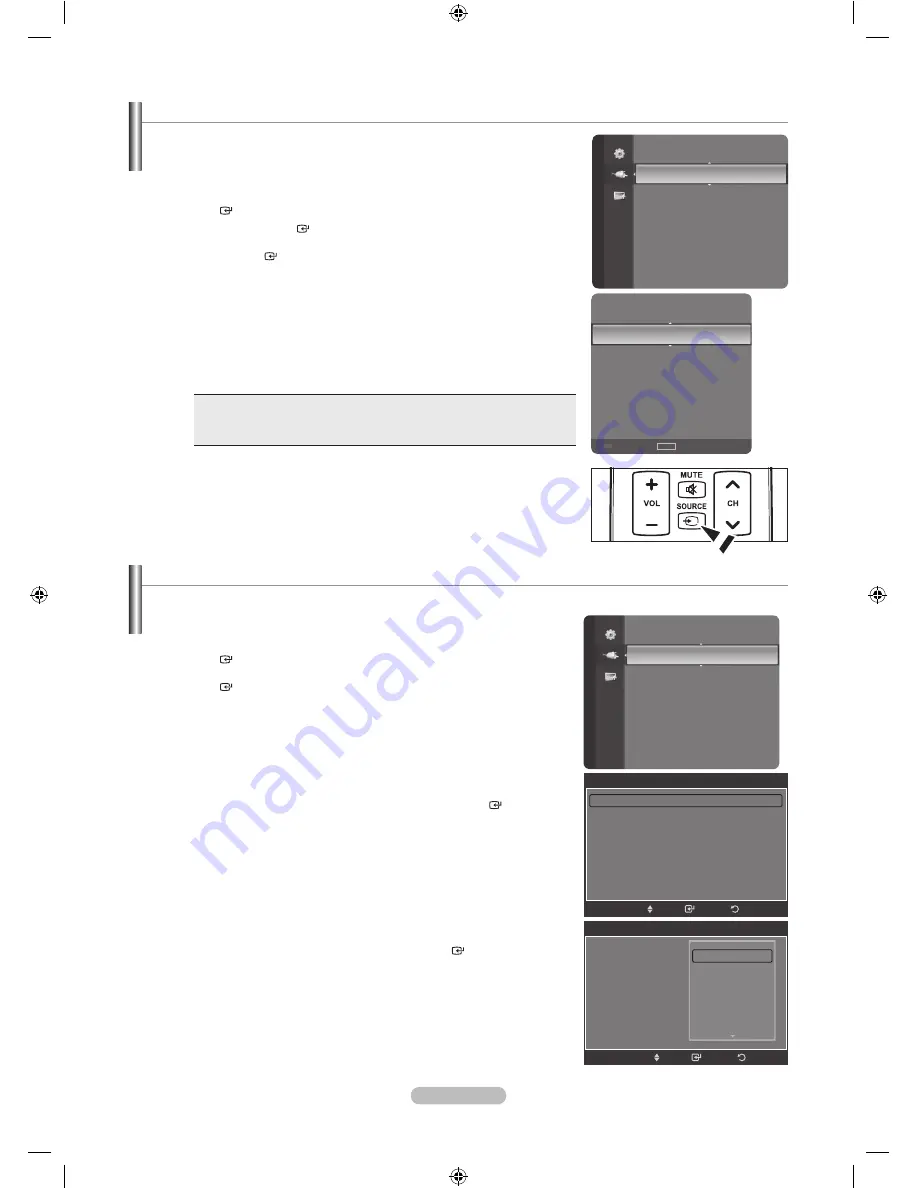
Pulse el botón
SOURCE
del mando a distancia para ver una fuente de señal
externa.
➣
➣
➣
O
Edición del Nombre de la Fuente de entrada
Nombre al dispositivo de entrada de información conectado con las tomas de entrada para facilitar la selección de fuente
de entrada.
1.
Pulse el botón
MENU
para ver el menú en pantalla.
Pulse los botón ▲ o ▼ para seleccionar “Entrada” y, después, pulse el botón
ENTER
.
Pulse los botón ▲ o ▼ para seleccionar “Editar Nombre” y pulse el botón
ENTER
.
2.
Pulse los botón ▲ o ▼ para seleccionar la toma de entrada “AV1”, “AV2”,
“S-Video”, “Componente1”, “Componente2”, “PC”, “HDMI1”, “HDMI2/DVI”,
“HDMI3” o “HDMI3” y, a continuación pulse el botón
ENTER
.
3.
Pulse los botón ▲ o ▼ para seleccionar la fuente de entrada “Vídeo”,
“DVD”, “Cable STB”, “Satélite STB”, “PVR STB”, “Receptor AV”, “Juego”,
“Filmadora”, “PC”, “TV”, “IPTV”, “Blu-ray”, “HD DVD”, “Adaptador digital
multimedia”, y, a continuación pulse el botón
ENTER
.
Pulse el botón
EXIT
para salir.
Cuando se conecta un ordenador con una resolución 1920 x 1080 a 60
Hz al puerto HDMI IN 2, se debe configurar el modo “HDMI2/DVI” como
“PC” en “Editar Nombre” en el modo “Entrada”.
➣
Lista de Origen
Editar Nombre
Entrada
tV
AV1
----
AV2
----
S-Video
----
Componente1
----
Componente2
----
PC
----
Actualizar
TOOLS
Opción
Lista de Origen
Editar Nombre
►
Entrada
Editar Nombre
AV1
: ----
►
AV2
: ----
S-Video
: ----
Componente1
: ----
Componente2
: ----
PC
: ----
HDMI1
: ----
▼
Ingresar
Regresar
Mover
Editar Nombre
AV1
: ----
AV2
: ----
S-Video
: ----
Componente1
: ----
Componente2
: ----
PC
: ----
HDMI1
: ----
----
Vídeo
DVD
Cable STB
Satélite STB
PVR STB
Ingresar
Regresar
Mover
BN68-01429A-00Spa.indb 19
2008-02-26 ¿ÀÈÄ 5:18:31


