background image

CONTENTS

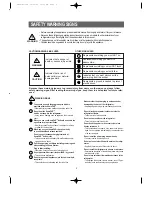
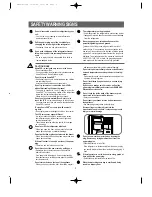
SAFETY WARNING SIGNS

...............................................................2

OPERATING INSTRUCTIONS

........................................................4

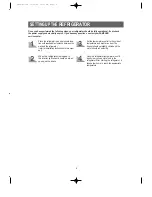
SETTING UP THE REFRIGERATOR ........................................................4
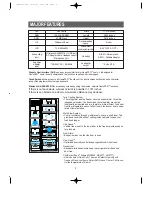
MAJOR FEATURES.....................................................................................5
CONTROL PANEL .......................................................................................6
DIGITAL PANEL ..........................................................................................7
TEMPERATURE CONTROL ......................................................................8
ICE and COLD WATER DISPENSER.........................................................8
SHELVES and BINS.....................................................................................9
FOOD STORAGE GUIDE  ........................................................................10
CoolSelect Zone

TM

Drawer GUIDE.............................................................12

REMOVING THE FREEZER ACCESSORIES .........................................14
REMOVING THE REFRIGERATOR  ACCESSORIES ............................14
CLEANING THE ACCESSORIES .............................................................15
CHANGING THE INTERIOR LIGHT .........................................................16
WATER FILTER..........................................................................................17
DOORS.......................................................................................................17

INSTALLATION INSTRUCTIONS

................................................18

INSTALLATION OF THE REFRIGERATOR  ............................................18
REMOVING THE REFRIGERATOR  DOORS .........................................19
REATTACHING THE REFRIGERATOR  DOORS....................................22
ADJUSTING THE CLEARANCE BETWEEN THE DOORS ....................25
CHECKING THE WATER DISPENSER LINE ..........................................27
INSTALLING THE WATER DISPENSER LINE ........................................28

OPERATING INSTRUCTIONS (HomePAD

TM

)

..........................30

VIEWS OF HomePAD

TM

.............................................................................30

USER INTER FACE ...................................................................................31
REMOTE OPERATION..............................................................................49
HOW TO USE VIRTUAL KEYBOARD ......................................................52
TURNING THE HomePAD

TM 

OFF..............................................................53

AUTO UPGRADE PROCESS ...................................................................53
BATTERY MANAGEMENT.........................................................................53

INSTALLATION INSTRUCTIONS (HomePAD

TM

)

...................54

INSTALLING AND STARTING THE HomePAD

TM

.....................................54

HOW TO PUT HOMEPAD

TM

ON THE DOCKING STATION OF THE REFRIGERATOR.........................55

HOW TO INSTALL HOME STATION.........................................................56
CABLE CONNECTION...............................................................................57

TROUBLESHOOTING ...............................................................................58

CONSUMER SUPPORT

....................................................................59

WARRANTY ...............................................................................................59

HomePAD

TM

REFRIGERATOR

RH2777AT
HP2777AT

OWNER’S  MANUAL AND INSTALLATION

DA68-01174A REV(0.1)

In the U.S.for questions about features, 

operation/performance, parts, accesories or service, call:

1-800-726-7864 (1-800-SAMSUNG)

www.samsungusa.com

Write the model and serial number here:

Model #

Serial #

These numbers can be found on the left side

of the refrigerator cabinet.

DA68-01174A  12/13/02 12:57 PM  Page 1

Содержание HomePAD HP2777AT

Страница 1: ...TER DISPENSER LINE 28 OPERATING INSTRUCTIONS HomePADTM 30 VIEWS OF HomePADTM 30 USER INTER FACE 31 REMOTE OPERATION 49 HOW TO USE VIRTUAL KEYBOARD 52 TURNING THE HomePADTM OFF 53 AUTO UPGRADE PROCESS 53 BATTERY MANAGEMENT 53 INSTALLATION INSTRUCTIONS HomePADTM 54 INSTALLING AND STARTING THE HomePADTM 54 HOWTOPUTHOMEPADTM ONTHE DOCKING STATION OFTHE REFRIGERATOR 55 HOW TO INSTALL HOME STATION 56 CA...

Страница 2: ...eave it on a blanket or linen or pillow for the long time When you use your HomePADTM keep your body in a comfortable and relaxed position Do not connect between charging terminals of HomePADTM bottom side This can cause reduced battery life malfunctions explo sion and electric shock Pull the power plug out before installing removing and disassembling the Home Station Plug in after installing Othe...

Страница 3: ... may cause malfunction and personal injury Do not try to remove or reattach the HomePADTM without first reading the owner s manual You need to connect to the A C adapter or put the HomePADTM on the docking station of the refrigerator door when the low battery signal comes on Otherwise you may lose data that is not saved Do not use the sharp material Pencil nail etc to touch the LCD it may easily d...

Страница 4: ... the refigerator refer to installation instructions in this man nal Set the temperature control to the coldest temperature and wait for an hour The freezer should get slightly chilled and the motor should run smoothly Once the refrigerator temperature is suffi ciently low you can store food in the refrigerator After starting the refrigerator it takes a few hours to reach the appropriate temperatur...

Страница 5: ...sible to 1 181 inches If there is an obstacle an actual communication distance may decrease Twin Cooling System The refrigerator and the freezer have two evaporators Given this independent system the freezer and the refrigerator are cooled individually as required and are therefore more efficient Food odor from the refrigerator does not affect food in the freezer due to sepa rate air flow circulat...

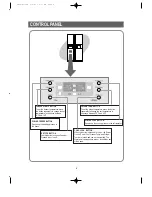
Страница 6: ...between 34 F and 46 F POWER COOL BUTTON Speeds up the cooling process in the refrigerator POWER FREEZE BUTTON Speeds up the freezing process in the freeze CHILD LOCK BUTTON When this button is pressed for 3 sec the Power Freeze Power Cool Freezer Temp and Fridge Temp are locked and can not be modified The Water and Ice dispensers are not locked they can still be used ICE TYPE BUTTON Use this butto...

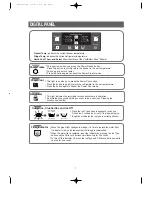
Страница 7: ... this button to quickly return the freezer to the set temperature You can get ice much faster Press the button again to cancel the Power Freezer mode Press the Ice Type button in sequence to choose Cubed Ice Crushed Ice or Ice Off to stop making ice Bright icon indicates the ice type is currently chosen Cubed Ice Crushed Ice and Ice Off When the green light changes to orange it is time to replace ...

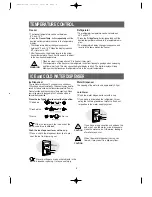
Страница 8: ...r valve Otherwise leakage of water may occur Push Push CAUTION When the water dispenser tray is over flowed it may result in a slippery floor CAUTION TEMPERATURE CONTROL Freezer The freezer temperature can be set between 8 F and 14 F Press the Freezer Temp button repeatedly until the desired set temperature is shown in the temperature display The temperature display changes in sequence between 8 F...

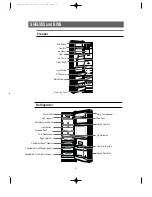
Страница 9: ...Front Leg Cover Tilt Pockets Freezer Egg Container Foldable Shelf Light upper Water Filter Spill proof glass Shelf Dairy Compartment Wine Rack Gallon Door Bin Lights lower Gallon Door Bins Door Bin Top Lips CoolSelect ZoneTM Drawer Vegetable Fruit Drawer upper Refrigerator Vegetable Fruit Drawer lower DA68 01174A 12 13 02 12 57 PM Page 9 ...

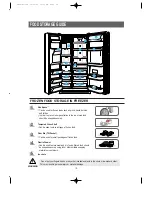
Страница 10: ... store all types of frozen food Door Bin Tilt Pocket Can be used for small packages of frozen food Plastic Drawer Can be used to store meat and dry foods Stored food should be wrapped securely using foil or other suitable wrapping materials or containers Ice chute WARNING Do not put your fingers hands or any other insuitable objects in the chute or ice maker bucket This may result in personal inju...

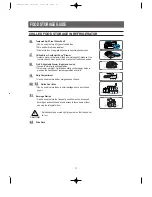
Страница 11: ...its and vegetables This drawer is airtight Optimized humidity control design helps to preserve the freshness of stored vegetables and fruits Dairy Compartment Can be used to store butter margarine and cheese Gallon Door Bins Can be used to store foods in small packages such as milk and yogurt Beverage Station Can be used to store the frequently used items such as canned beverages and snacks and al...

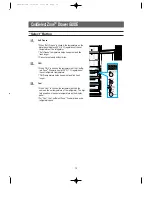
Страница 12: ...ut drips Chill When Chill is chosen the temperature of the CoolSe lect ZoneTM Drawer is kept at 30 F 1o C regardless of the set refrigerator temperature Chill temperature helps keep meat and fish fresh longer Cool When Cool is chosen the temperature will be the same as the set temperature of the refrigerator The digi tal panel shows the same temperature as the display panel For Cool the CoolSelect...

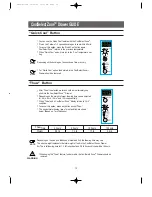
Страница 13: ...s and 12 hrs sequentially When Thaw ends CoolSelect ZoneTM displayreturns to chill condition To cancel this option press any button except Thaw The approximate thawing time of meat and fish are shown below Based on 1inch thickness Thaw Time 4 hours 6 hours 10 hours 12 hours Weight 0 8 lb 1 3 lb 1 7 lb 2 2 lb For Quick Cool option food stored in the CoolSelect ZoneTM Drawer should be removed NOTE N...

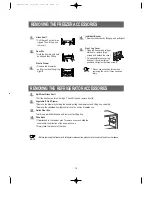
Страница 14: ...nal position and tighten the three screws NOTE REMOVING THE REFRIGERATOR ACCESSORIES Spill Proof Glass Shelf Pull the shelf out as far as it will go Then lift it up and remove it softly Vegetable Fruit Drawer Remove the drawer by holding the handle pulling the drawer out and lifting it up smoothly Remove the optimized humidity control cover by pulling it towards you Gallon Door Bin Hold the bin wi...

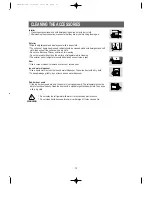
Страница 15: ... grid dry do not touch ice and water dispenser Interior Clean the accessories with a mild detergent then wipe out with a dry cloth After washing the accessories make sure that they are dry before using them again Exterior Wipe the digital panel and display panel with a clean cloth The surface of doors handles and cabinet should be cleaned with a mild detergent and soft cloth then wipe off the surf...

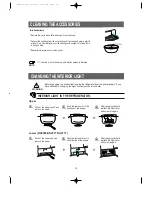
Страница 16: ...t in again Pull out the screw cap and remove the screw Take the lamp cover out in the dircotion of the arrows After changing the bulb reattach the light cover and screw it again Twin Deodorizers Remove the cover with a flat blade screw driver as shown Take out the cartridge from the cover and soak it in clean and warm water for at least 4 hrs Completely dry out the cartridge with sunlight for at l...

Страница 17: ...dge It is recommended that you replace the cartridge when the light changes to red see Install the water filter section for more informmation Using the dispenser without the water filter You can not use the water and ice dispenser without a water filter cartridge because the water line blocks at water supply Ordering replacement filters To order more water filter cartridges call 1 800 SAMSUNG and ...

Страница 18: ...f reducing power consumption NOTE inches 4 2 inches inches 2 Select a location with easy access to the water supply Select a location with enough space for the refrigerator Select a location without direct exposure to sunlight Before disassembling the freezer door the water supply line needs to be disconnected If not the water supply line can be damaged See Separating the water supply line from th...

Страница 19: ... away Open the freezer and refrigerator doors and then take off the front leg cover by turning the three screws counter clockwise a a FRONT LEG COVER SCREW Removing the Front Leg Cover Separating the Water Supply Line from the Refrigerator Do not cut the water tube but separate it from the coupler NOTE DA68 01174A 12 13 02 12 57 PM Page 19 ...

Страница 20: ...care when removing the door to ensure that it does not fall on you 3 Remove the door from the lower hinge by carefully lifting the door 4 Remove the lower hinge from the bracket lower hinge by lifting the lower hinge in the direction of the arrow Removing the Freezer Door Lift the door straight up Be careful not to pinch the water tubing and wire harness on the door Place doors on a protected surf...

Страница 21: ... direction of the arrow 1 With the door closed remove the upper hinge cover using a screwdriver and then disconnect the wires 2 Remove hinge screws and ground screw counter clockwise and take off the upper hinge in the direction of the arrow Take care when removing the door to ensure that it does not fall on you Removing the Refrigerator Door DA68 01174A 12 13 02 12 57 PM Page 21 ...

Страница 22: ...wer hinge and pull the hose down 3 Insert the upper hinge shaft into the hole After leveling between the upper hinge hole and the hole of the cabinet Reattach hinge screws and gound screw in a clockwise direction 4 Connect the wires 5 Put the front part of the upper hinge cover on the front part of the upper hinge and reattach from the front part of the upper hinge cover first 11 12 DA68 01174A 12...

Страница 23: ...nsert the upper hinge shaft into the hole After leveling between the upper hinge hole and the hole of the cabinet Reattach hinge screws and gound screw in the clockwise direction 4 Connect the wires 5 Put the front part of the upper hinge cover on the front part of the upper hinge and reattach it from the front part of the upper hinge cover first 11 12 DA68 01174A 12 13 02 12 57 PM Page 23 ...

Страница 24: ...ront face of coupler insert the water line in the coupler 2 Tighten the screw on the clamp a a Put on the front leg cover by turning the three screws clockwise as shown in the figure Reattaching the Water Supply Line Reattaching the Front Leg Cover DA68 01174A 12 13 02 12 57 PM Page 24 ...

Страница 25: ...e and level the refrigerator Case 2 Freezer door is higher than that of the refrigerator Insert a flat blade screwdriver into a slot of the control lever turn it clockwise and level the refrigerator Do not make small adjustments with the control lever Please refer to the next page DIFFERANCE OF HEIGHT DIFFERANCE OF HEIGHT DRIVER DRIVER CONTROL LEVER CONTROL LEVER Please level the refrigerator firs...

Страница 26: ... bolt may be released 2 Please adjust the height difference between the doors turning the bolt clockwise or counter clockwise When you turn clockwise the door goes up WRENCH Adjustment location NUT BOLT Adjustment location WRENCH NUT BOLT NUT BOLT WRENCH WRENCH WRENCH BOLT BOLT Please open the doors and adjust the doors as follows 1 Release the nut on the lower hinge until the upper end of the bol...

Страница 27: ...refrigerator is installed in area with low water pressure below 20psi you should install a boost er pump to compensate for the low pressure 4 Ensure the water storage tank inside the refrigerator is filled push the water dis penser lever until the water runs from the outlet NOTE A universal water supply kit is available at extra cost from your dealer The refrigerator manufac turer recommends using...

Страница 28: ... overtighten Please check that the indication line aligns with the lock position Install the water filter NOTE 1 Slip the compression nut and plastic ferrule through the plastic tube 2 After inserting the sleeve tighten the compres sion nut onto 1 4 compression fitting union Connect the water tube to the refrigerator Water line must be connected to drinkable water only NOTE Do not overtighten the ...

Страница 29: ...ck the amount of water supplied to the ice tray CHECK THE WATER LEVEL TEST BUTTON TOO HIGH OPTIMUM LEVEL 1 Lift up and pull out the ice maker bucket in the freezer ICE MAKER TOO LOW 1 Turn on the main water supply shut off valve of the water supply line 2 Run water through the dispenser until the water runs clear 6 7 minutes This will clean the water supply system and clear air from the lines 3 Ad...

Страница 30: ...cures HomePADTM on a desk Slip Pad Prevents HomePADTM from slipping on a desk and in the docking station Stylus pen Use to touch the screen Bottom view Docking Connection Port To charge the HomePADTM mount the connection port of HomePADTM in the door of the refrigerator docking station Right view Head Phone Connection Port Connects to commonly used PC headphones Microphone Connection Port Connects...

Страница 31: ...ESSID The ESSID number is listed on the Home station label Select the MAIN button to quit this process If the ESSID was input the HomePADTM will restart ESSID Extended Service Set Identificaton It divides one wireless LAN from another wireless LAN The Home station ESSID represent by label must match the HomePAD ESSID input data The first process starts with the ESSID setting You can modify this in...

Страница 32: ...1 LAN Select LAN when external network is LAN using static IP Input IP address Subnet mask Gateway DNS1 DNS2 obtained from network man ager 2 ADSL Choose ADSL when you use ADSL Modem Contact your ADSL service provider to input sub data 3 Cable Modem CM Choose Cable Modem when you use Cable Modem or LAN using DHCP Contact your Cable Modem service provider to input sub data Server Name and Clone Mac...

Страница 33: ...survey and receive free warrancy extension choose the Register Now button This page is for permission to get customer information Customer Information Survey Customer Registration and Information You will get a free warranty extension by completing customer the information sur vey All asterisk items must be input The following message will appear if there is any missing item The survey consists of...

Страница 34: ...file button The log in process will start Press the CANCEL button to go back without any change If you press the Clear Profile button the following message will appear Press OK to clear profile Clear profile Your old registration data is deleted you can re register anytime after System will restart MAIN Task Bar Indicates present time date battery level network connection status Message Board Each...

Страница 35: ... you want to update now Internet Access Internet connection is lost please check your network properties MESSAGE BORDER TEXT MESSAGE Message Board featuring text messaging Default screen will display recent saved messages Saved Message Display Mode No Message Mode Inpt Mode How to leave new messages Press the New button for Input mode If there are over 40 messages stored a warning message will be ...

Страница 36: ...ssage then click save MESSAGE BORDER VIDEO MESSAGE USER INTERFACE How to check text messages In the Saved Message Display Mode choose the desired message The message will then be displayed with title The Default screen will display the newest message automatically How to leave new Video Messages Choose CAMERA MODE to record video Video images from the camera will be displayed in the window If you ...

Страница 37: ... The title will appear on the top bar and the first video image will be displayed in the view window Press PLAY to view the entire video message You can control the volume using the volume controller In the default window the newest video message will be displayed Daily Mode Input Mode The Home Datebook menu features a memo pad with schedule management functions to record important daily events Ea...

Страница 38: ...warning will be displayed It will then change to Input Mode with a keyboard on the bottom Type your new schedule using the keyboard and choose the type of schedule from the choices on the upper left Your selection will be shown as an initial icon on the chosen date in the monthly calendar Indicate what time the schedule starts and check the Alarm Me option if you want to be notified Choose the int...

Страница 39: ...you have taken to the list press CANCEL If you want to use a photo as a screen saver press TO SCREENSAVER button after choosing photo PHOTO ALBUM 1 Saved Photo Display Mode Camera Mode Input Mode Photo Album The photo album memory is full Please delete old data to take a new picture Scheduler Are you sure you want to delete this item If you choose a desired schedule icon details and alarm settings...

Страница 40: ...nal storage device or import image file from external Storage device to the photo album How to save photo album to an external storage device Press To Disk Storage after choosing photo album list How to import image file from external stor age device to the photo album will be displayed Press To Photo Album after choosing Disk Storage image file Images files must be JPG to be imported Deleting fil...

Страница 41: ...ximum set time is 59 minutes 59 seconds INTERNET ACCESS 1 This Internet browser uses the samsungusa Internet directory page which provides links to diverse websites about lifestyle culture cooking and much more NEW WINDOW opens new windows BACK FORWARD STOP RELOAD HOME SEARCH MINIMIZE CLOSE are basic functions of the web browser TEXT SIZE controls the font type and font size of the web browser Opt...

Страница 42: ...ur default page Press CANCEL to keep your original default page SET Search page sets your search page The setting window will pop up CLOSE closes any Bookmark related windows TV Main Mode If you choose the TV button the default TV mode will be shown as Main Mode In the default TV mode the Task Bar and VIRTUAL REMOTE CONTROL will be dis played The Lower Task Bar offers basic TV functions including ...

Страница 43: ... of the freezer within the 14 F 8 F para meters Power Freeze If you select this function the light will go on and it will begin working To cancel press this button again Fridge Temp Setting controls the tem perature of the fridge within the 34 F 46 F parameters Power Cool If you select this function the Power Cool lamp will turn on and it will begin working To cancel press this button again Ice Cu...

Страница 44: ...ed cleaning method will be displayed 1 Dry Storage Area Open the cover with both hands and remove it by pushing to the left Remove storage shelf by lifting up with both hands 2 Freezer Fridge Storage Box Hold the box with both hands and remove by lifting up 3 Freezer Fridge Shelf Pull the shelf to remove 4 Freezer Fridge Drawer Pull the drawer with one hand and remove by lifting up CLEANING STORAG...

Страница 45: ...y error message will appear Enter names and phone numbers using the keyboard below Enter related information in the notes section Press SAVE after entering all the infor mation or press CANCEL If you press SAVE without entering a name the following error message will pop up Phone directory The phone directory memory is full Please delete old data in order to add a new item Phone directory There is...

Страница 46: ...to change or delete numbers Choose the number you want to change or delete To change press MODIFY It will then change to Input Mode with the original information Change the information using the keyboard below To save changes press SAVE To cancel the changes press CAN CEL To delete a selected item press DELETE The following message will appear to con firm Press OK to delete Phone directory Are you...

Страница 47: ...ou can change the time in minutes using the button If set to 0 minutes the screen saver will not work To select a screen saver To use the default screen saver select Use System Default To use image setting at photo album select Use Your Media File Hold the pen softly and press down lightly on the center of the mark Repeat as the mark moves on the screen 2 5 1 3 4 DEFAULT SETTING windows appear or ...

Страница 48: ...ou can modify HomePADTM ESSID here if the ESSID is different from the Home Station ESSID USER INTERFACE The HomePADTM powers off after 20 min utes in screensaver mode After resetting the screen saver press PREVIEW to view it How to save or delete new settings To activate your new settings press SAVE To cancel press CANCEL Edit Customer Profile is a linked function to manage user profiles If a scre...

Страница 49: ...ot or Next button system to con tinue customer registration process HomePAD may reboot to save data after reboot you can see following message and registration is done 4 If the following error appears sending information to server has failed check your internet status or turn the HomePADTM off and on Please confirm whether ESSID is set up correctly If this page is not displayed ESSID was not set u...

Страница 50: ...mote operation 1 Access to http www samsunghomepad com or http your ID samsunghomepad com by using web browser only Iexplores of Microsoft is acceptable 2 Input User ID and Password and type enter or click the Log In button for admission 3 When the dialog box for downloading remote control pro gram appears please click yes The download takes about 30 seconds 4 After completing the download control...

Страница 51: ...trol Setup and re registration 1 Choose Clear Profile button in HomePADTM properties Edit customer profile This procedure will delete Serial NO and ID while other customer information 2 HomePADTM will reboot The following message appears and modification has been completed 3 You can re register your information anytime you want to in HomePADTM properties Edit customer profile refer to re registrat...

Страница 52: ...5000 mSec and a default setting is 400mSec 2 Ink Width pixels When you input a character you can set up a width of a letter displayed in a screen Setting range is 1 5 pixels and a default setting is 2 pixels 3 Keyboard Recognition If you check this item writing recognition is possible in basic screen keyboard DioPen Help You can see how to write each letter Basic screen keyboard writing recognitio...

Страница 53: ...e will appear at one minute in this state If the battery power is insufficient Please save your data and recharge the battery immediately If the battery supply is insufficient you should return it to the retail center or cus tomer service center The battery is an expendable resource If you repeatedly recharge and discharge it the lifetime of the battery will be shortened If the battery life is too...

Страница 54: ...ark Please follow the Touch Screen instruc tions to correct its response system This option screen appears only for initial start up Press the screen point in sequence 1 2 3 4 5 refer to UI Manual Screen setting This option only appears during initial startup This process corrects the touch screen when it is not responding to your screen input Press each point on the LCD screen lightly with the in...

Страница 55: ...TOR 55 docking station When you put HomePADTM on the docking station of the refrigerator make sure the HomePADTM screen faces front Do not drop the HomePADTM It may cause malfunction and personal injury NOTE CAUTION DA68 01174A 12 26 02 2 46 PM Page 55 ...

Страница 56: ... upper hinge cover and replace the upper hinge cover using a cross screwdriver Home station Step2 Connect the refrigerator power cable to the home station port Home station rear panel Refrigerator power cable Fridge door upper hinge cover Step9 Remove the tape of cover wire base Step10 Insert wires into the cover wire base and attach cover wire base to the refrigerator Step11 Close the cover wire ...

Страница 57: ...57 CABLE CONNECTION TV Cable PC Notebook Internet ASL CABLE MODEM Pull out How to connect TV DVD How to connect network Cable Audio Cable Video Cable DA68 01174A 12 13 02 12 58 PM Page 57 ...

Страница 58: ... Frost forms on the wall of the freezer Is the air vent blocked Allow sufficient space between the foods stored for efficient air circulation Is the door closed properly No water is supplied Is the water pipe connected and the shut off valve open Is the water supply pipe crushed Is the water tank frozen because the refrigerator tempera ture is too low Select a warmer setting on the display panel W...

Страница 59: ...rranties This limited warranty covers manufacturing defects in materials and workmanship encountered in normal noncommercial use of this product and shall not apply to the following including but not limited to damage which occurs in shipment delivery and installation applications and uses for which this product was not intended altered product or serial numbers cosmetic damage or exterior finish ...

Страница 60: ...M E M O DA68 01174A 12 13 02 12 58 PM Page 60 ...

Страница 61: ...ADDRESS SAMSUNG ELECTRONICS AMERICA INC SERVICE DIVISION 400 VALLEY ROAD SUITE 201 MT ARLINGTON NJ 07856 TELEPHONE 1 800 SAMSUNG 1 800 726 7864 FAX 1 973 601 6001 DA68 01174A 12 13 02 12 58 PM Page 61 ...

Отзывы: