background image

Replacing the Lamp

Why do I need to replace the lamp?

The lamp used in a DLP TV has a limited lifespan. For the best screen quality it needs to be

replaced periodically. After replacing the lamp, the screen quality will be bright and clear as new.

When do I need to replace it?

It should be replaced when the screen becomes darker, less clear or when all three LEDs on the

front (TIMER, LAMP, & STAND BY/TEMP) are flashing.

Check before lamp replacement 

1. The lamp must be the same code number and type. 
2. The lamp type is indicated on the right side of the TV. It is also indicated on the lamp case. 
3. After checking the code number for the lamp, give the code number to the store where you

purchased the TV or to a Samsung Service center. 

Caution

1. Replace with the correct code numbered lamp to avoid damage to the TV. 
2. Turn the power off and wait for 30 minutes before replacing the lamp as it will be hot. 
3. Do not touch the glass part of the lamp with your bare hands nor insert any foreign object

inside the cover as it may cause poor screen quality, electric shock or fire.

4. Do not place the old lamp near flammable objects or within the reach of children. 
5. Be sure to connect this TV directly to an AC wall outlet. If the TV's AC plug is connected to a

cable box or other source, it will not allow for proper cool down time.

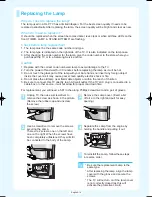
For replacement, you will need a 5.91 Inches-long Phillips screwdriver and a pair of gloves.

1

Unplug TV, then use a screwdriver to

remove the screw as shown in the picture.

(Remove the rubber cap and unscrew 

the screw.)

2

Remove the Lamp cover. (Exert a bit 

of force to the right and pull for easy

opening.)

3

Use a screwdriver to remove the screws

securing the Lamp. 

There are 2 screws: one on the left and

one on the right. When the screws have

been completely unfastened, they will still

be connected to the body of the Lamp.

4

Separate the Lamp from the engine by

holding the handle and pulling it out.

5

To reinstall the Lamp, follow these steps

in reverse order.

Be sure the replacement Lamp is the

same type.

After replacing the lamp, align the lamp

cover with the groove and secure the

screws.

The TV will not turn on if the lamp cover

is not correctly closed (as this will 

activate the protective circuit).

English-14

BP68-00461A-00Eng_1206  12/6/04  12:39 PM  Page 14

Содержание HLR4677W - 46" Rear Projection TV

Страница 1: ...sure that you have all the parts shown here If any piece is missing or broken call your dealer Accessories Instruction Manual Safety Guide Quick Guide Anynet Manual Manual Guide Warranty Cards 2 Regis...

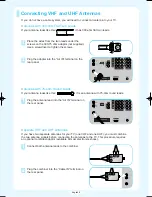
Страница 2: ...300 ohm flat twin leads 1 Plug the antenna lead into the Air IN terminal on the rear panel 1 Connect both antenna leads to the combiner 2 Plug the combiner into the Cable IN terminal on the rear pane...

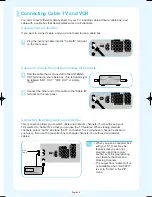
Страница 3: ...f you want to connect cable and you do not need to use a cable box Connecting an Analog Cable Converter Box This connection allows you to watch cable and premium channels You should keep your TV selec...

Страница 4: ...l as watch videotapes You should keep your TV selected to Cable IN so that you can use the TV s features When viewing premium channels or recording with the VCR select Air IN whichever channel is vaca...

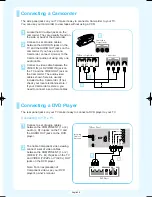
Страница 5: ...ereo you need to connect a set of two cables The side panel jacks on your TV make it easy to connect a Camcorder to your TV You can use your camcorder to view tapes without using a VCR TV Rear of righ...

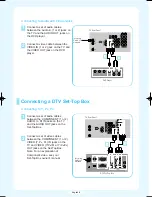
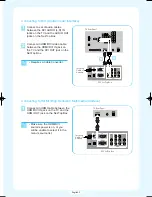
Страница 6: ...t a set of audio cables between the COMPONENT 1 or 2 AUDIO L R IN jacks on the TV and the AUDIO OUT jacks on the Set Top Box Connect a set of video cables between the COMPONENT 1 or 2 VIDEO Y PB PR IN...

Страница 7: ...DVI Digital Visual Interface Connecting to HDMI High Definition Multimedia Interface 1 Connect an HDMI cable between the HDMI DVI IN jack on the TV and the HDMI OUT jack on the Set Top Box Incoming Ca...

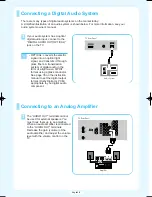
Страница 8: ...ot be used for external speakers You must hook them up to an amplifier When an audio amplifier is connected to the AUDIO OUT terminals Decrease the gain volume of the audio amplifier and adjust the vo...

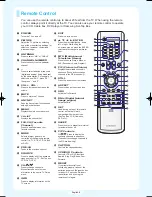
Страница 9: ...ht up down left or right While using the on screen menus press the ENTER to activate or change a particular item MTS Multichannel Television Stereo Press to choose Stereo Mono or SAP Secondary Audio P...

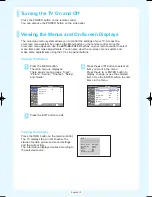
Страница 10: ...e current channel the status of certain picture and sound settings and the current time The information displayed varies according to the selected source Cable 3 Picture Mode Sound Mode MTS Caption V...

Страница 11: ...i e an antenna or cable system 1 Press the MENU button Press the or button to select Channel then press the ENTER button 2 Press the ENTER button to select Antenna Press the or button to select Air or...

Страница 12: ...ected 5 Press the button to select Start then press the ENTER button to start the auto program The TV begins memorizing all available stations Press the ENTER button at any time to interrupt the memor...

Страница 13: ...Press the or button to select a signal source then press the ENTER button When you connect equipment to the TV you can choose between the following sets of jacks AV1 AV2 S Video1 S Video2 Component1 C...

Страница 14: ...may cause poor screen quality electric shock or fire 4 Do not place the old lamp near flammable objects or within the reach of children 5 Be sure to connect this TV directly to an AC wall outlet If t...

Страница 15: ...he TV for 30 seconds then try operating it again Your remote control does not operate your TV Press the MODE button to put your remote control into TV mode Make sure the remote has batteries Poor soun...

Страница 16: ...English 16 Memo...
Отзывы: