background image

Getting started

29

Mode

Function

Number

Select an appropriate virtual key to 

enter a number.

You can enter numbers by 

tapping and holding a virtual 

key in ABC or T9 mode.

Symbol

Select 

1. 

 or 

 to scroll to a symbol 

set you want.
Select an appropriate virtual key to 

2. 

enter a symbol.

When entering text, rotate the device to display the

wider QWERTY keyboard.

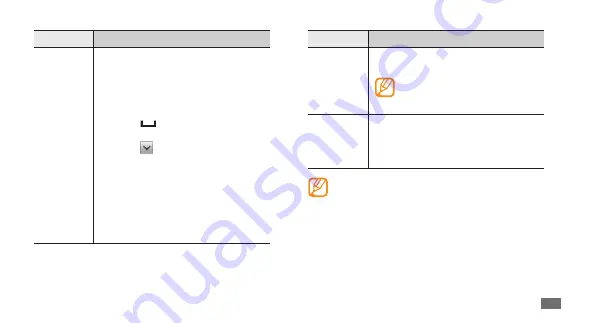
Mode

Function

T9 

(Predictive 

text)

In ABC mode, select

1. 

 T9

 (The dot 

turns green).
Select the appropriate virtual keys 

2. 

to enter an entire word.
When the word displays correctly, 

3. 

select 

 to insert a space. If the 

correct word does not display, 

select   and an alternative word 

from the list that appears.

Adding words to the T9 dictionary

If you cannot find a word in the 

alternative word list, you can add the 

word to the T9 dictionary. Select 

Add 

word

 at the bottom of the alternative 

word list.

Содержание GT-S5250

Страница 1: ...For more information refer to the user manual at www samsungmobile com GT S5250 quickstartguide...

Страница 2: ...he actual product Content in this user manual may differ from the product or from software provided by service providers or carriers and is subject to change without prior notice Refer to www samsungm...

Страница 3: ...ces wallpapers and images provided in this device are licenced for limited use between Samsung and their respective owners Extracting and using these materials for commercial or other purposes is an i...

Страница 4: ...Copyright 2010 Samsung Electronics This user manual is protected under international copyright laws No part of this user manual may be reproduced distributed translated or transmitted in any form or...

Страница 5: ...d strap optional 13 Getting started 14 Turn your device on and off 14 Get to know your device 15 Use the touch screen 18 Contents Lock or unlock the touch screen and keys 20 Access menus 20 Launch and...

Страница 6: ...Using Wi Fi 49 Safety precautions 50 Capturing photos and videos 35 Viewing photos and videos 37 Listening to music 39 Listening to the FM radio 41 Connecting to the internet 42 Downloading applicati...

Страница 7: ...nufacturer s warranty The items supplied with your device may vary depending on the software and accessories available in your region or offered by your service provider You can obtain additional acce...

Страница 8: ...t a SIM card you can only use your device s non network services and some menus Do not insert a memory card into the SIM card slot To install the SIM card and battery If the device is on press and hol...

Страница 9: ...g approved chargers and cables Unauthorised chargers or cables can cause batteries to explode or damage your device When your battery is low the device will emit a warning tone and display a low batte...

Страница 10: ...Service Centre When the battery is fully charged the battery icon is 4 no longer moving unplug the travel adapter from the device and then from the power outlet Do not remove the battery before removi...

Страница 11: ...or memory cards If you insert a card formatted with a different file structure your device will ask you to reformat the memory card Frequent writing and erasing of data will shorten the lifespan of me...

Страница 12: ...card out of the memory card slot 4 Replace the back cover 5 Do not remove a memory card while the device is transferring or accessing information as this could result in loss of data or damage to the...

Страница 13: ...mory card Formatting your memory card on a PC may cause incompatibilities with your device Format the memory card only on the device In Menu mode select Settings Memory Memory card details Format Yes...

Страница 14: ...Select a language you want and select 3 Next Select keyboard languages and select 4 Next Select your home time zone and select 5 Next Set the time and date and select 6 Next To turn off your device p...

Страница 15: ...d 15 Get to know your device Device layout Power Lock key Multifunction jack Camera key Internal antenna Back cover Camera lens Headset Earpiece Touch screen End key Menu key Volume key Dial key Mouth...

Страница 16: ...screen p 23 Scroll left or right to a panel of the idle screen You can also select a dot on the top of the screen to move to the corresponding panel of the idle screen directly Keys Key Function Powe...

Страница 17: ...serted Browsing the web Connected to secured web page New text or multimedia message New email message New voice mail message Indicator icons Icons shown on the display may vary depending on your regi...

Страница 18: ...Do not allow the touch screen to come into contact with water The touch screen may malfunction in humid conditions or when exposed to water Icon Definition Alarm activated Roaming outside of normal se...

Страница 19: ...imal use of the touch screen remove the screen protection film before using your device Your touch screen has a layer that detects small electrical charges emitted by the human body For best performan...

Страница 20: ...he device you can capture an image of a screen by pressing and the Menu key simultaneously The image will be saved in My files Images Lock or unlock the touch screen and keys You can lock the touch sc...

Страница 21: ...u can reorganise the applications in Menu mode by changing their order or grouping them into categories to suit your preferences and needs In Idle mode press the Menu key to access Menu 1 mode Select...

Страница 22: ...web services Using a web based widget may incur additional charges Available widgets may vary depending on your region or service provider Launch and manage applications Launch multiple applications Y...

Страница 23: ...left of the screen Rotate the device to landscape view 2 Open the widget toolbar To open the widget toolbar and access widgets In Idle mode select 1 Widget at the top left of the screen to open the wi...

Страница 24: ...the sound options for incoming calls 3 incoming messages and other device sounds Available sound options vary depending on the selected profile Select 4 Set Select 3 to add new panels to the idle scr...

Страница 25: ...requires a password you will be prompted to create and confirm a password To switch to another profile select the check box next to the profile and then Set Select a wallpaper for the idle screen In M...

Страница 26: ...e device from the web remotely In Menu mode select 1 Settings Security Select 2 Mobile tracker Enter your password and select 3 Done Select 4 OK to continue Once the device lock is enabled you must en...

Страница 27: ...ween Symbol Number mode and ABC mode Enter your email address and password for your 5 Samsung account and select Sign in To create a Samsung account select Sign up now Select 6 Recipients to open the...

Страница 28: ...ey until the character you want appears on the display Number Function 3 Insert a space Insert a period and space double tap 4 Clear your input 5 Start a new line 6 Change input languages Access the k...

Страница 29: ...display the wider QWERTY keyboard Mode Function T9 Predictive text In ABC mode select 1 T9 The dot turns green Select the appropriate virtual keys 2 to enter an entire word When the word displays corr...

Страница 30: ...t field until 1 appears Select 2 Select from the option list Drag your finger across the text 3 You can also tap the word you want to highlight twice Select 4 Copy or Cut to copy and paste or cut and...

Страница 31: ...press and hold theVolume key down to mute the ringtone To end the call press 2 View call and message logs You can view logs of your calls and messages filtered by their types In Menu mode select 1 Log...

Страница 32: ...first letters of the name you want Select the contact s name from the contact list 3 Creating and finding contacts Learn to create and find a contact in memory For more information see the Contacts se...

Страница 33: ...l ask if you want to send a multimedia message Select OK to confirm Select 4 Tap to add text and enter your message text Messaging Learn to send and view text multimedia or email messages For more inf...

Страница 34: ...t 5 Retrieve to view the body of the email Select 5 and attach a file You can select a file from the file list or capture a photo video or sound clip Select 6 Send to send the message Send an email me...

Страница 35: ...camera settings 6 Hide or display icons in the viewfinder Capturing photos and videos Learn to capture a photo or video while on the move For more information see the Camera section of the user manua...

Страница 36: ...ode Number Function 7 Adjust the colour balance according to lighting conditions 8 Select the length of the delay before the camera takes a photo 9 Adjust the brightness 10 View the photo or video you...

Страница 37: ...iew Select a photo to view 2 Scroll left or right to view more photos 3 Number Function 4 Change the camcorder settings 5 Hide or display icons in the viewfinder 6 Adjust the colour balance according...

Страница 38: ...to a point of the file by dragging the bar 3 Scan backwards in a file 4 Change a ratio of the video screen 5 Adjust the volume 6 Pause playback Select to resume playback 7 Scan forwards in a file View...

Страница 39: ...aylist with your favourite music For more information see the Music player section of the user manual Add music files to your device Start by transferring files to your device or memory card Download...

Страница 40: ...channel surround sound system when a headset is connected 2 View the details of the music file 3 Move to a point of the file by dragging the bar 4 Skip backwards Scan backwards in a file tap and hold...

Страница 41: ...nge the frequency by 0 1 MHz Listening to the FM radio Learn to listen to the FM radio For more information see the FM radio section of the user manual Plug the supplied headset into the device 1 In M...

Страница 42: ...o create your own connection profile for accessing the web see the user manual Browse web pages In Menu mode select 1 Internet to launch a specified homepage Number Function 5 Add the current radio st...

Страница 43: ...new window or switch between the currently opened windows 8 Open a list of saved bookmarks frequently visited pages and RSS feeds and recent internet history 1 These icons are shown when you tap the...

Страница 44: ...ly optimised applications from Samsung Apps Explore amazing applications and make your mobile life even better In Menu mode select 1 Samsung Apps Search for and download applications or widgets as 2 d...

Страница 45: ...t 1 Settings Connectivity USB Samsung Kies Set Press 2 to return to Idle mode To use Samsung Apps your device must be connected to the internet using cellular connection orWi Fi You may incur addition...

Страница 46: ...ge Set Press 3 to return to Idle mode Using an optional PC data cable connect the 3 multifunction jack on your device to a PC Run Samsung Kies and use wireless connections or 4 copy data and files Ref...

Страница 47: ...e To allow other devices to locate your device select 3 Settings My phone s visibility Always on Save If you selected Custom enter duration that your device is visible and select Done Using an optiona...

Страница 48: ...now use the Bluetooth services such as transferring files controlling the device remotely or printing data depending on the connected device type Once the Bluetooth wireless feature is active select a...

Страница 49: ...file for network connections Change the profile setting to the configured WLAN profile in the web browser or other web based services UsingWi Fi Learn to connect the device to a wireless local area ne...

Страница 50: ...rs that are not approved by the manufacturer Do not handle a damaged or leaking Lithium Ion Li Ion battery For safe disposal of your Li Ion batteries contact your nearest authorised service centre Han...

Страница 51: ...device in potentially explosive environments Turn off your device in potentially explosive environments instead of removing the battery Always comply with regulations instructions and signs in potenti...

Страница 52: ...ot engage in stressful or emotional conversations that may be distracting Make people you are talking with aware you are driving and suspend conversations that have the potential to divert your attent...

Страница 53: ...fields Use your device to call for help Dial a local emergency number in the case of fire traffic accident or medical emergencies Use your device to help others in emergencies If you see an auto accid...

Страница 54: ...s internal antenna Touching the antenna may reduce the call quality or cause the device to transmit more radio frequency than necessary Magnetic stripe cards including credit cards phone cards passboo...

Страница 55: ...uld cause injury to your hands and face Take the device to a Samsung Service Centre to have it repaired Do not use the device for anything other than its intended use Hold the device with a relaxed gr...

Страница 56: ...station By automatically emitting lower levels when possible your device reduces your overall exposure to RF energy Avoid disturbing others when using the device in public Do not allow children to use...

Страница 57: ...and recycle them through your local free battery return system The Declaration of Conformity statement at the back of this manual demonstrates your device s compliance with the European Radio Terminal...

Страница 58: ...protected by copyright patent trademark and or other intellectual property laws Such content and services are provided solely for your personal noncommercial use You may not use any content or servic...

Страница 59: ...ntre For the address or the phone number of Samsung Service Centre see the warranty card or contact the retailer where you purchased your product Declaration of Conformity R TTE We Samsung Electronics...

Страница 60: ...load the latest version of Kies from the Samsung 1 website www samsungmobile com and install it in your PC In Menu mode select 2 Settings Connectivity USB Samsung Kies Set Using a PC data cable connec...

Отзывы: