background image

_


system setup

system setup

EZ record

CVKL


(V-mode) 

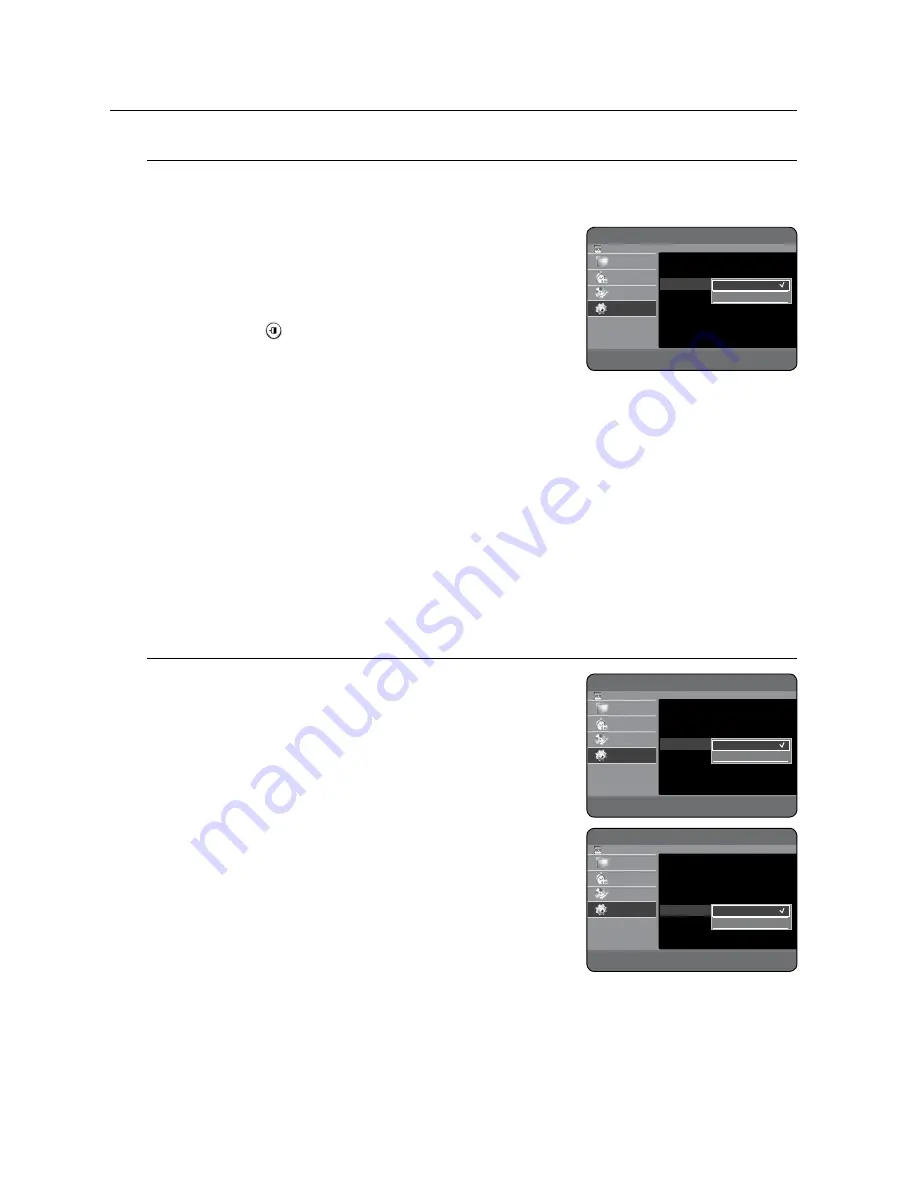
This function allows you to Initialise and Finalise a disc automatically.

Press the ▲▼ buttons to select 

EZ record

, then press the 

OK

 or 

▶ button.
Press the ▲▼ buttons to select 

On

, then press the 

OK

 or ▶ 

button. 

Press the 

EXiT ( )

 button to exit the menu.

Insert a disc. 

If the disc is new, it will initialise automatically.
Press the 

rEC 

button.

EZ Record function will automatically Finalise the disc under the following conditions.

When you press the 

OPEn/CLOSE

 button on your HDD & DVD RECORDER after recording on at least 

70% of the disc. The tray will open after the disc has been finalised.
The above feature is available only when a DVD-RW(V), DVD+R or DVD-R disc is inserted.

If you insert a new DVD-RW disc, it will be formatted in V mode after auto initialising.
If you insert a new DVD+RW disc, it will be formatted automatically.
If you select off, you must initialise (See page 69) and finalise the disc manually in the Disc Manager menu.  
(See page 98)
The length of Recording is different according to recording mode. (See pages 49~50)

V-Mode Compatibility 

This feature is about the setup for selecting audios when recording the 

NICAM STEREO (Multi-audio) broadcasting on HDD. It does not directly 

affect DVD recording of a programme. 

Off

 : Both “Dual L” and “Dual R” of the multi-audio broadcasting are 

recorded on HDD. Titles recorded on HDD under such setup status 

cannot be copied to DVD-R or DVD-RW (V mode). 

On

 : Either “Dual L” or “Dual R” of the multi-audio broadcasting is 

recorded on HDD. Titles recorded on HDD under such setup status 

can be copied to DVD-R or DVD-RW (V mode). “Dual L” and “Dual R” 

options can be selected from “Audio Selection.” 

1.

.

.

.
.

~

~

M

`
`
`

`

~

~

HDD & DVD RECORDER 

Recording

 HDD

Library

Timer Record

Disc Manager

Setup

Chapter Creator 

: Off

EP Mode Time 

: 6 Hours

EZ Record 

: Off

V-Mode Compatibility 

: Off

\
\
\
\

m

MOVE


s

SELECT


r

RETURN


e

EXIT

Off
On

HDD & DVD RECORDER 

Recording

 HDD

Library

Timer Record

Disc Manager

Setup

Chapter Creator 

: Off

EP Mode Time 

: 6 Hours

EZ Record 

: Off

V-Mode Compatibility 

: Off

\
\
\
\

m

MOVE


s

SELECT


r

RETURN


e

EXIT

Off
On

HDD & DVD RECORDER 

Recording

 HDD

Library

Timer Record

Disc Manager

Setup

Chapter Creator 

: Off

EP Mode Time 

: 6 Hours

EZ Record 

: Off

V-Mode Compatibility 

: On

Audio Selection 

: Dual L

\
\
\
\
\

m

MOVE


s

SELECT


r

RETURN


e

EXIT

Dual L
Dual R

Содержание DVD-HR773A

Страница 1: ...gine the possibilities Thanks you for purchasing this Samsung product To receive more complete service please register your product at www samsung com register DVD user manual DVD HR773 DVD HR775 DVD HR777 ...

Страница 2: ...lug incorporating a fuse The value of the fuse is indicated on the pin face of the plug If it requires replacing a fuse approved to BS1362 of the same rating must be used Never use the plug with the fuse cover omitted if the cover is detachable If a replacement fuse cover is required it must be of the same colour as the pin face of the plug Replacement covers are available from your dealer If the ...

Страница 3: ...unused for long periods of time Refer all servicing to qualified service personnel Servicing is required when the apparatus has been damaged in any way such as power supply cord or plug is damaged liquid has been spilled or objects have fallen into the apparatus the apparatus has been exposed to rain or moisture does not operate normally or has been dropped Handling Cautions Before connecting othe...

Страница 4: ...ecover lost data The hard disk is only a temporary storage space Disc Handling Use discs with regular shapes If an irregular disc a disc with a special shape is used this HDD DVD RECORDER may be damaged Holding discs Avoid touching the surface of a disc where recording is performed DVD RAM DVD RW and DVD R Clean with an optional DVD RAM PD disc cleaner LF K200DCA1 where available Do not use cleane...

Страница 5: ...ay experience a delay in the early playback time all recorded files may not play Some CD R RW discs may not be playable with this unit depending on the device which was used to burn them For contents recorded on CD R RW media from CDs for your personal use playability may vary depending on contents and discs DVD R Disc Playback and Recording Once a DVD R recorded in Video Mode is finalised it beco...

Страница 6: ...not work with other DVD components To determine compatibility with these DVD RAM discs refer to the user s manual for the player For cartridge type DVD RAM discs remove the cartridge and use the disc only Disc Copy Contents Copy Specifications Contents HDD DVD DVD HDD Recorded Video Title Supported Supported Copy Protected Title Not supported Not supported Copy Once Title Move Deletes the Title in...

Страница 7: ...lity DVD RAM RW R discs may cause following unexpected problems including without limitation recording failure loss of recorded or edited materials or damage to the HDD DVD RECORDER Disc Format Using MP3 disc CD R RW DVD RAM RW R HDD USB with MP3 files recorded with UDF ISO9660 or JOLIET format can be playbacked Only MP3 files with the mp3 or MP3 extension can be played For MP3 files recorded with...

Страница 8: ... The USB host port provides USB2 0 connectivity and also backward compatibility with USB1 1 USB1 0 devices Supported devices at host port Mass Storage Devices Digital Still Camera MP3 Player Memory stick Card Reader One or Multi slot Card Reader External Hard disk drive Only supports FAT32 formatted HDD Others removable storage devices PTP Picture Transfer Protocol devices Digital Still Camera in ...

Страница 9: ...Digital Still Camera Vendor Brand Samsung VP MS11 S800 Pro815 V20 V10 D60 UCA5 Sony DSC W50 DSC R1 DSC P200 DSC P150 Olympus C 70 zoom SP 700 FE5500 C 470Z Nikon Coolpix 7900 Coolpix p3 Coolpix S2 Panasonic DMC FX01 DMC LX1S DMC FZ5 Canon IXUS 60 IXUS 600 PowerShot A700 IXUS 700 A620 S80 Fuji Finepix F700 MP3 Vendor Brand i river N11 T30 T10 Mplayer Samsung YP T8 YP U2 YP T9 YP P2 Others Product V...

Страница 10: ...etup 34 34 On Screen Menu Navigation 34 Plug Play Setup 36 Setting the Clock 36 Channel Set 38 Setting up the Language Options 38 Setting up the System Options 41 Setting up the Audio Options 42 Setting up the Video Options 46 Setting up the Parental Lock 47 Setting up the Recording Options playback 49 49 Region code DVD Video only 49 Logos of Discs that can be played 49 Disc types that can be pla...

Страница 11: ...layback 76 Time Shift function as a live signal 77 Making a Timer Recording 79 Go To Recorded List editing 81 81 Basic Editing Title List 85 Using the Sort function Title List 86 Navigation Menu 87 Select Contents 87 Advanced Editing Playlist 92 Copying from HDD to DVD or VICE VERSA 93 Copying MP3 JPEG or DivX 95 Changing the name of Music Photo DivX file 96 Disc Manager reference 100 100 Troubles...

Страница 12: ...lected the video quality is adjusted automatically so that all video for the scheduled time can be recorded onto the free disc space See page 77 Copying data from a digital camcorder using a DV input jack Record DV Device video onto HDD and DVD RAM RW R discs using the DV input jack IEEE 1394 4pin 4pin See page 73 High quality progressive scan Progressive scanning provides high resolution and flic...

Страница 13: ...ailable on CD R RW DVD R RW RAM discs or HDD A MP3 This involves a function available on CD R RW DVD R RW RAM discs or HDD D DivX This involves a function available on CD R RW DVD R RW RAM discs or HDD J Caution This involves a case where a function does not operate or settings may be cancelled M NOTE This involves tips or instructions on the page that help each function operate N One Touch button...

Страница 14: ...Using a DVD RAM This type of disc can be formatted in DVD Video Recording format VR mode You can edit recorded images and create a playlist in a specific sequence according to your requirements Using a DVD RW This type of disc can be formatted in either DVD Video format V mode or DVD Video Recording format VR mode For an unused disc a message that asks whether to initialize a disc or not If you se...

Страница 15: ...s delete copy rename lock etc on a recorded title Creating a playlist DVD RAM RW in VR mode HDD With this HDD DVD RECORDER you can create a new playlist on a disc and edit it without the original pre existing recording Step 6 Finalising Playing on other DVD components To play your DVD on other DVD components finalising may be necessary First finish all editing and recording operations then finalis...

Страница 16: ...battery cover If the remote does not operate properly Check the polarity of the batteries Dry Cell Check if the batteries are drained Check if remote sensor is blocked by obstacles Check if there is any fluorescent lighting nearby Dispose of batteries according to local environmental regulations Do not put them in the household trash To determine whether your television is compatible follow the in...

Страница 17: ...rily work on all televisions If you encounter problems operate the television directly M M BRAND BUTTON SAMSUNG 01 02 03 04 05 06 07 08 09 AIWA 82 ANAM 10 11 12 13 14 15 16 17 18 BANG OLUFSEN 57 BLAUPUNKT 71 BRANDT 73 BRIONVEGA 57 CGE 52 CONTINENTAL EDISON 75 DAEWOO 19 20 23 24 25 26 27 28 29 30 31 32 33 34 EMERSON 64 FERGUSON 73 FINLUX 06 49 57 FORMENTI 57 FUJITSU 84 GRADIENTE 70 GRUNDIG 49 52 71...

Страница 18: ...ack mode Select TV preset Channels Stop mode STOP button Stops disc playback REC button Starts recording HDD DVD button Selects HDD DVD mode DISC TRAY Opens to accept a disc USB HOST Connects to digital still camera MP3 player memory stick Card reader external HDD or other removable storage devices 10 DV INPUT Connects to external digital equipment with a DV jack such as a camcorder 11 AV 3 INPUT ...

Страница 19: ...equipment having HDMI input 6 DIGITAL AUDIO OUT OPTICAL Connects to an amplifier having a digital optical audio input jack 7 AV1 TV OUTPUT SCART connector Connects to equipment having SCART input jack 8 AUDIO OUT Connects to the audio input of external equipment using audio cables 9 COMPONENT VIDEO OUT Connects to equipment having Component video input 10 Out to TV connector Connects RF cable to T...

Страница 20: ...r Lights when DVD mode is selected HDD VIEW Indicator Lights when HDD mode is selected USB VIEW Indicator Lights when USB mode is selected Disc Media Indicator Lights when a DVD RW R disc is loaded TIMER Indicator Lights to indicate the timer record mode HDMI Indicator Lights to indicate when HDMI is connected REC Indicator Lights in the record mode 10 STATUS Indicator Playing time clock current s...

Страница 21: ... right when setting the menu function EXIT button Press to exit the setup screen PLAY LIST TITLE MENU button Use this to return to the Title menu or to view the recorded files list REC MODE button Use this to set the desired Recording time and picture quality XP SP LP EP REC PAUSE TIME SHIFT button Use this to pause during recording In HDD mode use this to operate Time shift function TIMER REPEAT ...

Страница 22: ...ECORDER and TV Turn on the HDD DVD RECORDER and TV Press the INPUT SEL button on your TV remote control until the Video signal from the HDD DVD RECORDER appears on the TV screen The RF cable connection of this product sends only signals of TV You must connect SCART cable or Audio Video cables to watch a DVD from your HDD DVD RECORDER TV mode Press the TV DVD button on the remote control then TV wi...

Страница 23: ...connector on TV Turn on the HDD DVD RECORDER VCR Satellite receiver or digital tuner and TV Set Input mode on AV2 TV mode Press the TV DVD button on the remote control then TV will appear on Front display or turn off HDD DVD RECORDER You can watch programmes from a satellite or digital tuner connected to this HDD DVD RECORDER even when the HDD DVD RECORDER is turned off You can not use this connec...

Страница 24: ...eived through the built in TV tuner in HDD DVD RECORDER Connect RF antenna cables as shown Connect the AV1 connector on this recorder to the SCART AV connector on TV using a SCART cable Connect the AV2 connector to a SCART AV connector on decoder box To watch or record PAY TV Canal Plus programmes set your HDD DVD RECORDER to receive the channels using the on screen display Refer to pages 36 37 1 ...

Страница 25: ... only available with TVs that support progressive scan Progressive Scan Output 576P Consumers should note that not all high definition television sets are fully compatible with this product and may cause artifacts to be displayed in the picture in case of 576 progressive scan picture problems It is recommended that the user switch the connection to the standard definition output If there are quest...

Страница 26: ...n images Connect audio cables white and red between the AUDIO OUT jacks on the HDD DVD RECORDER and AUDIO IN jacks on TV or AV amplifier See pages 27 29 After connecting refer to the page 44 Make sure that the colour coded connections match The Y Pb Pr component output jacks of your HDD DVD RECORDER must be connected to the exact corresponding component input jacks on your TV Progressive setting i...

Страница 27: ...ing to an AV amplifier with a digital output jack Manufactured under license under U S Patent 5 451 942 other U S and worldwide patents issued pending DTS and DTS Digital Out are registered trademarks and the DTS logos and Symbol are trademarks of DTS Inc 1996 2009 DTS Inc All Rights Reserved Manufactured under licence from Dolby Laboratories Dolby and the double D symbol are trademarks of Dolby L...

Страница 28: ...etting up connecting setting up Case 2 Connecting to a stereo amplifier with AV output jacks If your stereo amplifier only has AUDIO INPUT jacks L and R use the AUDIO OUT jacks White Red Front L speaker Front R speaker ...

Страница 29: ...lifier with a digital output jack If your AV amplifier has a Dolby Digital MPEG2 or DTS decoder and a digital input jack use this connection To enjoy Dolby Digital MPEG2 or DTS sound you will need to set up the audio settings According to your amplifier connect to an optical cable or a coaxial cable See pages 41 42 ...

Страница 30: ...mote control until the HDMI signal from the HDD DVD RECORDER appears on your TV screen If the HDD DVD RECORDER is connected to your TV in HDMI 1080p output mode you must use High speed category2 HDMI cable M Case 2 Connecting to a TV with DVI Jack Using a DVI Adapter cable not supplied connect the HDMI OUT jack on the rear of the HDD DVD RECORDER to the DVI IN jack of your TV Using the audio cable...

Страница 31: ...RECORDER transmits a digital video and audio signal and displays a vivid picture on a TV having an HDMI input jack HDMI connection description HDMI connector Both uncompressed video data and digital audio data LPCM or Bit Stream data Though the HDD DVD RECORDER uses a HDMI cable not supplied the HDD DVD RECORDER outputs only a pure digital signal to the TV If TV does not support HDCP High bandwidt...

Страница 32: ...nnecting a DV Device to the DV IN jack Case 1 Connecting a VCR Set Top Box STB DVD player or Cam corder to the AV 3 IN jacks Connecting a VCR or external device to AV 3 IN jacks of the HDD DVD RECORDER You can record from connected equipment VCR STB DVD player or Camcorder AV 3 in selection will be automatically done If the input is not selected automatically use INPUT SEL button to select proper ...

Страница 33: ...ecting to USB Devices This allows you to connect your HDD DVD RECORDER to USB devices Connecting a USB memory MP3 player Digital Camera to the USB HOST Disconnecting the USB cable during the data transfer will stop the communication and may damage data stored in the memory When data communication is disrupted due to static electricity magnetic field or other reason restart the programme or try to ...

Страница 34: ...cable To use an HDMI cable not supplied make the Audio Video connection before plugging in the power cord or after finishing the Plug Play Setup Do not connect the HDMI cable while the Plug Play Setup is progressing Plug the HDD DVD RECORDER into the mains AUTO in the front panel display flickers Press a number button to select the language Press the OK button to start the auto setup Select Countr...

Страница 35: ...l Set Manual Setup menu See page 37 Auto setup function can be performed by pressing STOP on the unit continuously for 10 seconds or more during power off with no disc inserted Check the date and time If it is Correct press OK button then the date and time will be saved If you don t press the OK button the date and time will be saved automatically after 5 seconds If it is Incorrect input correct M...

Страница 36: ... you do not need the Auto Clock Set function select Off 1 M Channel Set Auto Scanning This feature allows you to manually set the HDD DVD RECORDER tuner band to Antenna or Cable whichever you connected to the Antenna In jack during initial setup With the unit in Stop mode press the MENU button Press the buttons to select Setup then press the OK or button Press the buttons to select Channel Set the...

Страница 37: ...he buttons to select Manual Setup then press the OK or button Press the buttons to select a PR programme you wish to edit delete or swap then press the COLOUR button Select Edit Delete or Swap In case of Edit RED A button You can add or edit PR programme information After change PR informations CH Name Decoder MFT select Save then press the OK button CH Tune the channel using buttons Name Display ...

Страница 38: ...select the desired system option then press the OK or button Press the buttons to select the desired item then press the OK or button Auto Power Off Setting This feature automatically turns off your HDD DVD RECORDER if you do not press any button for the selected time Press the buttons to select Auto Power Off then press the OK or button Press the buttons to select the desired item then press the ...

Страница 39: ...V buttons that can be used to control the HDD DVD RECORDER and buttons button When you press Anynet button on the TV remote control the OSD to the left will appear Select Device Use this option to select device Record Use this option to start recording or stop recording Menu on Device Same as MENU button on the HDD DVD RECORDER remote control Device Operation Same as INFO button on the HDD DVD REC...

Страница 40: ...ivX R Video On Demand format For more information visit www divx com vod HDD DVD RECORDER System HDD Library Timer Record Disc Manager Setup Clock Set Auto Power Off Off Anynet HDMI CEC On DivX R Registration sSelect rReturn eExit OK Your registration code is XXXXXXXX To learn more visit www divx com vod DivX R Video On Demand ...

Страница 41: ...ut setting is equally applied to both Dolby Digital and MPEG 2 audio LPCM sound track is always outputted as PCM It has no relation with Digital Output setting Be sure to select the correct Digital Output or you will hear no sound or a loud noise DTS Off Doesn t output DTS signal Select this when your AV receiver or AV amplifier does not have a DTS decoder On Outputs DTS bit stream via digital out...

Страница 42: ...d Bilingual transmission in another language NICAM programmes are always accompanied by a standard mono sound broadcast and you can select the desired sound by setting NICAM on or off On NICAM mode Off Only set at this position to record the standard mono sound during a NICAM broadcast if the stereo sound is distorted due to inferior reception conditions HDD DVD RECORDER Audio HDD Library Timer Re...

Страница 43: ...of the screen 4 3 Pan Scan Select this for conventional size TV when you want to see the central portion of the 16 9 screen Extreme left and right side of movie picture will be cut off 16 9 Wide You can view the full 16 9 picture on your wide screen TV 3D Noise Reduction motion adaptive noise reduction Off Normal On Provides a clear picture through noise reduction for recording 1 HDD DVD RECORDER ...

Страница 44: ...nent This setting enables you to select progressive mode To view Progressive scan mode first connect the component cable See page 26 Be sure the Component cables are connected properly Progressive The message Do you want to maintain progressive mode Reverting in 10 seconds will be displayed Select Yes to revert progressive mode Interlace The message Do you want to maintain interlace mode Reverting...

Страница 45: ...nnect the HDD DVD RECORDER to your TV via HDMI Set your TV s input to HDMI The BD Wise menu item appears only if BD Wise is set to On BD wise function is enabled only if BD Wise compliant Samsung Products are connected with each other using the HDMI cable Progressive scan automatically activates when HDMI is connected Please make sure HDMI is indicated on the front panel of the HDD DVD RECORDER Co...

Страница 46: ...K or button Press the buttons to select the rating level you want then press the OK or button For example if you select up to Level 6 discs that contain Level 7 8 will not play A larger number indicates that the programme is intended for adult use only Changing the Password Press the buttons to select Change Password then press the OK or button Enter the 4 digit password using the number buttons o...

Страница 47: ...hapter will be about 5 minutes long in XP and SP and about 15 minutes long in LP and EP mode Press the STOP button to stop recording To display the created titles finalise the disc See page 98 and then press the TITLE MENU button The title menu will be displayed Finalising is generally unnecessary when using a DVD RW disc To display the created chapters select the desired Title and then press the ...

Страница 48: ...ding to recording mode See pages 49 50 V Mode Compatibility This feature is about the setup for selecting audios when recording the NICAM STEREO Multi audio broadcasting on HDD It does not directly affect DVD recording of a programme Off Both Dual L and Dual R of the multi audio broadcasting are recorded on HDD Titles recorded on HDD under such setup status cannot be copied to DVD R or DVD RW V mo...

Страница 49: ...ear panel of the HDD DVD RECORDER Logos of Discs that can be played STEREO CREATOR Dolby Digital DTS Digital Audio Stereo PAL broadcast system in U K France Germany etc DivX MP3 Disc types that can be played Disc Types Disc Logo content Recorded content Disc Shape Max Playing Time DVD VIDEO VIDEO AUDIO Single sided 12cm 240 min Double sided 12cm 480 min Single sided 8cm 80 min Double sided 8cm 160...

Страница 50: ...ayer 12cm 4 7GB 1 hr XP Excellent Quality 2 hrs SP Standard Quality 4 hrs LP Long Playback 6 or 8 hrs EP Extended Dual Layer 12cm 8 5GB 1 hr 50 min XP Excellent Quality 3 hrs 40 min SP Standard Quality 7 hrs 20 min LP Long Playback 11 or 14 hrs 40 min EP Extended DVD RW AUDIO VIDEO 12cm 4 7GB 1 hr XP Excellent Quality 2 hrs SP Standard Quality 4 hrs LP Long Playback 6 or 8 hrs EP Extended DVD R AU...

Страница 51: ...he disc tray Your HDD DVD RECORDER closes the disc tray and plays the disc automatically The HDD DVD RECORDER does not play discs automatically after being powered on initially When the HDD DVD RECORDER is powered on and a disc is in the tray the unit will be activated and wait in stop status Press the PLAY button to start playback If you want the unit to play automatically when it is powered on w...

Страница 52: ...ss the PLAY LIST button This refers to a list of user selected titles When one playlist is played only the scene selected by the user will play and then stop Since only the information necessary for playing a desired scene is included in a playlist even if that playlist is deleted the original recording will not be deleted only VR mode Using the playback related buttons Searching through a Chapter...

Страница 53: ... 1 8 If you press the SEARCH button 1 2 1 4 1 8 To return to normal speed playback press the PLAY button Press and hold the SEARCH buttons during pause the disc will play slowly at 1 4 speed If the button is released the pause operation will resume The speed marked in this function may be different from the actual playback speed Slow motion operates only in the forward direction on DivX discs Step...

Страница 54: ...buttons Then press the OK button This may not work for some discs When an audio CD CD DA or an MP3 JPEG disc is inserted depending on the disc type the information display may not appear The Time Search function does not operate on some discs To make the screen disappear press the RETURN button Selecting the Subtitle Language ZD Selects one of the subtitle languages recorded on the disc You can al...

Страница 55: ...lect the Angle function Press the INFO button during playback Press the buttons to select Angle Press the buttons to select the desired angle This function is disc dependent and may not work on all DVDs This function does not work when a DVD has not been recorded with a multi camera angle system Displays the current angle and the total angle number Repeat Play Playing Repeatedly Repeat Playback SZ...

Страница 56: ...rmal Playback by pressing the EXIT button Audio CDs CD DA MP3 discs and DivX discs do not support the Repeat A B function Zooming In SZXCVKL Press the INFO button during playback Press the buttons to select Zoom then press the OK or button will be displayed Press buttons to move to the area you want to enlarge Press the OK button The screen will be enlarged to twice the normal size Pressing the OK...

Страница 57: ...t or deleted only playback is available Playing back a marker Press the MARKER button during playback Press the buttons to select a marked scene Press the OK or PLAY button to start playing from the selected scene If you press the SKIP button it moves to the beginning of the marker Pressing the button once again within 3 seconds returns to the beginning of the previous marker If you press the SKIP...

Страница 58: ...e scene is memorized Repeat above to bookmark other positions You can bookmark up to 10 scenes When the disc tray is opened and then closed bookmarks will disappear Playing back a bookmark Press the MARKER button during playback Press the buttons to select a bookmarked scene Press the OK or PLAY button to start playing from the selected scene Clearing a bookmark Press the MARKER button during play...

Страница 59: ... Audio CD CD DA Insert an audio CD CD DA into the disc tray The audio CD menu appears and the tracks songs are played automatically Press the buttons to select the track song you want to hear and then press the OK button Audio CD CD DA Screen Elements Current track song Displays the number of the track currently being played Displays available buttons and a playback time corresponding to a portion...

Страница 60: ...press the REPEAT button repeatedly to select the repeat mode you want Press the YELLOW C button during the Music List playback Press the buttons to select desired play mode then press the OK or button Normal CD CD DA MP3 Tracks on a disc are played in the order in which they were recorded on the disc Repeat Track CD CD DA MP3 Repeat Folder MP3 Repeat All CD CD DA MP3 Random CD CD DA MP3 The random...

Страница 61: ... select tracks in the order in which you want them to play then press the OK button If you playlisted a wrong track press the buttons to select the wrong track then press the OK button To store the Playlist press the RED A button A new Playlist will be created 1 M 1 CD Make Playlist mMove sAdd rReturn eExit No Title 001 TRACK01 002 TRACK02 003 TRACK03 004 TRACK04 005 TRACK05 006 TRACK06 007 TRACK0...

Страница 62: ...the Music List playback Press the buttons to select Go To Playlist then press the OK or button Press the buttons to select the Playlist you want to edit Press the GREEN B button in playlist mode Press the buttons to select tracks in the order in which you want them to play then press the OK button If you playlisted a wrong track press the buttons to select the wrong track then press the OK button ...

Страница 63: ...o List will be displayed See page 64 To operate this function you have to select the disc containing both music files and photo file 1 1 M 1 M 1 M CD Playlist Q TRACK04 1 4 eExit No Title Length Y PLAYLIST01 R TRACK04 4 03 002 TRACK02 3 57 003 TRACK06 5 08 004 TRACK01 4 19 Edit Playlist New Playlist Music List I TRACK04 PLAYLIST01 00 02 22 CD Music List Q Song 10 mp3 1 10 Previous Next Page a Chec...

Страница 64: ...to Photo List by pressing YELLOW C button To stop the Slide Show Press the GREEN B STOP or RETURN button Rotate To setup follow steps 1 and 4 above 5 1 Press the GREEN B button to select Rotate Press the buttons to select the rotate angle then press the OK or button Once you select a rotate angle you can change it by pressing the RED A button You can go to Photo List by pressing YELLOW C button To...

Страница 65: ...s the OK or button Name In alphabetical order Size In order of photo file size You can sort by Name and Size Sorted list will be resorted in copied order upon re entering Photo List Select Contents To setup follow steps 1 to 3 in page 64 Press the BLUE D button to select Contents Press the buttons to select the contents you want to move then Press the OK or button This function is possible only wh...

Страница 66: ...X 8 Slow Motion Play In pause mode press the SEARCH button on the remote control 1 2 1 4 1 8 Reverse Slow Motion Play is not available Step Motion Play In pause mode press the SKIP button on the remote control in the still mode Reverse Step Motion Play is not available Some DivX files created on a personal computer may not be play back That is why Codec Type Version and Higher resolution over spec...

Страница 67: ...u is displayed press the GREEN B button to select Sort Press the buttons to select the desired item then press the OK or button Name In alphabetical order Size In order of DivX file size You can sort by Name Size Sorted list will be resorted in copied order upon re entering DivX List Select Contents Press the BLUE D button to select Contents Press the buttons to select the contents you want to mov...

Страница 68: ...msung Recorder DVD RAM VR Mode Samsung X Recordable Other Company X Recordable DVD RW VR Mode Samsung finalised Not recordable not finalised Recordable Other Company finalised Not recordable not finalised Recordable V Mode Samsung finalised Not recordable not finalised Recordable Other Company finalised Not recordable not finalised Not recordable DVD R V Mode Samsung finalised Not recordable not f...

Страница 69: ...R Formatting will be started automatically DVD RW Use after formatting the disc DVD RW Use after initializing the disc If you want to change the VR or V mode refer to Formatting a Disc on page 98 DVD R Formatting disc is unnecessary and only V Mode Recording is supported DVD RAM RW VR mode This mode allows multiple editing functions such as deletion of the whole title partial deletion of a title e...

Страница 70: ...Approx 33 hours Approx 1 hour about 8 5 Mbps SP standard quality mode Approx 67 hours Approx 2 hours about 4 5 Mbps LP long recording mode Approx 133 hours Approx 4 hours about 2 Mbps EP extended mode Approx 199 hours Approx 264 hours Approx 6 hours about 1 6 Mbps Approx 8 hours about 1 2 Mbps FR Flexible Recording Approx 33 hours 264 hours Approx 1 8 hours DVD HR775 Recording Mode Recording Times...

Страница 71: ...ge appears on the screen Concerning Copy Control Signals TV broadcasts that contain copy control signals may have one of the following three signal types Copy Free Copy Once and Copy Never If you want to record a copy once type programme use DVD RW with CPRM in VR Mode DVD RAM HDD Signal type Media Copy Free Copy Once Copy Never DVD RW Ver 1 1 O DVD RW Ver 1 1 with CPRM VR mode V mode O O O DVD R ...

Страница 72: ...peed quality SP LP EP XP Press the REC button Information concerning the channel is displayed on the screen then recording begins Icon REC is displayed on the front panel Recording from external equipment you are watching Press the INPUT SEL button to select the input source according to the connection you made The front panel display changes in the following sequence PR Number AV1 AV2 AV3 DV If y...

Страница 73: ...matically if a copy protected image is selected DVD RAM RW discs must be formatted before starting to record Most new discs are sold unformatted Do not use DVD R authoring discs with this unit Copying from a Camcorder SXCVKL You may control the Camcorder using the IEEE1394 DV interface Connect the DV output jack of your camcorder to the DV input jack on the front of your HDD DVD RECORDER using a D...

Страница 74: ... DVD press the OPEN CLOSE button and place a recordable disc on the disc tray Press the OPEN CLOSE button to close the disc tray Wait until LOAD disappears from the front panel display Press the PROG or number buttons to select the programme to record Press the REC button to start recording Press the REC button repeatedly to adjust the desired recording time 0 30 1 00 8 00 Off The timer counter de...

Страница 75: ...tton It plays back the title that you are currently recording from the beginning Using the MENU button With the unit in recording mode press the MENU button Press the buttons to select Title then press the OK button Title List screen is displayed Press the SKIP buttons to select the recording title list then press the OK or button It plays back the title that you are currently recording from the b...

Страница 76: ...king Displays the current status Watching Point Current play time 5 Live Point 6 Live Time 7 Time Shift Time Bar Buttons on the Remote Control used for Time Shift function PLAY button Playback PAUSE button Pause live TV SEARCH buttons Fast play X 2 X 4 X 8 X 16 X 32 X 128 SKIP button STOP button Moves to Live point STOP button If you press this button in the Live point a dialog box appears where y...

Страница 77: ...XP SP LP and EP modes XP high quality Select when video quality is important SP standard quality Select to record in standard quality LP low quality Select when a long recording time is required EP extended Select when a longer recording time is required VPS PDC VPS Video Programme System or PDC Programme Delivery Control function If you set this function on you can control the starting and ending...

Страница 78: ...S PDC the fan can still operate and make a noise when the power is off Editing the Scheduled List Follow these directions to edit the Scheduled List To setup follow steps 1 to 2 in Making a Timer Recording on page 77 Press the buttons to select the number of the Scheduled List you want to edit then press the OK button Edit the items you want to modify See the Making a Timer Recording section for m...

Страница 79: ...ded List performed a Timer Recording successfully 3 1 Press the buttons to select the number of the Recorded List then press the OK button Delete Recorded List Deletes a Recorded List individually 3 1 Press the buttons to select the number of the Recorded List you want to delete and then press the RED A button Press the buttons to select Yes then press the OK button N 1 HDD Recorded List Move sSel...

Страница 80: ...LLOW C button HDD Scheduled List Current Time 10 54 Move sSelect rReturn eExit Recorded List No To Source Date Start End Mode VPS PDC Recordable Time HDD 105 44 SP Add a list HDD Recorded List mMove sSelect rReturn eExit Delete Delete All Scheduled List No To Source Date Start End Mode V P Status 01 HDD PR 01 JAN 01 17 30 18 30 SP On OK 02 HDD PR 01 JAN 01 21 00 22 00 SP On OK 03 HDD PR 01 JAN 01 ...

Страница 81: ...from the Title List then press the RED A button Press the buttons to select Rename then press the OK or button The Rename screen is displayed Select the desired characters using the buttons press the OK button Back Space RED A button Deletes and moves the cursor backwards by one position Space GREEN B button Enters a blank and moves the cursor one forward to the right Clear YELLOW C button Deletes...

Страница 82: ...elect On then press the OK button The key icon on the information window for the selected entry changes to the locked status 1 0 If you want to cancel the Protection select Off in step 5 and press the OK button The key icon changes to the unlocked status 0 1 If you select Select All in the Edit menu all title will be checked N 1 M HDD Title List JAN 02 2009 21 00 PR1 2 3 a Check eExit No Title Len...

Страница 83: ...d Press the buttons to select Yes then press the OK button You cannot delete a protected entry If you want to delete a protected entry select Off in the Title Protection menu See page 82 When the Disc Protection has been set to Protected you cannot delete titles See page 96 Once an entry is deleted from the Title List it cannot be recovered Once DVD RW R is finalised it cannot be deleted With DVD ...

Страница 84: ...nt to edit from the Title List then press the RED A button The Edit menu is displayed Press the buttons to select Partial Delete then press the OK or button N 1 N 1 HDD Split JAN 01 2009 17 30 PR1 Move sSelect rReturn eExit Title List No 001 Play Pause SCAN Split 1 Split 2 00 00 00 00 00 20 00 00 20 Split Select Return HDD Split JAN 01 2009 17 30 PR1 Move sSelect rReturn eExit Title List No 001 Pl...

Страница 85: ...le List SXCVKL When you need to change the Sort order of Title List While the list menu is displayed press the GREEN B button to select Sort Press the buttons to select the desired item then press the OK or button Date In order of when the titles were recorded Name In alphabetical order Length In order of recorded title length Channel Info In order of Channel information You can sort by Date Name ...

Страница 86: ...k mode press the TITLE LIST button Press the buttons to select an entry you want to play from Title List then press the YELLOW C button Press the buttons to select Scene Navigation then press the OK or button Press the buttons to select desired scene then press the OK or PLAY button Scene Navigation will not operate if a selected title does not have Markers N 1 M N 1 M HDD Time Navigation 3JAN 01 ...

Страница 87: ...displayed Repeat steps 4 6 to make a new scene for the playlist A new scene will be added to the current playlist You can check and see all the scenes on the Edit playlist screen See page 89 To make a new playlist Repeat steps 1 6 if you want to make a new playlist Press the buttons to select Return then press the OK button to finish the operation You can create up to 99 playlist entries Depending...

Страница 88: ...and moves the cursor backwards by one position Space GREEN B button Enters a blank and moves the cursor one forward to the right Clear YELLOW C button Deletes all the character inputs Save BLUE D button Registers the character inputs Press the BLUE D button to select Save The changed title is displayed in the title field of the selected playlist entry N 1 N 1 HDD Playlist JAN 02 2009 13 47 1 3 a C...

Страница 89: ...Select the starting or ending point of the section you want to modify using the playback related buttons PLAY SEARCH SKIP Press the OK button at the end point of the scene The image and ending point time is displayed in the End window Press the buttons to select Change then press the OK button The scene you want to modify is changed with the selected section N 1 HDD Edit Playlist JAN 02 2009 13 47...

Страница 90: ...button at the end point of the scene The image and end point time are displayed in the End window To cancel press the buttons to select Return then press the OK button Press the buttons to select Add then press the OK button The section you want to add is inserted prior to the scene selected in step 4 1 of Adding a Scene Deleting a Scene To setup follow steps 1 to 3 on page 89 4 1 Press the button...

Страница 91: ... the GREEN B button to select Sort Press the buttons to select the desired item then press the OK or button Date In order of when the playlists were created Name In alphabetical order You can sort by Date Name Sorted list will be resorted in copied order upon re entering Playlist N 1 M 1 M HDD Playlist JAN 02 2009 13 47 1 3 a Check eExit No Title Length 001 JAN 02 2009 13 47 00 06 09 002 JAN 02 20...

Страница 92: ...has enough available space for the recording Select a desired mode by pressing the HDD or DVD button on the remote control You can also select a desired mode by pressing the HDD DVD button on the front panel With the unit in Stop mode Playback mode press the TITLE LIST button Press the COPY button Copy screen is displayed During Playback you can also copy the title by pressing the COPY button Pres...

Страница 93: ...ivX Contents Copy Specifications Contents HDD DVD or USB DVD HDD or USB USB HDD or DVD MP3 Supported Supported Supported JPEG photo Supported Supported Supported DivX Supported Supported Supported CD DA Not supported Supported Not supported Disc CD R CD DA CD RW DVD RAM DVD R Finalise DVD RW DVD RW Finalise HDD or USB HDD DVD R DVD RW V or USB USB HDD or DVD R DVD RW V PTP USB is not available whe...

Страница 94: ...er by pressing the GREEN B button Press the RED A button to select Start Copy The message Number of file x is displayed Press the buttons to select Start then press the OK button Folder copy begins Subfolders and files in the selected folder are copied To cancel the copying in progress press the EXIT button 1 CD Copy Selected Items 9 68MB 2 Available 236724MB eExit Start Copy New Folder Rename MP3...

Страница 95: ...ons then press the OK button Back Space RED A button Deletes and moves the cursor backwards by one position Space GREEN B button Enters a blank and moves the cursor one forward to the right Clear YELLOW C button Deletes all the character inputs Save BLUE D button Registers the character inputs Press the BLUE D button to select Save The changed file name is displayed on the selected entry M 1 CD Co...

Страница 96: ...n Press the buttons to select Disc Manager then press the OK or button Press the buttons to select Protection then press the OK button Press the buttons to select On then press the OK button 1 M 1 DVD RAM VR Disc Manager Move sSelect rReturn eExit Disc Name DVD VR Used Space 00 17 0 52 GB Available Space 01 54 SP 3 85 GB Disc Protection Info Not Protected Current Rec Mode VR Mode Rename Protection...

Страница 97: ...t operate If there is a title containing a still picture however that function will not operate If you want to delete a protected entry disable Protect for it on the Lock item Press the buttons to select the Title DivX Music or Photo then press the OK button Press the buttons to select Yes then press the OK button All title lists DivX lists music lists or photo lists are deleted 1 1 DVD RAM VR Dis...

Страница 98: ...RW DVD RW DVD R With DVD RW discs there is no difference between DVD Video format Video mode and DVD Video Recording format VR mode Finalising a Disc CVL After you record titles onto a DVD RW R disc with your HDD DVD RECORDER it needs to be finalised before it can be played back on external devices With the unit in Stop mode press the MENU button Press the buttons to select Disc Manager then press...

Страница 99: ...lise then press the OK button You will be prompted with the message Do you want to unfinalise disc Press the buttons to select Yes then press the OK button You will be prompted again with the message Disc will be unfinalised Do you want to continue Press the buttons to select Yes then press the OK button The disc is unfinalised A DVD RW can be finalised or unfinalised in Video mode Finalise Unfina...

Страница 100: ...t all selected functions In this case some settings configured in the settings menu may not work properly Cannot change the aspect ratio The aspect ratio is fixed for DVD discs See page 43 The angle operation does not work while playing a DVD disc The angle operation is available only when the disc contains images captured from different angles The selected audio and or subtitle language is not pl...

Страница 101: ...not support HDCP High bandwidth Digital Content Protection HDMI output Jitter Check your TV system setup correctly Please refer to the user s manual of your TV The remote control doesn t work Point the remote control at the remote control sensor on your HDD DVD RECORDER Allow for proper distance Remove obstacles between your HDD DVD RECORDER and the remote control Check whether the batteries are d...

Страница 102: ...ital audio output Video Composite Video Video output jack x 1 Component output x 1 Y 1 0Vp p Pb 0 70Vp p Pr 0 70Vp p at 75Ω load HDMI DVI 576p 720p 1080i 1080p Scart Jack AV1 Scart TV Video Composite RGB Audio analogue Recording Picture Compression format MPEG II Audio Compression format Dolby Digital 2ch 256Kbps MPEG II Recording Quality XP about 8 5 Mbps SP about 4 5 Mbps LP about 2 5 Mbps EP ab...

Страница 103: ... placed by the copyright holder saying it may be distributed under the terms of this General Public License The Program below refers to any such program or work and a work based on the Program means either the Program or any derivative work under copyright law that is to say a work containing the Program or a portion of it either verbatim or with modifications and or translated into another langua...

Страница 104: ...License since you have not signed it However nothing else grants you permission to modify or distribute the Program or its derivative works These actions are prohibited by law if you do not accept this License Therefore by modifying or distributing the Program or any work based on the Program you indicate your acceptance of this License to do so and all its terms and conditions for copying distrib...

Страница 105: ... to most effectively convey the exclusion of warranty and each file should have at least the copyright line and a pointer to where the full notice is found One line to give the program s name and a brief idea of what it does Copyright C year name of author This program is free software you can redistribute it and or modify it under the terms of the GNU General Public License as published by the Fr...

Страница 106: ...estrict the users of a free program by obtaining a restrictive license from a patent holder Therefore we insist that any patent license obtained for a version of the library must be consistent with the full freedom of use specified in this license Most GNU software including some libraries is covered by the ordinary GNU General Public License This license the GNU Lesser General Public License appl...

Страница 107: ...sed by this function must be optional if the application does not supply it the square root function must still compute square roots These requirements apply to the modified work as a whole If identifiable sections of that work are not derived from the Library and can be reasonably considered independent and separate works in themselves then this License and its terms do not apply to those section...

Страница 108: ...copy For an executable the required form of the work that uses the Library must include any data and utility programs needed for reproducing the executable from it However as a special exception the materials to be distributed need not include anything that is normally distributed in either source or binary form with the major components compiler kernel and so on of the operating system on which t...

Страница 109: ...D BY APPLICABLE LAW EXCEPT WHEN OTHERWISE STATED IN WRITING THE COPYRIGHT HOLDERS AND OR OTHER PARTIES PROVIDE THE LIBRARY AS IS WITHOUT WARRANTY OF ANY KIND EITHER EXPRESSED OR IMPLIED INCLUDING BUT NOT LIMITED TO THE IMPLIED WARRANTIES OF MERCHANTABILITY AND FITNESS FOR A PARTICULAR PURPOSE THE ENTIRE RISK AS TO THE QUALITY AND PERFORMANCE OF THE LIBRARY IS WITH YOU SHOULD THE LIBRARY PROVE DEFE...

Страница 110: ...DS 0900 SAMSUNG 0900 7267864 0 10 Min www samsung com nl NORWAY 3 SAMSUNG 7267864 www samsung com no POLAND 0 801 1SAMSUNG 172678 022 607 93 33 www samsung com pl PORTUGAL 80820 SAMSUNG 726 7864 www samsung com pt SLOVAKIA 0800 SAMSUNG 726 7864 www samsung com sk SPAIN 902 1 SAMSUNG 902 172 678 www samsung com es SWEDEN 075 SAMSUNG 726 78 64 www samsung com se U K 0845 SAMSUNG 7267864 www samsung ...

Страница 111: ...nmentally safe recycling Business users should contact their supplier and check the terms and conditions of the purchase contract This product and its electronic accessories should not be mixed with other commercial wastes for disposal AK68 01787M Correct disposal of batteries in this product Applicable in the European Union and other European countries with separate battery return systems This ma...

Отзывы: