background image

65

Technical Specifications

Rated voltage

110 - 240V~, 50Hz

Power consumption

33 Watts

Weight

4.5 Kg

General

Size

430mm X 360mm X 70mm

Operating ambient temperature

+5°C ~ +35°C

Installation conditions

Operation position : Horizontal,

Relative humidity : Below 75%

Video (Rear)

Euro Scart Jack 1 : 1.0Vp-p (unbalanced) 75

Audio (Rear)

Euro Scart Jack 1 : -8dBm, 47K

unbalanced

Video (Rear)

Euro Scart Jack 2 : 1.0Vp-p (unbalanced) 75

Input

Audio (Rear)

Euro Scart Jack 2 : -8dBm, 47K

unbalanced

Video (Rear)              

S-Video 

Audio (Rear)             

for S-Video using 

Video (Front)              

RCA Jack 

Audio (Front)              

RCA Jack

RF out 

UHF 21-69 (Initial CH36)

Audio 

RCA Jack, Euro Scart Jack

Output

Audio 

Digital audio out (OPTICAL, COAXIAL)

Video 

RCA Jack, Euro Scart Jack

Video S-Video 

RGB : Euro Scart Jack

CODEC Format 

MPEG II

REC Speed 

SQ(2Mbps), HQ(4Mbps), SHQ(6Mbps)

Color system

PAL, SECAM for Video signal output

HDD

Tuning system

B/G, D/K, I

Video S/N

Above 43dB (standard recording)

Resolution

Above 350 lines (standard recording)

Audio S/N

Above 70dB (standard recording)

Audio frequency characteristics

20Hz - 20KHz

Disc

DVD, CD (12cm), CD (8cm), VIDEO-CD (12cm)

DVD

CD-R (12cm), CD-RW (12cm)

Audio S/N

95dB

Audio dynamic range 

105dB

Menu

lnstructions

Digital Recorder

DVD Player

Juke Box

Photo Album

Set-Up

Enter

Return

Menu

Exit

Move

Menu

lnstructions

Digital Recorder

DVD Player

Juke Box

Photo Album

Set-Up

HDD Playlist

HDD Edit

Copy Photo CD to HDD

CD Playlist

Enter

Return

Menu

Exit

Move

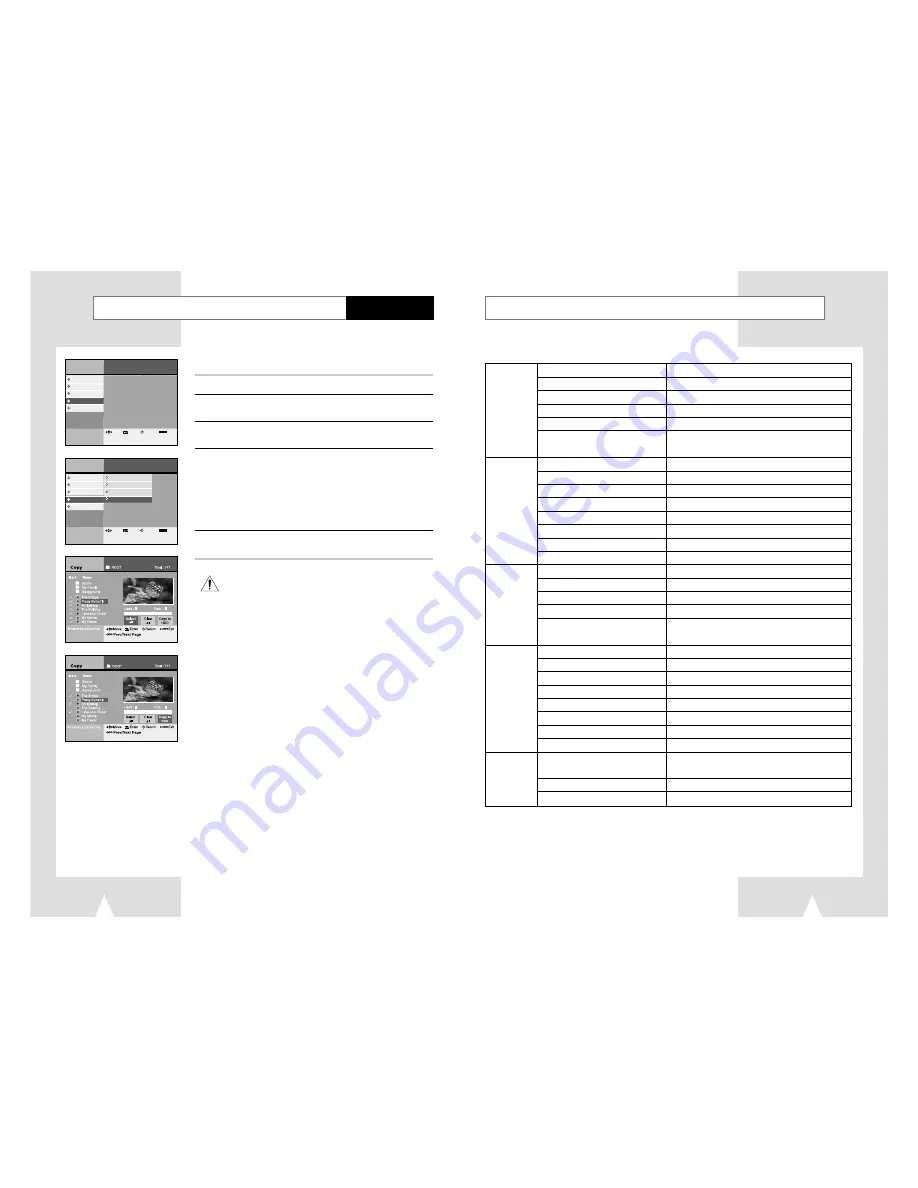
Copy JPEG file from CD to HDD

You can copy JPEG files from CD to HDD.

1

Press the MENU button.

2

Select Photo Album using 

buttons, then press the ENTER

or 

buttons.

3

Select Copy Photo CD to HDD using 

buttons, then press

the ENTER or 

buttons.

4

Select files to copy from CD to HDD using 

buttons, then

press the ENTER button.
• Press ENTER button to cancel file selection.

• 

If you would like to choose all files in folder, move to 

Select

All 

using

➛❿

buttons, then press the ENTER button.

• 

All files in the folder are selected when you press the P-LIST
button after selecting a folder.  

5

Select  

Copy to HDD  using 

➛❿

buttons, then press the ENTER

button.

64

Photo Album

Up to 200 files can be copied at once.

Содержание DVD-H40E

Страница 1: ...THIS APPLIANCE IS DISTRIBUTED BY www samsungdvd com AK68 00076M ELECTRONICS User s Manual DVD HDD Recorder DVD H40E ...

Страница 2: ...the plug with the fuse cover omitted if the cover is detachable If a replacement fuse cover is required it must be of the same colour as the pin face of the plug Replacement covers are available from your dealer If the fitted plug is not suitable for the power points in your house or the cable is not long enough to reach a power point you should obtain a suitable safety approved extension lead or ...

Страница 3: ... broadcasting Simply press the Pause button II when you leave and when you return DVD H40 will instantly replay what you missed while you were away 2 Recorded Program List If customer record the video program Program List will be generated automatically for easy understanding of the recorded program This program list includes Title Name Date and Length Title name can be changed by the Title Insert...

Страница 4: ... time DVD H40 allows MP3 music from CD to be downloaded into HDD as many as consumer wants Max capacity of HDD for MP3 10GB If user include his her favorite photos in the same music folder then user can enjoy the music slide show also At the edit mode user can generate his her own music folder like as CLASSIC JAZZ POP SONG and so on Play list lnstructions Repeat All Slide Show Mark Total 012 Name ...

Страница 5: ...he below GUI screen 8 Connection to DVC or DSC Connecting DSC or DVC through A V Input port enables to enjoy and edit those video programs simply through TV screen Limited to 20 string Indicates selected file Indicates selected file Pushed enter key then pop up menu will be display After delay time setting started slide show Time setting range 3 sec 10 sec Store Edit in HDD Enjoy through TV Image ...

Страница 6: ... Disc Copy 46 Preset of DVD language 47 Set the parental lock 48 Change the lock password 49 Using the Disc Title Menu 50 3D Sound Function 50 Selecting the Audio Language 51 Selecting the Subtitle Language 51 Using the Display Function 52 Special Playback Features 53 A B Repeat 54 Using the Zoom DVD VCD 55 Changing the Camera Angle 55 Using the Bookmark Function DVD VCD 56 Juke Box View the MP3 f...

Страница 7: ... naming your MP3 files do not exceed 15 characters and place mp3 as the file extension General name format of Title mp3 When composing your title make sure that you use 15 characters or less Use a decompression transfer rate of at least 128 Kbps when recording MP3 files Sound quality with MP3 files basically depends on the rate of compression decompression you choose Getting audio CD quality sound...

Страница 8: ...TOR Rear View of the DHR DVD HDD Recorder Accessaries You have just purchased a SAMSUNG DHR Together with your DHR you will find the following accessaries in the box REMOTE CONTROL BATTERIES AUDIO VIDEO CABLE 1 2 3 4 5 6 7 8 9 11 13 14 14 15 17 10 12 16 1 DVD Deck mode indicator 2 Disc type indicator 3 JPEG file indicator 4 MP3 file indicator 5 The time current position time remaining or current s...

Страница 9: ... PLAY LIST button 28 RETURN button 29 MARK button 30 ANGLE button 31 AUDIO button 32 JOG SHUTTLE F W D 1 2 3 4 7 6 5 8 9 10 11 12 13 14 15 16 29 30 31 19 20 21 22 23 24 25 26 27 32 28 17 18 You must insert or replace the batteries in the remote control when you Purchase the DHR Find that the remote control is no longer working correctly 1 Push the tab in the direction of the arrow to release the b...

Страница 10: ...gnal must be received from one of the following sources An outdoor aerial An indoor aerial A cable television network A satellite receiver Make sure that both the television and the DHR are switched off before connecting the cables 1 Remove the aerial or network input cable from the television 2 Connect this cable to the 75Ω coaxial jack marked on the rear of your DHR 3 Plug the coaxial cable supp...

Страница 11: ... to select an external source VOL or Used to adjust the volume of the television PROG Up or Down Used to select the required channel TV MUTE Used to toggle the sound on and off The various functions will not necessarily work on all televisions If you encounter problems operate the television directly 20 21 Using the TV Button on the Remote Control Connecting DHR DVD HDD Recorder to a Satellite Rec...

Страница 12: ... antenna cable from your indoor outdoor antenna or cable wall outlet to the IN FROM ANT jack on the rear panel of the DHR 2 Choose one of the following methods to connect the DHR to your TV RF Connection Connect the supplied RF antenna cable from the OUT TO TV jack on the rear panel of the DHR to your television s Antenna Input Line Connection Connect an RCA type audio video cable red white yellow...

Страница 13: ...onventional Audio CD CDDA is inserted it is automatically played back as the File List is displayed on the screen For MP3 or Photo CDs a desired file must be selected for playback once the File List is displayed on the screen 4 Press the STOP button to stop play When you stop disc play the player remembers where you stopped so when you press PLAY again it will pick up where you left off unless the...

Страница 14: ...language 1 Press the MENU button 2 Select Set Up using buttons then press the ENTER or buttons 3 Select Language using buttons then press the ENTER or buttons 4 Select language you want to change using buttons then press the ENTER or buttons Main menu language would be changed to selected language Menu Photo Album Set Up Digital Recorder lnstructions DVD Player Juke Box Enter Return Menu Exit Move...

Страница 15: ...tal Recorder lnstructions DVD Player Juke Box Enter Return Menu Exit Move Menu lnstructions Enter Return Menu Exit Photo Album Set Up Digital Recorder Buffer Time Audio Options Display Options Language DVD Player Channel Juke Box Clock Setting HDD Format Move Menu lnstructions Enter Return Menu Exit Photo Album Set Up Digital Recorder Audio Options Display Options Language DVD Player Channel Juke ...

Страница 16: ...lnstructions Language Channel Clock Setting Buffer Time Audio Options Display Options Aspect Ratio OSD Message Front Display Video Out System HDD Format Move Enter Return Menu Exit Front Display On Off Menu Digital Recorder DVD Player Juke Box Photo Album Set Up lnstructions Language Channel Clock Setting Buffer Time Audio Options Display Options Aspect Ratio OSD Message Front Display Video Out Sy...

Страница 17: ...ee page 35 36 Edit the recorded program in HDD You can combine divide delete or partial delete saved programs see page 37 40 Record TV program You can record TV programs by timer recording function or Showview see page 41 44 Menu Photo Album Set Up Digital Recorder lnstructions DVD Player Juke Box Enter Return Menu Exit Move Buffer Time Audio Options Display Options Language Channel Clock Setting ...

Страница 18: ...hlight play Select program then press the P LIST button The selected program will be played for 5 seconds in every 5 minutes length 5 Press Text button to change title Press the RETURN button to go back to the previous menu Press the MENU button to close menu mode Press the P LIST button to see program list in direct digest mode See the key Feature part page 5 Virtual keyboard Select character usi...

Страница 19: ...s to one so play programs continuously 1 Press the MENU button 2 Select Digital Recorder then press the ENTER or buttons 3 Select Edit using buttons then press the ENTER or buttons 4 Select Combine then press the ENTER or buttons 5 Select a program to combine using buttons then press the ENTER button Selected programs are displayed at below window Up to 6 programs can be selected The same program ...

Страница 20: ...orded program in HDD Delete White Unselected part Blue Selected part Red Current playback position Digital Recorder Edit the recorded program in HDD Divide Digital Recorder Live TV control will be stopped at the Edit mode The program can be broken or erased in case of sudden power off or plug off during Edit mode Combine divide delete partial delete using Make sure select the END point before move...

Страница 21: ...ion Edit the recorded program in HDD Partial Delete Digital Recorder Original file Delete parts After delete A A B C A A A You can record TV programs in the HDD Make sure present time is set 1 Press the MENU button 2 Select Digital Recorder then press the ENTER or buttons 3 Select Recording using buttons then press the ENTER or buttons 4 Select Timer Recording then press the ENTER button If clock ...

Страница 22: ...TER or buttons 3 Select Recording using buttons then press the ENTER or buttons 4 Select Showview then press the ENTER or buttons 5 Enter the program s Showview code to record then press ENTER button Refer to TV program guide magazine to find Showview Make sure set Prog when you use Showview menu at the first time 6 Turn off the power after finishing the timer recording Press the RETURN button to ...

Страница 23: ...source using the INPUT SEL button for a satellite tuner or external video source Result The channel number is displayed and the programme can be seen on the television 4 Hold the REC button down for a while to start recording Result The record indicator appears on the television screen 5 Press the REC button several times to increase the recording time From 30 min to 8 hours 6 If you wish to cance...

Страница 24: ...selection Audio language DVD title s audio language selection Sub Title DVD title s subtitle language selection 4 Select language using buttons then press the ENTER button Press the RETURN button to go back the previous menu Press the MENU button to close menu scene Menu lnstructions Move Enter Return Menu Exit Digital Recorder DVD Player Juke Box Photo Album Set Up Disc Language Audio Language Su...

Страница 25: ...Player Disc Language Juke Box Audio Language Lock Setting Change Password Lock Setting Level 8 Unlock Adult Kid Safe Level 7 Level 6 Level 5 Level 4 Level 3 Level 2 Level 1 Enter Return Menu Exit Move Menu Photo Album Set Up Digital Recorder lnstructions Sub Title Parental Lock DVD Player Disc Language Juke Box Audio Language Lock Setting Change Password Lock Setting Level 8 Unlock Adult Kid Safe ...

Страница 26: ... with all DVDs How to have the same audio language comes up whenever you play DVD titles See Disc Language Audio Language Sub Title on page 47 You can select a desired subtitle quickly and easily with the subtitle button 1 Press the SUBTITLE button 2 Select the desired subtitle language using buttons 3 Select subtitle On Off using buttons This function depends on what languages are encoded on the ...

Страница 27: ...LAY PAUSE button Pause Press the ll PLAY PAUSE button on the remote control during playback The picture will Pause and the audio will mute To resume playback press the ll PLAY PAUSE button If the player is left in Pause mode for 5 minutes it will play automatically Frame Search Step While in Pause mode roll the jog on the remote control to forward backward one frame at a time Audio is muted during...

Страница 28: ...Angle button when an angle icon is shown at the upper right hand corner then angle selection icon will be appeared at the upper left hand corner 2 Select desired screen angle using buttons 3 To turn off the display press the ANGLE button again Using the Zoom DVD VCD DVD player Changing the Camera Angle DVD player 1 1 54 A B Repeat The A B Repeat function allows you to repeat any segment of a DVD o...

Страница 29: ...57 You can play MP3 files in HDD You also make your own play list or edit MP3 files easily View the MP3 file list in HDD You can display saved MP3 files list in HDD and play see page 58 Edit the MP3 file in HDD You can move copy save or delete files and also change file name in HDD see page 59 View the MP3 file list in CD You can display MP3 files list in CD and play see page 58 Copy MP3 file from...

Страница 30: ...ile selection If you select folder then it shows you included files in folder 5 Press the P LIST button The selected files are displayed in selected order and play the first file All files in the folder are selected when you press the P LIST button after selecting a folder 6 Select Repeat All using buttons then press the ENTER button The selected MP3 files will be played continuously Select Slide ...

Страница 31: ...om CD to HDD You can copy MP3 files from CD to HDD 1 Press the MENU button 2 Select Juke Box using buttons then press the ENTER or buttons 3 Select Copy MP3 CD to HDD using buttons then press the ENTER or buttons 4 Select folder or files to copy from CD to HDD using buttons then press the ENTER button Press the ENTER button again to cancel file selection If you would like to choose all files in fo...

Страница 32: ...you included file s folder 5 Press the P LIST button 8 files are display Select Next using buttons then press the Enter button to see the next 8 files Select Previous using buttons then press the Enter button to see the previous 8 files 6 Select file to see using buttons then press the ENTER button You can enlarge it to full screen size 7 Select Slideshow using buttons then press the ENTER button ...

Страница 33: ... recording Audio S N Above 70dB standard recording Audio frequency characteristics 20Hz 20KHz Disc DVD CD 12cm CD 8cm VIDEO CD 12cm DVD CD R 12cm CD RW 12cm Audio S N 95dB Audio dynamic range 105dB Menu lnstructions Digital Recorder DVD Player Juke Box Photo Album Set Up Enter Return Menu Exit Move Menu lnstructions Digital Recorder DVD Player Juke Box Photo Album Set Up HDD Playlist HDD Edit Copy...

Страница 34: ...ng the reception of a TV program 7 The Copy key is pressed but does not respond The copy function will only work with DVDs but if they contain a copy protection signal the copy operation cannot be performed Discs other than DVDs such as VCDs and CDs cannot be copied 8 The recorded video signals cannot be combined The Combine operation is possible only on the files with the same record speed That i...

Страница 35: ...elen garancia nyújt Samsung leányvállalatai és kiskereskedôi nem felelnek a lemezek kompakt lemezek videó vagy magnókazetták vagy bármely ezekkel kapcsolatos berendezés illetve anyag közvetett vagy következményként felmerülô elvesztéséért vagy károsodásáért Magyarország ELEC Please ensure the form above is completed at the time of purchase and present it to the dealer to quality for guarantee serv...

Страница 36: ...miwv s eiı giaÚ a Belov n eı kai kefaleı pik ap b kefalev ı video kai kasetofwv n wn g kefalev ı camcordor d gennhv t rieı aktiv n wn laser sta compact disk e thleceiristhv r ia st lucniv e ı fouv r nwn mikrokumav t wn z prosarmogev ı metatropeı hv ruqmiv s eiı hv prospav q eieı proı touv t o anexav r thta tou eav n hv n an epituceiı hv anepituceiv ı ouv t e opoiadhv p ote zhmiv a pou eiv n ai apo...

Отзывы: