background image

ENG-9

ENG-8

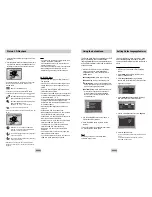
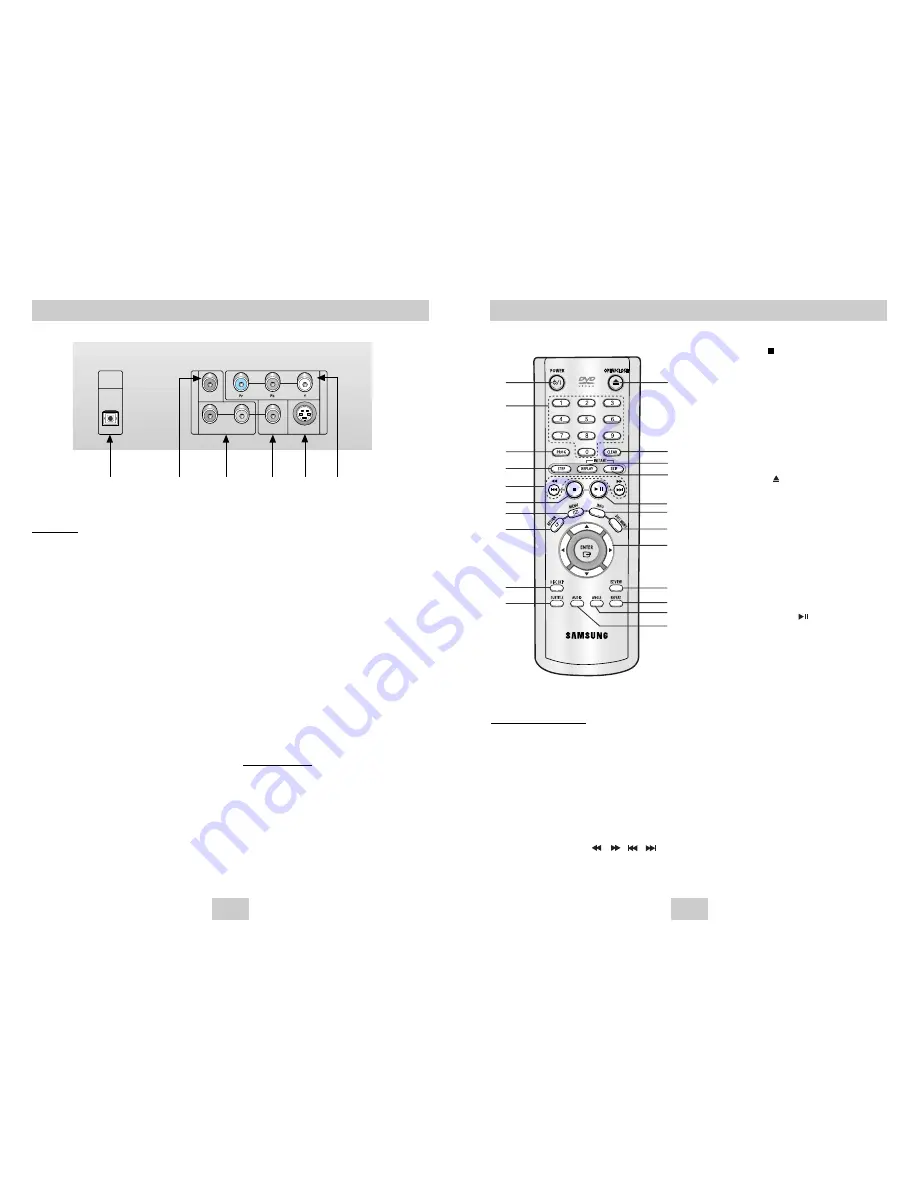
6. STOP Button (      )

7. MENU Button

• Brings up the DVD player’s setup menu.

8. RETURN Button

• Returns to a previous menu.

9. DISC SKIP Button

• Use to skip a disc in order.

10. SUBTITLE Button

11. OPEN/CLOSE (     ) Button

• To open and close the disc tray.

12. CLEAR Button

• Use to remove menus or status displays from the

screen.

13. INSTANT REPLAY Button

• This function is used to replay the previous 10

seconds of the movie from the current position.

14. INSTANT SKIP Button

• This function skips playback ahead 10 seconds.

15. PLAY/PAUSE Button (      )

• Begin/Pause disc play.

16. INFO Button

• Displays the current disc mode.

17. DISC MENU Button

• Brings up the Disc menu.

18. ENTER/DIRECTION Button

(UP/DOWN or LEFT/RIGHT Buttons)

• This button functions as a toggle switch.

19. EZ VIEW Button

• Easy View can convert Letter Box images to full

screen viewing on your conventional TV.

20. REPEAT Button

• Allows you to repeat play a title, chapter, track, or

disc.

21. ANGLE Button

• Use to access various camera angles on a DVD.

22. AUDIO Button

• Use this button to access various audio functions

on a disc.

DVD Function Buttons

1. DVD POWER Button

• Turns the power on or off.

2. NUMBER Buttons

3. PROG Button

• Allows you to program a specific order.

4. STEP Button

• Advances play one frame at a time.

5. SEARCH/SKIP Buttons (      /      ,       /      )

• Allows you to search forward/backward through 

a disc. Use to skip the title, chapter or track.

Tour of the Remote Control

1

11

12
13
14

15
16

17

18

19

20
21
22

2

3

4

5

6
7

8

9

10

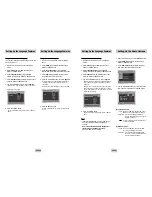
Description-Rear Panel

COAXIAL

DIGITAL

AUDIO OUT

OPTICAL

A

U

D

 I

O

V

 I

D

 E

O

R   -   AUDIO   -  L

VIDEO

S-VIDEO

Rear Panel

1. DIGITAL AUDIO OUT JACKS

• Use an optical digital cable to connect to a 

compatible Dolby Digital receiver. 
Use to connect to an A/V Amplifier that contains
a Dolby Digital or DTS decoder.

2. DIGITAL AUDIO OUT JACKS

• Use a coaxial digital cable to connect to a 

compatible Dolby Digital receiver. 
Use to connect to an A/V Amplifier that contains
a Dolby Digital or DTS decoder.

3. ANALOG AUDIO OUT JACKS

• Connect to the Audio input jacks of your 

television, audio/video receiver.

4. VIDEO OUT JACK

• Use a video cable to connect to the Video input

jack on your television. 

• The Video Output in Setup Menu must be set to

the Component (I-Scan) or S-Video.

5. S-VIDEO OUT JACK

• Use the S-Video cable to connect this jack to

the S-Video jack on your television for a higher
picture quality.   

• The Video Output in Setup Menu must be set to

the S-Video.

6. COMPONENT VIDEO OUT JACKS

• Use these jacks if you have a TV with

Component Video in jacks. These jacks provide
Pr, Pb and Y video. Along with S-Video,
Component Video provides the best picture
quality.  

• If Component (P-Scan) Video Output is selected

in Setup Menu, progressive scan mode will
work.

• If Component (I-Scan) Video Output is selected

in Setup Menu, interlaced scan mode will work.

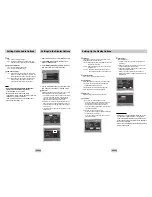
Important Note

Important Note

• Consult your TV User’s Manual to find out if your

TV supports Progressive Scan. 
If Progressive Scan is supported, follow the TV
User’s Manual’s instructions regarding Progressive
Scan settings in the TV’s menu system.

• If Component (P-Scan) Video Output is selected in

Setup Menu, Video(Composite) and S-Video will
not work.

• See page 29 to get more information on how to

use the Setup Menu.

1

2

3

4

5

6

Содержание DVD-C647P

Страница 1: ...5 Disc DVD Changer DVD C647P AK68 00354D AU ...

Страница 2: ...orth over the disc 5 Environmental info The battery used in this product contains chemicals that are harmful to the environment So dispose of batteries in the proper manner according to federal state and local regulations CAUTION USE OF ANY CONTROLS ADJUSTMENTS OR PROCEDURES OTHER THAN SPECIFIED HEREIN MAY RESULT IN HAZARDOUS RADIATION EXPOSURE STANDBY ON LOADING PLAY EZ VIEW STANDBY ON LOADING PL...

Страница 3: ... be played with this player DVD ROM DVD RAM CD ROM CDV CDI HD layer of super Audio CD CDGs play audio only not graphics Ability to play back may depend on recording conditions DVD R R CD RW DVD RW RW It may not play CD R CD RW and DVD R in all cases due to the type of disc or condition of the recording COPY PROTECTION Many DVD discs are encoded with copy protection Because of this you should only ...

Страница 4: ...ay 8 DISC SKIP Use to skip a disc in order 9 DISC EXCHANGE Press this button when you want to change a disc without stopping playback of the current disc STANDBY ON DISC SKIP DISC EXCHANGE 1 5 6 7 8 9 2 3 4 Display Indicators Front Panel Display 1 Tray number Chapter Track Indicator 2 Play Pause Forward play 3 Disc type indicator 4 Displays various messages concerning operations such as PLAY STOP ...

Страница 5: ...CAL A U D I O V I D E O R AUDIO L VIDEO S VIDEO Rear Panel 1 DIGITAL AUDIO OUT JACKS Use an optical digital cable to connect to a compatible Dolby Digital receiver Use to connect to an A V Amplifier that contains a Dolby Digital or DTS decoder 2 DIGITAL AUDIO OUT JACKS Use a coaxial digital cable to connect to a compatible Dolby Digital receiver Use to connect to an A V Amplifier that contains a D...

Страница 6: ...s Manual to find out if your TV supports Progressive Scan If Progressive Scan is supported follow the TV User s Manual s instructions regarding Progressive Scan settings in the TV s menu system Depending on your TV the Method of connection may differ from the illustration above R AUDIO L VIDEO S VIDEO Good picture Better picture Best picture Optimum picture Basic Audio AV Cable S Video Cable OR OR...

Страница 7: ...ress the PLAY button to resume normal play This icon indicates an invalid button press Using the Search Skip Functions During play you can search quickly through a chapter or track or use the skip function to jump to the next selection Searching through a Chapter or Track Press the or button on the remote for more than 1 second and press again to search at a faster speed on a DVD VCD or CD Skippin...

Страница 8: ...guages available in the disc You will be able to choose the subtitle languages or if you prefer turn them off from the screen A DVD disc can have up to 32 different subtitles Note Note When in VCD 2 0 mode MENU ON mode this function does not work See page 13 Title Chapter Time Audio Subtitle Using the Display Function When Playing a DVD VCD CD 1 During play press the INFO button on the remote 2 Us...

Страница 9: ... Title or A B using the LEFT RIGHT buttons Chapter repeats the chapter that is playing Title repeats the title that is playing A B repeats a segment of the disc that you select A B REPEAT Press ENTER at the point where you want the repeat play to start A The B is automatically highlighted Press ENTER at the point where you want the repeat play to stop B A B REPEAT does not allow you to set point B...

Страница 10: ...atio EZ View If you are using a 4 3 TV 1 For 16 9 aspect ratio discs 4 3 Letter Box Displays the content of the DVD title in 16 9 aspect ratio The black bars will appear at the top and bottom of the screen 4 3 Pan Scan The left and right of the screen are cut off and displays the central portion of the 16 9 screen Screen Fit The top and bottom of the screen are cut off and the full screen appears ...

Страница 11: ...ber Note Note Up to three scenes may be marked at a time When in VCD 2 0 mode MENU ON mode this function does not work See page 13 Depending on the disc the Bookmark function may not work Using the Instant Replay Skip Function Using the Instant Replay function DVD If you miss a scene you can see it again using this function If you press the INSTANT REPLAY button the current scene moves backward ab...

Страница 12: ...a y Parent Folder Current Folder and Peer Folders Folders and Files in Current Folder CD R MP3 WMA discs When you record MP3 or WMA files on the CD R please refer to the following Your MP3 or WMA files should be ISO 9660 or JOLIET format ISO 9660 format and Joliet MP3 or WMA files are compatible with Microsoft s DOS and Windows and with Apple s Mac This format is the most widely used When naming y...

Страница 13: ...ildren from viewing unsuitable movies such as those with violence adult subject matter etc 2 Use the UP DOWN buttons on the remote to access the different features 3 Press the ENTER button to access the sub features To make the setup screen disappear after setting up press the MENU button again Note Note Depending on the disc some Setup Menu selections may not work Using the Setup Menu Setup Disc ...

Страница 14: ...Others Subtitle JJJJ Automatic JJJJ Thai AUDIO LANGUAGE JJJJ Original JJJJ Others Audio JJJJ Thai Using the Disc Menu Language This function changes the text language only on the disc menu screens 1 With the unit in Stop mode press the MENU button 2 Select Setup using UP DOWN buttons then RIGHT or ENTER button 3 Select Language Setup using UP DOWN buttons then press the RIGHT or ENTER button 4 Sel...

Страница 15: ...isplay Options Setting Up the Display Options DISPLAY SETUP Still ModeJJJ Auto Screen MessagesJ On Video OutputJJ S Video TV AspectJJJ 4 3 L Box TV SystemJJJ PAL Front DisplayJJ Auto Dim Black LevelJJ Off TV ASPECT 4 3 Pan Scan 16 9 Wide 4 3 Letter Box DISPLAY SETUP Still ModeJJJ Auto Screen MessagesJ On Video OutputJJ S Video TV AspectJJJ 4 3 L Box TV SystemJJJ PAL Front DisplayJJ Auto Dim Black ...

Страница 16: ...rs Enter your new password Enter the new password again Note Note How to make the SETUP menu disappear or return to menu screen during set up Press RETURN or LEFT button If you have forgotten your password see Forgot Password in the Troubleshooting Guide Setting Up the Parental Control PASSWORD CHECK Enter Password 0 9 RETURN PARENTAL SETUP RATING LEVEL Level 8 Adult Level 7 Level 6 Level 5 Level ...

Страница 17: ...in the unit Press the STOP and PLAY buttons simultaneously on the front panel for three seconds The SELECT MENU LANGUAGE display will appear Select the number button of the desired language Press power on from a cold start with no disc in the unit Press the STOP and PLAY buttons simultaneously on the front panel for three seconds The SELECT MENU LANGUAGE display will appear Select the number butto...

Отзывы: