background image

DSR 9401 FT

A / DSB-9401F / DSB-9401V

DSR 9401 FT

A / DSB-9401F / DSB-9401V

GB

GB-9

D

I

G

I

T

A

L


S

A

T

E

L

L

I

T

E


R

E

C

E

I

V

E

R

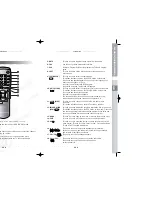
5. MUTE

This key is used to toggle between normal & muted audio.

6. FAV

Use the key to switch between favorite lists. 

7. EPG

Electronic Program Guide button displays the TV/Radio Program 
guide.

8. LAST

This key is used to call up directly whatever channel you were 
watching list.

9. TEXT(GREEN)

This key is used to select the subtitle mode.

(

)

This button functions same as the GREEN button on the menu. 
Press once and subtitle appears. You can select the language you 
want using the c/- keys.
Press twice and Teletext with OSD appears.
Press three times and Teletext with VBI appears.

10. ALT(YELLOW)

This key is used to select the soundtrack list for the current service. 

(

)

This button functions same as the YELLOW button on the menu.
Press once and sound track appears.
Press twice and video track appears.
The sound and video track services are not provided for every 
channel and depend on the conditions the operator is in. 

11. AUDIO(BLUE)

This key is used to change the Audio to the left, right or both 

(

)

channels. 
This button functions same as the BLUE button on the menu.

12. INFORMATION

This key is used to display the programe information box in the screen. 

(RED) (

)

This button functions same as the RED button on the menu. Press once
and you can get simple information on the program. Press twice and 
you can get detailed information on the channel in text box. 

13. MENU

This key is used to open up the menu or return to the previous menu. 

14. EXIT

This key is used to exit a menu or return to the previous menu.

15. OK(

)

This key is used to enter and confirm any data to the receiver in the 
menu system. This key is used to select the item. Press while viewing 
TV and a list of channels is displayed. 

16.          , 

These keys are used to move the highlight bar for selecting 

(        ,            )     

options on the menu, and this button is used to change channels 
and increase or decrease the volume. 

17.  CH+/CH-(       )

These keys are used to change channels.

18.  VOL+/VOL-

These keys are used to increase or decrease the volume.

)

These keys are used to move up or down pages 
on the channel list. 

Remote Control Unit

N

No

otte

e

: When inserting batteries, make sure that the po/-) is correct.

1.  POWER(      )      

This is used to switch the receiver ON/STANDBY mode.

2. 0-9 Numerical keys (

~

)

These keys are to enter numeric values and to select the channel 
directly by entering its number. 

3. Pg+/Pg- (

,

)

These keys are used to move up or down pages the menu.

4. TV/RADIO 

This key is used to toggle between the TV channel and Radio 
channel.

DESCRIPTION

DESCRIPTION

GB-8

DSR 9401_GB_5.0  5/22/03  6:17 PM  Page 8

Содержание DSB-9401F

Страница 1: ... RECEIVER ATELLITE RECEIVER DSR 9401 FTA DSB 9401F DSB 9401V Instructions for use D GB F I E Gebrauchsanweisung D Instructions for use GB Consignes d utilisation F Istruzioni per l uso I Instrucciones de uso E REV 1 1 1 ...

Страница 2: ...Gebrauchsanweisung D Instructions for use GB Consignes d utilisation F Istruzioni per l uso I Instrucciones de uso E DSR9401FTA DSB 9401F DSB 9401V ...

Страница 3: ...DIGITALER SATELLITENRECEIVER DSR 9401 FTA DSB 9401F DSB 9401V Gebrauchsanweisung D ...

Страница 4: ...UBEHÖR Verwenden Sie kein Zubehör das nicht vom Hersteller empfohlen wird Anderenfalls wird das Gerät möglicherweise beschädigt ANSCHLUSS AN DEN LNB KONVERTER DER SATELLITENSCHÜSSEL Das LNB Anschlusskabel verfügt im Kern über einen Spannungsleiter Es empfiehlt sich daher die Set Top Box vom Netz zu trennen bevor Sie dieses Kabel anschließen oder abtrennen ANDERENFALLS KÖNNTE DER LNB KONVERTER BESC...

Страница 5: ... VIDEOTEXT IN MEHREREN SPRACHEN UNTERSTÜTZUNG VON DiSEqC 1 2 INFRAROTFERNBEDIENUNG MIT VOLLEM FUNKTIONSUMFANG AUTOMATISCHE UND MANUELLE SUCHFUNKTION KANALANORDNUNG PROGRAMMIERBAR SCART Optional GERINGE LEISTUNGSAUFNAHME 9 FAVORITENLISTEN AUTOMATISCH AKTUALISIERTER PROGRAMMANAGER EPG 2 TUNER BREITBANDTUNER FÜR DEN FREQUENZBEREICH 950 MHz 2150 MHz UNTERSTÜTZUNG VON DiSEqC 1 2 UMSCHALTUNG ZWISCHEN 13...

Страница 6: ...en Schraubenschlüssel Bei dem Kabel oaxialkabel mit einem Widerstand von 75 Ohm S AN DAS FERNSEHGERÄT art Kabel an das Fernsehgerät angeschlossen mit TV gekennzeichneten Scart Anschluss am t dem entsprechenden Scart Anschluss KORDERS orders ist die STB mit einem durch uf der Rückseite ausgerüstet mithilfe eines Scart an den Receiver anschließen wird unterstützt EN AUDIOSYSTEMS Wandler DAC Digital ...

Страница 7: ...t zwischen 100V und 240V bei einer Frequenz von 50 Hz 60 Hz 2 S PDIF An diese Buchse wird ein Digitalverstärker angeschlossen 3 Scart Buchse VCR An diese Buchse wird ein Videorekorder angeschlossen 4 Scart Buchse TV An diese Buchse wird ein Fernsehgerät angeschlossen Rückseite Anzeige rot befindet sich der Receiver im Anzeige grün befindet er sich im ie Viaccess Smartcard 01V 2 2 1 3 4 ...

Страница 8: ...Taste hat dieselbe Funktion wie die BLAUE Schaltfläche im Menü 12 INFORMATION TMit dieser Taste wird das Programminformationsfeld auf dem Bildschirm BLAU angezeigt Diese Taste hat dieselbe Funktion wie die ROTE Schaltfläche im Menü Wenn die Taste einmal gedrückt wird werden Kurzinformationen zum Programm eingeblendet Wird die Taste zweimal gedrückt werden detaillierte Informationen über den Kanal ...

Страница 9: ...e Taste um das Programm des ausgewählten Kanals wiederzugeben Die farblich codierten Tasten sind den folgenden Dienstlisten zugeordnet Grüne Taste Favoritenliste Gelbe Taste alphabetische Liste Blaue Taste Anbieterliste Rote Taste Transponderliste GRUNDFUNKTIONEN FUNKTIONEN ben können müssen Sie die Installation zu Anfang ausschließlich Menüs angezeigt worden sind wird das folgende Bild Banner f e...

Страница 10: ... wird die Liste des jeweils nächsten Tags angezeigt Tasten Hiermit wird die Programmliste in Blöcken von 30 Minuten angezeigt Drücken Sie die Taste TV RADIO oder FAV um die verschiedenen Programmlisten zu durchsuchen Wählen Sie den Kanal mithilfe der Tasten aus und drücken Sie die Taste um das aktuelle Programm dieses Kanals wiederzugeben 7 Untertitel Wenn das zurzeit ausgestrahlte Programm untert...

Страница 11: ...ie den PIN Code Sie müssen die Hilfemitteilungen am unteren Bildschirmrand beachten Bevor Sie mit dem Menü Installation beginnen müssen Sie im 4 Menü System Setup überprüfen ob dort alle Informationen auf Sie zutreffen 1 Installation Über dieses Menü können Sie neue Dienste anpassen nd hinzufügen sowie den Status des Receivers anzeigen Wählen Sie Installation im Hauptmenü aus um das Untermenü zu ö...

Страница 12: ...eht Sobald Sie die richtige Antennenposition erreicht haben wählen Sie Aktuelle Position speichern aus und drücken Sie die Taste um den Antriebsmotor zurückzusetzen H Hi in nw we ei is s Der im Feld Signalstatus angezeigte Wert hat lediglich Informationscharacter Die Signalqualität kann ausreichend sein auch wenn der angezeigte Wert nicht maximal ist Zu gespeicherter Position gehen Wenn die gespei...

Страница 13: ...tzer können hier die entsprechenden Kanaldaten eingeben Wenn Sie im Menü Installation die Option 5 Manuelles Abtastung auswählen wird die folgende Bildschirmseite angezeigt Wählen Sie den Zielsatelliten aus bei dem die manuelle Suche durchgeführt werden soll Laden Sie einen Transponder Über diese Option können alle Transponder der vorprogrammierten Liste geladen werden die im Receiver gespeichert ...

Страница 14: ...nd 2 2 Transponder löschen Wählen Sie die Transponderliste aus die gelöscht werden soll indem Sie die rote Taste drücken Drücken Sie die Taste zur Bestätigung H Hi in nw we ei is s Mithilfe dieser Funktion wird nicht der Transponder sondern die Liste der Kanäle gelöscht die für diesen Transponder registriert sind ansponders aus htszirkular 18 V Spannung in der Leitung des LNB Konverters an V Spann...

Страница 15: ...icht die Taste sondern die blaue Taste Wenn Sie den Kanalnamen bearbeiten möchten drücken Sie die grüne Taste Die Zeichentabelle wird angezeigt Wählen Sie das gewünschte Zeichen mithilfe der Tasten aus und drücken Sie die Taste um das Zeichen in die Zeichenkette einzufügen Drücken Sie die Taste MENU um die geänderten Daten zu speichern en cht werden soll n g näle löschen ngsfenster die rücken Sie ...

Страница 16: ...DES RECEIVERS NEN DES RECEIVERS 3 2 PIN Code ändern Wählen Sie die zweite Option PIN Code ändern aus wenn Sie den PIN Code ändern möchten Anschließend wird das folgende Menü angezeigt IIm ersten Feld müssen Sie den aktuellen PIN Code eingeben und im zweiten Feld den neuen PIN Code Zur Bestätigung müssen Sie den neuen PIN Code erneut eingeben Beachten Sie dass der PIN Code vierstellig sein muss DER...

Страница 17: ... Drücken Sie die Tasten um die Ortszeit unter Zeitzone zu ändern Die Ortszeit hängt von Ihrem Standort ab Drücken Sie die Tasten um die Ereigniswiederholung auszuwählen die gespeichert werden soll Daily Every Sunday Every Monday Every Tuesday Every Wednesday Every Thursday Every Friday Every Saturday Once Täglich Jeden Sonntag Jeden Montag Jeden Dienstag Jeden Mittwoch Jeden Donnerstag Jeden Freit...

Страница 18: ...ht nicht auf allen Kanälen zur Verfügung 3 Sperranzeige ändern Sie können den Sperrstatus der Viaccess Smartcard ändern 4 Herausgeberinformationen Hier können Sie alle Informationen aufrufen die der Herausgeber auf der Smartcard gespeichert hat 5 Berechtigung Mithilfe dieser Option können die Berechtigungen für die Smartcard angezeigt werden oder einem ssen ationen nd menü ezeigt Top Box über heru...

Страница 19: ...am Datenrate Eingang YUV Format Bildformate Auflösung Skalierung e Problemlösung lsweise Styropor und die Batterien dürfen niemals werden gungsbestimmungen und entsorgen Sie Abfälle n den dafür vorgesehenen Standorten TECHNISCHE DATEN t schlossen sich im Scart Kabel ist mit dem rnsehgeräts de der falsche ang e falsch auf Null mschaltung ist braucht oder gering t nicht itzt nicht fest defekt cht ß ...

Страница 20: ...z Frequenz 22 kHz 4 kHz Amplitude 0 6 V 0 2 V QPSK Reed Solomon Code 204 188 t 8 MPEG 1 Layer I II bis zu 256 kbit s Single Modus Dual Mono Stereo Joint Stereo BASISBAND AUDIO VIDEO AUSGANG VIDEO PAL SECAM Schnittstelle 2 Scart Anschlüsse TV VCR Impedanz 75 Ausgangspegel 1 Vp p Differentialverstärkung max 5 Signal Rausch Abstand min 60 dB digital AUDIO Schnittstelle Scart Anschluss Impedanz 600 Ba...

Страница 21: ...DIGITAL SATELLITE RECEIVER DSR 9401 FTA DSB 9401F DSB 9401V Instructions foruse GB ...

Страница 22: ...t recommended by the manufacturer it may cause a hazard or damage the equipment CONNECTION TO THE SATELLITE DISH LNB The LNB connector cable has voltage in its center core It is therefore recommended that the STB be disconnected from the mains power before connecting or disconnecting this cable FAILURE TO DO SO COULD DAMAGE THE LNB SERVICING Do not attempt to service this product yourself Any atte...

Страница 23: ...AL SCAN FACILITY CHANNEL ORGANIZING PROGRAMMABLE SCARTS OUTPUT Optional LOW POWER CONSUMPTION 9 FAVORITE LISTS AUTO UPDATED EPG 2 TUNER SECTION 950 2150 MHz WIDE BAND TUNER SUPPORTING DiSEqC 1 2 VERSION 13V 18V SWITCHING 22KHz CONTINUOUS TONE CONTROL 3 VIDEO SECTION DVB S COMPLIANT MPEG 2 VIDEO MP ML 2 45 MS s SYMBOL RATE COMPATIBLE FOR BOTH SCPC MCPC SUPPORTS ASPECT RATIO 4 3 NORMAL AND 16 9 WIDE...

Страница 24: ...nger tightened do not use any kind nectors The cable should be 75ohm e end with an F type connector O TV r television you can use Scart Cable V through SCART cable connect the the respective SCART port on the TV been provided with SCART at the rear CR can be connected to the receiver dby UDIO SYSTEM ptical cable input you can connect the STB nd Connect S PDIF optical cable to a digital VIACCESS SE...

Страница 25: ...C mains power cord The input AC voltage range is 100V to 240V 50Hz 60Hz supply 2 S PDIF Output for connection to a digital amplifier 3 VCR SCART This is used to connect to your VCR 4 TV SCART This is used to connect to your TV Rear Panel ht Red the set top box enters the ht Green it enters the operation mode s smartcard For model DSB 9401V 2 2 1 3 4 ...

Страница 26: ...nnels This button functions same as the BLUE button on the menu 12 INFORMATION This key is used to display the programe information box in the screen RED This button functions same as the RED button on the menu Press once and you can get simple information on the program Press twice and you can get detailed information on the channel in text box 13 MENU This key is used to open up the menu or retu...

Страница 27: ...nel and the icon behind the channel name symbolises lock channel Select the channel by pressing Press key to watch that channel The colour key corresponds the following service list Green key Favorites Yellow key Alphabetical Blue key Provider Red key Transponder BASIC FUNCTION FUNCTIONS am you must perform the installation at first programmed you will see the following annels de erical keys or ke...

Страница 28: ...e program list until this day next week by key going forward per one day keys Use to display the program list by 30minutes per block With the TV RADIO or FAV key you can browse among the various programs lists Select the channel by pressing keys and press key to watch this channel 7 Subtitle When the current broadcasting program provides subtitle press the Green key to see the current subtitle lan...

Страница 29: ...ou need the PIN Code You must follow the help message at the bottom of the screen Before you begin with the Installation menu you should check in the 4th menu System Setup whether all the information there is applicable for you 1 Installation The menu provides settings for customizing adding new services and displaying the status of the receiver Select Installation in the main menu mode to select ...

Страница 30: ...drives to south If you finished driving of motor select Store current Position and press key to reset new driving motor N No ot te e The level indicated in the Signal Status is only for reference The signal quality may be adequate even though the level indicated is not maximum Go to Stored Position When the stored position is reached then screen displays Stop you can now continue with the further ...

Страница 31: ... the STB has been provided with the option Manual Scanning where the channel data can be entered by the user After selecting the 5 Manual Scanning from the Installation Menu the following screen will be displayed Select the target satellite for manual search Load a transponder This option will enable the user to load any transponder from the preprogrammed list available within the receiver N No ot...

Страница 32: ...e satellite itself but deletes the list of channels registered for satellite 2 2 Delete Transponder Select the desired transponder list you want to delete by pressing Red key Press key for confirmation N No ot te e This feature doesn t delete transponder itself but deletes the list of channels registered for transponder on of the transponder 3 4 5 6 7 8 or Auto der you want to find Circular Right ...

Страница 33: ...ain to return to previous state If you want to return the channel to the initial position do not press key but press blue key To edit channel name press Green key Font Table will be displayed Select desired character with and then press key to paste character to the string Press MENU key to save tge set data o delete by delete exit ls delete EXIT to exit V RADIO key s enables you to keys TV list a...

Страница 34: ... lock OPERATING THE RECEIVER TING THE RECEIVER 3 2 Change PIN Code To change the PIN Code select the second option Change PIN Code This will take you to the following menu In this option you need to enter the current PIN Code at the first cursor and at the second cursor enter the desired PIN Code To confirm you need to enter the new PIN code again Please remember the PIN Code should be a 4 digit n...

Страница 35: ... press Press the keys to change the Local time in Time Zone The local time will be changed according to your location Press the keys to choose event repetition you want to reserve Daily Every Sunday Every Monday Every Tuesday Every Wednesday Every Thursday Every Friday Every Saturday Once Press the Numerical keys to set the time you want and press the keys to choose a switch time you want to reser...

Страница 36: ...is service is not offered by all channels 3 Change Lock indicator You can change the lock status of the Viaccess Smartcard 4 Issuer Information Here you can call up all information stored on the Smartcard by the publisher 5 Authorization This option would indicate the authorization status of the Smartcard der or a service ailable from this press key ay ware of this satellite when TB ownload ht awa...

Страница 37: ...6 704 x 576 544 x 576 480 x 576 352 x 576 352 x 288 Scale 0 5 2 0 in both horizontal and vertical directions 4 Audio section MPEG 1 audio layer I II mono dual stereo and joint stereo audio mode 32 44 1 and 48 kHz sampling frequencies volume control and mute function through Remote Control Unit Solution of the problem Power cord plug in correctly ectly Back switch in correctly y mode Set receiver t...

Страница 38: ...0mA Overload Protection Frequency 22 4kHz Amplitude 0 6 0 2v QPSK Reed Solomon Coding 204 188 t 8 MPEG 1 layers I II Up to 256kbps Single mode dual mono stereo joint stereo BASE BAND AUDIO VIDEO OUTPUT VIDEO PAL SECAM Interface 2 SCART TV VCR Impedance 75 Output level 1Vp p Differential gain 5 max Signal to noise ratio 60dB min digital AUDIO Inteface Scart Impedance 600 balance Output level 3 0Vp ...

Страница 39: ...RECEPTEUR SATELLITE NUMERIQUE DSR 9401 FTA DSB 9401F DSB 9401V Consignes d utilisation F ...

Страница 40: ...nt comporter des risques et endommager l appareil BRANCHEMENT AU LNB DE LA PARABOLE SATELLITE L âme du câble de connexion du LNB présente une tension élevée Il est donc recommandé de débrancher le STB de l alimentation secteur avant de brancher ou de débrancher ce câble DANS LE CAS CONTRAIRE LE LNB RISQUE D ETRE ENDOMMAGE REPARATIONS Ne tentez pas de réparer vous même cet appareil Toute tentative ...

Страница 41: ...CHARGE DE DiSEqC 1 2 TELECOMMANDE INFRAROUGE MULTIFONCTIONS SYSTEME DE BALAYAGE AUTOMATIQUE ET MANUEL ORGANISATION DES CHAINES PROGRAMMABLE SORTIES SCARTS Optionnel FAIBLE CONSOMMATION 9 LISTES DES FAVORIS MISE A JOUR AUTOMATIQUE DES EPG 2 PARTIE TUNER TUNER A LARGE BANDE 950 2150 MHz PRISE EN CHARGE DE LA VERSION DiSEqC 1 2 COMMUTATION 13V 18V COMMANDE DE TONALITE CONTINUE 22KHz 3 PARTIE VIDEO CO...

Страница 42: ... serrés à la main n utilisez aucune pince quelle cteurs Utilisez un câble coaxial d une son extrémité et muni d un connecteur de type R AU TELEVISEUR léviseur vous pouvez utiliser un câble Scart a un câble SCART branchez le connecteur port SCART correspondant du téléviseur OSCOPE e le STB est équipé d une prise SCART à utilisant un connecteur SCART vous pouvez teur e mode veille TEME AUDIO NUMERIQ...

Страница 43: ...rrespond à une alimentation CA de 100V à 240V 50Hz 60Hz 2 S PDIF Sortie pour le branchement d un amplificateur numérique 3 PRISE SCART TV Permet le raccordement à votre téléviseur 4 PRISE MAGNETOSCOPE VCR Permet le raccordement à votre magnétoscope Panneau arriere de rouge s allume le boîtier décodeur se met de verte s allume il se met en fonctionnement les cartes Smart Viaccess dèle DSB 9401V 2 2...

Страница 44: ...TION Cette touche permet d afficher les boîtes d informations de programme Touche rouge à l écran Cette touche fonctionne comme la touche rouge du menu Si vous appuyez une fois vous obtenez des informations simples sur le programme Si vous appuyez deux fois vous obtenez des informations détaillées sur la chaîne dans la boîte de texte 13 MENU Cette touche permet de faire apparaître le menu ou de re...

Страница 45: ...la chaîne indique une chaîne verrouillée Sélectionnez la chaîne en appuyant sur Appuyez sur la touche pour visualiser cette chaîne Les touches de couleur correspondent à la liste des services ci dessous Touche Verte Favoris Touche Jaune Alphabétique Touche Bleue Prestataire Touche Rouge Transpondeur FONCTIONS DE BASE ONS DE BASE de télévision vous devez effectuer l installation s du menu programmé...

Страница 46: ...e en avançant d un jour à la fois Touches Elles permettent d afficher la liste des programmes par blocs de 30 minutes A l aide de la touche TV RADIO ou FAV vous pouvez parcourir les différentes listes de programmes Sélectionnez la chaîne en appuyant sur les touches et appuyez sur la touche pour visualiser cette chaîne 7 Sous titrage Si le programme en cours de diffusion comporte un sous titrage ap...

Страница 47: ...e Code PIN Suivez les messages d aide qui apparaissent en bas de l écran Avant d utiliser le menu Installation vérifiez si les informations qui figurent dans le 4ème menu System Setup Installation du système vous concernent 1 Installation Le menu propose des réglages de personnalisation l ajout de nouveaux services et l affichage de l état du récepteur Sélectionnez Installation dans le mode menu p...

Страница 48: ...z terminé d utiliser le moteur sélectionnez Store current Position Mémoriser position actuelle et appuyez sur la touche pour réinitialiser le moteur de déplacement R R R Re e e em m m ma a a ar r r rq q q qu u u ue e e e Le niveau figurant dans Signal Status Etat du signal n apparaît qu à titre indicatif La qualité du signal peut être convenable même si le niveau indiqué n est pas au maximum Go to...

Страница 49: ...ctionné 5 Recherche manuelle dans le menu d Installation l écran suivant s affichera Sélectionnez le satellite cible pour une recherche manuelle Chargez un transpondeur Cette option autorisera l utilisateur à charger n importe quel transpondeur depuis la liste préprogrammée disponible à l intérieur du récepteur R R R Re e e em m m ma a a ar r r rq q q qu u u ue e e e Lorsque vous entrez la fréquen...

Страница 50: ...enregistrées pour le satellite 2 2 Delete transponder Supprimer un transpondeur Sélectionnez la liste des transpondeurs désirée que vous souhaitez supprimer en appuyant sur la touche Rouge Appuyez sur la touche pour confirmation R R R Re e e em m m ma a a ar r r rq q q qu u u ue e e e Cette fonctionnalité ne supprime pas le transpondeur lui même mais supprime la liste des chaînes enregistrées pour...

Страница 51: ... sa position initiale n appuyez pas sur la touche mais appuyez sur la touche Bleue Pour éditer le nom des chaînes appuyez sur la touche Verte Un tableau des polices s affichera Sélectionnez le caractère désiré à l aide de puis appuyez sur la touche pour attribuer le caractère à la chaîne Appuyez sur la touche MENU pour sauvegarder les données réglées une chaîne souhaitez ouge ation es r la es et i...

Страница 52: ...RECEPTEUR 3 2 Modifier le Code PIN Pour changer le Code PIN sélectionnez la seconde option Modifier PIN Code Cela vous conduira au menu suivant Dans cette option vous devez entrer le Code PIN actuel au niveau du premier curseur et au niveau du second vous devez entrez le Code PIN souhaité Pour confirmer vous devez entrer une nouvelle fois le nouveau Code PIN Souvenez vous que le Code PIN doit être...

Страница 53: ...ction de votre localisation géographique Appuyez sur les touches pour choisir la répétition d un événement que vous souhaitez réserver Daily Every Sunday Every Monday Every Tuesday Every Wednesday Every Thursday Every Friday Every Saturday Once Chaque jour chaque dimanche chaque lundi chaque mardi chaque mercredi chaque jeudi chaque vendredi chaque samedi une fois Appuyez sur les touches Numerical...

Страница 54: ... toutes les chaînes 3 Changer l indicateur de verrouillage Vous pouvez changer l état de verrouillage de la carte Smart Viaccess 4 Informations de l organisme émetteur Vous pouvez appeler ici toutes les informations enregistrées par le fabricant relatives à la carte Smart 5 Autorisation Cette option devra indiquer le statut d autorisation de la carte Smart u un centre e vous ns ce menu ppuyez sur ...

Страница 55: ...4 Partie Audio Niveau audio MPEG 1 I II mono double stéréo et mode audio stéréo commune fréquences d échantillonnage 32 44 1 et 48 kHz réglage du volume et fonction de coupure du son via la télécommande Solution tion n est Branchez correctement le cordon ment d alimentation mode veille Placez le récepteur sur On nnecté de Vérifiez la connexion et corrigez sortie vidéo Vérifiez la chaîne et la sort...

Страница 56: ...ence 22 4 kHz Amplitude 0 6 0 2v QPSK Codage Reed Solomon 204 188 t 8 MPEG 1 niveaux I II Jusqu à 256 Kpbs Mode unique mono double stéréo et stéréo commune SORTIE AUDIO VIDEO DE LA BANDE DE BASE VIDEO PAL SECAM Interface 2 SCART Téléviseur magnétoscope Impédance 75 Niveau de sortie 1 Vp p Phase différentielle Maxi 5 Rapport signal sur bruit Mini 60 dB numérique AUDIO Interface Scart Impédance Bala...

Страница 57: ...RICEVITORE SATELLITARE DIGITALE DSR 9401 FTA DSB 9401F DSB 9401V Istruzioni perl uso I ...

Страница 58: ...I non utilizzare attacchi diversi da quelli consigliati dal produttore onde evitare rischi o danni all apparecchiatura COLLEGAMENTO ALL LNB DELL ANTENNA PARABOLICA la tensione del cavo a connettore LNB è presente nel relativo nucleo centrale Pertanto si raccomanda di scollegare il decodificatore digitale dall alimentazione di rete prima di collegare o scollegare questo cavo IN CASO CONTRARIO L LNB...

Страница 59: ...E VBI DiSEqC 1 2 SUPPORTATO TELECOMANDO A INFRAROSSI A FUNZIONALITÀ COMPLETA FUNZIONE DI RICERCA AUTOMATICA E MANUALE ORGANIZZAZIONE DEI CANALI PROGRAMMABILE USCITE SCART Opzionale BASSO CONSUMO ENERGETICO 9 ELENCHI DI CANALI PREFERITI EPG AD AGGIORNAMENTO AUTOMATICO 2 SEZIONE SINTONIZZATORE SINTONIZZATORE A BANDA LARGA 950 2150 MHz SUPPORTO DELLA VERSIONE DiSEqC 1 2 COMMUTAZIONE 13V 18V CONTROLLO...

Страница 60: ... antenna al sul retro del STB essere serrati a mano non utilizzare alcun tipo di siale intrecciato all estremità con impedenza di 75ohm RE AL TELEVISORE sore è possibile utilizzare il cavo SCART il cavo SCART collegare il connettore SCART ART corrispondente sul televisore GISTRATORE un videoregistratore il STB è stato dotato di un uscita VCR T è possibile collegare il videoregistratore al ricevito...

Страница 61: ... compreso tra 100V e 240V con alimentazione a 50Hz 60Hz 2 S PDIF Questa uscita viene utilizzata per collegare un amplificatore digitale 3 VCR SCART Questa uscita viene utilizzata per collegare il videoregistratore 4 TV SCART Questa uscita viene utilizzata per collegare il televisore Pannello posteriore l LED è rosso il set top box entra in modalità l LED è verde il set top box entra in modalità r ...

Страница 62: ...nu 12 INFORMATION Questo tasto viene utilizzato per visualizzare la casella delle informazioni RED sul programma Questo pulsante ha la stessa funzione del pulsante ROSSO sul menu Premere una volta per ricevere informazioni sintetiche sul programma Premere due volte per ricevere informazioni dettagliate sul canale nella casella di testo 13 MENU MENU Questo tasto viene utilizzato per aprire il menu ...

Страница 63: ... simbolizza un canale bloccato Selezionare il canale premendo Premere il tasto per guardare quel canale Il tasto colorato corrisponde all elenco di servizi seguente Tasto Verde Preferiti Tasto Giallo Alfabetico Tasto Blu Provider Tasto Rosso Risponditore FUNZIONI DI BASE ONI DI BASE sivo è necessario eseguire l installazione mmagini di menu i verrà visualizzata l immagine o intestazione canale all...

Страница 64: ... dei programmi fino al giorno corrente della settimana successiva andando avanti di un giorno alla volta Tasti Utilizzare questi tasti per visualizzare l elenco dei programmi blocchi da 30 minuti Tramite i tasti TV RADIO o FAV è possibile navigare tra i diversi elenchi di programmi Selezionare il canale premendo i tasti e premere il tasto per guardare il canale corrente 7 Sottotitoli Se il program...

Страница 65: ...lla Guida visualizzato nella parte inferiore dello schermo Prima di seguire le istruzioni del menu di installazione è necessario verificare che tutte le informazioni del 4 menu Simpostazione sistema siano appropriate 1 Installazione Il menu include le impostazioni per la personalizzazione l aggiunta di nuovi servizi e la visualizzazione dello stato del ricevitore Selezionare Installazione nel menu...

Страница 66: ... nord e il tasto regola la posizione verso sud Al termine selezionare Store current Position e premere il tasto per reimpostare il posizionatore N No ot ta a il livello indicato in Signal Status è solo a scopo di riferimento La qualità del segnale può essere adeguata anche se non viene indicato il livello massimo Passare alla posizione desiderata Quando si raggiunge la posizione desiderata viene v...

Страница 67: ...ale Dopo aver selezionato 5 Rilevazione Manuale dal menu Installation viene visualizzata la schermata seguente Selezionare il satellite di destinazione per la ricerca manuale Load a transponder Questa opzione consente all utente di caricare qualsiasi risponditore dall elenco preprogrammato disponibile all interno del ricevitore N No ot ta a quando si immette il valore di frequenza dopo aver impost...

Страница 68: ...il satellite ma solo l elenco di canali registrati per il satellite 2 2 Delete transponder Eliminazione del risponditore Selezionare l elenco di trasponditori che si desidera eliminare premendo il tasto Rosso Premere il tasto per confermare N No ot ta a questa funzione non elimina il risponditore ma solo l elenco di canali registrati per il risponditore itore che si desidera trovare cular Right po...

Страница 69: ...iportare il canale alla posizione iniziale non premere il tasto ma il tasto blu Per modificare il nome del canale premere il tasto Verde Verrà visualizzata la tabella dei caratteri Selezionare il carattere desiderato con quindi premere per incollare il carattere alla stringa Premere il tasto MENU per salvare i dati impostati e del canale minare premendo i e il tasto ENU EXIT ificati e il remere re...

Страница 70: ...are il codice PIN selezionare la seconda opzione Change PIN Code Verrà visualizzato il menu seguente Se si seleziona questa opzione è necessario immettere il Codice PIN corrente nel primo campo e il Codice PIN desiderato nel secondo campo Per confermare è necessario immettere il nuovo Codice PIN una seconda volta Ricordare che il Codice PIN deve essere un valore numerico di quattro cifre IL CODICE...

Страница 71: ...ale verrà modificata in base all area geografica dell utente Premere i tasti per selezionare la ripetizione degli eventi che si desidera impostare Daily Every Sunday Every Monday Every Tuesday Every Wednesday Every Thursday Every Friday Every Saturday Once giornaliera ogni domenica ogni lunedì ogni martedì ogni mercoledì ogni giovedì ogni venerdì ogni sabato una volta Premere i tasti numerici per ...

Страница 72: ...io non viene offerto da tutti i canali 3 Change Lock indicator È possibile modificare lo stato di blocco della smartcard Viaccess 4 Issuer Information Qui è possibile richiamare le informazioni memorizzate sulla smartcard dal produttore 5 Authorization Questa opzione indica lo stato di autorizzazione della smartcard der di servizi vengano esto menu remere il tasto ware di questo Sirius e va versio...

Страница 73: ...288 Scala 0 5 2 0 sia in verticale che in orizzontale 4 Sezione audio Livello audio MPEG 1 I e II modalità mono duale stereo e joint stereo frequenze di campionamento da 32 44 1 e 48 kHz regolazione del volume e funzione di disattivazione audio tramite telecomando Soluzione one Collegare il cavo di rettamente alimentazione correttamente tà standby Impostare il ricevitore su On egato Verificare il ...

Страница 74: ...O PAL SECAM Interfaccia 2 SCART TV VCR Impedenza 75 Livello di uscita 1Vp p Guadagno differenziale 5 max Rapporto segnale rumore 60dB min digitale AUDIO Intefaccia Scart Impedenza 600 bilanciamento Livello di uscita 3 0Vp p max controllabile Risposta in frequenza 3dB 20 15kHz Rapporto segnale rumore 60dB min digitale Uscita audio digitale S PDIF MEMORIA Flash 2MB SDRAM 8MB SPECIFICHE FISICHE Dimen...

Страница 75: ...RECEPTOR DE SATÉLITE DIGITAL DSR 9401 FTA DSB 9401F DSB 9401V Instrucciones de uso E ...

Страница 76: ... use ningún dispositivo que no esté recomendado por el fabricante podría provocar un accidente o dañar el equipo CONEXIÓN AL LNB DE LA ANTENA PARABÓLICA El cable del conector del LNB tiene voltaje en su núcleo central Por tanto se recomienda desconectar el decodificador de la alimentación antes de conectar o desconectar este cable NO HACERLO PUEDE DAÑAR EL LNB SERVICIO No intente reparar este prod...

Страница 77: ...D DE MANDO A DISTANCIA POR INFRARROJOS CON FUNCIONALIDAD COMPLETA FUNCIÓN DE EXPLORACIÓN AUTOMÁTICA O MANUAL ORGANIZACIÓN DE CANALES PROGRAMABLE SALIDAS SCARTS Opcional BAJO CONSUMO NUEVE LISTAS DE FAVORITOS EPG ACTUALIZADA AUTOMÁTICAMENTE 2 SECCIÓN DE SINTONIZACIÓN SINTONIZADOR DE BANDA ANCHA DE 950 2150 MHz ADMITE DiSEqC VERSIÓN 1 2 CONMUTACIÓN 13V 18V CONTROL DE TONOS CONTINUO DE 22 kHz 3 SECCI...

Страница 78: ...el STB eben apretarse a mano ve El cable debe ser coaxial trenzado y con un conector de tipo F V or puede usar un cable Scart te un cable SCART conecte el uerto SCART correspondiente del TV orpora en su parte trasera un conector SCART onectarse el vídeo al receptor esta conexión O DIGITAL a de cable óptico S PDIF podrá conectar con do de calidad superior Conecte el cable gital GENTES PARA SERVICIO...

Страница 79: ...oltaje CA de entrada va de 100 a 240 V a 50 60 Hz 2 S PDIF Salida para conexión a un amplificador digital 3 VCR SCART Se usa para conectar al vídeo 4 TV SCART Se usa para conectar al TV Pared dorsal dicador LED se enciende en rojo dor entra en modo en espera dicador LED se enciende en verde o de funcionamiento a tarjetas inteligentes Viaccess delo DSB 9401V 2 2 1 3 4 ...

Страница 80: ...unciona igual que el botón AZUL del menú 12 INFORMATION Tecla usada para ver en pantalla el cuadro de información del programa Este botón funciona igual que el botón ROJO del menú Pulse una vez y obtendrá información básica del programa Pulse dos veces y en el cuadro se obtendrá información detallada del canal 13 MENU Tecla usada para abrir el menú o volver al menú anterior 14 EXIT Tecla usada par...

Страница 81: ...entras que el icono significa que es una canal bloqueado Seleccione el canal pulsando Pulse la tecla para ver ese canal La teclas de color corresponden a la siguiente lista de servicios Verde Favoritos Amarilla Alfabética Azul Proveedor Roja Transpondedor FUNCIONES BÁSICAS NES BÁSICAS isión se ha de llevar a cabo la instalación genes de menú evisión se verá la siguiente imagen al de visionado as N...

Страница 82: ...emana siguiente avanzando día a día Teclas Se usa para ver la lista de programas en bloques de 30 minutos Con las teclas TV RADIO o FAV es posible desplazarse entre las distintas listas de programas Seleccione el canal pulsando las teclas y pulse la tecla para ver ese canal 7 Subtítulos Si el programa de emisión actual ofrece subtítulos pulse la tecla Verde para ver la lista de idiomas de subtítul...

Страница 83: ...IN debe seguirse el mensaje de ayuda de la parte inferior de la pantalla Antes de empezar con el menú Instalación debería comprobarse en el cuarto menú Ajuste del sistema si es aplicable toda la información allí indicada 1 Instalación El menú proporciona valores para personalizar añadir nuevos servicios y mostrar el estado del receptor Seleccione Instalación en el modo de menú principal para selec...

Страница 84: ... desplazamiento del motor seleccione Almace pos actual y pulse la tecla para poner a cero el nuevo accionamiento del motor N No ot ta a El nivel indicado en el Estado de la señal es sólo una referencia La calidad de la señal puede ser adecuada incluso si el nivel indicado no llega al máximo Desplazamiento a una posición almacenada Cuando se alcanza una posición almacenada en la pantalla aparece Pa...

Страница 85: ... puede introducir los datos del canal Tras seleccionar 5 Exploración manual en el menú Instalación aparecerá la pantalla siguiente Seleccione el satélite objeto de la búsqueda manual Cargue un transpondedor Esta opción permitirá al usuario cargar cualquier transpondedor de la lista preprogramada disponible en el receptor N No ot ta a Si se introduce Frecuencia después de indicar Cargar TR a nuevo ...

Страница 86: ... sino la lista de canales registrados del satélite 2 2 Delete transponder Suprimir transpondedor Seleccione la lista de transpondedores que desea suprimir pulsando la tecla Roja Pulse la tecla para confirmar N No ot ta a Esta función no suprime el transpondedor sino la lista de canales registrados del mismo edor que se desea encontrar da Circular derecha A través de la e horizontal y 13 V en caso ...

Страница 87: ... la posición inicial no pulse la tecla sino la azul Para editar un nombre de canal pulse la tecla Verde Aparecerá la tabla de tipos de letra Seleccione el carácter deseado pulsando las teclas y pulse la tecla para añadir el carácter a la cadena Pulse la tecla MENU para guardar los datos establecidos canal ir pulsando la s cla para U EXIT para s ificados cla para pulse MENU preferido radio con la t...

Страница 88: ...loqueo 3 2 Modif Cód PIN Para cambiar el Código PIN seleccione la segunda opción Modif Cód PIN De este modo se desplazará al menú siguiente En esta opción se debe introducir el Código PIN actual junto al primer cursor y el Código PIN nuevo ante el segundo Para confirmar se debe volver a entrar el Código PIN nuevo Recuerde que el Código PIN debe ser un valor numérico de cuatro dígitos CÓDIGO PIN PR...

Страница 89: ...e las teclas para cambiar la hora Local en Zona horaria La hora local cambiará en función de la ubicación Use las teclas para elegir la repetición de sucesos que quiera reservar Daily Every Sunday Every Monday Every Tuesday Every Wednesday Every Thursday Every Friday Every Saturday Once Diaria Cada domingo Cada lunes Cada martes Cada miércoles Cada jueves Cada viernes Cada sábado Una vez Pulse las...

Страница 90: ... los canales ofrecen este servicio 3 Cambie el indicador de bloqueo Puede cambiarse el estado de bloqueo de la tarjeta inteligente Viaccess 4 Información del emisor Aquí puede recuperarse toda la información guardada por el editor en la tarjeta inteligente 5 Autorización Esta opción indica el estado de autorización de la tarjeta inteligente ma oveedor de posible que menú ulse la tecla de satélites...

Страница 91: ...en y función de silencio a través del mando a distancia SMPS 100 240 V CA 50 60 Hz Máx 25 W 11 W MPEG 2 ISO IEC 13818 Especificación del flujo de transporte MPEG 2 MP a ML Hasta 100 Mbps 4 2 2 4 3 16 9 720 x 576 704 x 576 544 x 576 480 x 576 352 x 576 352 x 288 0 5 2 0 en dirección horizontal y vertical Solución del problema Enchufar bien el cable de red de Conectar el receptor onectado Comprobar ...

Страница 92: ...sobrecarga Frecuencia 22 4 kHz 0 6 0 2 v QPSK Codificación Reed Solomon 204 188 t 8 MPEG 1 capas I II Hasta 256 kbps Mono mono dual estéreo y estéreo conjunto SALIDA DE AUDIO V_DEO DE BANDA BASE VÍDEO PAL SECAM Interfaz 2 SCART TV VCR Impedancia 75 Nivel de salida 1 Vp p Ganancia diferencial 5 máx Relación señal ruido 60 dB min digital AUDIO Interfaz Scart Impedancia 600 balance Nivel de salida 3 ...

Отзывы: