120
Starting PC mode
If you connect the USB cable to a USB port on your PC and then turn on the power, the
camera will automatically switch to "computer connection mode".
In this mode, you can download stored images to your PC through the USB cable.
The LCD monitor is always turned off in PC mode.
The auto focus lamp will blinks when the files are transferring via the USB connection.
Connecting the camera to a PC
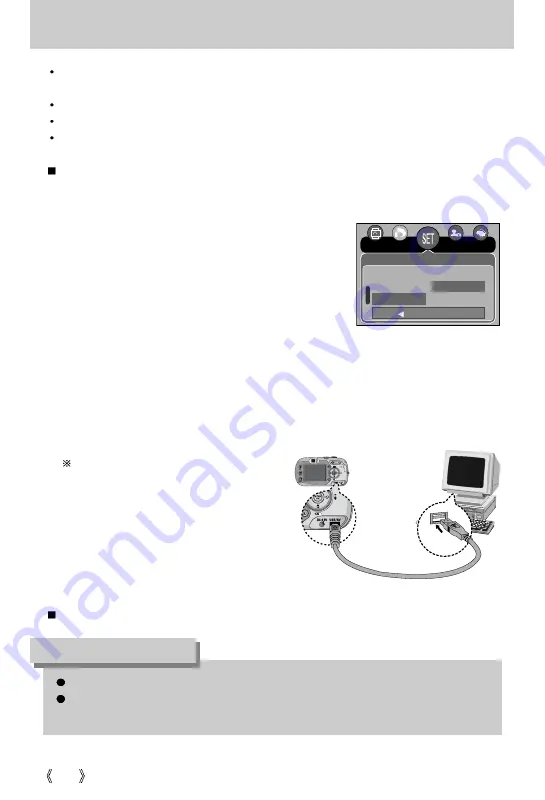
1. Turn the PC power on.
2. Turn the camera power on.
3. In any mode other than Voice Recording mode, press
the MENU button.
4. Press the LEFT/ RIGHT button and select the [Setup]
menu tab.
5. Select the [USB] menu by pressing the UP/ DOWN
button and press the RIGHT button.
6. Use the UP and DOWN buttons to select [Computer],
and then press the OK button.
7. Press the menu button twice and the menu will disappear.
8. Connect the PC and the camera via the USB cable.
- Insert the small plug of the USB cable into the camera USB connection terminal.
- Insert the large connector of the USB cable into the USB port of the PC.
- The plugs must be firmly inserted.
The camera driver must be installed before using PC mode.
To save battery power, it is recommended that you use an AC adapter (Optional) when
connecting the camera to a computer.
INFORMATION
Disconnecting the camera and PC : Refer to page 125 (Removing the removable disk).
If you selected [Printer] in Step 6, when you
connect the camera to your computer, the
[Connecting Printer] message will be
displayed on the LCD monitor and the
connection will not be established. In this
case, disconnect the USB cable, and then
follow the procedure from Step 3 and
onward.
Back:
Set : OK
Setup
Imprint
Sound
Computer
USB
Printer


