background image

ŝ

46

Ş

Starting the slide show
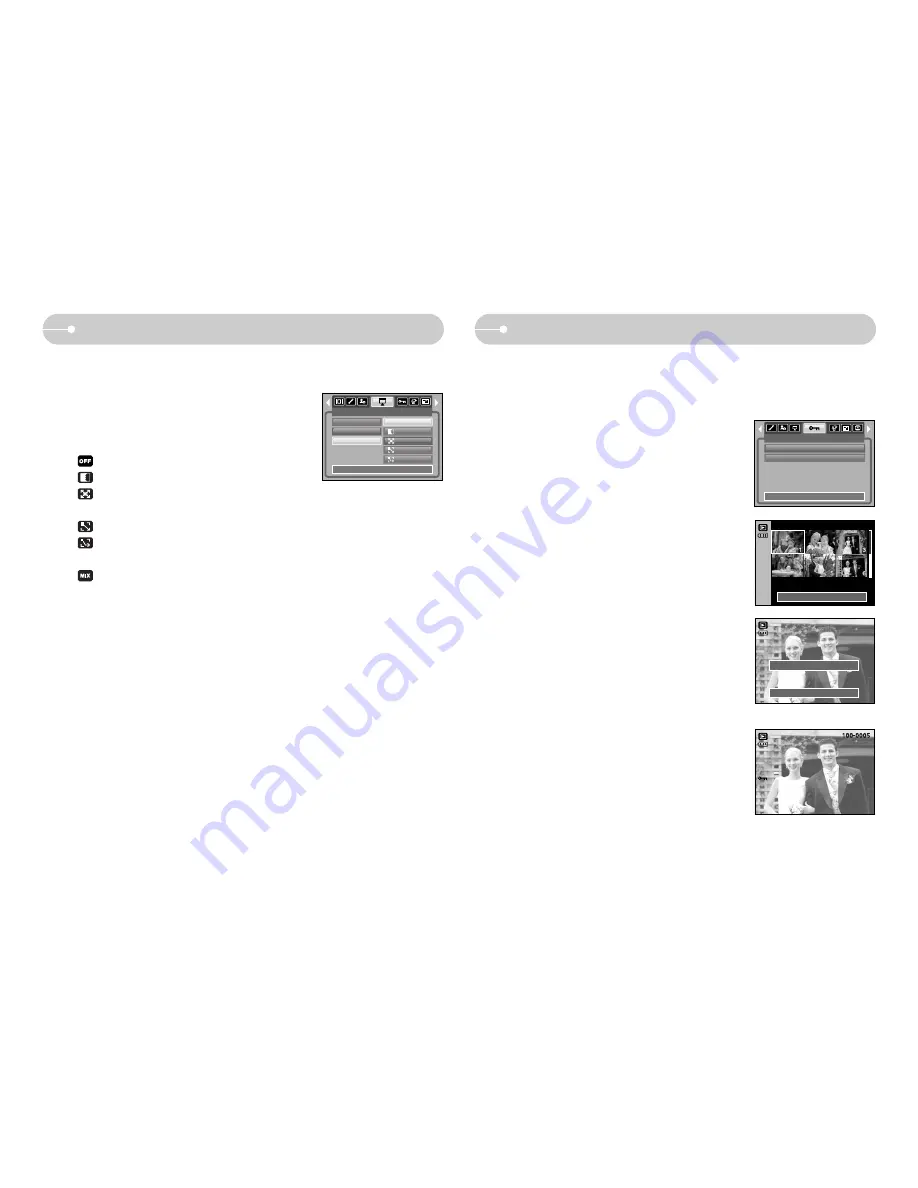
Protecting images

ƈ

This is used to protect specific shots from being accidentally erased (Lock).
It also unprotects images that have been previously protected (Unlock).

ƃ

Protecting Images

1. Press the play mode button and press the menu

button.

2. Press the LEFT / RIGHT button and select the

[PROTECT] menu tab.

3. Select a desired sub menu by pressing the UP /

DOWN button and press the OK button.

[Select ] : Selection window for an image to be

protected/released is displayed.

- Up / Down / Left / Right : Select an image
- Zoom W / T Button : Protect / release the image
- OK button

: Your changes will be saved

and the menu will
disappear.

[All Pics] : Protect / release all saved images
- Zoom W / T Button : Protect / release the images
- OK button

: Your changes will be saved

and the menu will disappear.

- If you protect an image, the protect icon will be

displayed on the LCD monitor. (An unprotected
image has no indicator)

- An image in LOCK mode will be protected from

the delete function or [Delete] functions, but will
NOT be protected from the [Format] function.

PROTECT

Select 
All Pics

Exit:MENU        

Move:   

Set:OK

W

Unlock      

T

Set:OK

W

Unlock      

T

ƃ

Configure slide show effects : Unique screen effects can be used for the slide

show.

1. Select the [Effect] sub menu by pressing the 

UP / DOWN button and press the RIGHT button.

2. Use the Up / Down button to select the type of

effect.

: Normal display.
: Image is displayed slowly.
: Image is displayed slowly from the centre

outwards.

: Image moves from the top left.
: The image slides diagonally from top left to

bottom right. 

: The image slides irregularly.

3. Press the OK button to confirm the setting.

SLIDE

Show
Interval

Effect

Back:

Set:OK

OFF

Содержание Digimax S800 - Digital Camera - 8.1...

Страница 1: ...ng Camera This manual will guide you through using the camera including capturing images downloading images and using the application software Please read this manual carefully before using your new c...

Страница 2: ...ure to use the supplied USB cable to connect the camera to your PC Please note that the manufacturer holds no responsibility for loss or damage of images on the memory card due to the use of a card re...

Страница 3: ...proximity to flammable or explosive gases as this could increase the risk of explosion Should any form of liquid or a foreign object enter the camera do not use it Switch off the camera and then disco...

Страница 4: ...ng play mode 36 Playing back a still image 36 Playing back a movie clip 36 How to capture the movie clip 37 Playing back a recorded voice 38 LCD monitor Indicator 38 Using the camera buttons to set th...

Страница 5: ...m II 450MHz Pentium 700MHz or better is recommended 200MB of available hard disk space Minimum 64MB RAM 1024x768 pixels 16 bit colour display compatible monitor 24 bit colour display recommended CD RO...

Страница 6: ...5 Identification of features Strap eyelet Shutter button Mode dial Power button Speaker Microphone Lens Lens cover Flash Self timer lamp Auto focus lamp Front Top...

Страница 7: ...ack Bottom LCD monitor Tripod socket 5 function button E Effects button Play mode Printer button Zoom T button Digital zoom Camera status lamp Zoom W button Thumbnail button Delete button USB AV conne...

Страница 8: ...ge to print and download images with the cradle Refer to page 51 70 71 Camera connection terminal AC connection terminal USB port AV connection terminal Battery chamber Battery chamber cover Voice mem...

Страница 9: ...saving the image data and turns off when the camera is ready to take a picture While voice memo recording The lamp blinks While voice recording The lamp blinks Transmitting Data with a PC The lamp tu...

Страница 10: ...nserted battery please check whether the battery is inserted with the correct polarity When the battery chamber cover is opened do not press the battery chamber cover by force This may cause damage to...

Страница 11: ...quid Should this happen clean the memory card with a soft cloth Please keep the memory card in its case when not in use During and after periods of extended use you may notice that the memory card is...

Страница 12: ...SD memory card before taking a picture Don t remove the memory card when the camera status lamp is blinking as this may cause damage to data in the memory card INFORMATION When using a 20MB internal m...

Страница 13: ...the left of its current position UP DOWN button Changes the value of each item Setting up the battery type 1 Select the Battery Type menu by pressing the UP DOWN button and press the RIGHT button 2 Se...

Страница 14: ...shake warning p 17 12 Date Time 2006 01 01 01 00 PM p 57 13 Exposure compensation p 31 14 White Balance p 30 31 15 ISO p 30 16 RGB RGB p 29 17 Sharpness p 35 18 Image quality Frame rate p 33 19 Image...

Страница 15: ...image as if the object is not moving Low Shutter speeds can capture a moving object with an active effect How to use the AUTO mode Please select this mode for quick and easy picture taking with minima...

Страница 16: ...ord the movie clip without voice 1 Press the Up button and the icon will display on the LCD monitor 2 Press the shutter button and movie clip is recorded for as long as the available recording time wi...

Страница 17: ...tings for a variety of shooting situations These include LANDSCAPE CLOSE UP SUNSET DAWN BACKLIGHT FIREWORKS and BEACH SNOW scenes 1 Select the SCENE mode by rotating the mode dial 2 Press the menu but...

Страница 18: ...oting conditions and camera settings When the Flash Off or Slow synchro mode is selected in a low lighting condition the camera shake warning indicator may appear on the LCD monitor In this case use a...

Страница 19: ...utton down halfway activates the autofocus and checks the condition of the flash Pressing the shutter button down fully takes and stores the image If you select voice memo recording the recording will...

Страница 20: ...ra malfunction When the camera is turned on take care not to touch the camera s moving lens parts as this may cause the resulting image to be dim and unclear INFORMATION TELE zoom Optical zoom 2X WIDE...

Страница 21: ...he shutter button will stop the voice memo A distance of 40cm between you and the camera microphone is the best distance to record sound INFORMATION While the menu is showing press the DOWN button to...

Страница 22: ...rame 2 Press the SHUTTER button halfway When the green auto focus frame lights up it means the camera is focused on the subject Be careful not to press the SHUTTER button all the way down to avoid tak...

Страница 23: ...in a poorly lit condtion with the flash there may be a white speck in the captured image The speck is caused by the reflecting of the flash light from the floating matters It is not camera malfuction...

Страница 24: ...recommend using a tripod for this function The flash does not fire Select this mode when capturing images in a place or situation where flash photography is prohibited When you capture an image in a...

Страница 25: ...ing In Movie Clip mode only the 10SEC self timer will work Selecting the self timer 1 Rotate the MODE DIAL to select a RECORDING mode with the exception of VOICE RECORDING mode 2 Press the SELF TIMER...

Страница 26: ...and select the sub menu in the rest special effect menu 25 E Effect button Special Effect Colour 3 Select a desired sub menu by pressing the Up Down button and press the OK button No effect is added...

Страница 27: ...ure The frame is activated Capture Shutter Move After changing the frame position Pressing the button Pressing the button Pressing the Up Down Left Right button You can make the subject stand out from...

Страница 28: ...hutter button Pressing the OK button 27 Special Effect Composite shooting Changing a part of composite shot before taking the last shot Before taking the last composite shot you can change a part of c...

Страница 29: ...ressing the Up Down Left Right button Photoframe Capture Shutter Frame Pressing the Up button Pressing the OK button Pressing the button Changing a part of composite shot after taking the last shot 1...

Страница 30: ...own Button Navigates between R G and B icons Left Right Button Changes value of each icon 3 When you press the button again the value you set will be saved and RGB setup mode will end 29 Movie Clip fr...

Страница 31: ...ed and White Balance setup mode will end White balance The white balance control allows you to adjust the colours to appear more natural looking Selecting an ISO Sensitivity 1 Press the button and the...

Страница 32: ...tion value reduces the exposure Note that a positive exposure compensation value increases the exposure and the LCD monitor will appear white or you may not get good pictures 1 Select the CUSTOM menu...

Страница 33: ...subject to change without prior notice Menu tab Main menu Sub menu Camera working mode Page Landscape Closeup Sunset Dawn Backlight Firework Beach Snow MODE p 16 You can use the menu on the LCD monit...

Страница 34: ...d by the Joint Photographic Experts Group This type of compression is most commonly used for compressing photos and graphics because it can compress the files efficiently without damaging the data INF...

Страница 35: ...best to use a tripod for the AEB shooting as the time to save each image file is longer and the blurring caused by camera shake may occur PROGRAM mode SHOOTING Single Continuous AEB If you cannot obta...

Страница 36: ...c LCD Save Full information mode Basic information mode You can adjust the sharpness of the picture you want to take You cannot check the sharpness effect on the LCD monitor before you take a picture...

Страница 37: ...have turned on the camera by pressing the POWER button you can press the PLAY MODE button once to switch to Play mode and press it again to switch to Recording mode You can turn the power on with the...

Страница 38: ...e trimming confirmation window will display at the point of the last frame INFORMATION Play Capture E On camera movie trimming You can extract desired frames of movie clip during the movie clip play b...

Страница 39: ...playing press the LEFT button To fast forward the voice file press the RIGHT button To stop playback of the voice file press the play pause button and then press the LEFT or RIGHT button The LCD monit...

Страница 40: ...he LCD monitor If the image is not an enlarged view the indicator will not be displayed You can also check the area of enlargement Movie clips and WAV files can t be enlarged If an image is enlarged a...

Страница 41: ...s A distance of 40cm between you and the camera microphone is the best distance to record sound The voice memo will be saved in wav format but has the same file name as the still image to which it cor...

Страница 42: ...utton E Effect button It is possible to add special effects to your images by using this button The changed image is saved in a new file name Voice recording is playing Voice recording is paused PLAY...

Страница 43: ...o delete by pressing the LEFT RIGHT button and press the DELETE button 2 A message will display as shown alongside on the LCD monitor 3 Select the sub menu values by pressing the LEFT RIGHT button and...

Страница 44: ...Setting up the play back function using the LCD monitor LEFT RIGHT MENU OK buttons activate the following LEFT button While the menu is showing press the LEFT button to select the menu tab to the lef...

Страница 45: ...Size p 52 p 52 p 53 This menu is available while the camera is connected to a PictBridge supporting printer direct connection to the camera sold separately with a USB cable Layout Menu tab Main menu S...

Страница 46: ...show is playing only the first frame of a MOVIE file is displayed While the slide show is playing the voice recording file will not display INFORMATION Images can be displayed continuously at pre set...

Страница 47: ...K button Your changes will be saved and the menu will disappear If you protect an image the protect icon will be displayed on the LCD monitor An unprotected image has no indicator An image in LOCK mod...

Страница 48: ...ion takes place The startup image is stored in the camera s internal memory i e not on the memory card and it will not be deleted even if you delete all files on the memory card Deleting images 1 Pres...

Страница 49: ...he OK button and the rotated image will be displayed If you display the rotated image on the LCD monitor empty spaces may appear to the left and right of the image DPOF Digital Print Order Format allo...

Страница 50: ...d voice files W T button Select a number of prints Cancel Cancel the print setup 5 Press the OK button to confirm the setting If an image carries DPOF instructions the DPOF indicator will show Images...

Страница 51: ...me When the Reset of the File setup menu is set The copied file names start from after the last stored file name When the Series of the File setup menu is set The copied file names start from after th...

Страница 52: ...et OK Computer Printer Using the USB cable with Cradle Using the USB cable with Camera You can check shooting information about the displayed image How to select the type of information you want to se...

Страница 53: ...ess the OK button When One Pic is selected The PictBridge function will be applied only to the picture currently displayed When All Pics is selected The PictBridge function will be applied to all pict...

Страница 54: ...tures 1 Use the LEFT and RIGHT buttons to select the CUSTOM SET menu tab 2 Use the UP and DOWN buttons to select the desired sub menu value and then press the RIGHT button 3 Use the UP and DOWN button...

Страница 55: ...se the UP and DOWN buttons to select the desired sub menu value and then press the OK button No Cancel the printing Yes Directly print the file with the DPOF information Depending on the manufacturer...

Страница 56: ...are named using numbers that follow the previous sequence even when a new memory card is used or after formatting or after deleting all pictures Reset After using the reset function the next file nam...

Страница 57: ...de show playing back a voice recording playing back a movie clip and taking a composite shot SETUP File Power Off Language Format Date Time Off 1 min 3 min 5 min 10 min Back Set OK Language There is a...

Страница 58: ...Error message Setup menu SETUP File Power Off Language Format Date Time No Yes Back Set OK Setting up the Date Time Date type You can change the date and time that will be displayed on the captured im...

Страница 59: ...Printer Select this if you want to connect the camera to your printer Refer to page 51 for instructions on how to connect the camera to your printer SETUP Language Format Date Time Imprint Sound Back...

Страница 60: ...g a TV as an external monitor you will need to select the external or AV channel of the TV There will be a digital noise on the external monitor but it is not a malfunction If the image is not in the...

Страница 61: ...You can set up a start up image start up sound and shutter sound Every camera working mode with the exception of Voice recording mode has the MyCAM menu The items indicated by are default settings Me...

Страница 62: ...ation Areas with high explosives or highly flammable materials Do not leave this camera in places subject to dust chemicals like naphthalene and mothball high temperature and high humidity Keep this c...

Страница 63: ...Use a soft brush available from photo stores to gently clean the lens and LCD assemblies If this does not work lens cleaning paper with lens cleaning fluid can be used Clean the camera body with a sof...

Страница 64: ...age There are no images stored on the memory Take images Insert a memory card that is holding some images File Error File error Format the memory card Memory card error Contact a camera service centre...

Страница 65: ...take a clear image The picture was taken with the subject beyond the flash range Take a picture within the flash range The lens is smudged or dirty Clean the lens The flash does not fire Flash off mod...

Страница 66: ...Type 1 1 8 CCD Effective Pixel Approx 8 1 Mega pixel Total Pixel Approx 8 3 Mega pixel Lens Focal Length SHD Lens f 7 4 22 2mm 35mm film equivalent 35 105mm F No F2 8 F7 1 Wide F5 1 F13 1 Tele Digita...

Страница 67: ...s are measured under Samsung s standard conditions and may vary depending on shooting conditions and camera settings Image Play Type Single image Thumbnails Slide show Movie Clip Editing Trimming Resi...

Страница 68: ...included in the Software CD ROM supplied with this camera Search the PDF files with Window s explorer Before opening the PDF files you must install the Adobe Reader included in the Software CD ROM To...

Страница 69: ...X Xvid and Digimax Master by selecting a button shown on the monitor If an upper version of DirectX was installed on your computer DirectX may not be installed The XviD codec is distributed according...

Страница 70: ...er starting Digimax Master the camera driver was set up successfully 3 After restarting the computer connect the PC to the camera with the USB cable If you have installed the camera driver the Found N...

Страница 71: ...ION If you connect the USB cable to a USB port on your PC and then turn on the power the camera will automatically switch to computer connection mode In this mode you can download stored images to you...

Страница 72: ...s 5 Click a folder where you want to paste the file 71 Starting PC mode We recommend that you should copy the images to the PC to view them Opening images directly from the removable disk may be subje...

Страница 73: ...e following site http www divx com divx mac and download the codec Or use a media player that supports the Xvid codec Mplayer VLC VideoLAN Client media player CAUTION Setting up the USB Driver for MAC...

Страница 74: ...only compatible with Windows except for the Windows 98 To start the program click Start Programs Samsung Digimax Master 3 Click Next button Downloading images 1 Connect the camera to your PC 2 A windo...

Страница 75: ...window You can see the folder location of the selected image Image display window Images of the selected folder are displayed Refer to the Help menu in Digimax Master for further information 4 Select...

Страница 76: ...edit You can get the still image movie clip narration music files together in a movie clip Movie clip edit functions are listed below Edit menu You can select the following menus Add Media You can ad...

Страница 77: ...the PC at the same time as another USB cable In this case disconnect the other USB cable and connect only one USB cable to the camera Movies for viewing on the camera You can play back a movie on this...

Страница 78: ...vie clip recorded by the camera doesn t play back on the PC the causes are mostly due to the codec installed on the PC 77 FAQ When codec for play back the movie clip isn t installed Install the codec...

Страница 79: ...select the CD ROM drive USB Driver DirectX 9 0 folder and click the DXESETUP exe file The DirectX will be installed Visit the following site for downloading the DirectX http www microsoft com directx...

Страница 80: ...nterference by one or more of the following measures Reorient or relocate the receiving antenna Increase the separation between the equipment and receiver Connect the equipment into an outlet on a cir...

Страница 81: ...80 MEMO MEMO...

Страница 82: ...4320 4510 www samsungphoto fr SAMSUNGOPTO ELECTRONICSGMBH AMKRONBERGERHANG6 D 65824SCHWALBACH TS GERMANY TEL 49 0 6196665303 FAX 49 0 6196665366 www samsungcamera de TIANJINSAMSUNGOPTO ELECTRONICSCO...

Отзывы: