4. Troubleshooting
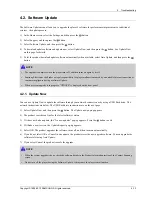
4.2.2. Auto Update
You can set the Auto Update function so that the player downloads new upgrade software when it is in Auto Update
mode. In Auto Update mode, the player is off, but its Internet connection is active. This allows the player to download
upgrade software automatically, when you are not using it.
1) Press the
buttons to select Auto Update Mode, and then press the
button.
2) Select On or Off. If you select On, the player will automatically download new upgrade software when it is in Auto
Update mode with the power off. If it downloads new upgrade software, the player will ask you if you want to install
it when you turn the player on.
NOTE
•
To use the Auto Update Mode Upgrade function, your player must be connected to the Internet.
• By USB
1) Visit www.samsung.com.
2) Click SUPPORT on the top right of the page.
3) Enter the product's model number into the search field. As you enter the model number, a drop down will display
products that match the model number.
4) Left click your product's model number in the drop down list.
5) On the page that appears, scroll down to and then click Firmware Manuals & Downloads.
6) Click Firmware in the centre of the page.
7) Click the ZIP button in the File column on the right side of the page.
8) Click Send in the first pop-up that appears. Click OK in the second pop-up to download and save the firmware file
to your PC.
9) Unzip the zip archive to your computer. You should have a single folder with the same name as the zip file.
10) Copy the folder to a USB flash drive.
11) Make sure no disc is inserted in the product, and then insert the USB flash drive into the USB port of the product.
12) In the product's menu, go to Settings > Support > Software Update.
13) Select Update Now.
14) The product searches for the software on the USB drive. When it finds the software,the Update Request pop-up appears.
15) Select OK. The product
NOTE
•
There should be no disc in the player when you upgrade the software using the USB jack.
•
When the system upgrade is done, check the software details in the Product Information section of the Contact Samsung
screen.
•
Do not turn off the player during the software Update. It may cause the player to malfunction.
•
Software Updates using the USB jack must be performed with a USB flash memory stick only.
4-13
Copyright© 1995-2013 SAMSUNG. All rights reserved.
Содержание BD-H8500A
Страница 19: ...2 Product Specifications Copyright 1995 2013 SAMSUNG All rights reserved 2 11 ...
Страница 20: ...2 Product Specifications 2 12 Copyright 1995 2013 SAMSUNG All rights reserved ...
Страница 21: ...2 Product Specifications Copyright 1995 2013 SAMSUNG All rights reserved 2 13 ...
Страница 22: ...2 Product Specifications 2 14 Copyright 1995 2013 SAMSUNG All rights reserved ...
Страница 23: ...2 Product Specifications Copyright 1995 2013 SAMSUNG All rights reserved 2 15 ...
Страница 24: ...2 Product Specifications 2 16 Copyright 1995 2013 SAMSUNG All rights reserved ...
Страница 25: ...2 Product Specifications Copyright 1995 2013 SAMSUNG All rights reserved 2 17 ...
Страница 26: ...2 Product Specifications 2 18 Copyright 1995 2013 SAMSUNG All rights reserved ...
Страница 27: ...2 Product Specifications 2 3 Option Product Specification Copyright 1995 2013 SAMSUNG All rights reserved 2 19 ...
Страница 29: ...3 Disassembly and Reassembly 3 1 2 Wi Fi Module Removal Copyright 1995 2013 SAMSUNG All rights reserved 3 2 ...
Страница 30: ...3 Disassembly and Reassembly 3 1 3 Assy Deck Removal 3 3 Copyright 1995 2013 SAMSUNG All rights reserved ...
Страница 31: ...3 Disassembly and Reassembly 3 1 4 Assy S HDD Removal Copyright 1995 2013 SAMSUNG All rights reserved 3 4 ...
Страница 32: ...3 Disassembly and Reassembly 3 1 5 S M P S PCB Removal 3 5 Copyright 1995 2013 SAMSUNG All rights reserved ...
Страница 33: ...3 Disassembly and Reassembly 3 1 6 Front PCB Removal Copyright 1995 2013 SAMSUNG All rights reserved 3 6 ...
Страница 34: ...3 Disassembly and Reassembly 3 1 7 Main PCB Removal 3 7 Copyright 1995 2013 SAMSUNG All rights reserved ...
Страница 35: ...3 Disassembly and Reassembly 3 2 PCB Location Copyright 1995 2013 SAMSUNG All rights reserved 3 8 ...
Страница 36: ...4 Troubleshooting 4 Troubleshooting 4 1 Troubleshooting 4 1 Copyright 1995 2013 SAMSUNG All rights reserved ...
Страница 37: ...4 Troubleshooting Copyright 1995 2013 SAMSUNG All rights reserved 4 2 ...
Страница 38: ...4 Troubleshooting 4 3 Copyright 1995 2013 SAMSUNG All rights reserved ...
Страница 39: ...4 Troubleshooting Copyright 1995 2013 SAMSUNG All rights reserved 4 4 ...
Страница 40: ...4 Troubleshooting 4 5 Copyright 1995 2013 SAMSUNG All rights reserved ...
Страница 41: ...4 Troubleshooting Copyright 1995 2013 SAMSUNG All rights reserved 4 6 ...
Страница 42: ...4 Troubleshooting 4 7 Copyright 1995 2013 SAMSUNG All rights reserved ...
Страница 43: ...4 Troubleshooting Copyright 1995 2013 SAMSUNG All rights reserved 4 8 ...
Страница 44: ...4 Troubleshooting 4 9 Copyright 1995 2013 SAMSUNG All rights reserved ...
Страница 45: ...4 Troubleshooting Copyright 1995 2013 SAMSUNG All rights reserved 4 10 ...
Страница 46: ...4 Troubleshooting 4 11 Copyright 1995 2013 SAMSUNG All rights reserved ...
Страница 51: ...4 Troubleshooting Copyright 1995 2013 SAMSUNG All rights reserved 4 16 ...
Страница 52: ...5 PCB Diagrams 5 PCB Diagrams 5 1 Copyright 1995 2013 SAMSUNG All rights reserved ...
Страница 53: ...5 PCB Diagrams 5 1 Wiring Diagram Copyright 1995 2013 SAMSUNG All rights reserved 5 2 ...
Страница 54: ...5 PCB Diagrams 5 2 Main PCB 5 3 Copyright 1995 2013 SAMSUNG All rights reserved ...
Страница 55: ...5 PCB Diagrams Copyright 1995 2013 SAMSUNG All rights reserved 5 4 ...
Страница 56: ...5 PCB Diagrams 5 3 Front PCB 5 5 Copyright 1995 2013 SAMSUNG All rights reserved ...
Страница 57: ...5 PCB Diagrams 5 4 Touch PCB Copyright 1995 2013 SAMSUNG All rights reserved 5 6 ...
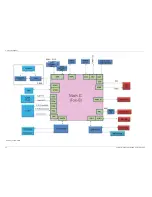
Страница 60: ...6 Schematic Diagrams Block Diagram BD H8900 6 3 Copyright 1995 2013 SAMSUNG All rights reserved ...
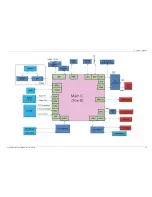
Страница 61: ...6 Schematic Diagrams Copyright 1995 2013 SAMSUNG All rights reserved 6 4 ...
Страница 65: ...6 Schematic Diagrams 6 3 S M P S S M P S PCB Copyright 1995 2013 SAMSUNG All rights reserved 6 8 ...
Страница 66: ...6 Schematic Diagrams 6 4 Power Block Main PCB 6 9 Copyright 1995 2013 SAMSUNG All rights reserved ...
Страница 67: ...6 Schematic Diagrams 6 5 Front End SC7501 1 Main PCB Copyright 1995 2013 SAMSUNG All rights reserved 6 10 ...
Страница 68: ...6 Schematic Diagrams 6 6 Front End SC7501 2 Main PCB 6 11 Copyright 1995 2013 SAMSUNG All rights reserved ...
Страница 69: ...6 Schematic Diagrams 6 7 F_ Micom Main PCB Copyright 1995 2013 SAMSUNG All rights reserved 6 12 ...
Страница 70: ...6 Schematic Diagrams 6 8 HDMI 4K UPSCALER Main PCB 6 13 Copyright 1995 2013 SAMSUNG All rights reserved ...
Страница 71: ...6 Schematic Diagrams 6 9 HDMI_GPIO Main PCB Copyright 1995 2013 SAMSUNG All rights reserved 6 14 ...
Страница 72: ...6 Schematic Diagrams 6 10 Ethernet_USB Main PCB 6 15 Copyright 1995 2013 SAMSUNG All rights reserved ...
Страница 73: ...6 Schematic Diagrams 6 11 FOX B MMC Flash Main PCB Copyright 1995 2013 SAMSUNG All rights reserved 6 16 ...
Страница 74: ...6 Schematic Diagrams 6 12 FOX B DDR3 Main PCB 6 17 Copyright 1995 2013 SAMSUNG All rights reserved ...
Страница 75: ...6 Schematic Diagrams 6 13 FOX B Interface Main PCB Copyright 1995 2013 SAMSUNG All rights reserved 6 18 ...
Страница 76: ...6 Schematic Diagrams 6 14 SATA_USB Main PCB 6 19 Copyright 1995 2013 SAMSUNG All rights reserved ...
Страница 77: ...6 Schematic Diagrams 6 15 TSD_Power Main PCB Copyright 1995 2013 SAMSUNG All rights reserved 6 20 ...
Страница 78: ...6 Schematic Diagrams 6 16 Tuner_LNB Main PCB 6 21 Copyright 1995 2013 SAMSUNG All rights reserved ...
Страница 79: ...6 Schematic Diagrams 6 17 CI Main PCB Copyright 1995 2013 SAMSUNG All rights reserved 6 22 ...
Страница 80: ...6 Schematic Diagrams 6 18 Front Front PCB 6 23 Copyright 1995 2013 SAMSUNG All rights reserved ...
Страница 81: ...6 Schematic Diagrams 6 19 Touch Touch PCB Copyright 1995 2013 SAMSUNG All rights reserved 6 24 ...


