background image

D

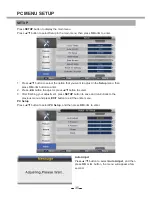
TV MENU SETUP


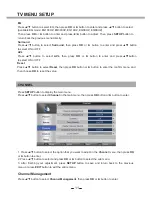
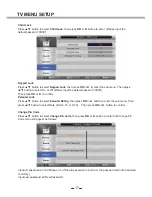
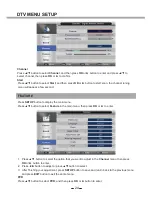
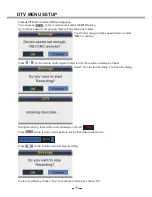
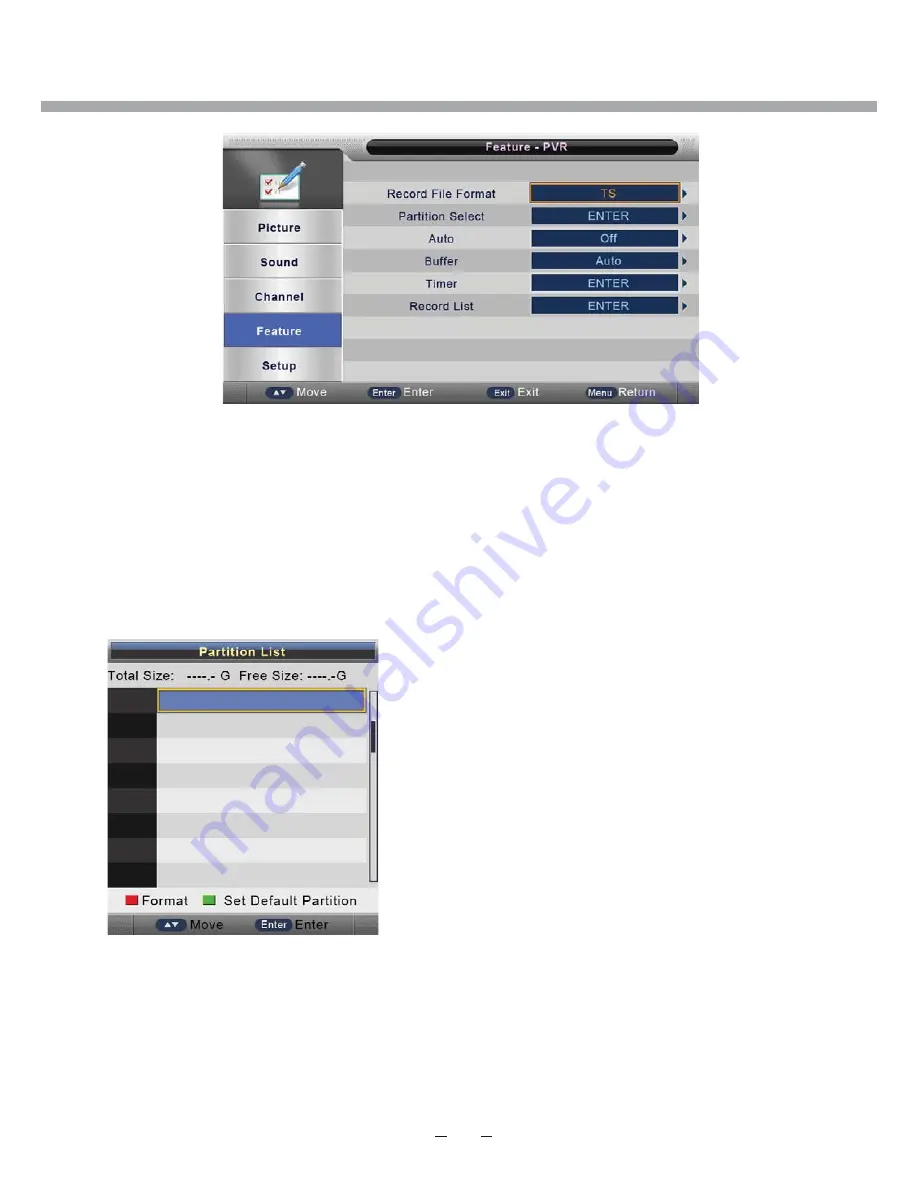
Record File Format 

Press 

/

 button to select 

Record File Format

, press 

OK

 or 

 button to enter the sub 

menu. Then 

press 

/

 to select the 

TS

 or 

PS

, then press 

OK

 or 

 to confirm. 

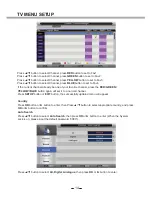
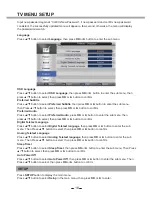
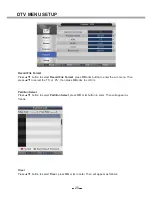
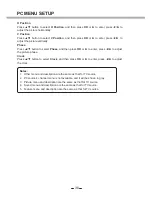
Partition Select 

Press 

/

 button to select 

Partition Select

, press 

OK

 or 

 button to enter. Then will 

appear as 

follows: 

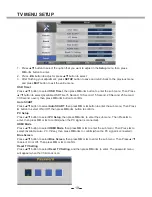
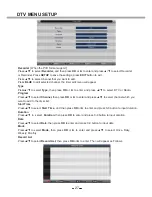
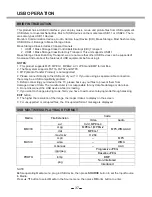
Timer 

Press 

/

 button to select 

Timer

, press 

OK

 or 

 to enter. Then will appear as follows: 

+

5

Содержание 22LED3305TD

Страница 1: ...LED KLEUREN TV GEBRUIKERSHANDLEIDING NL LEES DIT ZORGVULDIG DOOR VOOR GEBRUIK 22LED3305TD 22LED3315TDW...

Страница 2: ...or adapter openen x Gebruik uw LED TV monitor adapter nooit als het netsnoer beschadigd is Plaats geen objecten op het netsnoer en houd het snoer zo dat niemand erover kan struikelen x Houd de stekker...

Страница 3: ...al functioneert als er vreemde geluiden of geuren ontstaan haal dan direct de stekker uit het stopcontact en neem contact op met een geautoriseerde verkoper of uw servicecentrum x Hoge temperaturen ku...

Страница 4: ...M4 x 12 M4 x 12 INSTRUCTIES VOOR HET BEVESTIGEN VAN DE TV STANDAARD WAARSCHUWING leg de TV v r het plaatsen van de standaard op een deken met het scherm omlaag om beschadigingen te voorkomen...

Страница 5: ...Zijpaneel 2 DVD BEDIENING BASISBEDIENING 41 ONDERSTEUNING DVD FORMAAT 41 BEDIENINGSVOORSCHRIFTEN DVD FUNCTIES 42 Afspelen MP3 JPEG Functie instellingen 45 Pagina algemene instellingen Pagina audio in...

Страница 6: ...menu openen of sluiten 9 Wisselen tussen stand by en ingeschakelde modus PANEEL TOETSEN 1 Afspelen starten of pauzeren 2 Diskhouder openen ETIKETZIJDE 1 IR sensorvenster 2 Indicator de indicator is r...

Страница 7: ...4 CVBS S Video L Audio ingang 5 CVBS ingang 6 Y Pb Pr ingang 7 Coaxiale ingang 3 4 7 6 5 2 1 4 3 7 1 12V DC ingang 2 USB aansluiting 3 HDMI ingang 4 PC VGA ingang 5 SCART aansluiting 6 PC Audio ingang...

Страница 8: ...3 AANSLUITSCHEMA EXTERNE APPARATUUR OPMERKING U dient eerst alle vereiste kabels aan te sluiten VOORDAT u de stekker in het stopcontact steekt...

Страница 9: ...DTV INDEX Kies een paginanummer van index van teletekst ATV Stop Stoppen met afspelen of opnemen USB DVD REVEAL Openbaart verborgen informatie zoals een antwoord op Gekleurde toetsen Geeft toegang tot...

Страница 10: ...elt de teletekst in en uit ATV DTV I Om het afspelen snel naar voren te brengen DVD Media Houd 3 seconden ingedrukt om naar het begin van volgende episode track foto over te slaan DVD Media MIX Kies T...

Страница 11: ...het verwarmen van de batterij en gooi het niet in het vuur Let op dat u de afstandsbediening niet laat vallen of stoot dit zal schade of storingen veroorzaken Combineer geen oude en nieuwe batterijen...

Страница 12: ...andsbediening om uw keuze te maken Druk op de OK toets om uw keuze te bevestigen AAN DE SLAG Ga als volgt te werk nadat het apparaat correct op een bureau of tegen de wand geplaatst is en alle vereist...

Страница 13: ...verlaten Druk op DISPLAY op de afstandsbediening om informatie over het programma op te roepen TV MENU INSTELLEN MERK OP DAT ALS SOMMIGE ONDERDELEN NIET ACTIEF OF NIET BESCHIKBAAR ZIJN GRIJS WEERGEGEV...

Страница 14: ...de instelling te doen Contrast Gebruik om contrast te selecteren druk op OK en gebruik om de instelling te doen Scherpte Gebruik om scherpte te selecteren druk op OK en gebruik om de instelling te do...

Страница 15: ...hoge tonen en balans instellen als u Gebruiker gekozen heeft TIP u kan op S MODE op de afstandsbediening indrukken om direct naar de geluidsmodus te gaan GELUID Laag Gebruik om Laag te selecteren dru...

Страница 16: ...op de rode toets om te deblokkeren Druk op de groene knop om de huidige zender te verwijderen Druk opnieuw op de groene toets om het verwijderen te annuleren Druk op de gele toets om de huidige zende...

Страница 17: ...gaan naar de vorige pagina druk op om naar de volgende pagina te gaan Gebruik om een zender te selecterenen druk op OK om in het menu voor het herbenoemen te gaan Opmerking de zendernaam kan 8 karakte...

Страница 18: ...s om hem in Fav 2 te plaatsen Gebruik om de zender te kiezen druk op de gele toets om hem in Fav 3 te plaatsen Gebruik om de zender te kiezen druk op de blauwe toets om hme in Fav 4 te plaatsen Als de...

Страница 19: ...het standaard paswoord 0000 in Gebruik om Alle Digitaal Analoog te selecteren druk op OK en het volgend menu verschijnt Auto zoeken naar gemarkeerde items te selecteren OK en druk op OK of selecteer...

Страница 20: ...m Zoeken te selecteren en druk op OK Het volgende menu verschijnt TV MENU INSTELLEN Druk kort op OK om de zenderfrequentie te wijzigen om druk lange tijd om naar de volgende zender te zoeken Druk op S...

Страница 21: ...of druk op EXIT om het menu volledig te verlaten System vergrendelen Gebruik om System vergrendelen te selecteren en druk op OK om te kiezen tussen Aan of Uit als System vergrendelen ingeschakeld is...

Страница 22: ...het niet gelukt is Taal Gebruik om Taal te selecteren en druk op OK om in het volgend menu te gaan OSD taal Gebruik om OSD taal te selecteren en druk op OK om te kiezen Preferred Subtitle Gebruik om...

Страница 23: ...ezen en gebruik om te kiezen tussen Aan of Uit Blue Screen Gebruik om Blue Screen te kiezen en gebruik om te kiezen tussen Aan of Uit Beeldverhouding Gebruik om Beeldverhouding te selecteren en gebrui...

Страница 24: ...de RODE toets om naar Setup 1 te gaan Druk op OK of de GROENE toets om naar Setup3 te gaan Druk op Cancel en OK om terug te gaan naar het vorig menu Als u OK kiest verschijnt het aangepast menu gedur...

Страница 25: ...de RODE toets om naar Setup 4 te gaan Druk op OK of de GROENE toets om het automatisch zoeken digital te starten en het volgend menu verschijnt Druk op de SETUP toets om de Auto Tune Digital menu te v...

Страница 26: ...k op OK om in het volgend menu te gaan Software upgraden Gebruik om Software upgraden aan te duiden druk dan op OK of om in het menu te gaan Versie Gebruik om Versie aan te duiden druk dan op OK of om...

Страница 27: ...van TV bron 2 Geluidmenu en omschrijving identiek aan dat van TV bron 3 Instelmenu en omschrijving identiek aan dat van TV bron 8 1 2 3 4 9 5 6 7 DTV MENU INSTELLEN KANAAL Druk op SETUP om het hoofdme...

Страница 28: ...ndig zoeken te selecteren en druk op OK om in het menu te gaan Als System Lock ingeschakeld is breng dan het standaard paswoord 0000 in DTV MENU INSTELLEN Kanaal Gebruik om Kanaal te selecteren en dru...

Страница 29: ...ecteren 3 Na de instelling te hebben gedaan druk op SETUP om terug naar het vorig menu te gaan of druk op EXIT om het menu volledig te verlaten KENMERK Record File Format Gebruik om Record File Format...

Страница 30: ...selecteren en druk op de RODE knop om het geselecteerde kanaal wordt het menu als volgt verwijderen Ga terug naar het vorige menu op bepaalde Cancel en druk op de OK knop Als u OK en druk op de OK toe...

Страница 31: ...ezen Druk op de blauwe toets en het timer menu verschijnt Type Gebruik om Type te selecteren en druk op OK om in het menu te gaan en gebruik om te kiezen tussen DTV of Radio Kanaal Gebruik om Kanaal t...

Страница 32: ...Uit te selecteren en druk op OK om te bevestigen CI info Gebruik om CI info te selecteren en druk op OK om in het menu te gaan Druk op OK om in het menu te gaan Opmerkingen 1 Dit is een voorbeeld ver...

Страница 33: ...lijst menyn Gebruik om de zender te kiezen die u wil bekijken en druk op OK om te kijken Gebruik om te kiezen tussen Favorite 1 2 3 of 4 Ondertiteling Druk op SUBTITLE op de afstandsbediening en het v...

Страница 34: ...toets om de datum te verminderen Om programma s van volgende dagen te zien druk op de BLAUWE toets om de datum te verhogen Voor meer informatie over een programma druk op INFO Druk op de GROENE toets...

Страница 35: ...pnieuw op op de afstandsbediening om de opnametijd in te stellen Druk op op de afstandsbediening om de opname te stoppen Rec Duration Time 00 00 Druk op OK om de opname te stoppen druk op Cancel om de...

Страница 36: ...alde teletekstpagina wordt weergegeven druk opnieuw op de TEXT toets en TV en teletekstinformatie worden op hetzelfde moment op het scherm weergegeven Druk nogmaals op de TEXT toets en alleen het TV s...

Страница 37: ...bron 4 Eigenschappenmenu en omschrijving identiek aan dat van TV bron 5 Instelmenu en omschrijving identiek aan dat van TV bron OPMERKING Als er geen ingangssignaal is in TV DTV SCART AV COMPONENT za...

Страница 38: ...het vorig menu te gaan of druk op EXIT om het menu volledig te verlaten HDMI Setup Gebruik om HDMI Setup te kiezen en druk op OK om in het menu te gaan INSTALLATIE Opmerkingen 1 Andere menu s en omsc...

Страница 39: ...an 2 Gebruik om in te stellen of om te selecteren 3 Na de instelling te hebben gedaan druk op SETUP om terug naar het vorig menu te gaan of druk op EXIT om het menu volledig te verlaten PC Setup Gebru...

Страница 40: ...in het menu te gaan gebruik om in te stellen Dit regelt de fase om jitter te minimaliseren Klok Gebruik om Klok te kiezen en druk op OK om in het menu te gaan gebruik om in te stellen Opmerkingen 1 A...

Страница 41: ...van uw TV aan Als u een aparte kabelverbinding gebruikt kan er een USB compatibiliteitsprobleem bestaan 5 Voordat u uw apparaat op de TV aansluit maak een back up van uw bestanden om beschadiging of v...

Страница 42: ...K of I II om te spelen of te pauzeren U kunt de informatie van de huidige afspelen van media in de eerste paar seconden of na het indrukken van DISPLAY knop Druk op of toets om het beeld te roteren Dr...

Страница 43: ...t vorige menu U kunt de informatie van de huidige spelende nummer aan de linkerkant van het menu Movie FILM Druk op de toets om FILM in het hoofdmenu te selecteren en druk vervolgens op de OK toets om...

Страница 44: ...vorige pagina U kunt de informatie van de huidige afspelen van media in de eerste paar seconden of na het indrukken van DISPLAY knop PVR Druk op om de video te selecteren drukt u op OK of I II knop o...

Страница 45: ...ofdmenu te selecteren en druk vervolgens op de OK toets om te openen Druk op de EXIT toets om naar het vorige menu terug te keren E BOOK e Book Druk op om het bestand te selecteren drukt u op OK of I...

Страница 46: ...oets om de disc eruit te halen Als de disc is uitgeworpen houd de disc licht aan de rand vast en neem het uit de uitwerpinrichting om krassen te voorkomen Wanneer de DVD functie niet wordt gebruikt in...

Страница 47: ...ruit of achteruit afspelen Druk op de I I toetsen om te schakelen tussen de verschillende snelheden in de sequentie FFx2 FFx4 FFx8 FFx16 FFx32 Afspelen of FRx2 FRx4 FRx8 FRx16 FRx32 Afspelen Tijdens h...

Страница 48: ...ultitalige DVD Super VCD discs druk op de SUBTITLE toets om de gewenste ondertitelingstaal te selecteren 11 Hoek voor DVD disc Druk op de ANGLE toets om de huidige beeldhoek weer te geven Druk nog een...

Страница 49: ...rd Afspelen MP3 JPEG MP 3 MP 3 MP 3 MP 3 Gebruik de navigatietoetsen om uw favoriete map te selecteren en speel het eerste bestand af of verplaats deze naar uw favoriete bestand OPMERKING Druk op de t...

Страница 50: ...e meeste normale televisie uitzendingen en het is de standaardinstelling Het heeft een aspectratio van 4 3 Als u deze instelling kiest voor het bekijken van een DVD zal het beeld het scherm vullen maa...

Страница 51: ...of uit te schakelen Aan als u de volgende keer de weergave start begint deze bij het punt waar u gestopt bent en herneemt hij alle vorige instellingen Uit gaat automatisch terug naar de standaard ins...

Страница 52: ...rschillende talen te wisselen Druk op de OK toets om te bevestigen OPMERKING Als de geselecteerde taal niet is opgenomen in de discinhoud van uw DVD zal het automatisch de standaardtaal van de disc ki...

Страница 53: ...aar wanneer Wachtwoord is ontgrendeld En kan alleen functioneren als het Wachtwoord is vergrendeld Het zal echter niet het Wachtwoord of de Ouderlijk resetten Wachtwoord De standaardinstelling is gebl...

Страница 54: ...49 PROBLEEMOPLOSSING...

Страница 55: ...igen x Horizontale scanfrequentie 30 KHz 75 KHz x Verticale scanfrequentie 50 Hz 75 Hz GELUID EN TV PROBLEMEN OPLOSSEN Symptoom Oorzaken en Oplossing Inschakelen onmogelijk x Controleer of de voedings...

Страница 56: ...aan te passen 2 Stel de TV kleuren terug Disk wordt niet ingelezen 1 Disk verbogen of vuil 2 Disk verkeerd geladen 3 Condensatie op laserkop 1 Maak de disk schoon 2 Laad de disk opnieuw met de bedruk...

Страница 57: ...SB Bestandsformaat MP3 MPEG1 MPEG2 AVI JPEG en BMP Audioparameters Audio ingang Frequentieresponsie 3 5 jack L R 0 5 0 3 Vrms TV signaal 100 Hz 12 kHz 3 dB AV 100 Hz 15 kHz 3 dB DVD Disktype DVD VIDEO...

Страница 58: ...he producten Door voor de juiste verwijdering van dit product te zorgen helpt u potenti le gevaren voor het milieu en de gezondheid van de mens te voorkomen die anders door ongeschikte afvalverwerking...

Страница 59: ...TELEVISEUR LED COULEUR MANUEL DE L UTILISATEUR FR A LIRE ATTENTIVEMENT AVANT L UTILISATION 22LED3315TDW 22LED3305TD...

Страница 60: ...iteur adaptateur N utilisez jamais votre t l LED moniteur si le cordon d alimentation a t endommag Ne rien d poser sur le c ble d alimentation et mettez le loin des passages des gens afin que personne...

Страница 61: ...ible Si votre la t l LED moniteur ne fonctionne pas normalement en particulier en cas de sons anormaux ou odeurs manant de l int rieur d branchez la imm diatement et contacter un revendeur ou un centr...

Страница 62: ...M4 x 12 M4 x 12 INSTRUCTIONS POUR LE MONTAGE DU PIED TV ATTENTION placer le t l viseur avant fixer le standard sur un blanchet avec l cran vers le bas pour emp cher des dommages...

Страница 63: ...DE LA FONCTION USB Breve Introduction 36 Formats de fichier compatibles 36 Photo 37 Musique 37 Film 38 PVR 39 EQUIPEMENT EXTERNE Schema de branchement 2 3 2 CONFIGURATION HDMI Installation 33 CONFIGUR...

Страница 64: ...asculer entre le mode veille et le mode fonctionnement PANNEAUX DES TOUCHES 1 Pour lancer ou suspendre la lecture 2 Pour sortir le disque FACE IMPRIMEE PANNEAUX DES TOUCHES DE FONCTIONS 1 Fen tre du c...

Страница 65: ...vision 6 Connecteur de sortie coaxiale 2 3 6 6 5 2 1 4 3 1 Connecteur d alimentation CC 12 V 2 Connecteur d entr e HDMI 1 3 Connecteur d entr e HDMI 2 4 Connecteur d entr e HDMI 3 5 Connecteur d entr...

Страница 66: ...3 SCHEMA DE BRANCHEMENT EQUIPEMENT EXTERNE REMARQUE Vous devez brancher tous les c bles avant de mettre sous tension...

Страница 67: ...B mode TNT INDEX Afin de s lectionner le num ro de page de l index ou du t l texte mode ATV Stop Afin d arr ter la lecture ou l enregistrement mode USB DVD REVEAL R v le les informations dissimul s co...

Страница 68: ...fonction du t l texte mode ATV TNT I Afin de faire avancer la lecture rapide mode DVD M dia Tenez 3 secondes afin de passer au d but du chapitre piste photo suivant mode DVD M dia MIX S lectionnez le...

Страница 69: ...les piles dans du feu Faites attention de ne pas faire tomber la t l commande ou lui donner des coups ceci peut l endommager N utilisez pas des piles anciennes avec des nouvelles Si vous n allez pas...

Страница 70: ...fonctionnalit s de votre t l SELECTION DE LA SOURCE Vous pouvez s lectionner la source d entr e l aide du menu source Appuyez sur la touche SOURCE situ e sur le c t droit de la t l LED pour afficher l...

Страница 71: ...retourner au menu pr c dent et poussez EXIT pour quitter compl tement le menu CONFIGURATION TV A NOTER LES OPTIONS INACTIVES INDISPONIBLES AFFICHEES GRISEES DANS LE MENU NE SERONT PAS MENTIONEES DANS...

Страница 72: ...osit poussez OK et utilisez pour faire le r glage Contraste Utilisez pour s lectionner Contraste poussez ENTER et utilisez pour faire le r glage Nettet Utilisez pour s lectionner Nettet poussez OK et...

Страница 73: ...s Aigus et de la EQ quand vous avez choisi l option Utilisateur CONSEIL vous pouvez pouser S MODE sur la t l commande pour changer imm diatement le mode image SON Graves Utilisez pour s lectionner Gra...

Страница 74: ...d bloquer l metteur Poussez le bouton vert pour annuler l metteur actuel quand l metteur est d j annul repoussez le bouton vert pour annuler l annulation Poussez le bouton jaune pour sauter l metteur...

Страница 75: ...our poussez pour aller la page suivante Utilisez pour s lectionner l metteur poussez OK pour entrer dans le menu pour changer le nom de l metteur Remarque le nom peut se composer de 8 caract res Pouss...

Страница 76: ...m moriser sous Fav2 Utilisez pour s lectionner l metteur et poussez le bouton jaune pour le m moriser sous Fav3 Utilisez pour s lectionner l metteur et poussez le bouton bleu pour le m moriser sous Fa...

Страница 77: ...loquage est en fonction entrez le mot de passe standard 0000 Utilisez pour s lectionner Tous Num rique Analogique option appuyez sur OK et le menu suivant appara t Pour quitter le menu s lectionnez Ca...

Страница 78: ...r s lectionner Rechercher Utilisez pour s lectionner Rechercher et poussez OK ou pour entrer Le menu suivant appara t Poussez bri vement OK pour changer la fr quence poussez plus longtemps pour cherch...

Страница 79: ...nu pr c dent et poussez EXIT pour quitter compl tement le menu Verrou du syst me Utilisez pour s lectionner Verrou du syst me et poussez OK pour entrer quand le bloquage enfants est en fonction entrez...

Страница 80: ...OK pour entrer dans le sousmenu Langue OSD Utilisez pour s lectionner Langue OSD et poussez OK pour s lectionner Preferred Subtitle Utilisez pour s lectionner Preferred Subtitle et poussez OK pour s...

Страница 81: ...n ou hors fonction Blue Screen Utilisez pour s lectionner Blue Screen et poussez OK pour choisir entre en ou hors fonction Ratio d aspect Utilisez pour s lectionner Ratio d aspect et poussez OK pour s...

Страница 82: ...our aller vers le r glage 1 Poussez OK ou le bouton VERT pour aller vers le r glage 3 Poussez Cancel et le bouton OK pour revenir au menu pr c dent Si vous choisissez OK et poussez OK le menu appara t...

Страница 83: ...E pour aller vers le r glage 4 Poussez OK ou le bouton VERT pour Auto Tune digital pour d marrer et le menu suivant appara t Poussez le bouton SETUP pour entrer dans l Auto Tune digital pour quitter l...

Страница 84: ...onction Mise niveau du logiciel Utilisez pour s lectionner Mise niveau du logiciel et poussez OK pour choisir entre en ou hors fonction Version Utilisez pour s lectionner Version et poussez OK pour ch...

Страница 85: ...st identique celui de source TV 2 Le menu et la description son est identique celui de source TV 3 Le menu et la description r glages est identique celui de source TV 8 1 2 3 4 9 5 6 7 CANAUX Poussez...

Страница 86: ...ur s lectionner Recherche Manuelle Num rique et poussez OK pour entrer quand le Bloquage enfants est en fonction introduisez le mot de passe standard 0000 Canaux Utilisez pour s lectionner Canaux et p...

Страница 87: ...r glage et utilisez pour s lectionner 3 Apr s le r glage poussez SETUP pour m moriser et pour retourner au menu pr c dent et poussez EXIT pour quitter compl tement le menu CARACT RISTIQUE Record File...

Страница 88: ...ge pour annuler l metteur s lectionn Le menu suivant appara t Poussez Cancel et le bouton OK pour revenir au menu pr c dent Si vous choisissez OK et poussez OK pour annuler l metteur s lectionn dans l...

Страница 89: ...le menu timer appara t Type Utilisez pour s lectionner Type poussez OK pour entrer et utilisez pour choisir entre DTV ou Radio Canaux Utilisez pour s lectionner Canaux poussez OK pour entrer et utilis...

Страница 90: ...List Info CI Utilisez pour s lectionner Info CI poussez OK pour entrer Poussez OK pour entrer Remarque 1 Ceci n est qu un exemple les diff rents modules CT ont un diff rent menu CI 2 Les autres menus...

Страница 91: ...te des metteurs pr f r s Utilisez pour s lectionner l metteur que vous voulez regarder et poussez OK pour regarder Utilisez pour choisir entre favorite 1 2 3 4 Soustitres Poussez SUBTITLE sur la t l c...

Страница 92: ...les programmes de hier poussez le bouton JAUNE pour diminuer la date Pour voir les programmes de demain poussez le bouton BLEU pour augmenter la date Pour plus d informations d un programme poussez I...

Страница 93: ...ur la t l commande pour r gler le temps d enregistrement Poussez sur la t l commande pour arr ter l enregistrement Rec Duration Time 00 00 Pour arr ter l enregistrement poussez OK pour continuer l enr...

Страница 94: ...une page t l texte est affich e appuyez nouveau sur la touche TEXT la cha ne de t l vision et l interface T l texte s affichent Appuyez nouveau sur la touche TEXT pour afficher nouveau la cha ne de t...

Страница 95: ...tique celui de source TV 4 Le menu et la description caract ristiques est identique celui de source TV 5 Le menu et la description r glages est identique celui de source TV No signal CONFIGURATION SCA...

Страница 96: ...er et pour retourner au menu pr c dent et poussez EXIT pour quitter compl tement le menu HDMI Setup Utilisez pour s lectionner HDMI Setup et poussez OK pour entrer INSTALLATION Remarques 1 Les autres...

Страница 97: ...OK pour entrer 2 Utilisez pour faire le r glage et utilisez pour s lectionner 3 Apr s le r glage poussez SETUP pour m moriser et pour retourner au menu pr c dent et poussez EXIT pour quitter compl tem...

Страница 98: ...isez pour r gler Ceci r gle la phase pour diminuer le jitter Horloge Utilisez pour s lectionner Horloge poussez OK et utilisez pour r gler Opmerkingen 1 Quand la source PC n est pas disponible le menu...

Страница 99: ...s suivants MP3 MPEG1 MPEG2 AVI JPEG et BMP 2 Les syst mes de fichiers suivants sont support s FAT16 FAT32 et NTFS 3 Le MTP protocole de transfert de m dias n est pas support 4 Connectez directement vo...

Страница 100: ...r lire ou mettre en pause Vous pouvez v rifier les informations du m dia courant jouant dans les premi res secondes ou apr s avoir appuy sur la touche DISPLAY Appuyez sur ou pour faire pivoter l image...

Страница 101: ...ouvez v rifier les informations de la piste en cours de lecture la gauche du menu Movie FILM Utilisez les touches pour s lectionner l option FILM du menu principal appuyez ensuite sur la touche OK pou...

Страница 102: ...vez v rifier les informations du m dia courant jouant dans les premi res secondes ou apr s avoir appuy sur la touche DISPLAY PVR Appuyez sur pour s lectionner la vid o appuyez sur la touche OK ou I II...

Страница 103: ...u menu principal appuyez ensuite sur la touche OK pour y acc der Appuyez sur la touche EXIT pour revenir au menu pr c dent E BOOK e Book Appuyez sur pour s lectionner le fichier appuyez sur la touche...

Страница 104: ...pas le rayer Pour prot ger le chargeur et le disque vitez de laisser un disque dans le plateau du lecteur DVD pour une longue p riode surtout lorsque le lecteur n est pas utilis 4 Lecture des Titres p...

Страница 105: ...obinage sont disponibles Utilisez les touches I I pour s lectionner une vitesse dans l ordre s quentiel suivant ARx2 ARx4 ARx8 ARx16 ARx32 Lecture ou RRx2 RRx4 RRx8 RRx16 RRx32 Lecture En cours d avan...

Страница 106: ...ppuyer sur MUET pour annuler cet tat 13 ZOOM Compatible avec les disques DVD Super VCD VCD Mp3 et JPEG Appuyez sur la touche ZOOM pour effectuer un zoom avant sur l image 3 niveaux de ZOOM sont dispon...

Страница 107: ...lectionner Utilisez les touches num riques pour s lectionner les l ments lire directement Pour les nombres au del de 10 appuyez sur 0 en premier Ex Fichier num ro 15 appuyez sur 0 puis sur 5 Durant l...

Страница 108: ...lupart des diffusions TV ce format d affichage est s lectionn par d faut Le format d affichage est 4 3 Lorsque vous s lectionnez ce format d affichage en cours de lecture d un disque DVD l image est t...

Страница 109: ...ois que vous d marrez la lecture la lecture commence au point o vous avez arr t et l appareil reprend les derni res r glages D sactiv l appareil retourne automatiquement vers les r glages standards De...

Страница 110: ...che OK pour confirmer Quelques langues sont disponibles utilisez les touches pour s lectionner une langue Appuyez sur la touche OK pour confirmer REMARQUE Si la langue choisie n est pas sur le disque...

Страница 111: ...la touche Arr t puis ouvrez le menu Configuration REMARQUE Modifiable uniquement quand le code pin est d verrouill Et n est op rationnel que lorsque le code pin est verrouill Mais n alt re ni le code...

Страница 112: ...49 D PANNAGE...

Страница 113: ...hangez la configuration de l affichage x Fr quence de balayage Hor 30KHz 75KHz x Fr quence de balayage Ver 50 Hz 75Hz PROBLEMES AUDIO ET TELE Sympt me Causes et rem de Impossible d allumer x Assurez v...

Страница 114: ...r gl e 1 Changer le syst me de couleurs 2 R initialisez le syst me de couleurs Lecture de disque impossible 1 Le disque est ray ou sale 2 Le disque est mal plac 3 Condensation sur la t te laser 1 Net...

Страница 115: ...e audio Prise 3 5 L R 0 5 0 3 Vrms Param tres audio R ponse en fr quence Signal TV 100 Hz 12 KHz 3 dB AV 100 Hz 15 KHz 3 dB DVD Type de disque DVD VIDEO MPEG4 SVCD VCD 1 0 1 1 2 0 version CD DA Conne...

Страница 116: ...ar e pour les produits lectriques et lectroniques usag s Respecter les consignes de mise au rebut de cet appareil permet d viter les dangers ventuels sur l environnement et la sant qu un traitement in...

Страница 117: ...LED COLOUR TV 22LED3305TD 22LED3315TDW...

Страница 118: ...en disconnecting the adapter from an electric socket This symbol indicates dangerous voltage inside the product that presents a risk of electric shock or personal injury This symbol indicates importan...

Страница 119: ...personnel Unplug your DC adapter from the AC outlet before any service Be sure the service technician uses authorized replacement parts or their equivalents Unauthorized parts may cause fire electrica...

Страница 120: ...CAUTION Before mounting a TV stand place TV on a blanket or quilt with the TV screen facing down to avoid surface damage TV STAND MOUNTING M4 x 12 M4 x 12...

Страница 121: ...P Channel 23 Feature 24 TELETEXT FUNCTION Teletext function 32 SCART AV COMPONENT MENU SETUP Setting menu 33 PC MENU SETUP USB OPERATION Brief introduction 37 USB Multimedia Playback Format 37 Photo M...

Страница 122: ...FRONT PANEL PANEL BUTTON FUNCTIONS OPTION LABEL SIDE 3 Mains Power Switch Completely turns ON or OFF the power to the TV set to save on electricity option green...

Страница 123: ...signal input 3 CVBS S Video R Audio input 4 CVBS S Video L Audio input 5 CVBS input 6 Component input 7 Coaxial output 3 4 7 6 5 2 1 4 3 7 1 12V DC power input 2 USB connector 3 HDMI input 4 PC VGA in...

Страница 124: ...3 CONNECTING DIAGRAM EXTERNAL EQUIPMENT...

Страница 125: ...t RECORD Recording to USB device DTV mode INDEX To select the page number of the index from teletext ATV mode Stop To stop the playback or recording USB DVD mode REVEAL Reveals hidden information such...

Страница 126: ...on and off the teletext function ATV DTV mode I To advance playback rapidly DVD Media mode Hold 3 seconds to skip to the beginning of the next chapter track photo DVD Media mode MIX Select TELETEXT w...

Страница 127: ...at the battery or throw it into fire Pay attention not to fall or knock the remote controller which will cause damage or function failure to it Do not use new and old battery together When not using t...

Страница 128: ...switch to power on mode you will see the LED indicator turn green Now you can enjoy the many features of your new TV SELECT SOURCE OPERATION You can select input source by using source menu Press SOU...

Страница 129: ...tton to save and return back to the previous menu and press EXIT button to exit t he entire menu TV MENU SETUP Press DISPLAY button on the remote control to display program information 1 Current Sourc...

Страница 130: ...to adjust Then press SETUP button to return back the previous menu directly Sharpness Press button to select Sharpness then press OK button or button to enter and press button to adjust Then press SE...

Страница 131: ...ND Press button to select Sound Mode and then press OK or button to enter And then press button to select Available Sound mode User Standard Movie Music Speech You can change the value of bass and tre...

Страница 132: ...utton or button to enter Surround Press button to select Surround then press OK or button to enter and press button to select ON or OFF CHANNEL 1 Press button to select the option that you want to adj...

Страница 133: ...p press YELLOW button again will cancel skip Press BLUE button to swap the channel position If one of the channel has been incorrectly placed in the station listing you may move it to the current posi...

Страница 134: ...ss YELLOW button to delete the previous character Press BLUE button to save the change and return to the previous page Press EXIT button the menu will appear as follows Exit the entire menu if select...

Страница 135: ...r favorite channel press the RED GREEN YELLOW BLUE button again will set it to a normal channel Press SETUP button or EXIT button the successfully updated menu will appear Country Press OK button or b...

Страница 136: ...e Manual Search Press button to select Analogue Manual Search then press OK or button to enter When the System Lock is on please input the default password 0000 Current Channel Press OK or button to e...

Страница 137: ...utton to select Sound System and press OK or to enter the sub menu Press button to select BG DK I L L Then press OK or to confirm Press SETUP button to display the main menu Press button to select Fea...

Страница 138: ...0 Then press OK or to confirm Parental Lock Press button to select Parental Rating then press OK or button to enter the sub menu Then press button to select Rate From4 18 or OFF Then press OK or butto...

Страница 139: ...OK or button to enter the sub menu then press button to select then press OK or button to confirm Digital Teletext Language Press button to select Digital Teletext language then press OK or button to...

Страница 140: ...n to select Auto SCART then press OK or button to enter the sub menu Then Press button to select ON or Off then press OK or button to confirm PC Setup Press button to select PC Setup then press OK or...

Страница 141: ...me installation menu will appear as follows Press EXIT button to exit entire menu and ignore following set Setup 1 Press button to select language Press ENTER button or GREEN button to enter setup 2 m...

Страница 142: ...ter setup 5 menu Setup 5 Press RED button to enter setup 4 menu Press OK button to enter Auto Tune Digital the menu will appear as follow Press SETUP button to exit Auto Tune Digital menu and enter se...

Страница 143: ...fo 3 The current time 4 TV channel icon if the current channel is RADIO channel it will be a RADIO icon 5 The current program s start stop time 6 Language icon 7 Text icon 8 Subtitle icon 9 Favorite p...

Страница 144: ...2 Press button to adjust or press button to select 3 After finishing your adjustment press SETUP button to save and return back to the previous menu and press EXIT button to exit the entire menu Chan...

Страница 145: ...utton to display the main menu Press button to select Feature in the main menu then press OK or to enter 1 Press button to select the option that you want to adjust in the Channel menu then press OK o...

Страница 146: ...utton to enter the sub menu Then press to select the TS or PS then press OK or to confirm Partition Select Press button to select Partition Select press OK or button to enter Then will appear as follo...

Страница 147: ...s OK button If select OK and press OK button to delete the selected program from the timer list z Press GREEN button to delete all timers the menu will appear as follows Return back to the previous me...

Страница 148: ...Program Press to select Channel then press OK or to enter and press to select channel which you want to add to the timer list Start Time Press to select Start Time and then press OK or to enter and pr...

Страница 149: ...ess OK or to enter CI Info menu will appear as follows Press OK or to enter Notes 1 This is just an example for reference different CI module will have different CI menu 2 Other menu and description a...

Страница 150: ...orite 1 favorite 2 favorite 3 and favorite 4 Subtitle Press subtitle button on the remote control the subtitle menu will appear as follows Press button to OFF then press OK button will not display sub...

Страница 151: ...o decrease the date To see programmers for the next day or further press BLUE button to increment the date For more information about a program press INFO Press GREEN button twice to add channel to th...

Страница 152: ...tinue Press on the remote control again to start record there will be a dialog as follow Select Yes to start recording You ll see the dialog During Recording there will be a small dialog on the left P...

Страница 153: ...let you enjoy TV and teletext information at the same time When a certain teletext page displays press TEXT button again TV and teletext information will display on screen at the same time Press TEXT...

Страница 154: ...t more than 15 minutes SCART AV COMPONENT MENU SETUP Picture menu and description are the same as that for TV source Sound menu and description are the same as that for TV source Channel menu is not a...

Страница 155: ...ress SETUP button to save and return back to the previous menu and press EXIT button to exit the entire menu HDMI Setup Press button to select HDMI Setup and then press OK or to enter SETUP Notes 1 Ot...

Страница 156: ...hen SETUP press OK or button to enter 2 Press button to adjust or press button to select 3 After finishing your adjustment press SETUP button to save and return back to the previous menu and press EXI...

Страница 157: ...en press OK or to enter press to adjust the picture phase Clock Press button to select Clock and then press OK or to enter press to adjust the clock Notes 1 Other menu and description are the same as...

Страница 158: ...ect directly to the USB port of your TV If you are using a separate cable connection there may be a USB compatibility problem 5 Before connecting your device to the TV please back up your files to pre...

Страница 159: ...sub folder Press OK button or I II button to play or pause You can see the information of the current playing media at the first few seconds or after press DISPLAY button Press or button to rotate th...

Страница 160: ...return back to the previous menu You can see the information of the current playing song at the left of the menu Movie MOVIE Press button to select Movie in the main menu and then press OK button to...

Страница 161: ...n back to previous page You can see the information of the current playing media at the first few second or after press DISPLAY button PVR Press to select the video press OK or I II button or button t...

Страница 162: ...OPERATION 3UHVV EXWWRQ WR VHOHFW RRN LQ WKH PDLQ PHQX DQG WKHQ SUHVV 2 EXWWRQ WR HQWHU 3UHVV 7 EXWWRQ WR UHWXUQ EDFN WR WKH SUHYLRXV PHQX 22 H RRN 3UHVV WR VHOHFW WKH ILOH SUHVV 2 RU EXWWRQ RU EXWWRQ...

Страница 163: ...orrectly you may damage the DVD mechanism 1 Insert Disc to DVD Insert the Disc to the Disc slot mirror record side of the disc has to face towards front of the unit the player will load the disc autom...

Страница 164: ...pause press I II button to resume Repeat for DVD Super VCD VCD CD CD G HD CD and Mp3 JPEG discs Press REPEAT button once to display the current repeat mode For Super VCD VCD CD CD G HD CD discs while...

Страница 165: ...nt playback angle codes in sequent E g Angle Current Full or OFF NOTE Only for DVD with multi angle press ANGLE button to select your favorite playback angle Selectable playback angle depends on the a...

Страница 166: ...k the first file or move to the your favorite file NOTE Press buttons to move the highlight to folders documents or mode selection Press numeric buttons to select the contents directly For number over...

Страница 167: ...priate aspect ratio for the DVD being viewed TV DISPLAY MODE Use navigation buttons to select the OSD Language setup icon press OK button to confirm There are few languages for your selection press bu...

Страница 168: ...Memory resumes it from the last point and restores last used settings Off automatically switches back to the default settings LAST MEMORY Enable or disable Last Memory Speaker Setup Page Downmix Speak...

Страница 169: ...he disc automatically The default language setting is English SUBTITLES Use navigation buttons to select the Subtitles setup icon press OK button to confirm There are few languages for your selection...

Страница 170: ...can select the Parental setting according to your preference Rating restriction divided in eight different category from KID to ADULT NOTE PASSWORD The default setting is locked No Parental selection...

Страница 171: ...urges Handing Discs 1 To remove a disc from its storage case press on the centre of the case and take the disc out 2 Hold the disc by the edges to avoid touching the Recorded side of the disc 1 Finger...

Страница 172: ...t s receiving window Check whether receiving window has strong light Symptom Causes and Correction Symptom Causes and Correction Black screen power indicator light off Check whether power cord is well...

Страница 173: ...emporary function failure 1 Mal fabricated disc used 2 Wrong buttons pressed 3 Static leakage into the unit from outside 1 Wait for 5 to 10 seconds to restore to normality automatically 2 Operate agai...

Страница 174: ...D VCD1 0 1 1 2 0 version CD DA DVD RGB YPbPr VGA Panel Life Hours From DC car 12V _ _ _ _ 3 5 jack L R 0 5 0 3Vrms Hint the items with symbol are related to LED screen Specifications and design are su...

Страница 175: ...ms for used electrical and electronic product By ensuring the correct disposal of this product you will help prevent potentially hazardous to the environment and to human health which could otherwise...

Страница 176: ...m incorporates copy protection technology that is protected by U S patents and other intellectual property rights of Rovi Corporation Reverse engineering and disassembly are prohibited 8 T1 0 0 0 1 1...

Отзывы: