
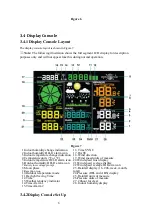
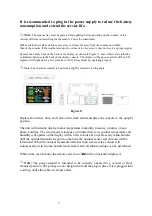
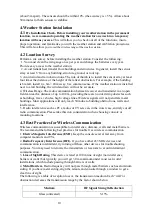


11
Plastics
10-15%
Wood
10-40%
Brick
10-40%
Concrete
40-80%
Metal
90-100%
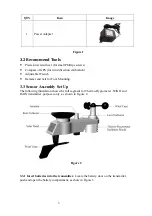
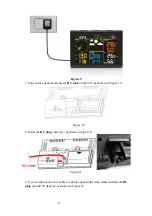
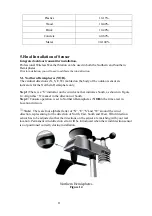
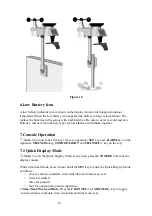
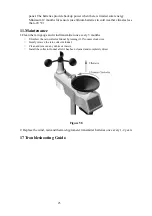
5.Final Installation of Sensor
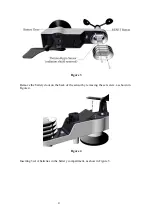
Integrated outdoor transmitter installation.
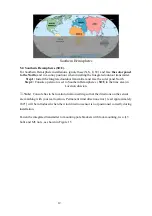
Professional Wireless Weather Station can be used in both the Northern and Southern
Hemispheres.
Prior to installation, you will need to calibrate the wind direction.
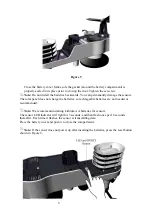
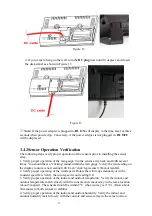
5.1. Northern Hemispheres (NOR).
The cardinal directions (N, S, E, W) molded on the body of the outdoor sensor are
indicators for the Northern Hemisphere only.
Step 1:
There is a “S” indicator on the wind vane that indicates South, as shown in Figure
14. Align this “S” marker in the direction of South.
Step 2:
Console operation is set to Northern Hemispheres (
NOR
in the time area) in
Location division.
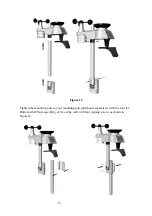
Note:
There are four alphabet letter of “N”,”E”,”S”and “W” around the wind
direction, representing for the direction of North, East, South and West. Wind direction
sensor has to be adjusted so that the directions on the sensor are matching with your real
location. Permanent wind direction error will be introduced when the wind direction sensor
is not positioned correctly during installation.
Northern Hemispheres
Figure 14


