SAFETY WARNINGS AND PRECAUTIONS
9
10
7. LEFT/RIGHT button
a) Press the “Direction (LEFT/RIGHT)” button, SCR drives synchronous
motor to open/close vertical vanes.
b) Press the “Direction (LEFT/RIGHT)” and “Direction (UP/DOWN)”
button for 3 seconds to turn off the sound; press the two buttons for three
seconds again to turn on the sound.
8. UP/DOWN button
Press the “Direction (UP/DOWN)” button to open/close horizontal vanes.
For manual water filling, please note the level indicator in the front of
the air cooler.
1. Do not fill the water exceeding the maximum water level.
2. Be sure to use clean tap water.
3. Tip: It is normal, non-toxic, and will not affect your health if the device
To avoid the dangers caused by misoperation and to use the device
more conveniently, several considerations are given through the
following icons. Please get familiar with the icons below, and
read the User Guide.
● Symbol Meaning Description
2. Use cleanser and banister brush to clean the dustproof filter.
3.Dip the cooler master filter assemblage into cleanser for several
minutes, then clean and dry it.
●Water tank cleaning
1. Cut off the power and rotate the water tank lock to horizontal
direction, then take the water tank out.
2. Use the towel to clean the incrustation of the water tank by cleanser,
and then use water to wash and pour the dirty water out.
●Machine body cleaning
1. Use wet towel to clean the machine body, washing by water directly
is forbidden.
2. Do not wash by corrosive cleanser or solvent.
3. The power should be off and power cord should be pulled out when
cleaning the machine body, or there is electric shock risk.
●Installation after cleaning
1. Install the dustproof filter, cooler master filter assemblage and water
tank orderly and ensure the installation is correct.
2. Link the power and confirm the machine runs smoothly.
●Maintenance
After turning on, the horizontal vanes are in 127° by default. Press the
Horizontal button and the vanes swing between 60° and 127°; press it
again, and the vanes stay at any angle; press it again, and the vanes
swing between 60° and 127°. When the device is turned off, the vanes
must be always in 0°.
9. Buttons combination
1. Press the “Direction (LEFT/RIGHT)” button and the “Direction
(UP/DOWN)” button together for 3s, all buzzers and voices can be
cancelled. Press again for 3s, all buzzers and voices can resume.
2. Press the “Direction (LEFT/RIGHT)” button and “Timer” button
together for 3s, the continuous working protection function can be
cancelled.
C Protection function
1. Water shortage protection:
If the software detects water protection switch off (lacking water) for 5
seconds continuously when the water pump has been working for 45
seconds, the water pump stops working; and the buzzer beeps 10
seconds (software control).
2. Tank extraction protection:
When the water tank is extracted, the power is cut off, and the buzzer
beeps; when the tank is put back in place, the power enters standby
mode.
3. Power failure protection:
When the power restores after a power failure, the horizontal vane turns
on, the buzzer beeps after 3 seconds, and the horizontal vane closes
automatically.
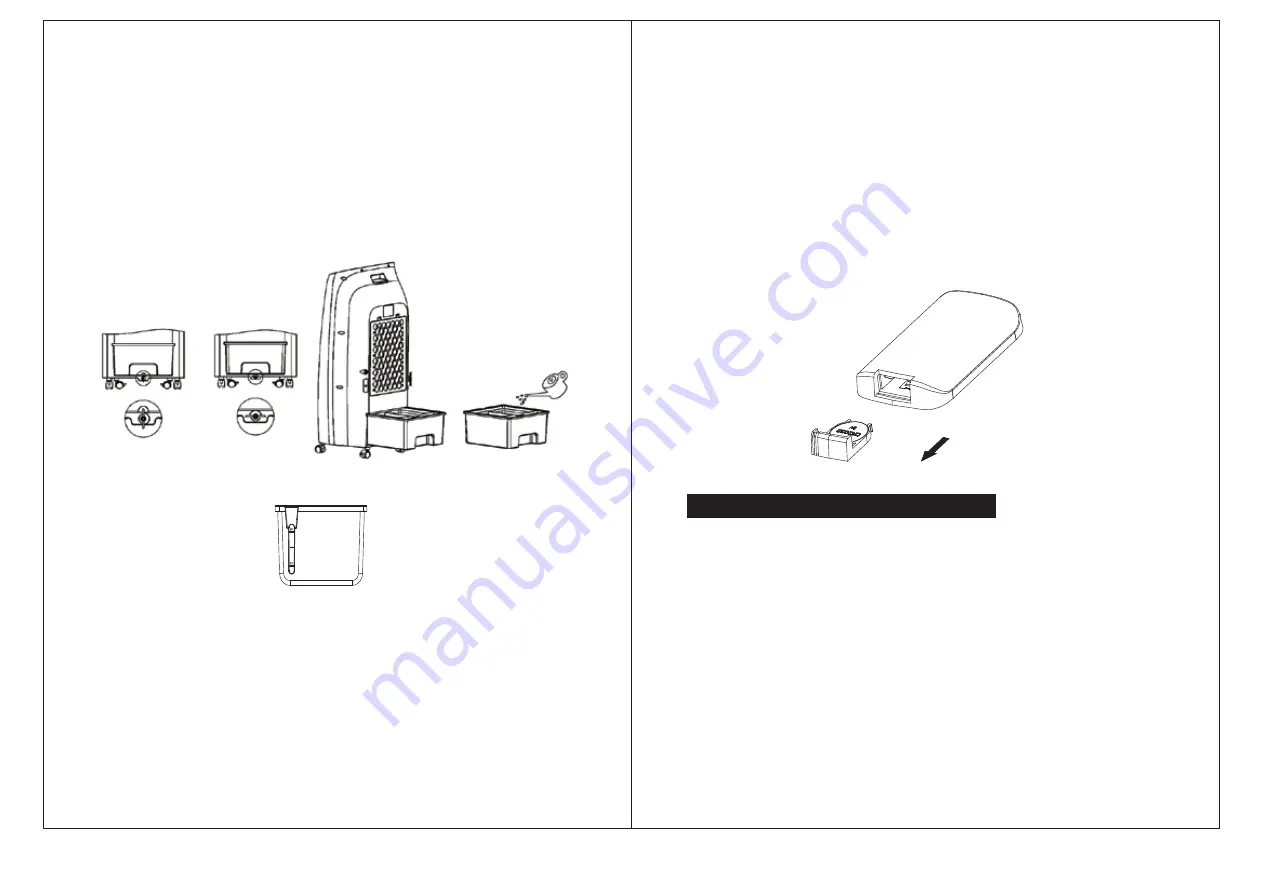
● Filling water:
If need refrigeration or humidification function, please add water into the
water tank. Before adding water, please open the water tank lock, take
the water tank out and add water in it slowly (Figure 1, 2, 3 and 4): put the
water tank to the original location after adding water and lock the water
tank lock
Water tank Locked (Fig. 1) Water tank unlocked (Fig. 2) Water tank pulled out (Fig. 3) Filling water (Fig. 4)
Fig. 5
has slight odor or the water in the tank has a slight discoloration when it
is used for the first time
Using the remote control:
1. Open the battery cover of the remote control, and insert a 3V
CR2032 battery.
2. Please point to the receiver when using the remote control.
3. If the battery voltage is low, please open the battery cover as shown
in the figure and replace with new battery (CR2032). Please note the
positive pole and the negative pole of the battery; then, put on the
battery cover.
1. If the machine has not been used for a long time, the power cord
should be pulled out and the machine should be packed to prevent
dust.
2. Please ensure the cooler master filter and dustproof filter is dry and
there is no water in the tank before packing.
Содержание AC-9110CL
Страница 1: ...MODEL AC 9110CL AIR COOLER...


