the saw. The rip ruler is set at the factory, but the two crosscut rulers must be adjusted to the specific blade that
is mounted in the saw. Install a blade, then refer to “Adjusting the Crosscut Rulers” in the Operation Section.
NOTE:
After the saw is completely assembled, you can make a simple cut to verify that the rulers are lined up
correctly.
Installing the Cord Keeper
The cord keeper keeps the cord away from the blade or bit and away from your workpiece. (The Models 7400
and 7400XL have an integral cord keeper.)
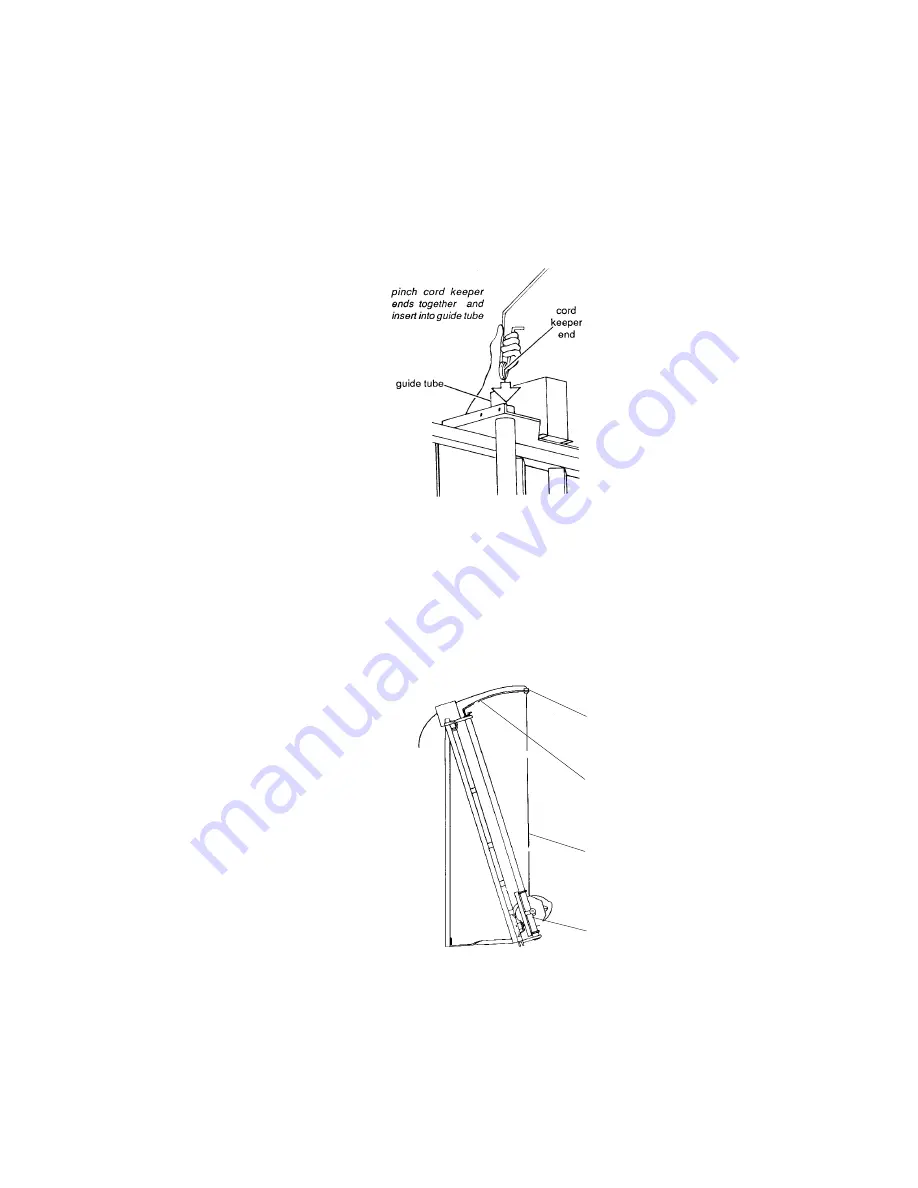
1. Pinch the ends of the cord keeper together as shown in Figure 10 while you slowly slide the ends into the
guide tubes. Seat the ends securely.
Figure 10: Installing the Cord Keeper
2. Remove the rubber stopper from the ring in the cord keeper. See Figure 11. Uncoil the cord from the motor,
and place the plug end through the ring as shown.
3. Loosen the carriage lock and lower the carriage to the
bottom
of the guide tubes (the farthest that the cord
will have to be extended). Lock the carriage lock in this lowered position.
4. Pull the cord keeper down so it is roughly parallel to the floor as shown. Pull the cord up to remove any slack
in it. Then open the rubber stopper and pull it over the cord with the small end of the taper on the bottom.
Press the rubber stopper into the ring on the cord.
Rubber Stopper
Pull cord keeper
so it is parallel
to the floor.
No slack in cord.
Carriage (at the
bottom of the guides)
Figure 11: Installing the Cord Keeper
5. Loosen the carriage lock. Allow the carriage to return to the top of the guide tubes, then lock the carriage
lock.
NOTE:
If you discover there is too much or not enough slack in the cord, readjust as necessary.
14


