41
5.
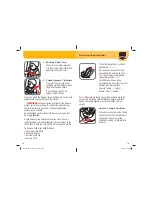
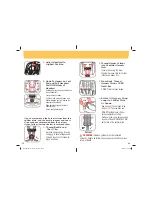
Route Vehicle Lap or
Lap/Shoulder Belt
Through Rear-Facing
Belt Path
Review pages 30-31 and your
vehicle owner’s manual to
determine what kind of vehicle
belts you have and how to lock a
child restraint in place.
42
6.
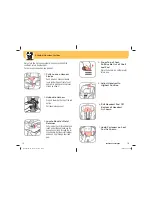
Pull Vehicle Belt Across
to Opposite Side
Do not twist belt.
Belt
MUST
be
in front of buckle strap.
You
MUST
use the 1st or 2nd
buckle slot. Do not place belt
over child’s legs.
Buckle vehicle
belt.
7.
Tighten Belt
Place hand in child restraint.
Firmly push child restraint down
and back towards the vehicle
seat back while pulling shoulder
belt or the free end of lap belt to
tighten.
It may be easier to pull the
shoulder belt or the free end of
lap belt parallel with the belt path
through the Easy Access Belt
Path panel in pad as shown.
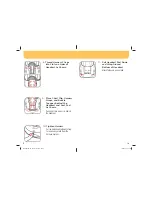
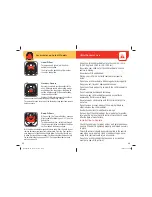
8.
Check Belt Tightness
Hold child restraint at the belt path
with your weakest hand.
Push and pull from side to side.
It should not move more than 1 in.
(2.5 cm).
10.
Secure Child in Child
Restraint
Recheck the level line.
Repeat
steps 2-9 if not reclined correctly.
NOTE:
You may need to place
a large rolled towel(s) or foam
pool noodle(s) under front of
child restraint to help achieve the
correct recline angle. Check often
to be sure padding is still in place
and the belt is tight.
If it moves more than 1 in. (2.5 cm),
you can try:
A.
Pulling the belt tighter.
B.
Reinstalling the child restraint.
C.
Changing to a different seating location.
D.
Switching to the lower anchor belt installation if lower
anchors are available in your vehicle.
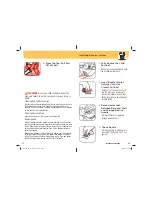
9.
Replace Easy Access
Belt Panel
Attach seat pad fasteners and put
body pillows back in seat.
Adjust the headrest/harness to
the proper height for your child
.
See page 5 for fi t guidelines.
4358-6835 Grow and Go Air.indd 47-48
4358-6835 Grow and Go Air.indd 47-48
10/29/15 3:34 PM
10/29/15 3:34 PM

