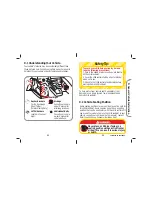
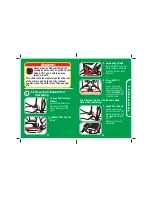
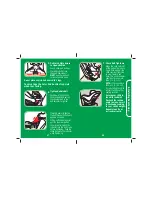
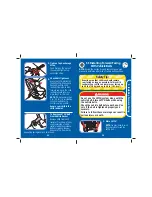


6.
Check Belt Tightness
Grasp the child restraint at
the belt path with one hand.
Push and pull the child
restraint from side to side,
forward and back. The child
restraint should not move
more than 1 in. (2.5 cm).
NOTE:
If it moves more than
1 in. (2.5 cm) try reinstalling
the child restraint or try
another seating location.
Secure your child in the
child restraint.
continued on next page.
59
60
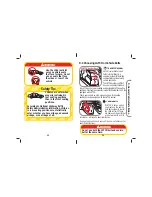
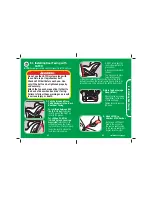
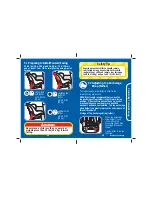
You will rarely need to use a locking clip except in some
older vehicles. Built in child restraint locking systems
have been required in vehicles since 1996, and many
vehicles had these features even earlier.
Check your vehicle owner’s manual to learn how to use
the systems in your vehicle. If you need a locking clip, re-
turn to the store where you purchased this child restraint
to purchase a locking clip or call us at 1-800-544-1108 to
order one.
Locking clips from any child restraint manufacturer are
okay to use.
Remove the locking clip when the vehicle seat belt is not
being used with the child restraint.
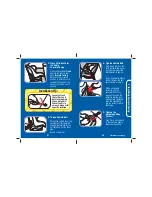
A locking clip will not fi x all
types of seat belt problems.
Refer to section D-4 to determine if your vehicle belts require
a locking clip.
Using the Locking Clip
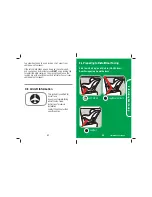
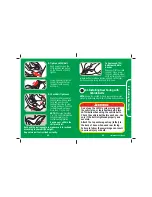
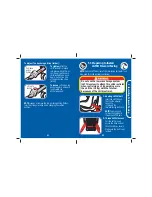
Do not use both the LATCH belt and vehicle belt
at the same time.
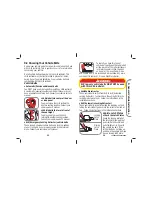
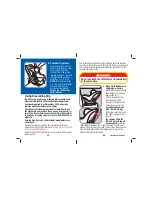
Place Child Restraint in
Vehicle Rear Facing
NOTE:
Store top anchorage
hook (tether) on the base.
See section E-1.
With child restraint fully
reclined, place child
restraint in the back seat.
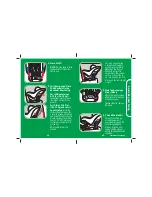
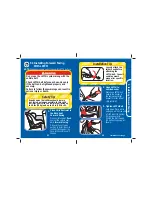
Check for proper recline.
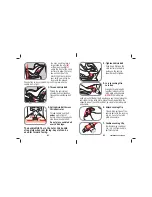
For children between
5-22 lbs (2.3-10 kg),
the bottom level to ground
line MUST be level to the
ground.
For children 22-40 lbs
(10.1-18 kg) and can sit
up unassisted,
rotate the
child restraint between the 2 level to ground lines. Start by
making the bottom level to ground line level, then rotate seat up.
DO NOT rotate past the top most upright level to ground line.
Adjust child restraint if needed.
1.
The following directions describe installing the child restraint
rear facing. Same steps apply for forward facing, except install
the restraint forward facing and thread the vehicle belt in the
forward-facing belt path.
Содержание Advance SE 65 air+
Страница 2: ...www safety1st com airprotect ...


