


© Safe Fleet | May 2018 | All rights reserved | Part #: 700-1111 R2
Title of Document
p. 23
Performing AVM Calibration
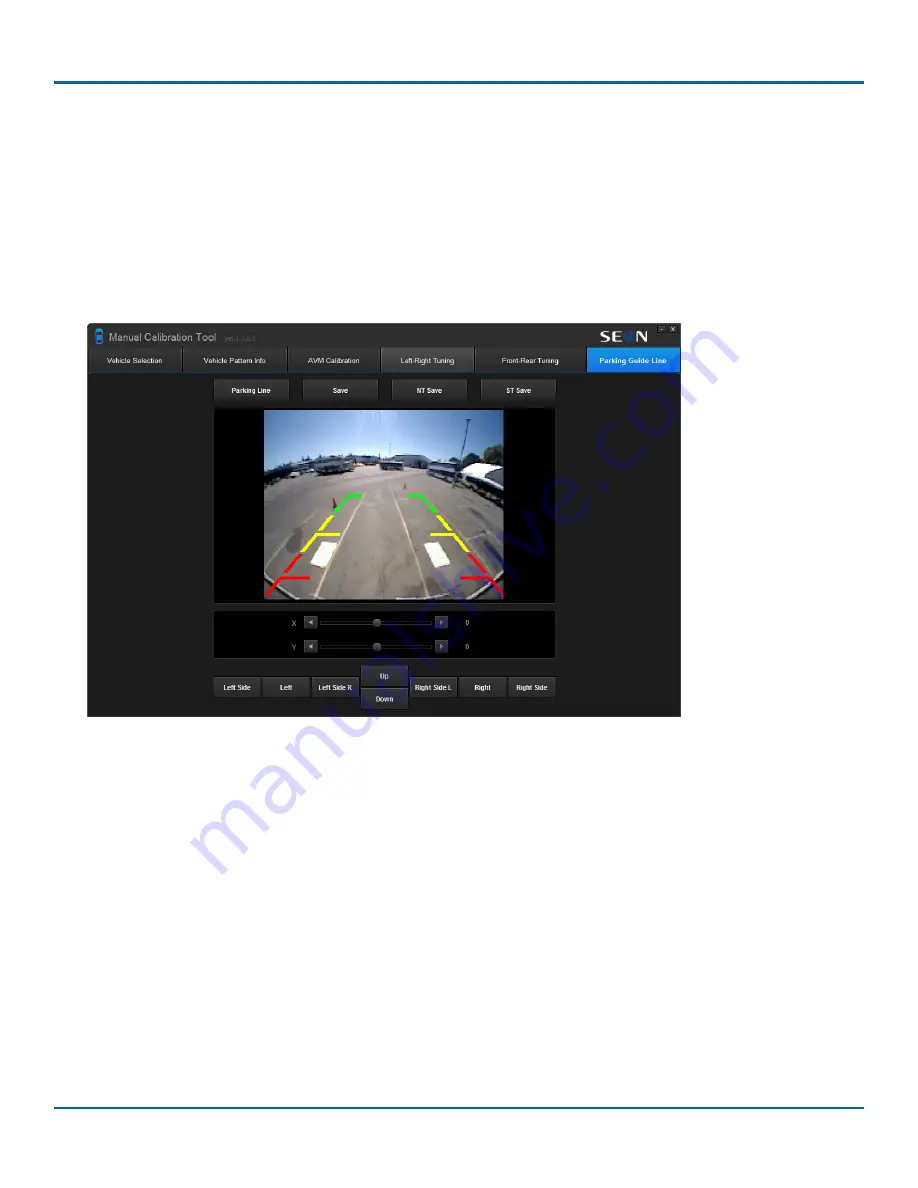
Adjusting Parking Lines and Saving
The final steps of the calibration tool involve adjusting parking lines and saving the files.
1. Click
Parking Line
to load the rear camera image and display the parking lines. You'll see your rear calibration pads in
the adjustment window.
2. Using your calibration pads as reference, move the parking lines until the red indicators are in line with the calibration
pads. For example, if you know that your pads are 30" from the bumper, the red lines will tell you that you are within
30" of the bumper when backing up. The green and yellow lines let you know that you still have room to back up, and
that you're getting close to the red zone.
3. Use the
X
and
Y
buttons to move the parking lines. Alternately, you can use the configuration buttons below to move
the lines.
• Left Side
moves the left line outwards (towards the left)
• Left
moves both lines to the left
• Left Side R
moves the left line inwards (towards the right)
• Up
moves both lines up
• Down
moves both lines down
• Right Side L
moves the right line inwards (towards the left)
• Right
moves both lines to the right
• Right Side
moves the right line outwards (towards the right)
4. Click
Save
when done.


