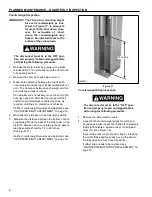


17
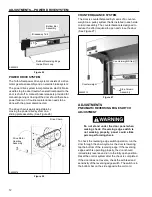
ADJUSTMENTS—DRIVE CHAIN ADJUSTMENT
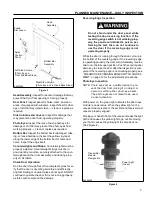
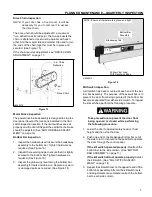
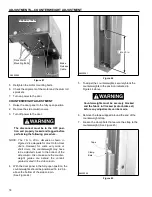
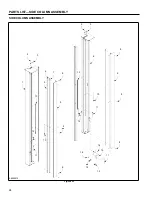
3. Remove sealing band. (See Figure 40)
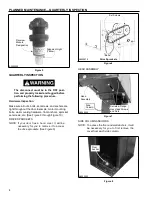
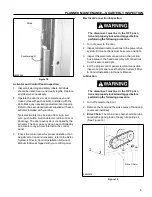
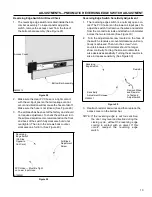
Feeler Gauge Checking Brake
Air Gap (0.010—0.024-in.)
Sealing Band
A7700047
A7700048
Figure 42
Figure 40
4. Using a feeler gauge and a nut driver, adjust the
retaining nuts until you achieve the proper air gap
(0.010–0.024-in.). (See Figure 41 and Figure 42)
5. Reinstall the dust cover and the manual brake
release lever.
6. Restore power to the door and perform an opera-
tions check.
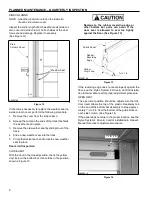
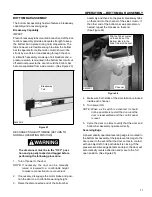
DRIVE CHAIN ADJUSTMENT
The disconnect must be in the OFF posi-
tion and properly locked and tagged before
performing the following procedure.
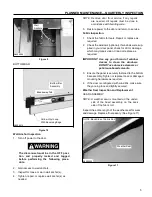
A7500246
Brake Retaining Nuts
Figure 41
1. Turn off power to the door.
2. Loosen the four drive motor mounting bolts secur-
ing the motor mount plate to the top plate assembly.
3. Release the brake.
4. While holding the brake in the released position,
turn the adjustment bolts to increase or decrease
the chain tension. (See Figure 43)
• Turn bolts clockwise to increase tension.
• Turn bolts counterclockwise to decrease tension.
All retaining nuts and air gap must be
equally set throughout the entire circum-
ference of the brake, or the parts will wear
unevenly.


