


Connecting your PTX Model 3 PRO head(s)
Since the head requires an network connection, you need to identify an IP
address and port number to establish communications.
Using a CAT 5 or 6 cable, connect the PTX fixture to the network switch you
wish to use. It’s highly recommended that you do NOT use a general purpose
office network switch since there is often a lot of traffic that can interfere
with IP production system component operations.
Connect your VISCA over IP controlling device (joystick) to the same network
switch. You’ll need to set the network IP address for both the controller and
the PTX head(s).
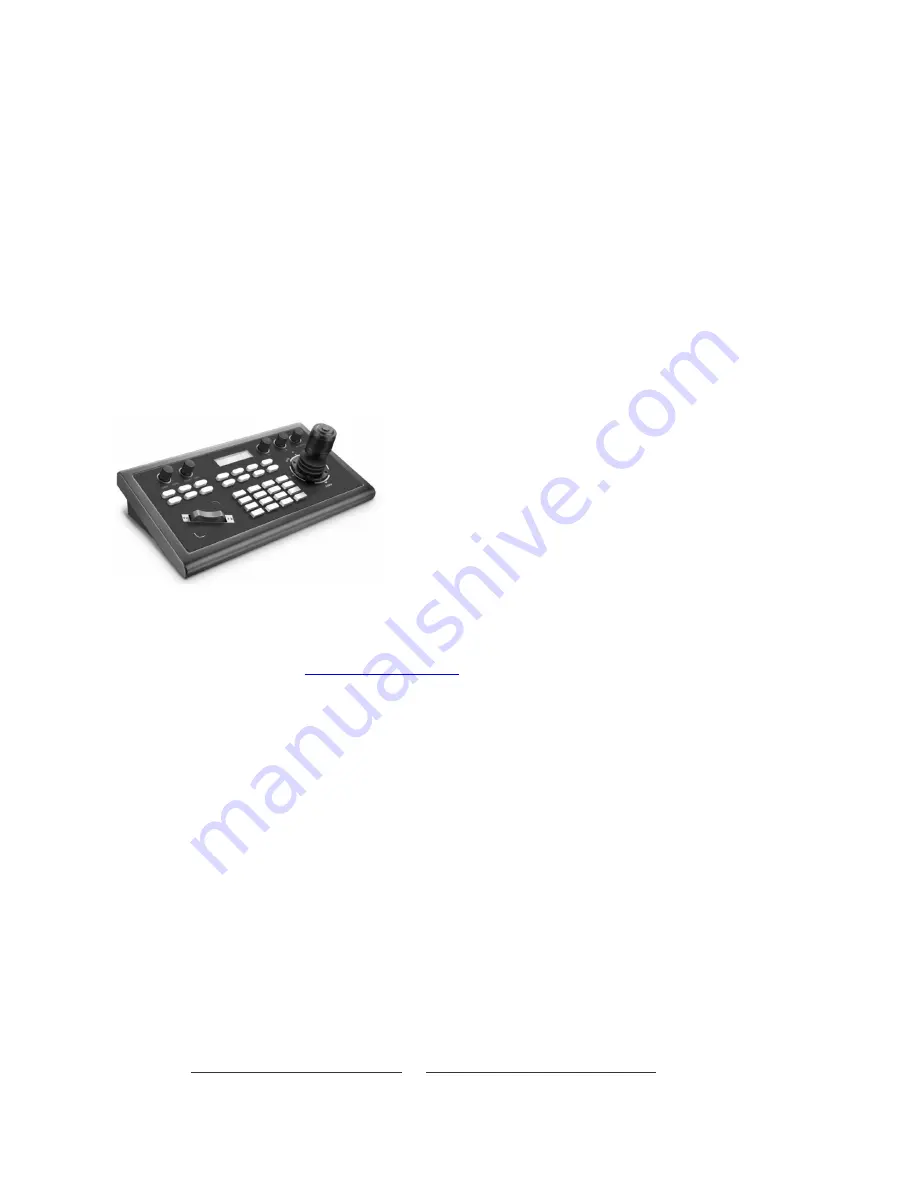
In this example we’re using the RUSHWORKS
RW/JOYCON VISCA over IP joystick controller
that supports up to seven (7) PTX and/or PTZ
heads. This device provides manual joystick
control as well as the ability to save and recall
up to 256 presets. You can also set the PTZ
Speed which applies globally to all connected
devices.
The controller and PTZ camera must be connected to the same LAN, and IP
addresses must at the same segment.
For example
:
192.168.1.123 is at the same segment with 192.168.
1
.111
192.168.1.123 is not at the same segment with 192.168.
0
.125
The default setting for the IP controller is to obtain the IP address dynamically.
CAM1~CAM4
Quickly switch to CAM NUM 1-4 devices (IP VISCA)
PRESET
Use a short press to set presets; a long press to delete presets.
It needs to work with the number keys and
ENTER
button for setting or
deleting presets.
There are many VISCA over IP controllers available, including a versatile
product lineup from
Just follow the operations guide for
whatever controller you choose. The basic connections and operations are
very similar between and among the different models.


