background image

13

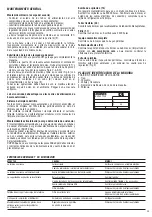
TROUBLESHOOTING AND SOLUTION

EFFECTS

CAUSES

SOLUTIONS

The turbine will not start

No power

Check the connection at the electric panel

Power supply cable, switch

Call an authorised service centre 

or motor faulty

The turbine will not start 

Faulty electronics

Call an authorised service centre 

in automatic 

or microswitch 

Poor suction capacity

Dust bag full  

Replace the bag

One of the pipes or accessories is blocked

Check hoses and accessories

Filter cleaning system fault 

Check air pressure.

Blocked filter

Call an authorised service centre 

Dust leaks from the turbine

Cartridge filter ruptured

Switch off the turbine immediately

discharge

and call an authorised service centre

Compressed air does not arrive at the distributor

Inlet coupling not connected properly

Check the connection

Adjusting the regulator 

Regulator faulty or air leak in the system

Call an authorised service centre 

change in the pressure gauge reading 

in the system

GENERAL MAINTENANCE

Ordinary maintenance (by the user)

- Check the condition of the compressed air feed hoses and relative

connections; 

- check the condition of the dust suction pipes; 
- periodically replace the dust bag; 
- drain the condensate from the pressure regulator collection tray (4B)

daily by rotating screw anticlockwise. 

The dust bag (21) is housed in a container (8) located inside a com-
partment (9) . 

Each morning, prior to starting the turbine, visually inspect the correct
positioning of the dust bag and the contents, which must not be
more than 3/4 of the capacity of the bag itself. 

Replacing the dust bag:

- Switch off the turbine completely by turn the knob (30) to OFF to

switch the shut down the machine. 

- Open door (8) and the filter housing will lift automatically to free the

dust bag. Extract the container (21) and free the dust bag from the
plastic ring. Remove the bag containing the dust and seal it with a
clip. See the sequence in Fig. 6-7-8-9-10. 

Hook the bag onto the plastic ring  and fix it in position in its housing
(Fig. 6) using the elastic. Tilt the bag so that the pressure balancing
holes (Fig. 8) are free. Place the bag in the container ensuring that it
is well spread on the bottom of the container. Place all the
components inside the compartment and close the door (8-9). 
The utmost care must be taken when carrying out these operations to
prevent dust from being allowed to enter the environment. Wear a
dust mask. 

The sealed bag must be delivered to an authorised disposal centre.

Filter cleaning system 

When the motor is switched on, in either automatic or manual mode,
the filter cleaning system will carry out a periodic filter cleaning cycle
of duration 3 seconds. This system allows the filter cartridge to
operate efficiently. It is also possible to perform manual cleaning
cycles by pressing button (45).  

Extraordinary maintenance (by the service centre) 

Extraordinary maintenance and the repairs listed below must be
carried out by specialised electronic personnel authorised by RUPES
Spa Before gaining access to the internal parts of the turbine,
disconnect the unit from the mains electricity supply. Lock the eternal
panel using  padlock to prevent accidental start-up. The key to the
padlock must be kept by the person responsible for factory safety.
RUPES Spa. will not be held responsible for direct or indirect
damages resulting from non-compliance with the requirements of this
manual. 

Suction pump (13)

The unit does not require maintenance if used continuously for 8
hours a day. Replace the bearings every 20,000 hours. Check the
conditions of the electric cables every 6 months and verify that the
cooling grid is cleaned.

Hoses (46)

Check the tightness of the clips every 6 months. 

Filter (17)

Check every 6 months. Replace every 2,500 hours. 

Complete pneumatic plant 

Check for leaks every 6 months. 

Electronic panel (23) 

Check the tightening of all clamps every 6 moths, clean all the
internal components with 

dry and low pressure compressed air

, and

check the working conditions of the thermal protection device. 

Turbine structure

During the periodic inspections, check the tightness of all bolts.

TOOL IDENTIFICATION PLATE

POSITION AND MEANING OF INFORMATION
1. Type.
2. Absorption.
3. Voltage and frequency.
4. Tool code or serial number.
5. Power.

4

5

3

2

1

A

V.         Hz.

MILANO - ITALY

Содержание HE200K

Страница 1: ...действующими Едиными Европейскими нормами Низкое напряжение EN60335 1 2008 Безопасность электрических приборов Основные нормы EN60335 2 69 A2 2008 Особые требования для пылесосов промышленного применения EN 60704 3 Определение уровня звуковой мощности источников шума с помощью звукового давления Электромагнитная совмест EN55014 1 2008 EN55014 2 1998 A1 2008 EN61000 3 2 2006 EN61000 3 3 1995 A1 200...

Страница 2: ...действующими Едиными Европейскими нормами Низкое напряжение EN60335 1 2008 Безопасность электрических приборов Основные нормы EN60335 2 69 A2 2008 Особые требования для пылесосов промышленного применения EN 60704 3 Определение уровня звуковой мощности источников шума с помощью звукового давления Электромагнитная совмест EN55014 1 2008 EN55014 2 1998 A1 2008 EN61000 3 2 2006 EN61000 3 3 1995 A1 200...

Страница 3: ...действующими Едиными Европейскими нормами Низкое напряжение EN60335 1 2008 Безопасность электрических приборов Основные нормы EN60335 2 69 A2 2008 Особые требования для пылесосов промышленного применения EN 60704 3 Определение уровня звуковой мощности источников шума с помощью звукового давления Электромагнитная совмест EN55014 1 2008 EN55014 2 1998 A1 2008 EN61000 3 2 2006 EN61000 3 3 1995 A1 200...

Страница 4: ...risulti danneggiato mostri segni di precedenti aperture o la documentazione contenuta nella busta posta all esterno non sia completa non procedere ulteriormente ma respingere il collo avanzando le opportune riserve al vettore L inosservanza di tale norma comporta il decadimento della garanzia Per disimballare la macchina tagliare le regge di legatura rimuovere il cappuccio di cartone ondulato togl...

Страница 5: ...risulti danneggiato mostri segni di precedenti aperture o la documentazione contenuta nella busta posta all esterno non sia completa non procedere ulteriormente ma respingere il collo avanzando le opportune riserve al vettore L inosservanza di tale norma comporta il decadimento della garanzia Per disimballare la macchina tagliare le regge di legatura rimuovere il cappuccio di cartone ondulato togl...

Страница 6: ...risulti danneggiato mostri segni di precedenti aperture o la documentazione contenuta nella busta posta all esterno non sia completa non procedere ulteriormente ma respingere il collo avanzando le opportune riserve al vettore L inosservanza di tale norma comporta il decadimento della garanzia Per disimballare la macchina tagliare le regge di legatura rimuovere il cappuccio di cartone ondulato togl...

Страница 7: ...ometro 5 ed a una elettrovalvola 19 che gestisce la pulizia del filtro e da una valvola pneumatica 20 che garantisce la costante chiusura del contenitore Sezione plug in L unità può essere utilizzata come turbina di aspirazione centralizzata collegando il tubo di aspirazione di un terminale RUPES e di relativo comando remoto mediante la presa plug in Sezione presa di servizio Sul pannello frontale...

Страница 8: ...continuo della turbina Per interrompere il funzionamento in continuo premere il pulsante 29 per passare in modalità AUTOMATICO oppure ruotare la manopola 30 sulla posizione OFF che spegne completamente la macchina Modalità automatico La modalità AUTOMATICO prevede il funzionamento della turbina con avviamento a distanza E possibile avviare la macchina a distanza collegando utensili pneumatici alle...

Страница 9: ...usto porta filtro e si libera il secchio polveri Estrarre il secchio 21 e liberare il sacco dall anello in plastica Estrarre il sacco contenente le polveri e chiuderlo con una fascetta Vedi sequenza Fig 6 7 8 9 10 Calzare il sacco sull anello di plastica e fissarlo con il relativo elastico nella sede Fig 6 rivoltare il sacco in modo che i fori di compenso pressione Fig 8 siano liberi posizionare i...

Страница 10: ... paints that have not completed the catalyst cycle do not vacuum sparks or white hot shavings immediately disconnect the machine from the electrical mains if dust is discharged do not vacuum flammable or explosive liquids i e petrol thinners etc do not vacuum aggressive liquids or substances i e acids bases solvents etc PARTS OF THE TOOL 1 discharge fitting 2 vacuum hose nozze 3 Tool support 4 com...

Страница 11: ...ket 6 is present on the front panel of the unit The service socket does not enable the vacuum system to be automatically started when the tool is switched on INSTALLATION Warning The machine must be installed and started for the first time by qualified personnel Turbine positioning Fig 3 The machine must be positioned on a solid and level surface at the distances indicated in Fig 3 generally insta...

Страница 12: ...tion press button 29 to pass to AUTOMATIC mode or turn the knob 30 to OFF to switch the shut down the machine Automatic mode The AUTOMATIC mode supports the remote operation of the turbine To start the machine remotely connect the pneumatic tools to the front connections or connect the fixed terminal to the plug in system The unit automatically set the stand by mode 30 sec after the air or electri...

Страница 13: ... the pressure balancing holes Fig 8 are free Place the bag in the container ensuring that it is well spread on the bottom of the container Place all the components inside the compartment and close the door 8 9 The utmost care must be taken when carrying out these operations to prevent dust from being allowed to enter the environment Wear a dust mask The sealed bag must be delivered to an authorise...

Страница 14: ...mé 4A pommeau de réglage 4b vidange de la condensation 5 manomètre indicateur de la pression de service 6 prise électriques de service 7 raccordement de l air comprimé pour outils 8 portillon conteneur du sac de collecte de la poussière 9 portillon 10 grilles du ventilateur 11 étiquette d identification 12 câble d alimentation en courant électrique 13 pompe aspirante 14 soupape de sécurité 15 capt...

Страница 15: ...tion de prise de service Sur le panneau frontal de l unité se trouve une prise électrique de service 6 La prise de service ne permet pas de démarrer automatiquement la source d aspiration lorsqu on allume l outil INSTALLATION Attention La première fois la machine doit être installée et mise en service par des personnes spécialisées Positionnement de la turbine Fig 3 La machine doit être placée sur...

Страница 16: ...r sur le bouton poussoir 29 pour passer en modalité AUTOMATIQUE ou tourner la poignée 30 et la mettre sur la position OFF ce qui éteint complètement la machine Modalitè automatique Le mode AUTOMATIQUE prévoit le fonctionnement de la turbine avec démarrage à distance Il est possible de démarrer la machine à distance en raccordant les outils pneumatiques aux connexions frontales ou au moyen de la bo...

Страница 17: ...fixer par l élastique dans le siège Fig 6 retourner le sac de façon à ce que les trous de compensation de la pression Fig 8 soient libres positionner le tout dans le logement 8 et fermer le volet 9 Toutes ces opérations doivent être accomplies en faisant particulièrement attention pour éviter de répandre la poussière dans l environnement Endosser un masque de protection Le sac fermé doit être remi...

Страница 18: ...ldet sind Die Maschine ist nicht für die Bedienung durch Kinder oder Personen mit Mental sen sorischen Störungen konzipiert und hergestellt es ist erforderlich dafür zu sorgen dass ein ausreichender Luftaustausch im Raum stattfindet wenn die die ausströmende Luft in den Raum zurück strömt Die nationalen Gesetzgebungen sind stets einzuhalten die Temperatur am Arbeitsplatz muss zwischen 10 und 35 li...

Страница 19: ...ON Achtung Die Installation und erste Inbetriebnahme der Turbine muss durch spezialisiertes Personal erfolgen Positionierung der Turbine Abb 3 Die Maschine muss auf einem festen und ebenen Untergrund sowie mit den in Abb 3 dargestellten Abständen installiert werden Die Positionierung erfolgt in der Regel direkt auf der Arbeitsebene oder tiefer Vermeiden Sie es die Turbine in einer Position zu inst...

Страница 20: ...nterbrechung des Dauerbetriebs die Taste 29 drücken um zum AUTOMATISCHEN Betrieb zu wechseln oder Den Knopf 30 in Position OFF drehen was die Maschine vollkommen abschaltet um die Turbine komplett abzuschalten Automatischer Betrieb Der AUTOMATIK Modus sieht die Funktionsweise der Turbine mit Fernstart vor Die Maschine kann aus der Ferne eingeschaltet werden indem Pneumatikwerkzeuge an die frontale...

Страница 21: ...eich frei sind den Sack in den Eimer einsetzen und am Boden sorgfältig glattstreichen nun den Eimer mit dem Sack in das Fach 8 einsetzen und die Klappe 9 Alle diese Arbeiten müssen mit der größtmöglichen Vorsicht vorgenommen werden um zu vermeiden dass der Staub in der Umgebung verstreut wird Dabei eine Staubschutzmaske Der geschlossene Sack wird den amtlichen Entsorgungsstellen zugeführt Filterre...

Страница 22: ...el aspirador desconectarlo inmediatamente de la red de alimentación no se deben aspirar líquidos inflamables o explosivos por ej bencina diluyentes etc no se deben aspirar líquidos o sustancias agresivas por ej ácidos bases disolventes etc USO CONFORME A LAS FINALIDADES PREVISTAS La máquina es idónea para grandes esfuerzos en aplicaciones industriales según las normas EN60335 1 La máquinas es idón...

Страница 23: ...toma de servicio no permite el arranque automático de la fuente aspiradora al encender la herramienta INSTALACIÓN Atención La máquina debe ser instalada y puesta en servicio la primera vez por personal especializado Colocación turbina Fig 3 La máquina debe colocarse sobre un plano sólido y a nivel a las distancias indicadas en la Fig 3 generalmente se instala sobre el mismo plano de trabajo o bien...

Страница 24: ...tinuado presione el botón 29 para pasar al modo AUTOMÁTICO o girar el pomo 30 a la posición OFF para apagar completamente la máquina Modo automático La modalidad AUTOMÁTICO prevé el funcionamiento de la turbina con arranque a distancia Es posible arrancar a distancia la máquina conectando herramientas neumáticas en las conexiones frontales o mediante terminal fijo conectado con sistema plug in La ...

Страница 25: ...presión queden libres la bolsa de recogida de polvos está contenida en un cubo 8 colocar todo en el compartimiento y cerrar la tapa 9 Todas estas operaciones deben hacerse con la máxima atención evitando esparcir polvo en el ambiente Póngase una máscara antipolvo La bolsa cerrada debe entregarse a los centros de eliminación de basura autorizados Sistema de limpieza del filtro Tanto en modo manual ...

Страница 26: ...erfde oppervlakken opgezogen wor den die hun katalysecyclus nog niet voltooid hebben zuig geen gloeiend hete spaanders en andere stoffen op als er stof uit de stofzuiger komt dan moet de stofzuiger on middellijk van het elektriciteitsnet afgekoppeld worden er mogen geen ontvlambare of explosieve vloeistoffen bijv benzine verdunners enz opgezogen worden er mogen geen agressieve vloeistoffen of stof...

Страница 27: ...ontactdoos 6 De servicecontactdoos maakt een automatische start van de zuigbron bij de start van het gereedschap niet mogelijk INSTALLATIE Let op De machine moet geïnstalleerd worden en de eerste keer in werking gesteld worden door vakmensen Plaatsing van de turbine afb 3 De machine moet op een stevige en vlakke ondergrond geplaatst worden op de op afb 3 aangegeven afstanden over het algemeen geïn...

Страница 28: ...nderbreken moet u op de knop 29 drukken om op de AUTOMATISCHE stand over te schakelen of moet u draai de knop 30 op de stand OFF waardoor de machine volledig uitgeschakeld wordt Automatische stand De AUTOMATISCHE bedrijfsmodus zorgt ervoor dat de turbine werkt met startbediening op afstand De machine kan van een afstand worden gestart door de pneumatische apparaten op de aansluitingen op de voorka...

Страница 29: ...les in de ruimte en sluit het deurtje 8 9 Bij al deze werkzaamheden is de grootst mogelijke oplettendheid geboden om te vermijden dat het stof in de omgeving verspreid wordt Er moet een stofmasker gedragen worden De dichte volle stofzak moet weggegooid worden door hem bij een erkende afvalverwerkingsinstantie in te leveren Filterreinigingssysteem Zowel op de handbediende als op de automatische sta...

Страница 30: ...8 и открыть дверцу 9 отделить мешочек содержащий дополнительные приспособления Контроль комплектности груза Упаковка должна содержать турбину снабженную питающим кабелем 5 типолюсная электрическая розетка розетка пульта дистанционного управления При ликвидации упаковочного материала придерживаться действующих локальных предписаний по запуску машины в работу не забывая о правилах раздельного сборао...

Страница 31: ...тветствующего пульта дистанционного управления к штепсельной розетке Секция рабочей розетки На фронтальной панели блока находится электрическая рабочая розетка 6 Рабочая розетка не позволяет автоматически запускать источник вытяжки при запуске инструмента МОНТАЖ Внимание Машина должна быть смонтирована и запущена в работу первый раз только специализированным персоналом Положение турбины Рис 3 Маши...

Страница 32: ...лую ручку 30 в положение OFF что приведет к полному отключению машины Автоматический режим АВТОМАТИЧЕСКИЙ режим работы предусматривает функционирование турбины с дистанционным запуском Возможен дистанционный запуск машины при подсоединении пневматических инструментов к фронтальным соединениям или с помощью неподвижного терминала используя систему штепсельного соединения При выключении инструмента ...

Страница 33: ...мешок на пластмассовое кольцо и закрепить с помощью соответствующей эластичной ленты Рис 6 в его гнезде Рис 8 перевернуть мешок так чтобы отверстия для компенсации давления были свободны Мешок для сбора пыли содержится в контейнере 8 находящемся в закрытой полости дверцы 9 Все эти операции должны быть осуществлены с максимальной осторожностью для предотвращения выброса пыли в окружающую среду Наде...

Страница 34: ...n la ùltima de ta pa del presente manual de instrucciones En caso de comprobado mal funcionamiento la máquina acompañada del certifica do de garantìa deberá entregarse o enviarse con porte pagado sin dismontarla y en su embalaje original a la fábrica o a un Centro de Asistencia autorizado indicado en la lista adjunta al presente manual En ningùn caso la garantia da derecho a la substitución de la ...

Страница 35: ...risulti danneggiato mostri segni di precedenti aperture o la documentazione contenuta nella busta posta all esterno non sia completa non procedere ulteriormente ma respingere il collo avanzando le opportune riserve al vettore L inosservanza di tale norma comporta il decadimento della garanzia Per disimballare la macchina tagliare le regge di legatura rimuovere il cappuccio di cartone ondulato togl...

Страница 36: ...действующими Едиными Европейскими нормами Низкое напряжение EN60335 1 2008 Безопасность электрических приборов Основные нормы EN60335 2 69 A2 2008 Особые требования для пылесосов промышленного применения EN 60704 3 Определение уровня звуковой мощности источников шума с помощью звукового давления Электромагнитная совмест EN55014 1 2008 EN55014 2 1998 A1 2008 EN61000 3 2 2006 EN61000 3 3 1995 A1 200...

Отзывы: