background image

9

PRODUCT USER SAFETY INSTRUCTIONS

BEFORE INITIAL USE - BE TRAINED AND MEDICALLY QUALIFIED

Do not use this device until you have read this manual and the approved head top Instruction 
Manual (additional copies available at www.rpbsafety.com) and been trained in the respirator’s 
use, maintenance, and limitations by a qualified individual (appointed by your employer) who is 
knowledgeable about the RPB

®

 PX4 AIR

®

 PAPR.

Do not wear this respirator until you have passed a medical evaluation using a medical 
questionnaire or an initial medical examination by a qualified physician or other licensed health 
care professional (PLHCP).

Allergens:

 No known common allergens are used in this product.

Some materials could cause an allergic reaction in susceptible individuals. If you have a known 
allergy or develop irritation, inform your employer. Irritation may occur from lack of cleaning. 
Following all cleaning and care instructions provided in the instruction manuals for this and any 
other RPB

®

 products you are using.

MAKE SURE THE SYSTEM IS READY FOR USE
Make sure you have a complete system.

 The PX4 AIR

®

 is only one component of an approved 

respirator system. Verify that you have all required components for the PX4 AIR

®

 to serve as a 

complete approved respirator:

 Respirator Head-top Assembly

 Breathing Tube Assembly 


PX4 AIR

®

 PAPR

See Respirator Component Diagram (page 6).

 See the instruction manual and approval label 

for the selected head top for approval with the PX4 AIR

®

and the assigned protection factor. 

Use only authentic RPB

®

 brand parts and components that are part of the approved respirator 

assembly. Using incomplete or inappropriate equipment, including the use of counterfeit or 
non-RPB

®

 parts, can result in inadequate protection and will void the approval of the entire 

respirator. Do not modify or alter any part of this product. 

Inspect

 all components daily for signs of damage or wear and tear that may reduce the level 

of protection originally provided, see Inspection and Cleaning (p. 24) for details. Remove any 
damaged component or product, including any belt, breathing tube, or front cover of the 
PAPR, from service until repaired or replaced. Damaged components should be replaced with 
genuine RPB

®

 brand replacement parts. Replace HE filter when they are visually dirty, filter 

media is damaged, or the airflow is reduced. OV/HE filters may need to be replaced after each 
use depending on the contaminant being filtered. Inspect the prefilter and the spark arrestor 
for damage or blockage. Inspect the inside of the respirator for respirable dust or other foreign 
objects. Keep the inside of the respirator clean at all times.

Make sure that the PAPR is correctly assembled

 in the configuration that suits your application. 

Never use the respirator without a HE or OV/HE filter in place depending on the application. It is 

Содержание PX4 Air

Страница 1: ...on Manual and carry out the Employer Responsibilities page 7 Product users Read this manual and the head top Instruction Manual and follow the Product User Safety Instructions page 9 Manuals are regul...

Страница 2: ...llowing signal word and safety symbols are used in this manual and product labeling WARNING indicates a hazardous situation that if not avoided could result in death or serious injury Read the Instruc...

Страница 3: ...ty means any patent patented articles patent applications designs industrial designs copyrights software source code database rights moral rights inventions techniques technical data trade secrets kno...

Страница 4: ...nt for loose fitting respirators such as helmets and face shields PROTECTION PROVIDED AND LIMITATIONS Improper selection fit use or maintenance of this product can result in injury life threatening de...

Страница 5: ...rtridge was installed into the PX4 AIR PAPR MARKINGS AND SYMBOLS ON THE EQUIPMENT Read all instructions before use Li Ion Lithium Polymer Batteries Batteries shall be disposed of as electronic waste R...

Страница 6: ...schedules or observe ESLI to ensure that cartridge and canisters are replaced before breakthrough occurs I Contains electrical parts that may cause an ignition in flammable or explosive atmospheres J...

Страница 7: ...riate for the intended activities and environments of use For example select a respirator appropriate to the specific airborne hazards with consideration of workplace and user factors and with an Assi...

Страница 8: ...reads both these manuals Ensure that equipment is properly set up used and maintained Make sure that equipment is properly set up inspected fitted used and maintained including selection of the appro...

Страница 9: ...4 AIR PAPR See Respirator Component Diagram page 6 See the instruction manual and approval label for the selected head top for approval with the PX4 AIR and the assigned protection factor Use only aut...

Страница 10: ...lter cartridge for the contamination and application PAPR Once the contamination level has been confirmed determine the correct filter cartridge to be used for the application to make sure that you ar...

Страница 11: ...NTS Welding and Grinding For welding grinding and other applications that produce sparks or high heat be sure to use the FR Fire Retardant specific model of the PX4 AIR with the FR belt and spark arre...

Страница 12: ...t attempt to service the chargers There are no user serviceable parts inside Use only the provided charger and cord Where to charge Charge only indoors in a dry area away from sources of heat away fro...

Страница 13: ...4 F to 113 F Do not disassemble Do not immerse in water or other liquids The battery can short if the contacts are accidentally connected by metal other than the PX4 AIR or the charger The protections...

Страница 14: ...position making sure that the latch snaps into place FIGURE 2 5 FIGURE 2 6 To remove the battery from the charging station press the release latch on the bottom of the battery and lift the battery fro...

Страница 15: ...iciency OV HE Filter Use the OV HE combination filter 03 995 in atmospheres that may contain organic vapors and gases such as solvents Some of these gases and vapors include sulphur dioxide chlorine h...

Страница 16: ...t rotate the door to the left and latch in place In environments with sparks such as welding or grinding use the 03 982 Spark Arrestor in front of the 03 981 Prefilter This will reduce the risk of fir...

Страница 17: ...and lift the door off the latch 1 2 Remove the 03 985 filter from the Door and dispose of it in a suitable way Install the new replacement 03 985 filter as per Fig 3 3 and 3 4 Inspect the 03 981 Prefi...

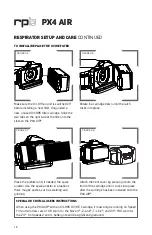
Страница 18: ...arrestor in situations there may be sparks such as welding and grinding Attach the front cover by pressing it onto the front of the cartridge until it clicks into place after the cartridge has been i...

Страница 19: ...at suits your respirator head top check that the fitting connects to your respirator type Take the end that fits to the respirator and connect it securely FIGURE 5 1 FIGURE 5 2 FIGURE 5 3 FIGURE 5 4 W...

Страница 20: ...r 04 091 is in the safe range before use so that there is sufficient air flow POWER BUTTON AND BATTERY INDICATION The top row of green lights indicate the charge of the battery 3 lights is fully charg...

Страница 21: ...1 cannot be achieved Speed 240 slpm The blue lights indicate the selected fan speed The red lights indicate the level of blockage When the lights flash red and blue the selected fan speed cannot be re...

Страница 22: ...replace the filter with a new one LOW BATTERY CHARGE ALARM A pulsing alarm sounds when approximately 10 15 minutes of charge is left in the battery Leave the work area Power the unit off and remove t...

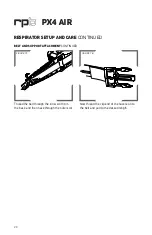
Страница 23: ...Welding grinding where sparks may be present and High Heat Applications BELT AND SUPPORT ATTACHMENT Take the loose end of the Belt and thread from behind through the outer slot slot furthest out from...

Страница 24: ...nner slot from the back and then back through the outer slot Now thread the clip end of the buckle on to the belt and pull to the desired length BELT AND SUPPORT ATTACHMENT CONTINUED FIGURE 7 5 FIGURE...

Страница 25: ...er must not be cleaned or submersed in water at any time Damage to the HE filter paper will affect its ability to filter the air and could expose users to harmful environments All damaged filters pre...

Страница 26: ...elt Loops and screw in tight until secure Do not over tighten FIGURE 8 1 WARNING STORAGE The PX4 AIR should not be transported or stored with the filter or battery attached if not being used for long...

Страница 27: ...optimal temperature range for storage to maximise the life of the battery BATTERY RUN TIMES Lithium ion HE Filter Speed 1 Greater than 9 hours Speed 2 Greater than 7 hours Speed 3 Greater than 6 hours...

Страница 28: ...28 PX4 AIR PARTS AND ACCESSORIES FIGURE 9 1 1 3 2 4 5 7 8 9 10 11 12 10 13 6 14 15 16 17 19 21 20 18 22...

Страница 29: ...Cord 03 952 24 Volt Power Supply with Power Cord AU 03 952 AU 24 Volt Power Supply with Power Cord EU 03 952 EU 24 Volt Power Supply with Power Cord UK 03 952 UK 17 Battery Charger and Power Supply K...

Страница 30: ...ect occurs RPB will repair or replace the defective Product or a component of the Product in its sole discretion This repair or replacement remedy is the sole and exclusive remedy under this limited w...

Страница 31: ...31 NOTES...

Страница 32: ...ance your safety Designed to increase your productivity RPB T LINK Built off the Z Link platform the T Link is designed to work with you not against you Gone are the days of having to fight against a...

Отзывы: