background image


36

RN6 Users Manual 


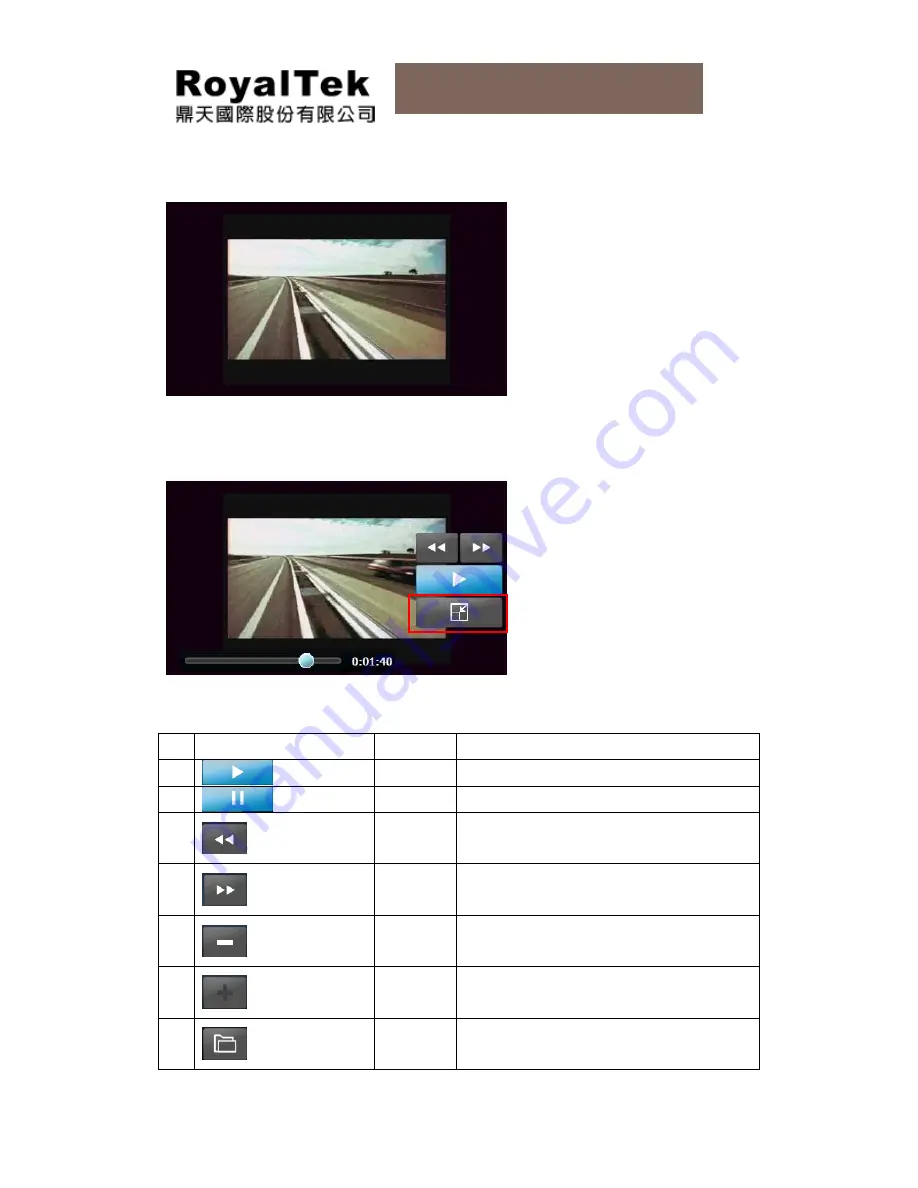
h.  Tapping screen will switch to “Play Mode”. 


i. 

Tap screen at Play Mode. Function icons will pop up. 

j. 

Then tap “Mode Switch. The screen will switch back to “Normal Mode”. 


NO Icon  Function

Description 


Play 

Play a video file 


Pause 

Pause to play a video file 


Forward  


Downward


Volume 

down 

Turn down volume 


Volume 

up 

Turn up volume 


File 

Manager 

List video files 

Содержание RN6

Страница 1: ...l RN6 Portable Navigation Device Prepared by RoyalTek Company LTD 4F No 188 Wen Hwa 2nd Rd Kuei Shan Tao Yuan 333 Taiwan TEL 886 3 3960001 FAX 886 3 3960065 Email http www royaltek com contact Web Http www royaltek com ...

Страница 2: ...any means electronic mechanical photocopy recording or otherwise without the prior written permission of RoyalTek Inc DISCLAIMER AND LIMITATION OF LIABILITY RoyalTek and its subsidiaries make no representations or warranties either expressed or implied with respect to the contents hereof and specifically disclaims the implied warranties of merchantability or fitness for a particular purpose RoyalT...

Страница 3: ...able parts inside Replace the unit if it is damaged or exposed to excess moisture Do not use the adapter if the cord becomes damaged Connect the adapter to the proper power source The voltage requirements are found on the product case and or packaging BATTERY This unit contains a non replaceable internal Li polymer battery The battery could be bursting or exploding and releasing hazardous chemical...

Страница 4: ...on If this equipment does cause harmful interference to radio or television reception which can be determined by turning the equipment off and on the user is encouraged to try to correct the interference by one or more of the following measures Reorient or relocate the receiving antenna Increase the separation between the equipment and receiver Connect the equipment into an outlet on a circuit dif...

Страница 5: ...EPT ANY INTERFERENCE RECEIVED INCLUDING INTERFERENCE THAT MAY CAUSE UNDESIRED OPERATION CE MARK This equipment complies with the requirements for CE marking when used in a residential commercial vehicular or light industrial environment R TTE Directive Products with the CE marking comply with Radio Telecommunication Terminal Equipment Directive R TTE 1999 5 EEC the Electromagnetic Compatibility Di...

Страница 6: ...Start RN6 16 2 7 How to Turn off RN6 16 2 8 How to Reset RN6 17 Chapter 3 Start to Use RN6 18 3 1 Operating Basics 18 3 2 Turn on the device 18 3 3 Configure system settings 18 3 4 How to Use System Settings 20 3 5 Reset 21 3 6 System Information 23 3 7 Volume 24 3 8 Backlight 24 3 9 Set Favorite Application Category 25 3 9 1 Add Icons to Favorite Page 25 3 9 2 Delete Icon to Favorite Page 26 3 10...

Страница 7: ...books 45 Chapter 6 Troubleshooting and Maintenance 46 6 1 General Troubleshooting 46 6 1 1 If your device does not respond do a hard reset 46 6 1 2 Users can also perform a system reset 46 6 1 3 Screen responds slowly 46 6 1 4 Inaccurate responses to tap on touch screen 46 6 1 5 Connection Problems with PC 46 6 1 6 No GPS connection 46 6 1 7 No sound coming from the device 47 6 1 8 Cannot see phot...

Страница 8: ... bits Multimedia functionality with high performance processor 1 2 RN6 Specifications Table 1 RN6 dimensions and specifications Category Item Chassis Dimension 128 9 85 2 12 6 mm Weight 185g Specifications Operating Temperature 0 to 55 Storage Temperature 20 to 70 Battery charge Temperature 0 to 35 System OS Windows CE 5 0 Core Version Storage 1GB 2GB iNAND Flash Memory 64MB 128MB Mobile DDR SDRAM...

Страница 9: ...From empty to full by AC adapter 6 hrs Power Suspend Mode From empty to full by AC adapter 4 hrs Audio Earphone Yes option Speaker 1 5W mono speaker Microphone Option for Bluetooth SKU Hardware Button Slot Micro SD Supports Micro SD Power Button Yes Reset Button Yes Mini USB Device Slot USB 2 0 device with supporting mass storage High Speed ...

Страница 10: ...als Instructions for setting up the device and some basic system operations are also discussed NOTE Although RN6 battery comes approximately 25 capacity it is advised to fully charge the battery before using 2 1 Packing Items RoyalTek RN6 box contains all of the items listed below Portable Navigation Device Car mount Car holder ...

Страница 11: ...RN6 Users Manual Car charger USB cable Optional Accessory Earphone Optional Accessory AC adaptor Optional Accessory Dashboard Optional Accessory Application Software CD Quick Start Guide Warranty statement ...

Страница 12: ...map images 2 Speaker Emits system sounds 3 Hook Point Fixed point for car holder 4 Car Kit Connector Option Connector for power car holder 2 2 2 Left and Right Views Left View Right View NO Function Description 1 Micro SD Slot To upload files from Micro SD storage cards 2 Microphone Optional Receives your voice while using hands free of Bluetooth function ...

Страница 13: ...en PND is with battery only 2 USB Port Docking connector Mini USB connector serves as the power connector for charging the device or as the dock for uploading files from computers It can not be charged by USB device cable 3 Earphone Standard stereo headphone jack 4 Hook Point Fixed point for car holder 5 Reset Button To reset system when PND is with external power supply To turn system off when PN...

Страница 14: ...ies prohibit the mounting of any electronic device on the vehicle dashboard Be sure to check your local laws for acceptable mounting areas before installing the car mount bracket This section shows how to install the car mount kit in your vehicle s windshield using the suction cup RN6 uses a snap on mounting cradle to use when the device attaches to the car mount Below is the backside view of RN6 ...

Страница 15: ...t the angles of the arm to your proper viewing position Figure 2 4 1 4 Mounting the device holder with your RN6 a Fit RN6 down in the device holder first and then lock it using the plugs on the bottom of the device holder See Figure2 4 2 b Firmly lock RN6 with device holder on the car mount which has been mounted to your windscreen See Figure2 4 3 Figure 2 4 2 Figure 2 4 3 ...

Страница 16: ...ing 2 seconds power button or plugging by car charger or AC adaptor can boot system Then the main menu screen appears b When PND is suspend mode clicking power button or plugging by car charger or AC adaptor can wake up system Then the main menu screen appears c Tap Navigation you will see the map screen displayed d Please read the User s Guide of Navigation software for the detail setting informa...

Страница 17: ...N6 If a problem cannot be corrected you can reset RN6 by either of the following ways a When RN6 is with external power supply please press reset button to reboot RN6 directly b When RN6 is with battery only please press reset button to turn off RN6 Then short press 2 seconds power button to turn on RN6 ...

Страница 18: ...n 3 2 Turn on the device Long pressing 5 seconds power button or plugging by car charger or AC adaptor can boot system Then the main menu screen appears This is also referred to the Favorite page 3 3 Configure system settings If you intend to start using your RN6 at once we recommend that you configure the language and time zone settings first a Tap System in the right category bar ...

Страница 19: ... RN6 Users Manual b Tap Language on the System page c It will display the current language in central column d To scroll wheel for language tags e To set the system time zone tap Time Zone in System Menu ...

Страница 20: ... To enable the function of daylight savings time To disable the function of daylight savings time g Drag the Map to adjust the time zone 3 4 How to Use System Settings Other system settings can be used to view and adjust your device current preferences Navigate from the System Menu ...

Страница 21: ... The factory reset function not only resets the operating system settings to default factory values but also reset the GPS settings Calibration When touch screen does not respond well calibrate the screen of your device a Tap the Reset icon in the System Menu b Tap the GPS Reset icon in the Reset Menu c Tap the YES to reset the GPS ...

Страница 22: ...22 RN6 Users Manual d Tap the Factory Reset icon in the Reset Menu e Tap the YES to do the Factory Reset f Tap the Calibration icon in the Reset Menu ...

Страница 23: ...nual g Tap on the center of the target Repeat as the target moves around the screen 3 6 System Information a Tap About icon in the System Menu b You can view the OS AP GPS firmware version and other system information ...

Страница 24: ... 3 7 Volume a Tap the Volume icon in the System Menu b Adjust the volume by dragging the wheel c Dragging to left will become mute and opposite will become larger 3 8 Backlight a Tap the Backlight icon in the System Menu ...

Страница 25: ...e lighter 3 9 Set Favorite Application Category You can drag and drop to organize your own favorite application category but the maximum number of favorite application shortcut is six 3 9 1 Add Icons to Favorite Page a Drag the icon to the favorite icon of the right category bar b Tap the favorite icon Then the icon will show in the favorite page ...

Страница 26: ...p just tap YES to delete 3 10 Power Supply RN6 has a completive power management system It can make you more convenient to carry it for entertainment purpose not only using in cars but also at home or outdoor activities 3 10 1 Charging Please use our standard car charger or AC adapter to charge RN6 the main screen would remind you the charging status ...

Страница 27: ...would remind if you would like to have RN6 suspend or not Suspend mode still slightly consumes power If you want to cut off power output please turn off the device 3 10 3 Power Outage When battery capacity is lower than 15 the main screen would remind you the following message Please recharge the device immediately ...

Страница 28: ...he device with a computers and then via File Explorer to copy digital files into the device To use a compatible card reader and directly copy digital music and image files to the Micro SD card It is recommended to organize files into subfolders These folders will make files easier to find and play 4 2 Music player Enjoy your favorite music on the road The program features Support for WMA and MP3 f...

Страница 29: ...nu or multimedia icon of the right category bar NO Icons Functions Description 1 Return Return to list page 2 Songs List all song by alphabet 3 Album List all albums by alphabet 4 Artist List all artists by alphabet 5 Search Current play list 1 2 3 4 5 ...

Страница 30: ...nual b Tap a song or scroll upward or downwards to view songs on the music list c Bottom information bar will show song s name and play time d Taping the screen will switch to song s progress status 1 2 3 4 5 6 7 8 9 ...

Страница 31: ...wer RN6 has a great photo viewer option that makes it easy to share and view digital photos anywhere you like The program features Support for JPEG files Support Max 500 photos Auto scanning of supported files in the device s Micro SD card Three viewing modes Thumbnail Full Screen and Slide Show Each sub directory containing compatible music files is treated as an individual different album For ea...

Страница 32: ...n in the Main Menu or multimedia icon of the right category bar b List photos of thumbnail viewing mode c Dragging upward or downwards will make photos move to next or previous page d Taping a specific thumbnail photo will switch the photo to full screen view ...

Страница 33: ...ous photo 3 Slide show mode Automatically play all photos 4 Next page Display next photo 5 Rotate Rotate photo 4 3 2 View Photos in Slide Show Mode You have the option to view images in a slide show much like viewing a Power Point presentation in your computer Images are adjusted to fit the entire display area and are shown in a 5 second interval 1 5 2 3 4 ...

Страница 34: ...les Maximum 500 files Auto scanning of supported files in the device s Micro SD card and Flash memory Three viewing modes Browser Mode Normal Mode Play Mode 4 4 1 Use Video Player a Tap Video icon in the Main Menu or multimedia icon of the right category bar b The screen will show safety warning message Tap Accept icon to enter Video Player function screen or tap Cancel to give up ...

Страница 35: ...Users Manual c Tap File Manager to view files by browser mode d The screen shows Browser Mode e Tap a file which you would like to play f The screen switches to Normal Mode and shows function icons g Tap Play ...

Страница 36: ...unction icons will pop up j Then tap Mode Switch The screen will switch back to Normal Mode NO Icon Function Description 1 Play Play a video file 2 Pause Pause to play a video file 3 Forward 4 Downward 5 Volume down Turn down volume 6 Volume up Turn up volume 7 File Manager List video files ...

Страница 37: ...ion to output sounds via your car audio stereo FM frequency can be varied from 88 2 to 107 8 Mhz 4 5 1 Turn on FM Transmitter Frequency a Tap Volume icon in the System Menu b Tap FM icon to open FM Transmitter function NO Icon Function Description 1 FM Transmitter Open FM Transmitter function 2 Stop Stop FM Transmitter function 3 Frequency Set frequency Default setting 88 2 MHz 4 Return Return to ...

Страница 38: ...and tap Enter d Set the same frequency number to make your car radio receive audio from RN6 e Go back to Main menu Play Music Player Video player or Navigation f Then sounds will come out from your car radio NO Icon Function Description 1 Delete Delete frequency number 2 Enter Implement this frequency number 3 Return Return to list page NOTE FM Frequency can only be set from 88 2 to 107 8 Mhz ...

Страница 39: ...ng you keep your eyes on the road while RN6 integrates seamlessly with your mobile phone Easy to connect and use just follow a few quick steps to enjoy the benefits of Hands free calling 5 1 Connection a Tap Bluetooth icon of the right category bar to enter the communication main menu 5 2 Mobile Phone Connection a Tap Settings icon on the communication main menu NOTE Make sure the Bluetooth settin...

Страница 40: ...lso prefer to automatically receive calls when the mobile phone is ringing b Choose automatic answering time 3 seconds 10seconds or 30 seconds c Go back to the communication main menu screen and tap Connection NOTE There will be icon on the main menu to remind you if Bluetooth is operating ...

Страница 41: ...this case g When connection is accomplished the name of the connected phone is displayed on the title bar of the communications screen NOTE If the connected mobile phone has the Bluetooth auto accept function please turn on this function For more detailed information see your phone s manual Bluetooth function has distance limitation When the mobile phone is away and makes Bluetooth function discon...

Страница 42: ...3 Calling Out a Tap Call out icon b Set the phone number you would like to call out and tap Dial icon c If you would like to end a call please tap Hang up icon d To enable or disable mute function tap speaker icon 1 2 3 4 5 ...

Страница 43: ...5 You can tap a phone number directly to call out 4 Hang up End a call 5 Non Mute Two sides of the phone call can hear each other 6 Mute Mute function is turned on Your conversation won t be heard by the other side of the phone call 5 4 Receiving a Call c When the connected mobile phone receives a call the caller s phone number and two buttons are displayed on the screen d To receive a call tap to...

Страница 44: ...uld like to end a call please tap Hang up icon g To enable or disable mute function tap Microphone icon No Icon Function Description 1 Hang up End a call 2 Microphone ON Microphone function is turned on The other side of the phone call can hear your voice 3 Microphone OFF Microphone function is turned off and mute Your conversation won t be heard by the other side of the phone call ...

Страница 45: ...45 RN6 Users Manual 5 5 Phone Book Import Phonebooks a Tap Contacts icon b Tap Import icon c The contact information will be imported from the connected mobile phone ...

Страница 46: ...o do a factory reset restore to default set tings reset the GPS status and recalibrate the touch screen interface 6 1 3 Screen responds slowly a Make sure you have enough battery power 6 1 4 Inaccurate responses to tap on touch screen a Recalibrate the touch screen 6 1 5 Connection Problems with PC a Make sure that the cable is securely plugged into the USB port on your computer and on the device ...

Страница 47: ...x 6 1 10 Factory reset does mean a GPS reset a Yes The Factory Reset function resets the OS settings to their default factory values and it will reset the GPS settings 6 2 Maintenance Avoid exposing your device to direct sunlight or strong ultraviolet light for extended periods of time Do not drop your device or subject it to severe shock Do not subject your device to sudden and severe temperature...

Страница 48: ...nty 6 2 1 Storage precautions Do not store your device anywhere it may be exposed to water or in conditions of high humidity When the device is not in use for an extended period of time bring it indoors and store it in cool dry area 6 2 2 Accessories and repair precautions Only authorized accessories should be use with the device The use of incompatible accessories could result in bodily injury an...

Отзывы: