background image

PRODUCT OVERVIEW

-3-

1.   3 or 5 Gallon bottles (Sold separately)

2.   Secure 2-step child safety lock 

      protection (hot water)

3.   LED indicator lights

4.   Removable dishwasher safe drip tray

5.   Hot Water Spout 

6.   Cold Water Spout

OPERATION

A. Unpacking

Steps to replace water bottles


3

1

6

4

2

5

This water dispenser has been cleaned prior to packaging the unit . To remove any dust or debris that may have collected during shipment,

we however recommend cleaning the water dispenser prior to use. Refer to the Rinsing, Cleaning  and Draining section of this manual.

(Page 4, Section B)

   •  Use a clean cloth to wipe off neck of bottle. 

   •  Remove cap.

   •  Carefully lift bottle (approx. 40 Ibs.) using your legs and not your back. Do not place hands on opening of bottle while placing in reservoir. 

   •  Insert the water bottle on the water intake over reservoir opening so it settles properly on it.

   •  Wipe off any water which may have splashed on dispenser top.

To turn on the cooling operation, turn on the switch at the back of the water dispenser. 

The green LED Indicator light will now be lit. The green LED indicator light will stay lit while the cooling process is on. Once the water 

reaches the appropriate temperature the green LED indicator light will turn off and will remain off until the water dispenser starts the 

cooling process again.

C. Cold Water Control

D. Hot Water Control

To turn on the heating operation, turn on the switch at the back of the water dispenser. The red LED indicator 

light will then be lit and the heating process will start. When the water reaches the appropriate temperature the red LED indicator light will 

turn off. When the temperature goes down to approx 80°C (176°F), the red LED indicator light will turn on and another heating process will 

start.

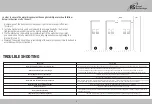
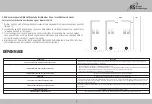
Do not plug-in the water dispenser into an electrical outlet or turn on the unit until water has begun to dispense from the 

hot and cold water spots. Failure to follow this warning may cause the water dispenser to overheat.

Place the water dispenser upright on a flat surface. Position the water dispenser so that there is about 

10cm (4”) of clearance from the wall on the back and on both sides.

DO NOT PLUG IN THE POWER CORD OR TURN ON THE UNIT.

B. Locating the Water Dispenser

Do not plug-in the water dispenser into an electrical outlet or turn on the unit until water has begun to dispense from the hot and 

cold water spots. Failure to follow this warning may cause the water dispenser to overheat.

Содержание RWD-700W

Страница 1: ...Owner s Manual RWD 700W Royal Sovereign International Inc Please read and retain these instructions www royalsovereign ca TOP LOAD WATER DISPENSER RWD 700W...

Страница 2: ...1 CONTENTS Safety Instructions Product Overview Operating Rinsing Cleaning and Draining Troubleshooting Speci cations Warranty 2 3 3 4 5 6 4 5 6 7...

Страница 3: ...damage the taps and will void the product warranty This water dispenser is intended for water dispensing only Do not use other liquids For indoor use only Do not place water dispenser in an enclosed...

Страница 4: ...s is on Once the water reaches the appropriate temperature the green LED indicator light will turn off and will remain off until the water dispenser starts the cooling process again C Cold Water Contr...

Страница 5: ...e would be placed Let the water settle for about 2 minutes 3 Plug the water dispenser into an electrical outlet and turn the power switch ON Wait about 1 hour for the water to reach its optimal water...

Страница 6: ...aps Water taps maybe loose Tighten the leaking tap slightly by turning it clockwise The water dispenser needs to be pre cleaned or rinsed Water tastes funny Condensation on the inside of the water bot...

Страница 7: ...Cold Tank Capacity Rate Heating Cooling Tank Bottle Size Dimensions Weight Power Supply Certi cation RWD 700W Top Load Hot Cold Yes 2 Step 90 95 C 194 203 F 7 8 C 45 46 F 1 0L 5L per hour 3 4L 2 5L pe...

Страница 8: ...onsibility of the Purchaser Return defective product in original packaging to the address below Upon repair or replacement the product will be returned to the original Purchaser freight or postage pre...

Страница 9: ...Guide d utilisation RWD 700W Royal Sovereign International Inc Veuillez lire et conserver ces instructions www royalsovereign ca DISTRIBUTEUR D EAU CHARGEMENT PAR LE HAUT RWD 700W...

Страница 10: ...8 CONTENU Instructions de s curit Survol du produit Fonctionnement Rin age nettoyage et vidange D pannage Sp ci cations Garantie 9 10 10 11 12 11 12 13 14...

Страница 11: ...install e Une telle action pourrait endommager les robinets et annulerait la garantie du produit Ce distributeur d eau est destin la distribution d eau uniquement Ne pas utiliser d autres liquides Uti...

Страница 12: ...nt est en cours Une fois que l eau a atteint la temp rature appropri e le voyant DEL vert s teint et restera teint jusqu ce que le distributeur d eau relance le processus de refroidissement C Contr le...

Страница 13: ...ement du distributeur d eau Si le distributeur d eau ne doit pas tre utilis pendant une p riode prolong e proc dez comme suit Avant l entreposage D branchez le cordon d alimentation de la prise lectri...

Страница 14: ...uler Le distributeur d eau n est pas suf samment loign du mur Une trop grande quantit d eau a t distribu e dans un courte p riode Laissez le temps au syst me de refroidissement de se recycler La temp...

Страница 15: ...voir de froid Chauffage refroidissement R servoir Taille de bouteilles Dimensions Poids Source d alimentation Certi cation RWD 700W Chargement par le haut Eau froide chaude Oui 2 tapes 90 95 C 194 203...

Страница 16: ...ort pour le retour du produit ou des pi ces endommag es seront la charge de l acheteur Retournez le produit d fectueux dans son emballage d origine l adresse ci dessous Apr s r paration ou remplacemen...

Отзывы: