background image


Gebrauchsanweisung      ○      Mode   d’emploi      ○      Istruzioni   per   l’uso      ○      Instruction   for   use   


NOTE:   


1)   

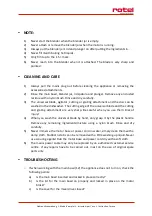
Never   start   the   blender   when   the   blender   jar   is   empty.   

2)   

Never   attach   or   remove   the   blender   jar   when   the   motor   is   running.   

3)   

Always   put   the   blender   jar's   lid   and   plunger   on   after   putting   the   ingredients   in.   

4)   

Never   fill   it   with   boiling   hot   liquids.   

5)   

Only   fill   it   up   to   the   1.5   l.   mark.   

6)   

Never    reach    into    the    blender    when    it    is    attached.    The    blade    is    very    sharp    and   
pointed.   


CLEANING   AND   CARE   


1)


Always    pull    the    mains    plug    out    before    cleaning    the    appliance    or    removing    the   
accessories/attachments.   

2)   

Rinse   the   main   bowl,   blender   jar,   lid   spatula   and   plunger.   Remove   any   encrusted   
residue   with   a   nylon   brush.   Rinse   and   dry   carefully.   

3)   

The    universal    blade,    agitator,    cutting    or    grating    attachment    and    the    disc    can    be   
washed   in   the   dishwasher.   The   cutting   edge   of   the   universal   blade   and   the   cutting   
and    grating    attachment    are    very    sharp.    Be    careful    when    you    use    them:    Risk    of   
injury!   

4)   

When   you   wash   the   universal   blade   by   hand,   only   grasp   it   by   the   plastic   handle.   
Remove    any    remaining    ingredients/mixture    using    a    nylon    brush.    Rinse    and    dry   
carefully.   

5)   

Never   immerse   the   motor   base   or   power   cord   in   water,   simply   clean   them   with   a   
damp   cloth.   Stubborn   stains   can   be   removed   with   a   little   washing   up   liquid.   Never   
use   scouring   agents!   Rub   the   motor   base   and   power   cord   dry   with   a   soft   cloth.   

6)   

The   mains   power   cable   may   only   be   replaced   by   an   authorised   customer   service   
centre.    If    any    repairs    have    to    be    carried    out,    insist    on    the    use    of    original    spare   
parts   only.   


TROUBLESHOOTING   


o


If   when   working   with   the   main   bowl   (12)   the   appliance   does   not   turn   on,   check   the   
following   points:   
a)   

Is   the   main   bowl   inserted   and   locked   in   place   correctly?   

b)   

Is    the    lid    for    the    main    bowl    on    properly    and    locked    in    place    on    the    motor   
block?   

c)   

Is   the   cover   for   the   mixer   drive   closed?   


Содержание KITCHENMACHINE4361CH

Страница 1: ...Gebrauchsanweisung Mode d emploi Istruzioni per l uso Instruction for use KITCHENMACHINE4361CH U4361CH GEBRAUCHSANWEISUNG MODE D EMPLOI ISTRUZIONI PER L USO INSTRUCTION FOR USE...

Страница 2: ...Mixerantrieb 4 Couvercle pour entra nement du mixeur 4 Coperchio per commando frullatore 4 Cover for the mixer drive 5 Sicherheitsschalter Nocken 5 Came du contact de s curit 5 Camma per l interrutto...

Страница 3: ...16 Couteau universel 16 Coltello universale 16 Universal blade 17 Schutzh lle f r Universalmesser 17 Protection pour couteau universel 17 Protezione coltello universale 17 Protective sleeve for unive...

Страница 4: ...n Erfahrung und oder Wissen verwendet werden wenn sie beaufsichtigt werden oder bez glich des sicheren Gebrauchs des Ger ts unterwiesen wurden und die daraus resultierenden Gefahren verstanden haben K...

Страница 5: ...Stopfer nachstossen o Das Universalmesser die Schneid und die Raffelscheibe sind sehr scharf Verletzungsgefahr Diese Zubeh rteile stets mit gr sster Vorsicht handhaben und ausser Reichweite von Kinde...

Страница 6: ...warmem Wasser reinigen und dazu eine Nylonb rste verwenden So vermeiden Sie Verletzungen und besch digen die Klingen nicht 3 Zubeh rteile nachsp len und abtrocknen INBETRIEBNAHME o Vor jedem Einsetze...

Страница 7: ...ssch ssel geben 4 Ger tedeckel 11 vorschriffsm ssig verriegeln 5 Schalter f r 3 4 Sekunden auf P Puls halten und Verarbeitungsresultat berpr fen Wenn n tig Schalter erneut bet tigen bis die gew nschte...

Страница 8: ...erer Druck beschleunigt den Arbeitsgang nicht 6 Nach beendetem Arbeitsgang Ger t ausschalten die kurze Nachlaufzeit der Scheibe abwarten und dann den Ger tedeckel abnehmen 7 Die Schneid Raffelscheibe...

Страница 9: ...echers immer aufsetzen 4 Keine kochend heisse Fl ssigkeiten einf llen 5 Ger t nur bis zur 1 5 l Markierung f llen 6 Nie in den aufgesetzten Mixer greifen Das Messer ist scharf und spitz REINIGUNG UND...

Страница 10: ...de Punkte a Ist die Arbeitssch ssel richtig eingesetzt und eingerastet b Ist der Deckel zur Arbeitssch ssel richtig aufgesetzt und am Motorblock eingerastet c Ist die Abdeckung zum Mixerantrieb geschl...

Страница 11: ...surveillance ou ont t instruites sur l utilisation s re de l appareil et si elles ont compris les risques pouvant en r sulter Les enfants ne doivent pas jouer avec l appareil Le nettoyage ou la maint...

Страница 12: ...tion Le couteau universel les couteaux et les disques r peur sont tr s tranchants Ces pi ces doivent toujours tre manipul es avec la plus grande pr caution et hors de port e des enfants Ne saisir le c...

Страница 13: ...disque l eau chaude additionn e d un peu de d tergent et l aide d une brosse en nylon Vous viterez ainsi de vous blesser et n ab merez pas les lames 3 Rincer et s cher les accessoires MIS EN SERVICE o...

Страница 14: ...rrouiller le couvercle 11 de l appareil conform ment aux instructions Presser sur le P pulsion de l interrupteur durant 3 4 secondes et contr ler le r sultat du traitement Au besoin actionner de nouve...

Страница 15: ...complet du disque puis enlever le couvercle de l appareil 7 Ne jamais utiliser les disques r per couper pour hacher de la viande fra che du fromage mou des fruits confits des fruits secs ou des bonbon...

Страница 16: ...e couteau tant tr s tranchant NETTOYAGE ET ENTRETIEN 1 Avant chaque nettoyage ou avant d enlever les pi ces accessoires d connecter la prise de courant 2 Laver le bol de travail le mixeur les couvercl...

Страница 17: ...dans le bloc moteur c Le couvercle pour l entra nement du mixeur est il ferm o Si l appareil ne se laisse pas enclencher lors de l utilisation avec le mixeur 3 contr ler les points suivants a Le mixeu...

Страница 18: ...condizione che siano sotto sorveglianza o che abbiano ricevuto istruzioni sull uso sicuro dell apparecchio e siano consapevoli dei rischi connessi I bambini non devono giocare con l apparecchio ne dev...

Страница 19: ...il calchino o Maneggiate con precauzione tutte le lame e il coltello universale per evitare tagli e lesioni e non lasciatele mai alla portata dei bambini Quando usate il coltello universale prendetelo...

Страница 20: ...si e di danneggiare le lame 3 Sciacquare ed asciugare le componenti ISTRUZIONI PER L USO DELL APPARECCHIO o Quando si monta e si smonta l apparecchio assicurarsi sempre che non sia attaccato alla pres...

Страница 21: ...fino a raggiungere la consistenza desiderata Per paste consistenti o altre quantit che richiedono una lavorazione pi lunga usate le graduazioni 1 3 dell interruttore a seconda della consistenza della...

Страница 22: ...essere obbligato a procedere in modo regolare sotto la spinta del premicibo ad esempio non inserire nell imboccatura una sola carota ma pi d una fino ad occupare tutto lo spazio disponibile le fette u...

Страница 23: ...amente 3 Il coltello universale l agitatore gli utensili per tagliare o grattugiare ed il disco possono essere lavati nella lavastoviglie Si ricorda di maneggiare le lame del coltello universale e deg...

Страница 24: ...frullatore 3 l apparecchio non dovesse funzionare controllate i punti seguenti a E stato innestato correttamente il vaso del frullatore b E stato innestato il contenitore con coperchio e sono scattat...

Страница 25: ...and understand the hazards involved Children shall not play with the appliance Cleaning and user maintenance shall not be made by children without supervision o This appliance was only designed for pr...

Страница 26: ...e cutting and grating disc Risk of injury Always handle this attachment with great care and keep it out of reach from children Only hold the universal blade by the plastic handle o Never pour boiling...

Страница 27: ...up liquid and a nylon brush This will avoid injuries and damaging the blade 3 Rinse and dry the accessories BEFORE STARTING THE APPLIANCE o Pull out the mains plug before every time you insert or rem...

Страница 28: ...l If you need to press the switch again until you get the consistency you want For heavy doughs or other quantities that require a longer processing time use settings 1 3 on the switch depending on th...

Страница 29: ...place one carrot in the shaft but several next to each other FUNCTIONS OF THE BLENDER JAR o Mixing liquids o Pureeing fruit vegetables diets and baby food o Chopping up fruit vegetables nuts dried whi...

Страница 30: ...The cutting edge of the universal blade and the cutting and grating attachment are very sharp Be careful when you use them Risk of injury 4 When you wash the universal blade by hand only grasp it by...

Страница 31: ...e blender 3 the appliance does not turn on check the following points a Is the blender jar correctly connected b Is the main bowl in place with the lid and the cam locked into the cam opening DISPOSAL...

Страница 32: ...ne Les frais de transport sont la charge de l ache teur Veuillez ne pas oublier d indiquer votre adresse et si le d faut n est pas vident de joindre une explication votre envoi o Impegno di garanzia C...

Страница 33: ...Gebrauchsanweisung Mode d emploi Istruzioni per l uso Instruction for use Service station 5012 Sch nenwerd E mail office rotel ch...

Отзывы: