background image

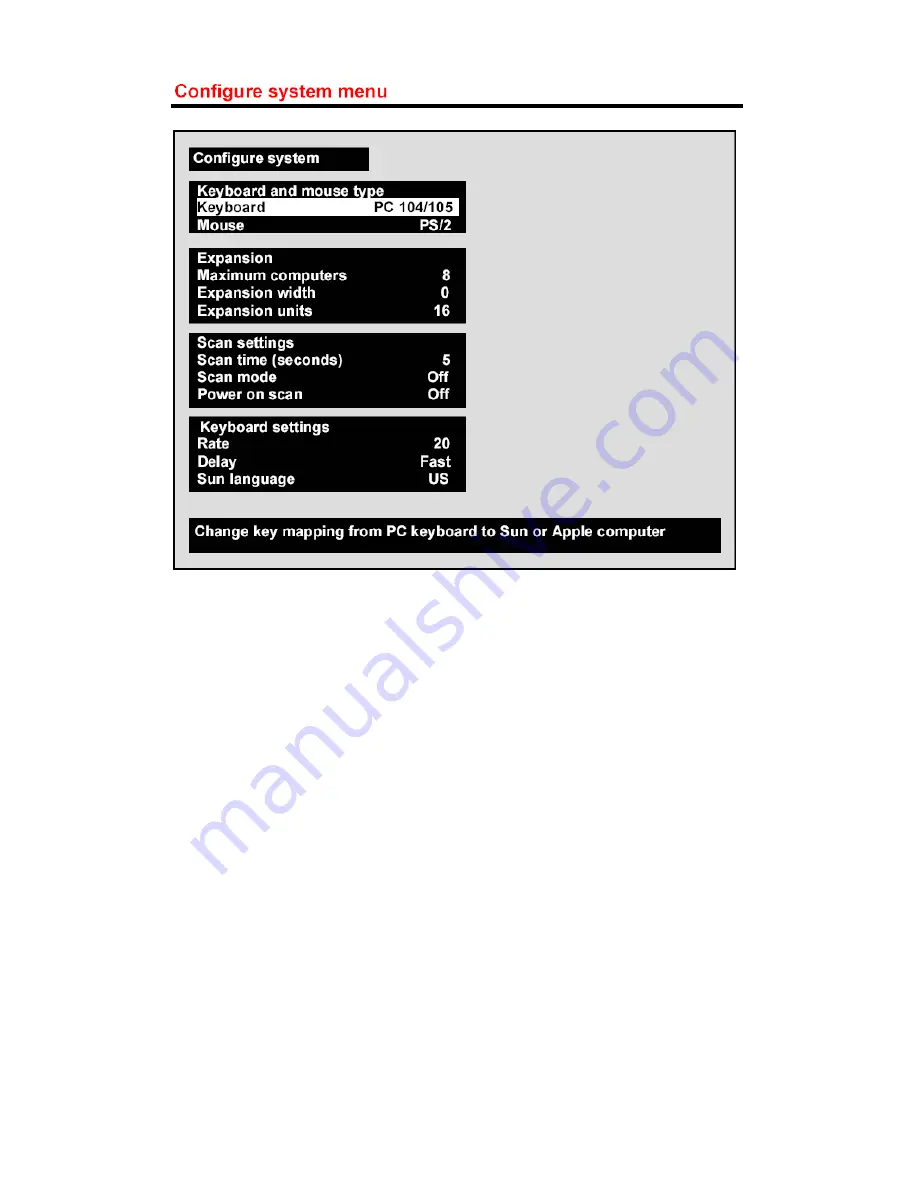
Using the cursor control keys, select “Sun language” and press “Enter”.
The language options (below) will then be displayed. 

 US 

Spanish

 US Unix 

Swed/Finn

 French  

SWFrench

 Danish  

SWGerman

 German 

UK

 Italian  

Korean

 Neth/Dutch 

Taiwan

 Norwegian 

Japan

 Portuguese 

FrCanadian

Using the cursor control keys, select “UK” and press “Enter”.

Press the escape key (Esc) to return to the Main Menu.

From the Main Menu select “Configure Computer” and press “Enter” and the 
Configure Computers Menu will be displayed (next page).

Quick Installation Guide 

Rev. 1.1

Содержание Ultraview Pro UKT-KVM-1U08-Z

Страница 1: ...Sun Complementary Products Keyboard Video Mouse switch Quick Installation Guide UKT KVM 1U08 Z UKT KVM 2U16 Z Quick Installation Guide Rev 1 1 ...

Страница 2: ...talling the Keyboard Video Mouse switch into a rack 4 Connecting the Console Monitor Keyboard and Mouse 5 Setting up server ports using the On Screen Display menus 6 Connecting to the servers 7 Using the Keyboard Video Mouse switch to access the servers 8 Cascading switches 9 Important notes when Cascading ...

Страница 3: ...Video Mouse switch one of the following Server cables is needed Server Keyboard and Mouse interface Cable Product code Description USB UKT KVM USB S Z 5ft DB25 to VGA male and USB male cable UKT KVM USB M Z 10ft DB25 to VGA male and USB male cable UKT KVM USB L Z 20ft DB25 to VGA male and USB male cable Sun Serial 8 pin UKT KVM SUN S Z 5ft DB25 to DB13W3 male and Sun Serial male cable UKT KVM SUN ...

Страница 4: ...odized mounting brackets Four 6 32 x 3 8 countersink head mounting bracket screws Rack mounting screws To mount your KVM in a rack attach the two rack mounting brackets to your unit with the short flange against the unit using the four mounting bracket screws provided Secure the mounting brackets to the rack using the appropri ate rack mounting screws provided Fig 1 below Fig 1 Quick Installation ...

Страница 5: ... using the relevant Console cable see below to the KVM 1 port on the rear of the KVM Note The other unused Console cables should be retained for use should the Console Monitor Keyboard and Mouse be changed to a different type in the future VGA Monitor and USB Keyboard and mouse DB13W3 Monitor and Sun Serial Keyboard and mouse Quick Installation Guide Rev 1 1 ...

Страница 6: ... select LED illuminated Note Some CRT Monitors may not react quickly enough to display the boot sequence and the screen will appear blank If this happens note whether the Port 1 LED is lit and press and release the Left Control key Ctrl followed within 2 seconds by the F12 function key The On Screen Display menu should then appear confirming the KMV is active and communicating Quick Installation G...

Страница 7: ...or overlay of the displayed menus and assign unique passwords for accessing the configuration menus and a password for accessing the connected computers Note For the purposes of this Quick Installation Guide we will cover the minimum con figuration options necessary to get the KVM up and running For further options please refer to the supplied User Manual Use the cursor control keys to select Conf...

Страница 8: ...h Danish SWGerman German UK Italian Korean Neth Dutch Taiwan Norwegian Japan Portuguese FrCanadian Using the cursor control keys select UK and press Enter Press the escape key Esc to return to the Main Menu From the Main Menu select Configure Computer and press Enter and the Configure Computers Menu will be displayed next page Quick Installation Guide Rev 1 1 ...

Страница 9: ...nge the keyboard and mouse type for each connected compu ter As this point you will have needed to have decided which computers are to be connected to which ports on the back of the KVM Note The port numbering layout on the rear of the KVM is not intuitive Quick Installation Guide Rev 1 1 ...

Страница 10: ...nection PC3 Not used for Sun servers USB PC Not used for Sun servers USB Sun For servers with USB keyboard connection Apple Not used for Sun servers Sun For servers with Sun Legacy serial Mini DIN keyboard connection Note The Mouse settings need not be changed Selecting Sun for the keyboard will automatically set the Mouse to Sun other settings remain as PS2 Once you have set up the Computer Name ...

Страница 11: ...KVM 1U08 Z Rear Panel Connect each computer to the KVM using the appropriate server cable see below UKT KVM USB x Z x length S 5foot M 10foot L 20foot UKT KVM SUN x Z x length S 5foot M 10foot L 20foot Quick Installation Guide Rev 1 1 ...

Страница 12: ...foot L 20foot Power on the KVM Power on the servers and the power LED on the front panel of the KVM corresponding to each attached port should illuminate The Keyboard Video Mouse switch is now ready for use Quick Installation Guide Rev 1 1 ...

Страница 13: ...rol keys highlight the server to be accessed and press the Enter key to select it 3 Using Hot Keys to directly select the server Press and release the left Control Ctrl key and within 2 seconds press the number key corresponding to the port number the server is connected to In all cases the Console Monitor Keyboard and Mouse will now be connected to the server and you will be able to carry out any...

Страница 14: ... KVM s ports may be used in this way yielding a maximum of 256 servers controlled by the one Monitor Keyboard and Mouse Console using 16 port KMVs UKT KVM CAS x Z x length S 5foot M 10foot L 20foot Further lengths of up to 100ft are available by request contact cp uk sun com To connect a Slave KVM to the Master KVM the above cable connects to the first available CPU port of the Master KVM and to t...

Страница 15: ...essing beyond port 16 in the menus When accessing either the Server s menu Ctrl Esc or the Configuration menu Ctrl F12 you will only see Ports 1 to 16 displayed To get beyond Port 16 use the page down PgDn key this will display ports 17 to 32 To get beyond this use the page down PgDn key again this will display ports 33 to 48 and so on To go back a level use the page up PgUp key Configuring ports ...

Отзывы: