Roper Whitney - Model 3617 Crimping & Beading Machine Manual
3617 MACHINE OPERATING PROCEDURES
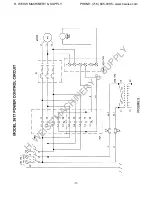
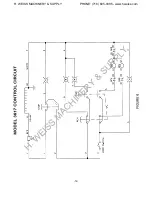
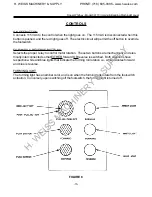
1. Select forward rotation by depressing “Forward” button on control panel (see Page 15). White
light will be illuminated. NOTE: This only determines the direction of rotation the rolls will turn
when rotation is actuated by the footswitch. Always select direction of rotation when rolls are
not rotating.
2. To initiate rotation of the rolls, depress the footswitch. Amber light will be illuminated. This will
cause the material to be fed through the rolls. Before activating rotation be sure the sheet
material is aligned properly.
3. To stop roll rotation, release the footswitch with an upward movement of the operators foot. A
very quick stop will occur, because the engaging brake (nearly simultaneously with the motor
power being switched off) will stop all rotating components. NOTE: For any Emergency Stop
(roll forming problem, parts of the body or clothing become entangled in the rolls), the rotating
rolls will immediately stop, either from an upward movement at the footswitch or depressing
the “OFF” mushroom button having a red light.
OPERATION AND ADJUSTMENT
CAUTION: Do not operate machine without proper instructions. Become familiar with controls
and intended operation before using. Machine to be operated by qualified personnel only.
This PEXTO beading machine is intended for deep throat beading, crimping and other roll opera-
tions on 18 gauge maximum mild steel sheet material. The positioning gauge is adjustable within
it’s 12” range.
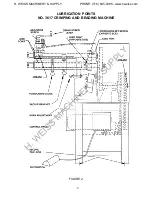
Rolls are secured to the shafts by roll nuts and keys. The lower shaft horn adjustment will provide
lateral adjustment for alignment of the rolls. An adjustable “saddle” bracket will provide additional
support for the lower shaft horn when required. The pivoting upper shaft is spring loaded in the
open position. Amount of the opening is controlled by the adjusting screw and crank screw lever.
Depth of bead can be limited by the check nuts on the adjusting screw. The positioning gauge is
adjustable to locate the bead in relation to the end of the material being worked.
LOWER HORN ADJUSTMENT:
To adjust lower horn the lower horn set screw, which is located directly below oil hole on back side
of machine, must be loosened FIRST. Then loosen lock nut on horn adjustment screw. Adjust horn
to desired position, tighten locknut and retighten set screw.
-17-
H. WEISS MACHINERY & SUPPLY
H. WEISS MACHINERY & SUPPLY
PHONE: (718) 605-0395 - www.hweiss.com
Содержание 3617
Страница 11: ... 11 H W E I S S M A C H I N E R Y S U P P L Y H WEISS MACHINERY SUPPLY PHONE 718 605 0395 www hweiss com ...
Страница 12: ... 12 H W E I S S M A C H I N E R Y S U P P L Y H WEISS MACHINERY SUPPLY PHONE 718 605 0395 www hweiss com ...
Страница 13: ... 13 H W E I S S M A C H I N E R Y S U P P L Y H WEISS MACHINERY SUPPLY PHONE 718 605 0395 www hweiss com ...

