Ronix RC-5010 Скачать руководство пользователя страница 15

USER MANUAL

15

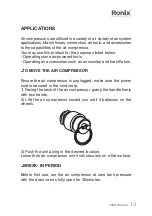
3) Attach 6.35 mm (1/4 in.) NPT quick-  connect air fitting to accessory 

or tool you intend to use.

4) Insert the other end of the quick connect air fitting to the quick 

coupler on the open end of hose.

5) Connect the power cord to the power supply.
6) Turn the switch ON (1).
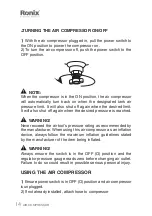
7) Pull out and rotate pressure regulator knob to desired line 
pressure at the outlet; turning counterclockwise regulator knob 
to desired line pressure. Turning the knob clockwise increases 
air pressure at the outlet; turning counterclockwise reduces air 
pressure at the outlet.
8) Following all safety precautions in the air tool manual. You may 
now proceed to use your air-powered tool.

WARNING!

Air-powered tools may require more air consumption than this 

air compressor is capable of providing. Check the tool manual 
to avoid damage to the tool or risk of personal injury.

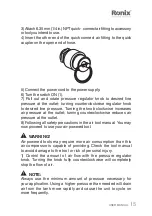
1)  Control  the  amount  of  air  flow  with  the  pressure  regulator 

knob. Turning the knob fully counterclockwise will completely 

stop the flow of air.

NOTE:

Always use the minimum amount of pressure necessary for 
your application. Using a higher pressure than needed will drain 
air from the tank more rapidly and cause the unit to cycle on 

more frequently.

13

Содержание RC-5010

Страница 1: ...AIR COMPRESSOR 50LITER RC 5010...

Страница 2: ......

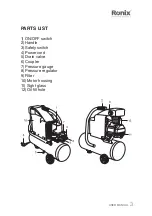
Страница 3: ...USER MANUAL 3 PARTS LIST 1 ON OFF switch 2 Handle 3 Safety switch 4 Power cord 5 Drain valve 6 Coupler 7 Pressure gauge 8 Pressure regulator 9 Filter 10 Motor housing 11 Sight glass 12 Oil fill hole 1...

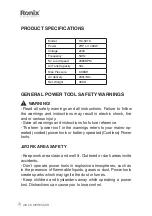
Страница 4: ...or battery operated Cordless Power tools WORK AREA SAFETY Keep work area clean and well lit Cluttered or dark areas invite accidents Don t operate power tools in explosive atmospheres such as in the p...

Страница 5: ...ectric shock When operating a power tool outdoors use an extension cord suitable for outdoor use Using a cord suitable for outdoor use will reduce the risk of electric shock If operating a power tool...

Страница 6: ...on facilities ensure these are connected and properly used Use of dust collection can reduce dust related hazards POWER TOOL USE AND CARE Don t force the power tool Use the correct power tool for your...

Страница 7: ...afety of power tool is maintained Follow instruction for lubricating and changing accessories Keep handles dry clean and free from oil and grease AIR COMPRESSOR USE AND CARE Do not exceed the pressure...

Страница 8: ...moisture after each day s use If unit will not be used for a while it is best to leave drain valve open unit such time as it to be used This will allow moisture to completely drain out and help preve...

Страница 9: ...ding Always follow all safety rules recommended by the manufacturer of your air tool in addition to all safety rules for the air compressor Following this rule will reduce the risk of serious personal...

Страница 10: ...with air connected Storing the tool with air connected can result in unexpected firing and possible serious personal injury Protect your lungs Wear a face or dust mask if the operation is dusty Follo...

Страница 11: ...ny parts on the packing list are already assembled to your product when you unpack it Use of a product that may have been improperly assembled could result in serious personal injury Inspect the produ...

Страница 12: ...glass is located above the tank There is a red dot in the center of the glass 2 An oil level at the top of the red dot indicates oil is at maximum level 3 An oil level at or below the bottom of the r...

Страница 13: ...zles and tire inflators TO MOVE THE AIR COMPRESSOR Ensure the air compressor is unplugged make sure the power cord is secured in the cord warp 1 Facing the back of the air compressor grasp the handle...

Страница 14: ...ut off again when the desired pressure is reached WARNING Never exceed the air tool s pressure rating as recommended by the manufacturer When using this air compressor as an inflation device always fo...

Страница 15: ...ng counterclockwise reduces air pressure at the outlet 8 Following all safety precautions in the air tool manual You may now proceed to use your air powered tool WARNING Air powered tools may require...

Страница 16: ...N 1 Turn the air compressor off 2 Pull the ring on the pressure relief valve to release until pres sure gauge reads less than 1 4 bar 3 Release the ring 4 Rotate drain valves counterclockwise to open...

Страница 17: ...ompressor on and allow the tanks to fill The compressor will shut off when the pressure reaches the preset maximum 2 Turn the air compressor off 3 Pull the ring on the safety valve to release air for...

Страница 18: ...of air compressor maintenance it is also advised that the oil is routinely checked for proper levels WARNING Do not at any time let brake fluids gasoline petroleum based products penetrating oils etc...

Страница 19: ...ilter cover and secure it by turning it clockwise CHANGING THE OIL Replace the oil after the first 10 hours of operation and every 100 hours following the oil change The sight glass located above the...

Страница 20: ...er Shop house breaker open Replace shop house blow fuse Current limiting protector open Reset shop house breaker determine why problem happened Pressure switch bad Motor will restart when cool Tank is...

Страница 21: ...sture in Discharge air Excessive water in air tanks Drain tanks High humidity Move to area of less humidi ty use air line filter Compressor runs continu ously Defective pressure switch Take compressor...

Отзывы: