What Is Cutting with Crop Marks?
If you are removing the printed media and loading it again in order to cut it (for example, if you are proc-
essing the media such as laminating after printing, and then loading this media again for cutting), you
have to align the printing and cutting positions. By printing the data together with crop marks, you can
make it possible to align the positions using the crop marks when you load the media again to cut it. In this
manual, this printing method is referred to as "cutting with crop marks."
"Crop marks" are marks used to align positions. They are also called "alignment marks."
Step 1: Performing a Nozzle Drop-out Test
Before you carry out actual printing, perform a printing test to ensure no dot drop-out or dot displacement
occurs. If dot drop-out or dot displacement occurs, perform cleaning of the print heads (normal cleaning).
When performing printing tests successively, you can select [Feed] (vertical printing) or [Scan] (horizontal printing) as
the printing position for the second and later tests in comparison to the first test.
P. 207Performing Printing Tests Arranged Horizontally
MEMO
Procedure
1.
Tap
[Nozzle Drop-out Test] on the home screen.
2.
Tap [Execute] next to [Printing Test].
Printing of the test pattern starts.
3.
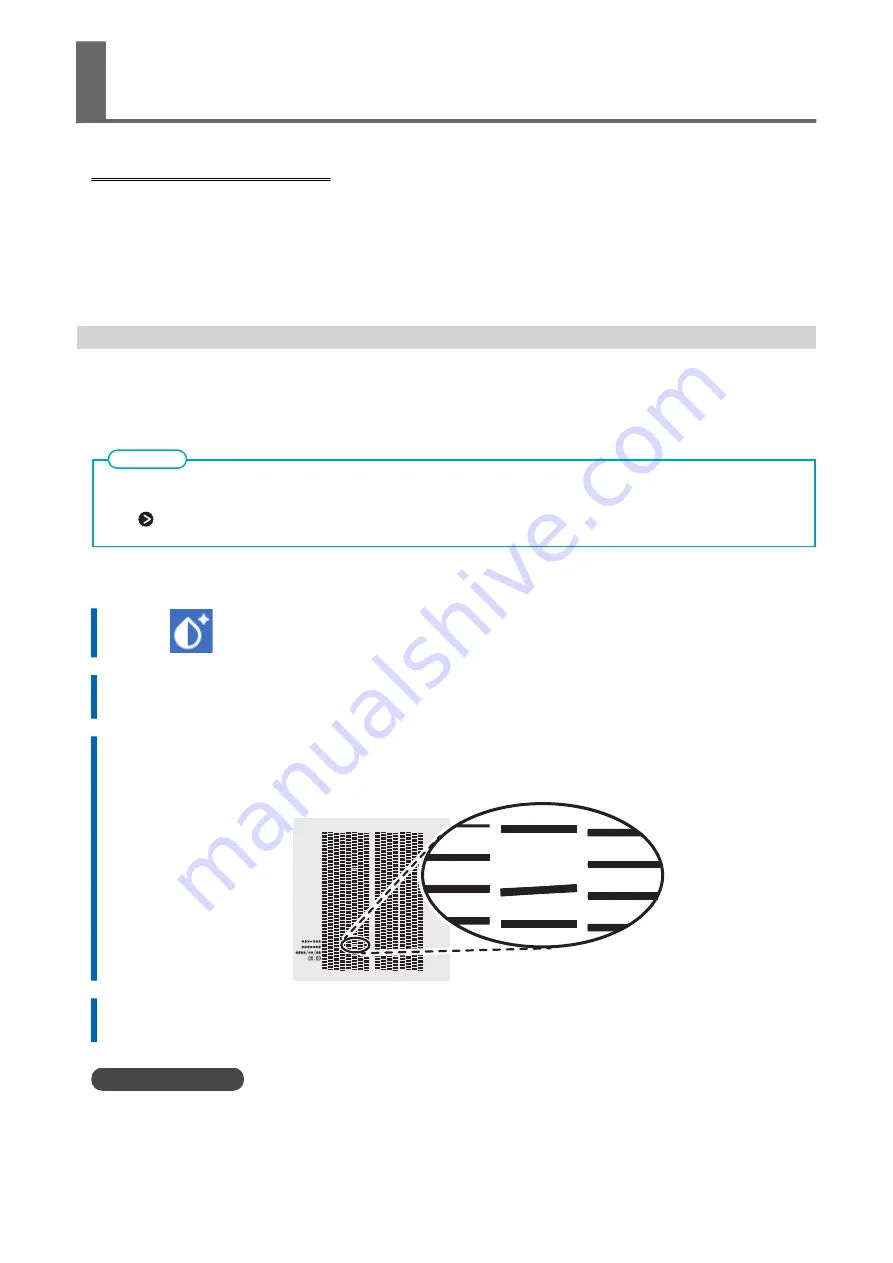
Check whether there is dot drop-out or dot displacement in the test pattern.
Missing blocks indicate dot drop-out. Collapsed or inclined blocks indicate dot displacement.
4.
If you have opened the front cover, close it.
If no dot drop-out or dot displacement occurs, preparations for output are finished.
RELATED LINKS
P. 244 When Dot Drop-out or Dot Displacement Occurs
Preparations for Output with Crop Marks
How to Cut with Crop Marks
135
Содержание TrueVIS SG3-300
Страница 8: ...Basic Handling Methods 7...
Страница 28: ...Power Supply Operations Basic Operations 27...
Страница 58: ...11 Close the front cover Setup of New Media Basic Operations 57...
Страница 63: ...13 Close the front cover Setup of New Media 62 Basic Operations...
Страница 93: ...11 Close the front cover Setup of Registered Media 92 Basic Operations...
Страница 98: ...13 Close the front cover Setup of Registered Media Basic Operations 97...
Страница 116: ...Output Method 115...
Страница 147: ...Optimizing Quality and Ef ficiency 146...
Страница 172: ...Drying Time Printing Cutting 0 min Adjusting the Ink drying Method Optimizing the Output Quality 171...
Страница 181: ...Accurately Adjusting the Cutting Settings 180 Optimizing the Output Quality...
Страница 222: ...Maintenance 221...
Страница 235: ...9 When you have finished cleaning close the right cover Cleaning around the Print Heads 234 Regular Maintenance...
Страница 274: ...Troubleshooting Methods 273...
Страница 283: ...P 176 Accurately Adjusting the Cutting in Amount Cutting Is Misaligned Skewed or Not Clean 282 Output Quality Problems...
Страница 314: ...Appendix 313...
Страница 327: ......


