13
Feb,1999
MC-80
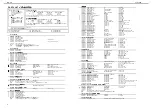
TEST 8: SOUND
TEST 8: SOUND
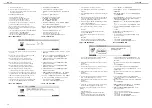
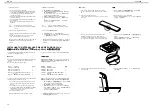
1. Connect the headphones into PHONES jack.
Connect the monitor speaker into OUTPUT jack.
(It has no problem to check the signal with an
oscilloscope.)
Raise [EXPANSION VOLUME] suitably.
2. Check that no sound is heard from the headphones and
the monitor speaker.
3. Press [F5(TEST)],then check that a sine wave sound is
heard from left channels.
4. Press [F5(TEST)] again,then check that a sine wave sound
is heard from right channels.
5. Press [F5(TEST)] once more,then check that a sine wave
sound is heard from both channels.
6. Press [F5(TEST)] once more,then check that no sound is
heard from both channels.
7. After checking,disconnect the headphones and the monitor
speaker.
Press [F6(NEXT)] to advance to TEST 9: CLICK.
* If the sound is NOT heard correctly, check the following.
•
VE-GSPro
•
IC101,IC102,IC103,IC130 and circumference chips on the
JACK BOARD
•
VR BOARD and wiring connecting it
•
fuji-card connecting MAIN BOARD and JACK BOARD
1.
ヘッドホンを
PHONES
ジャックに接続します。
モニタースピーカーを
OUTPUT
ジャックに接続します。
(
出力波形をオシロスコープで確認しても構いません。)
[EXPANSION VOLUME]
を適当に上げます。
2.
ヘッドホンとモニタースピーカーからは音が出力されてい
ないか確認します。
3. [F5(TEST)]
を押し、左側からサイン波の音がするか確認し
ます。
4.
再び
[F5(TEST)]
を押し、右側からサイン波の音がするか
確認します。
5.
再び
[F5(TEST)]
を押し、両側からサイン波の音がするか
確認します。
6.
再び
[F5(TEST)]
を押し、両側とも音が出力されていない
か確認します。
7.
確認が終わったら、ヘッドホンとモニタースピーカーの
ケーブルを外し、
[F6(NEXT)]
を押します。
※ 発音に異常がある場合、以下をチェックしてください。
・
VE-GSPro
・
JACK
BOARD
の
IC101,IC102,IC103,IC130
および周辺回
路
・
VR
BOARD
およびワイヤリング
・
MAIN
BOARD
と
JACK BOARD
を結ぶフジカード
TEST 9: CLICK
TEST 9: CLICK
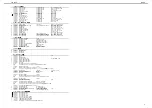
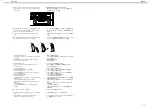
1. A metronomic click will sound from internal speaker.
2. Check the volume change by turning [CLICK LEVEL] on
the rear panel.
3. Connect the headphones into PHONES jack, then check
that the sound is only heard from the headphones which
overrides internal speaker.
4. After checking,disconnect the headphones.
Press [F6(NEXT)] to advance to TEST 10: RESULT.
* If no sound is heard, check the following.
•
SP101,JK102,VR101 and circumference chips on the
JACK BOARD
•
fuji-card connecting MAIN BOARD and JACK BOARD
1.
本体からクリック音が鳴り始めます。
2.
リアパネルにある
[CLICK LEVEL]
を回して、クリック音
がレベル変化するか確認します。
3.
ヘッドホンを
PHONES
ジャックに接続すると、本体から
クリック音が消え、ヘッドホンからのみクリック音がする
か確認します。
4.
確認が終わったら、ヘッドホンを外し、
[F6(NEXT)]
を押
します。
※ 発音しない場合、以下をチェックしてください。
・
JACK
BOARD
の
SP101,JK102,VR101
および周辺回路
・
MAIN
BOARD
と
JACK BOARD
を結ぶフジカード
TEST10: RESULT
TEST10: RESULT
1. When "ERR!" appears on display, the unpassed test items
that highlighted will appear on display and the
corresponding [TRACK] LEDs will blink.
2. The MC-80 power can be turned off in this state.
Press the corresponding blinking LED when going back to
the unpassed test item.
1. "ERR!"
が、ディスプレイに表示されている場合、
"OK"
に
ならなかったテスト項目が反転表示され、対応する
TRACK
ボタンの
LED
が点滅します。
2.
この状態で電源を落とせます。
もし、
"OK"
にならなかったテスト項目に戻る場合は、対
応する点滅中の
LED
を押してください。
1. When "COMPLETED!" appears on display, it means all the
test items have been completed.
2. The MC-80 power can be turned off in this state.
1. "COMPLETED!"
が、ディスプレイに表示されている場合、
全てのテスト項目を正常に終えたことを示します。
2.
この状態で電源を落とせます。
Содержание Micro Composer MC-80
Страница 3: ...3 Feb 1999 MC 80 LOCATION OF CONTROLS...


